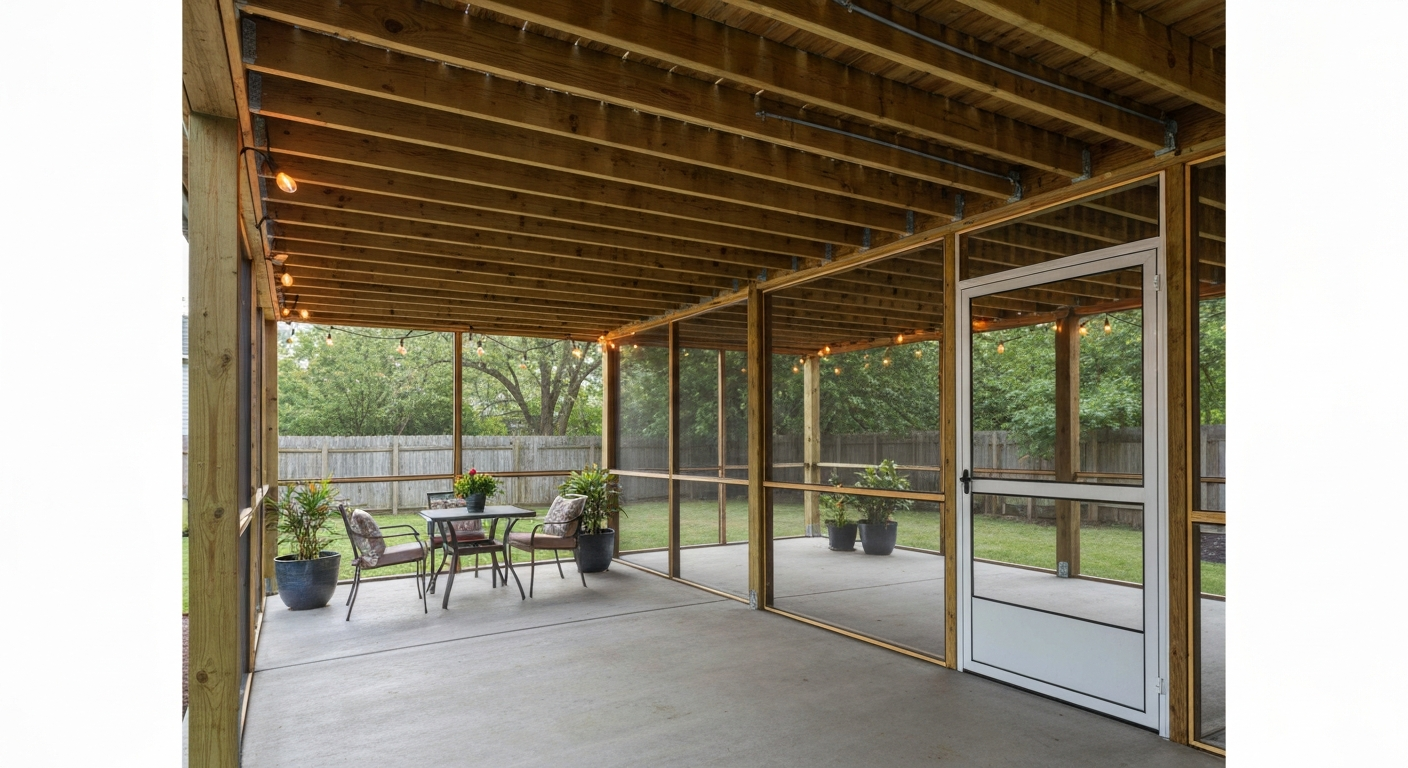
Screening in a patio that already has a roof is genuinely one of the more satisfying DIY projects you can tackle: the hard structural work (the roof itself) is already done, so you're mostly building vertical walls of screen between existing posts or new framing. A basic retrofit on a covered concrete patio runs roughly $800 to $2,500 in materials if you do it yourself, or $3,000 to $8,000 installed by a contractor, depending on size, screen type, and whether you need a screen door and new framing. The biggest mistakes people make are skipping the permit check, ignoring roof-attachment flashing, and buying the wrong screen fabric for their climate. This guide walks through all of it, from the first structural check to the final screen spline. For step-by-step instructions and material lists, see our guide on how to screen a patio enclosure.
How to Screen in Patio with Roof: DIY Guide, Costs & Tips

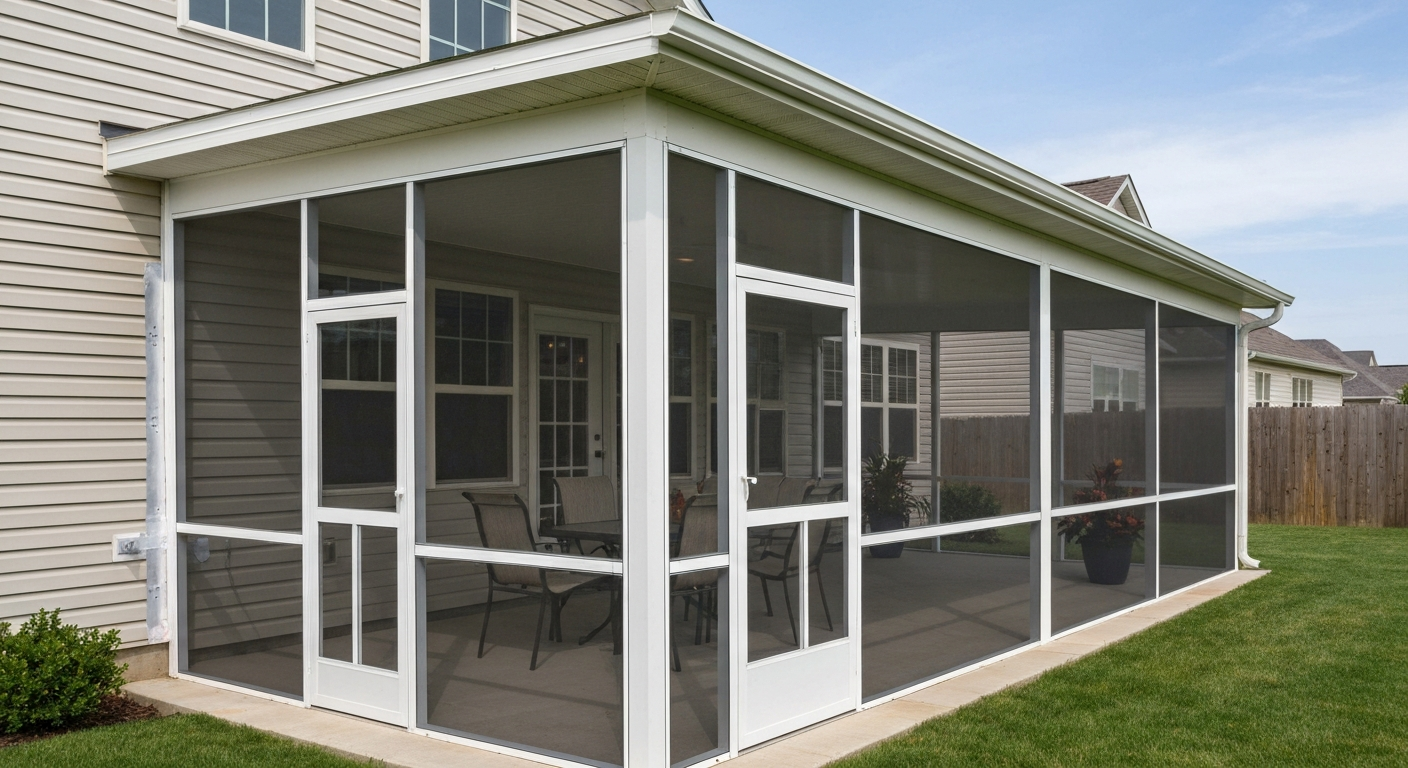
What screening a roofed patio actually does (and what it doesn't)
A screened enclosure keeps insects and wind-blown debris out, makes the space usable in the evening, and can meaningfully reduce UV exposure depending on the screen fabric you choose. What it won't do is meaningfully insulate the space, stop heavy rain from blowing in at angles, or turn the patio into a room you'd use in winter without a heating source. Under the 2021 International Residential Code (IRC) Appendix AH, patio screen enclosures are explicitly classified as outdoor living space, not habitable space, which matters for how the space is permitted and how your insurer categorizes it. That distinction also means you can't run the project through a simpler residential addition permit in most jurisdictions.
The practical ceiling on a DIY screen enclosure under an existing roof is one story tall, with a minimum ceiling height of 7 feet per IRC Appendix AH. Extruded aluminum framing members used in a screen system must meet a minimum wall thickness of 0.040 inches, and screen mesh density is capped at 20x20 mesh. These are the prescriptive minimums the code sets; staying within them keeps the design path simple when you go to pull a permit.
Decide before you build: use, budget, and permanence
Before you price materials or call a contractor, spend twenty minutes answering these questions honestly. Your answers will point you toward the right approach, screen type, and whether DIY makes sense.
- Intended use: Is this primarily bug protection for evening dining, sun and UV reduction for daytime comfort, a pet containment area, or a year-round living space? Bug control and UV reduction point toward different screen fabrics. Pet containment requires a heavier mesh and a self-closing door.
- Budget: Are you working with under $1,000 (temporary or renter-friendly solutions), $1,000 to $3,000 (DIY permanent framing and screen), or $3,000 and up (contractor installation or upgraded materials like retractable screens or glass panels)?
- Permanence: Do you own the property and plan to stay long-term? Or are you renting, or planning to sell within two to three years? Permanent framing adds value but requires permits. Removable systems skip permits in most jurisdictions but don't add lasting value.
- Roof condition: Is the existing roof solid and properly flashed? Any sagging, rotting fascia, or leaks need to be fixed before you attach new framing to it.
- Post spacing and existing framing: What is the bay width between existing posts? Bays wider than 8 feet typically need an intermediate vertical member to keep screen fabric taut and prevent sag.
- HOA or rental restrictions: Does your HOA require architectural approval? Does your lease prohibit permanent modifications? These two questions alone can eliminate certain options before you get started.
- Climate: High wind loads (coastal or tornado-prone areas), heavy rain, extreme UV, or salt air all affect which materials will hold up. Aluminum mesh resists salt air better than fiberglass; heavier solar fabrics handle intense sun better than standard fiberglass.
Structural checks before you touch a single screw
Because the roof is already there, you're attaching new framing to existing structure, which means you need to know what you're attaching to. Walk the perimeter of the patio roof and check three things: the condition of the ledger or header where the roof ties into the house, the condition of the existing posts and footings (if any), and the roof drainage situation.
Ledger and wall attachment
If your patio roof is attached to the house wall via a ledger board, that ledger must be fastened to the structural rim or band joist of the house, not simply over siding or stucco. Simpson Strong-Tie's deck connection guidance is explicit on this: ledgers need to resist both vertical load and lateral movement, and connections must use approved fasteners or engineered connectors. Before adding any new screen framing that loads the ledger, visually inspect for rot, check that the ledger bolts are tight and not corroded, and make sure there's flashing directing water away from the house sheathing. If the ledger is soft, fix it first.
Posts and footings
Existing patio-roof posts should be anchored to concrete footings or piers that extend below the frost line in your climate. If posts are sitting directly on a concrete slab with no anchor hardware, that's a structural concern worth noting before you hang a screen door that will cycle open and closed thousands of times. Post bases from manufacturers like Simpson or MiTek prevent direct wood-to-concrete contact and reduce rot risk. If you're adding new posts to create smaller bays for screen panels, those posts need their own properly sized footings, not just a baseplate on the slab.
Roof penetrations and flashing
If any new posts or rails will penetrate the roof surface or sit against the roof edge, proper flashing is non-negotiable. The RCABC Roofing Practices Manual and general roofing trade standards require that any penetration at a roof drainage plane be flashed with purpose-made penetration flashings or sealed with EPDM wrap or a fleece-reinforced liquid membrane where a proprietary flashing won't fit a square post. Skipping this step is the most common cause of rot and water damage in otherwise well-built screen enclosures. Plan your rail and post attachment points to avoid penetrating the roof membrane whenever possible; top rails fastened to the fascia board rather than through the roof deck are usually the simpler and safer approach.
Ventilation of the enclosed rafter space
If your patio roof has a finished ceiling attached directly to the rafters (creating an enclosed rafter bay), IRC Section R806 requires ventilation of that space: a minimum net free ventilating area of 1/150 of the vented space, reducible to 1/300 if upper and lower vents are provided or a vapor retarder is present. Screened vent openings count toward this requirement. Blocking these vents when you install screen framing and rails creates a hidden moisture problem that shows up as rot and mold years later. Check that your rail and framing layout won't cover existing soffit or ridge vents.
Permits, inspections, and HOA rules: check these before anything else
Most jurisdictions require a building permit when you screen in a patio if the work involves any structural changes, new footings, roof attachments, or new electrical. Florida, for example, lists enclosing a porch or patio as a common permit trigger, along with any structural work. The Los Angeles Department of Building and Safety similarly flags structural and electrical work as standard permit requirements. Los Angeles Department of Building and Safety, Types of Plan Checks & Permits notes structural and electrical work as common examples of triggers for plan checks and permits Los Angeles Department of Building and Safety — Types of Plan Checks & Permits. Doing this work without a permit creates problems at resale (disclosure requirements) and can void homeowner's insurance coverage for the structure.
- Contact your local building department and ask specifically whether screening in an existing covered patio requires a permit in your jurisdiction. Bring the square footage and a rough sketch.
- Find out if plan submittal is required or if an over-the-counter permit is available for simple screen enclosures.
- Ask what inspections are required: typically footings (if new posts), framing/structural, and a final inspection.
- Check whether your jurisdiction has adopted IRC Appendix AH or has its own patio cover code section.
- If the project includes any new lighting, ceiling fans, or outlets, add electrical permit and inspection to the list.
- Look up your HOA CC&Rs or contact the HOA management company directly. Most CC&Rs contain language requiring written Architectural Review Board (ARB) approval before any exterior alteration, regardless of whether a building permit is required.
- A typical ARB application requires: completed application form, scaled site plan, elevation drawings or renderings showing the screen framing and roof tie-in, material and color samples, contractor license and insurance information (if using a contractor), and photos of the existing patio.
- If you're renting, re-read your lease before doing anything permanent. Many leases prohibit structural modifications without written landlord approval.
- HOA approval and building permit approval are separate processes. You need both where applicable, and HOA approval does not substitute for a building permit.
Choosing your approach: full retrofit screen enclosure vs. the alternatives
A permanent screen enclosure with framing and spline-set screen fabric is the most common approach, but it isn't always the right one. Retractable screens, glass or acrylic panels, lattice, and temporary/removable systems all serve different combinations of budget, permanence, and use case. For a side-by-side comparison of other approaches, see our patio screen alternative guide for pros, cons, and use-case recommendations. Here's how they stack up.
| Approach | Typical DIY Cost | Permanence | Insect Protection | Weather Protection | UV/Solar Control | Permit Usually Required | Best For |
|---|---|---|---|---|---|---|---|
| Fixed screen enclosure (framing + fiberglass or aluminum mesh) | $800–$2,500 DIY; $3,000–$8,000 installed | Permanent | Excellent | Moderate (wind-driven rain still enters) | Low–Moderate (standard mesh); High (solar screen) | Yes, usually | Year-round insect control, budget-conscious homeowners, most climates |
| Retractable screen system | $1,500–$5,000+ installed | Permanent but retractable | Excellent when deployed | Moderate | Moderate–High depending on fabric | Often yes | Homeowners who want flexibility between open and screened |
| Glass or acrylic panels (three-season enclosure) | $5,000–$20,000+ installed | Permanent | Excellent | High (wind, rain) | Moderate (Low-E glass adds UV control) | Yes, always | Year-round use, cold climates, maximum weather protection |
| Lattice or wood privacy panels | $300–$1,500 DIY | Permanent | None | Partial wind only | None | Sometimes (structural) | Privacy and wind reduction without insect protection |
| Removable/tension-fit screen panels or curtains | $100–$600 DIY | Temporary/removable | Good–Moderate | Low | Low–Moderate (solar curtains) | Rarely | Renters, apartments, seasonal use, low budgets |
If your priority is a bug-free patio for a reasonable budget with a permanent result, a fixed screen enclosure is almost always the value leader. If you want to fully weatherproof the space and use it in cold or rainy seasons, glass panels or a three-season room conversion make more sense, but the cost jumps significantly. Retractable screens make sense when you genuinely want the open-air feel on good days and screened protection on others. Lattice alone won't stop bugs. And if you're renting or just want a seasonal fix, skip to the temporary solutions section below.
Step-by-step: how to install a screen enclosure on an existing roofed patio
This method assumes a concrete-slab patio with an attached roof and existing posts at the corners. For tips specific to screening a patio under a deck, see our short guide on how to screen in a patio under a deck. It's the most common residential scenario. Adjust for your specific framing and post layout as needed. For a full step-by-step guide on how to screen in a patio, see how to screen in a patio.
Materials and tools checklist
- Pressure-treated 2x4 or 2x6 lumber (bottom rails, intermediate verticals, door rough opening header)
- Aluminum screen frame channel or wood 1x4 for screen bays (aluminum channel is lighter and won't rot)
- Screen fabric: choose your material (see section below) — buy 10–15% extra for waste and mistakes
- Spline (the flexible cord that holds fabric in the channel groove) — match diameter to your frame channel
- Screen spline roller tool
- Utility knife with fresh blades
- Self-tapping hex head screws for aluminum; structural screws for wood framing
- Screen door (pre-built aluminum screen door sized to your opening, or build your own)
- Door hinges rated for exterior use (stainless steel or galvanized)
- Door sweep or threshold seal
- Self-closing door spring or closer
- Exterior wood screws or lag screws for ledger/post connections
- Post anchor hardware (if adding new posts)
- Flashing tape or liquid flashing membrane (for any roof edge or wall connections)
- Tape measure, level, speed square, pencil
- Drill and bits, circular saw or miter saw
- Staple gun (for temporary fabric positioning before spline is set)
- Safety glasses, work gloves
Step 1: Measure, plan the bays, and order materials
Measure each opening between existing posts. If any bay is wider than 8 feet, plan to add an intermediate vertical post or frame member at mid-span to prevent the screen from sagging or billowing. Sketch your bay layout, mark where the door opening will go (typically the most convenient access point, usually centered in a bay), and calculate your total linear footage of framing and total square footage of screen fabric. Add one foot to every dimension when ordering fabric to account for the overlap needed to set spline cleanly.
Step 2: Install the bottom rail
A bottom rail (knee wall) runs between posts at a height of 12 to 18 inches above the slab. This serves two purposes: it keeps the screen above splash-back from rain and gives you a solid base to attach the bottom of each screen panel. Anchor the bottom rail to the posts with structural screws and to the slab with concrete anchors at mid-span. For a clean look and rot protection on wood rails, prime and paint before installation or use aluminum channel throughout.
Step 3: Install the top rail and side frame members
The top rail runs along the underside of the roof framing or fascia and defines the top edge of the screen panels. Fasten it with structural screws into the fascia or rafter tails every 16 inches. If the rail attaches to the house wall, fasten it to the structural framing behind the sheathing, not just into siding. Apply flashing tape or liquid flashing behind any rail that sits against the house wall or roof edge. At each post, attach vertical side frame members between the top rail and bottom rail to define each screen bay.
Step 4: Frame the door opening
A standard 32-inch or 36-inch pre-built aluminum screen door fits most residential openings. Frame the rough opening with doubled vertical members on each side (king and jack studs if using wood framing, or a double aluminum channel member) and a header across the top. Set the door opening level and plumb before fastening, this is the most common point where DIYers lose time, because a door opening that is even slightly out of plumb will cause the door to swing open or closed on its own.
Step 5: Install screen fabric using the spline method
Cut a piece of screen fabric approximately 2 inches larger than the bay opening on all four sides. Lay it over the frame channel grooves. Starting at the top, use the convex wheel of the spline roller to press the spline cord into the groove, locking the fabric edge. Work from the center outward on each side to avoid puckering. Pull the fabric taut but not tight enough to distort the mesh before setting the remaining three sides. Trim the excess fabric flush with the outer edge of the spline using a sharp utility knife held at a 45-degree angle against the frame. Repeat for each bay.
Step 6: Hang the screen door and install closer
Hang the screen door with exterior-rated hinges on the side that makes the most traffic sense. Install the self-closing spring or pneumatic closer so the door latches automatically every time, which is essential for keeping insects out. Adjust the door sweep to contact the threshold without dragging so badly it wears out quickly. Test the door through at least twenty open-and-close cycles before calling it done.
Drainage and ventilation details
Make sure your bottom rail design allows water that blows in under the screen to drain off the slab. A small gap (half an inch) at the base of the bottom rail or weep holes drilled at the low points of the rail prevent water from pooling. If your patio roof has soffit vents, confirm none of them are blocked by your top rail installation. The Building Science Consortium guidance on porch roof tie-ins emphasizes maintaining the drainage plane and drying potential at the house wall connection, so don't seal the space between the top rail and the house wall in a way that traps moisture behind the framing.
Which screen material is right for your patio
Screen fabric choice matters more than most people realize before they start. Standard fiberglass, aluminum, pet-resistant mesh, and solar fabrics all have distinct performance profiles. For a concise comparison to help pick the best screen for patio enclosure, see best screen for patio enclosure. Here's a direct comparison.
| Screen Type | Material | UV/Solar Block | Visibility | Durability | Best Use Case | Relative Cost |
|---|---|---|---|---|---|---|
| Standard fiberglass | Woven fiberglass coated in PVC | Low (standard bug screen) | Good | Moderate — tears and dents but doesn't corrode | Basic insect control, most climates | Lowest |
| Aluminum mesh | Woven aluminum wire | Low (standard) | Good | High stiffness, resists sag; may corrode near saltwater | High-traffic areas, coastal climates with corrosion-resistant coatings | Low–Moderate |
| Pet / heavy-duty mesh (e.g., Phifer TuffScreen) | Vinyl-coated polyester | Low–Moderate | Good | Significantly higher tear resistance than fiberglass; wider roll widths for large bays | Homes with dogs or cats that press against or scratch the screen | Moderate |
| Solar 80 (e.g., Phifer SunTex 80) | Vinyl-coated polyester, open weave | ~75% UV block, ~25% openness | Good outward view | High — designed for exterior exposure | Patios with afternoon sun, mild UV reduction without losing the view | Moderate |
| Solar 90 (e.g., Phifer SunTex 90) | Vinyl-coated polyester | ~90% UV block, ~10% openness | Reduced — visible mesh texture | High | Strong sun exposure, glare reduction, furniture and flooring UV protection | Moderate–High |
| Solar 95 (e.g., Phifer SunTex 95) | Vinyl-coated polyester | ~95% UV block, ~5% openness | Limited — noticeably darker interior | High | Maximum heat and UV reduction, intense sun climates | Moderate–High |
A few practical notes from using these materials on real projects: fiberglass is forgiving for first-time installers because it's flexible and rolls into the spline groove easily without kinking. Aluminum mesh is stiffer and takes a little more care to set cleanly without buckling at the corners. TuffScreen and SunTex fabrics are heavier, which means they need slightly firmer hand pressure on the spline roller and a slightly larger spline diameter to stay seated. SunTex 90 and 95 noticeably darken the interior view from inside the patio, which some people love for the cave-like cool effect and others find oppressive. If you're unsure, order a small sample of each grade and tape it over a door or window for a few days before committing to a roll.
If UV protection is your primary goal, solar screen fabrics deliver meaningfully better performance than standard insect screens. The SunTex 90's roughly 90% UV blockage, compared to standard fiberglass that offers little more than minimal shade, is a real difference for protecting patio furniture, flooring, and skin. For more detail on UV-blocking screen performance, this is directly connected to the broader topic of how different screen materials compare on sun protection. For a focused answer, see the article "Do patio screens block UV rays".
Low-cost, temporary, and renter-friendly screening solutions
Not everyone is in a position to build a permanent screen enclosure. If you're renting, if your HOA hasn't approved permanent work yet, or if you're just trying to get through the summer before budgeting a real project, there are practical options that don't require permits or permanent modifications.
Magnetic screen doors
Magnetic mesh screen doors (Flux Phenom is one widely sold example) use a hook-and-loop border strip that sticks to the door frame and a center seam held closed with embedded magnets. Installation is tool-free and takes about fifteen minutes. They work reasonably well for single doorway openings and are genuinely renter-friendly since removal leaves only the adhesive border strip behind. The honest caveat: the adhesive backing weakens in heat and direct sun after one to two seasons, the magnets misalign in consistent wind, and the mesh is not as taut or durable as a properly framed screen. But at $20 to $60, they're a reasonable seasonal solution for a doorway that leads out to a covered patio.
Tension-fit and removable screen panels
Pre-built aluminum screen panels can be cut to size and friction-fit or tension-mounted between posts without fasteners. Some systems use a rubber or foam perimeter gasket that grips the post face without screws. These hold up better than magnetic curtains and can be removed and stored in winter. They're a reasonable middle ground for owned homes where a permit hasn't been pulled yet or where a landlord has approved temporary screens but not permanent framing.
Outdoor screen curtains
Heavy outdoor curtain panels made from mesh or solar fabric can be hung from a curtain rod or tension rod mounted under the roof edge. They don't seal tightly against posts so they don't fully exclude insects the way framed screen does, but they block significant sun and wind and can be drawn back when not needed. Solar curtain panels in the 80 to 90 percent blockage range reduce afternoon heat noticeably on west-facing patios. These are the most renter-friendly option and the easiest to coordinate with outdoor furniture aesthetics.
What temporary solutions can't do
All of these temporary options share the same limitation: they don't create a fully sealed enclosure. Insects will find the gaps. Wind will move fabric panels. They're seasonal or situational tools, not permanent solutions. If your goal is a truly bug-free, usable screened patio, a framed screen enclosure is the only reliable path. For renters specifically, the topic of screening an apartment patio has its own set of considerations around permissions and damage-free installs that go deeper than what's covered here.
DIY vs. hiring a pro: how to decide
The framing and screen installation on a straightforward roofed patio is within reach of a capable DIYer who is comfortable with basic carpentry and has a weekend plus one extra day. The spline method for screen fabric is one of those skills that seems awkward for the first panel and becomes easy by the third. The parts of this project that push toward hiring a pro are: any needed repair or modification of the existing roof attachment and ledger, any electrical work (ceiling fans, lighting), footings for new posts (requires concrete work and knowledge of your frost depth and local code), and projects with complex geometry (multiple rooflines, hip roofs, octagonal patios).
Contractor pricing varies significantly by region. In the Southeast (Florida, Georgia, the Carolinas), where screened patios are extremely common, you'll find competitive pricing from specialized screen-enclosure contractors. In the Northeast or Pacific Northwest, the same project may cost more because fewer contractors specialize in the work. Always get three quotes and ask specifically whether the price includes permit fees, and whether the contractor handles the HOA application or if that's on you.
- DIY makes sense when: the existing framing is solid, no new footings are needed, no electrical is involved, and you have basic carpentry comfort and a helper for a weekend.
- Hire a pro when: the ledger or roof attachment needs repair, new concrete footings are required, any electrical work is part of the project, or local permit requirements include engineer-stamped drawings.
- Hire a pro when: the project is large (over 300 square feet), the roof geometry is complex, or the deadline for completion is firm and you can't absorb a learning curve.
- Consider a hybrid approach: hire a contractor for the structural framing and permit work, then install the screen fabric yourself to save $500 to $1,500 in labor.
What this project costs, realistically
Cost ranges for screening in a roofed patio vary by size, material choice, and whether you DIY or hire out. Here's a realistic breakdown for a 200- to 300-square-foot patio, which is a typical size for an attached residential patio cover.
| Cost Item | DIY Range | Contractor Range | Notes |
|---|---|---|---|
| Framing lumber or aluminum channel | $150–$400 | Included in labor/material quote | Aluminum channel costs more but lasts longer and won't rot |
| Screen fabric (fiberglass or aluminum) | $80–$200 | Included in quote | Budget for 10–15% overage |
| Screen fabric (solar/pet mesh upgrade) | $150–$350 | Included in quote | SunTex 90 and TuffScreen run $0.40–$0.80/sq ft more than standard |
| Screen door (pre-built aluminum) | $60–$200 | Included in quote | Self-closing hardware is worth the extra $20–$40 |
| Hardware, screws, anchors, spline | $40–$100 | Included in quote | Don't skimp on stainless or galvanized fasteners |
| Flashing tape/liquid membrane | $20–$60 | Included in quote | Critical at roof and wall connections |
| Permit fees | $50–$300 | $50–$300 (usually passed through) | Varies widely by jurisdiction and project scope |
| Total DIY (materials + permit) | $400–$1,300 | N/A | For a 200–300 sq ft patio, basic materials |
| Total contractor installed | N/A | $3,000–$8,000 | Includes labor, materials, permit; high end for complex geometry or premium materials |
If you're trying to minimize cost, the cheapest reliable path to a permanent screened enclosure is framing with pressure-treated wood and standard fiberglass screen. For a focused, step-by-step cost-first guide, see what is the cheapest way to screen in a patio. For the full breakdown on what drives cost up and down and where you can cut without sacrificing quality, the broader question of the cheapest way to screen in a patio goes into more detail on budget-first strategies.
FAQ
What initial planning and inspection steps should I take before screening in an existing roofed patio?
Measure the patio footprint and clearances; check the roof and house wall where you’ll attach framing for structural soundness (solid rim/band joist, not just siding); verify roof drainage and locate gutters/downspouts; determine if the patio is under a finished ceiling or open rafters (ventilation implications); photograph the site and create a simple site plan with dimensions and roof tie locations; check utility runs (electrical, gas) and tree/clearance constraints; set a target use (insect protection, sun/UV reduction, pet‑proofing, year‑round living) because that drives screen type and whether you’ll need insulated or sealed walls.
How do I know if I need a building permit or HOA/ARC approval?
Ask your local building department: permits are commonly required when you alter structure (attach ledgers, add posts/footings, change roof drainage, or add electrical) or when the enclosure could be treated as conditioned/altered occupancy. If you only add removable tension‑fit screens without structural work you may not need a permit. HOA/CC&R rules are separate — most require written architectural approval for exterior changes. Typical required submissions: application, site plan, elevations, flashing/attachment detail, material/color samples, and contractor license/insurance if you hire someone. Always confirm both local code and HOA requirements before work.
What structural checks and connection details are critical for a safe retrofit?
Verify the house rim/band joist is solid and can accept ledger fasteners (don’t fasten to siding alone). Use approved fasteners (structural wood screws, through‑bolts, or manufacturer connectors) per Simpson Strong‑Tie guidance. Size posts and footings to code and anchor posts with proper post bases to frost‑protected footings or piers. Provide lateral ties or hold‑downs if the enclosure loads the house for lateral resistance. Ensure any ledger/attachment is flashed and sealed to maintain the building’s drainage plane.
What screen fabrics and mesh types should I consider and what are the tradeoffs?
Main types: fiberglass (economical, good visibility, moderate durability), aluminum/metal mesh (stiffer, resists sag, may corrode in marine air), pet/tuff screens (vinyl‑coated polyester with high tear resistance suited for pets), and solar/UV‑blocking fabrics (SunTex 80/90/95 with decreasing openness and increasing heat/UV reduction). Tradeoffs: higher solar blocking reduces view and airflow but lowers heat/UV; pet screens offer durability but reduce transparency slightly; metal is robust but can dent and corrode; fiberglass is best for clear sight lines and low cost.
How effective are solar/UV‑blocking screens and how do openness factors affect performance?
Manufacturer data (Phifer SunTex) gives example openness factors: SunTex 80 ≈ 25% openness (~75% UV block), SunTex 90 ≈ 10% openness (~90% UV block), SunTex 95 ≈ 5% openness (~95% UV block). Lower openness increases heat and solar reduction but reduces outward visibility and airflow. Choose based on desired shade/heat reduction vs view and ventilation needs.
What materials and tools will I need for a typical DIY retrofit screening of a roofed patio?
Materials: screening fabric (rolls), spline, aluminum screen framing/rails or pressure‑fit channels, corner connectors, screen door kit, structural lumber for posts/rails (pressure‑treated or rot‑resistant), ledger board materials and fasteners, post bases and anchor bolts, concrete for footings (if adding posts), flashing materials (EPDM wrap, self‑adhered membrane), stainless or hot‑dipped fasteners, caulk/sealant, insect‑screen clips. Tools: tape measure, circular saw/mitre saw, drill/impact driver, level, chalk line, spline roller, hammer, socket set, caulk gun, ladder/scaffold, safety gear (glasses, gloves), and basic masonry tools if pouring footings.
How to Screen in a Patio Under a Deck: DIY Guide & Costs
Learn how to screen in a patio under a deck: decision guide, permits, DIY steps, costs, and top products.