The cheapest way to screen in a patio is to add fixed fiberglass screen panels to an existing covered patio using a DIY screen kit, without building a new roof or frame from scratch. For a 200-square-foot covered patio with existing posts and a solid roof, you can realistically spend $800 to $2,500 doing it yourself, or around $2,000 to $4,000 if you hire a pro. The moment you need a new roof, structural posts, electrical work, or a permit-triggered inspection, costs jump significantly. So the single biggest lever for keeping costs low is starting with a patio that already has a roof and posts in place.
What Is the Cheapest Way to Screen in a Patio?

Miles Hart
13 Jun 2026
What "screening in a patio" actually means
This phrase covers a pretty wide range of projects, and the cost difference between them is enormous. It helps to know which one you're actually talking about before you start getting quotes or buying materials.
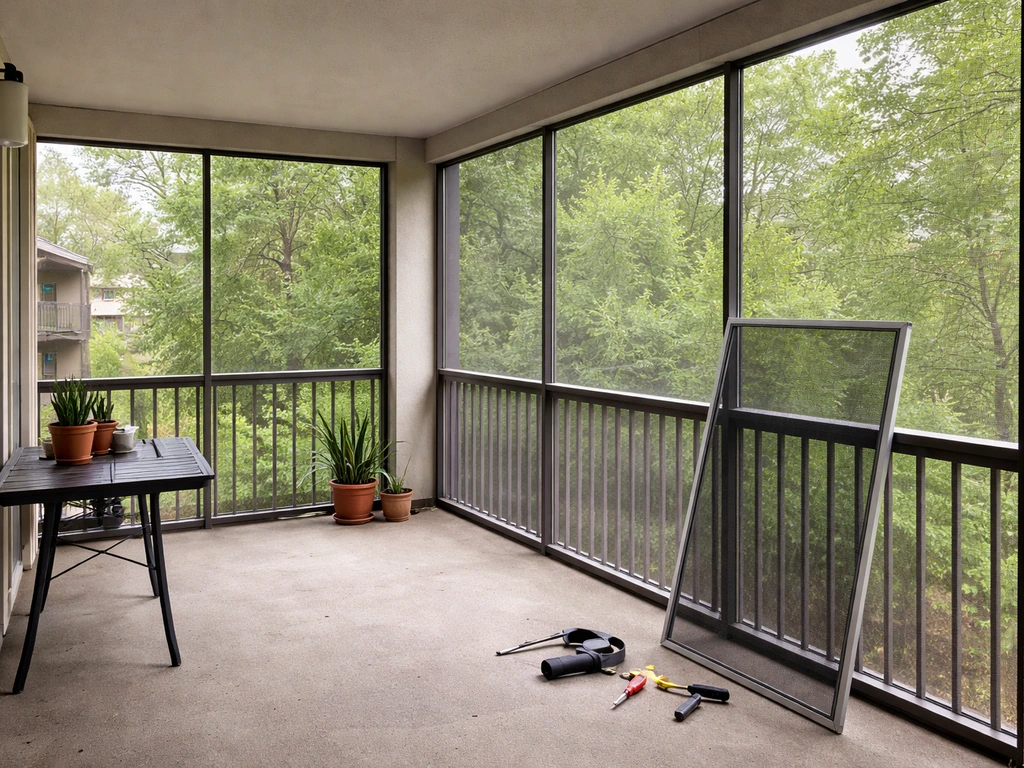
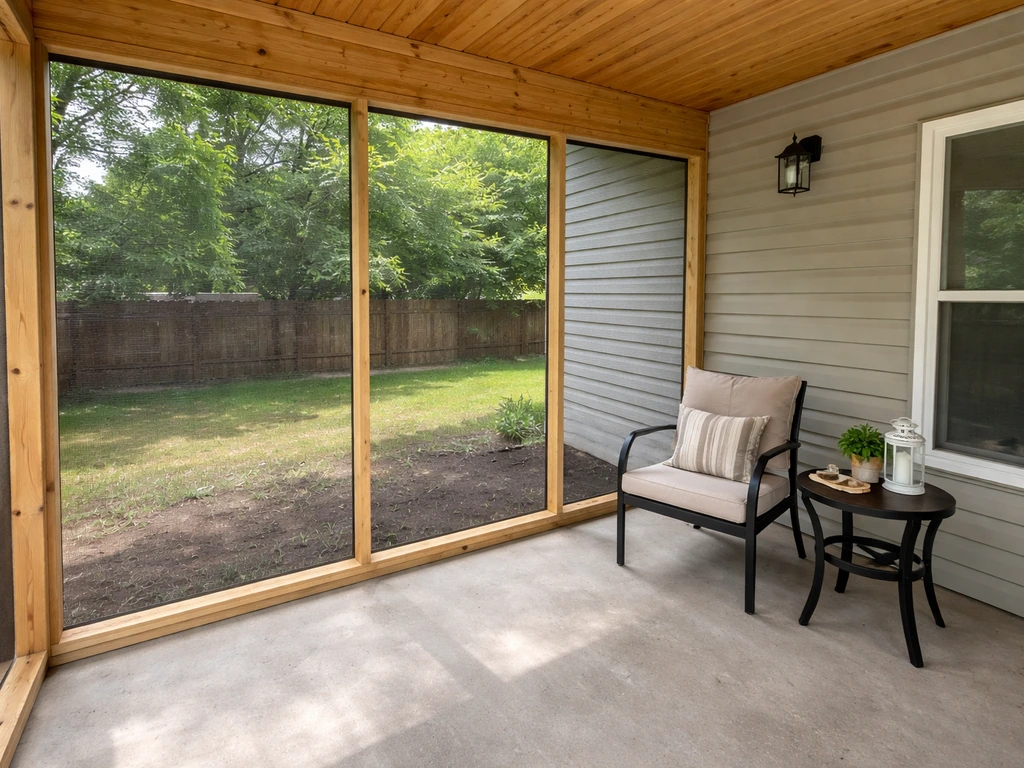
- Screen-only wall panels on an existing covered patio: You already have a roof and posts. You're just filling in the open sides with screening. This is the cheapest scenario by far.
- Full screen room enclosure: You're building or adding a structure that includes a new roof, framing, screens, and often a door. This is a bigger construction project and costs significantly more.
- Retractable or seasonal screen systems: Motorized or manual screens that roll up when not in use. More expensive upfront than fixed panels but often skip permit requirements and preserve your open-air view.
- Partial screening: Screening only one or two sides of the patio rather than fully enclosing it. A legitimate budget move when full enclosure isn't needed.
If your patio doesn't already have a roof, you're really talking about building a screened porch from scratch, which is a different (and more expensive) project. Similarly, if you're working with an apartment patio or a patio under a deck, the constraints change quite a bit. For this guide, the focus is on what most homeowners mean: adding screening to a covered patio they already own, with the goal of keeping bugs out.
Cheapest materials and systems to consider
Screen material and enclosure system choice have a big impact on total cost. For the best screen for a patio enclosure, match the material and enclosure system to your climate and how you plan to use the space Screen material and enclosure system choice. Here's how the main options compare.
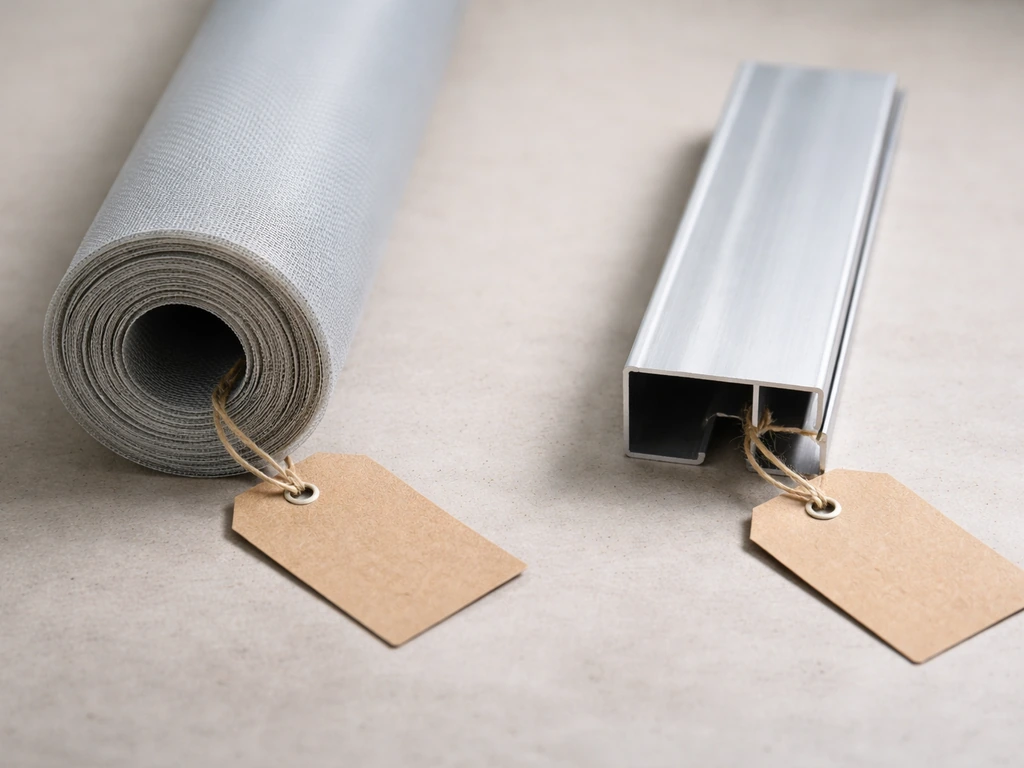
Screen material: fiberglass vs aluminum
| Material | Cost per sq ft (approx.) | Durability | DIY-friendly? | Best for |
|---|---|---|---|---|
| Fiberglass screen | $0.10–$0.25 | Moderate (10–15 yrs) | Yes | Budget DIY projects, most climates |
| Aluminum screen | $0.25–$0.50 | High (15–20+ yrs) | Yes, but stiffer to work with | High-traffic areas, pets, coastal zones |
| Solar/privacy screen | $0.50–$1.50 | High | Yes | UV reduction, privacy needs |
| No-see-um screen | $0.50–$1.00 | Moderate | Yes | Tiny insect problems, Gulf Coast climates |
For pure budget-focused projects, standard fiberglass screen is the right call. It's easy to cut, easy to install, and forgiving of minor measurement errors. Aluminum is better if you have pets that lean or push against screens, but it costs more and is harder to work with for a first-timer. Solar and privacy screens are worth considering if UV blocking is important to you, though they do reduce airflow slightly. Solar and privacy screen options can help block more UV rays than standard fiberglass screen material Solar and privacy screens.
Enclosure system: panels vs kits vs custom
| System Type | Typical Cost Range | DIY Feasible? | Permit Likely? | Best Fit |
|---|---|---|---|---|
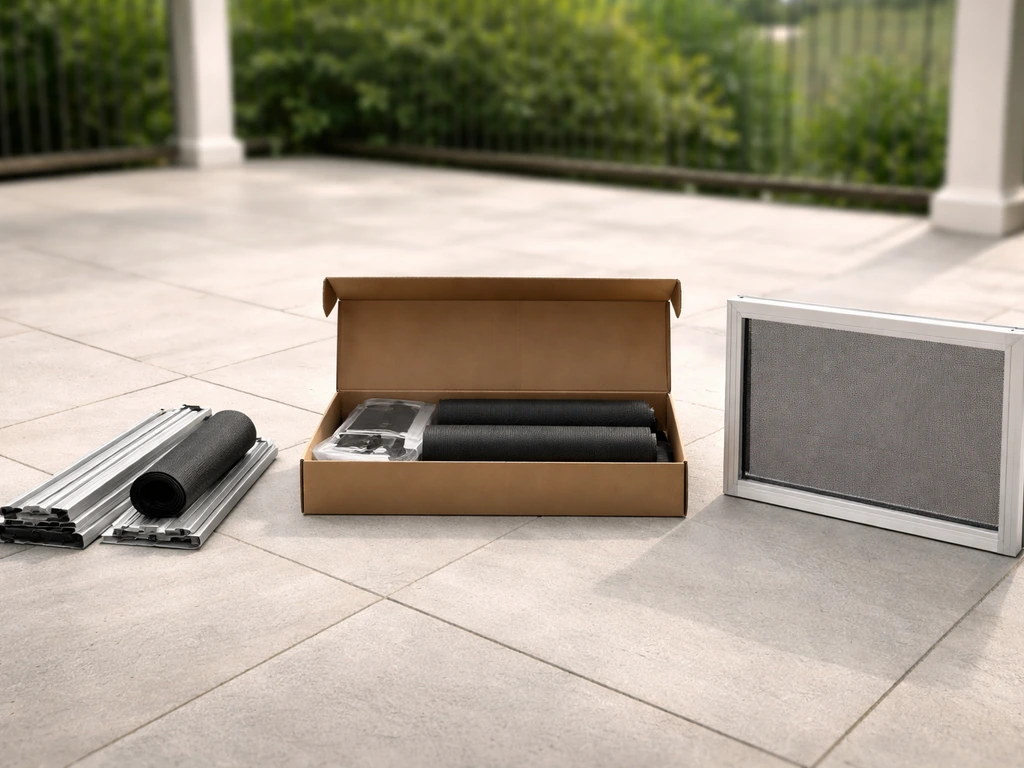
| DIY screen panel kit (EZ Screen, Screen Tight, etc.) | $500–$2,000 materials | Yes | Sometimes not required | Existing covered patio, handy homeowner |
| Custom-framed aluminum enclosure (contractor-built) | $3,000–$10,000+ | Rarely | Usually yes | Complex layouts, HOA requirements |
| Retractable zip-track screens | $9,000–$18,000 for 3 openings | No (typically pro-installed) | Often not required | High-end finish, want open-air option |
| Screen curtains/snap-on panels (seasonal) | $200–$800 | Yes | No | Renters, temporary use, minimal bugs |
Retractable screen systems do have real advantages: they often avoid permit triggers in many jurisdictions, and they eliminate the closed-in feeling of a fixed enclosure. But a three-opening patio with retractable screens can run $9,000 to $18,000 installed, which is hard to call "cheapest" by any measure. Fixed screen panel kits are where the real savings are for most homeowners.
DIY vs hiring a pro: where the savings actually are
blank" rel="noopener noreferrer">Labor for screened-in porch work ranges from roughly $4 to $60 per square foot depending on scope. If you want a patio screen alternative that still lets you control insects and airflow, compare options like retractable or panel-based enclosures. On the low end, that's a pro adding screens to an existing porch with a solid frame already in place. On the high end, it's building a new screen room from scratch with framing, roofing, and all. The national average for screening a 200-square-foot existing porch is around $2,085 total, which already factors in modest labor. DIY on the same project can cut that in half.
DIY is genuinely the cheapest option when your patio already has a roof and structural posts, the opening sizes are standard and rectangular, you're comfortable with basic carpentry (a drill, a staple gun, and a utility knife are the main tools), and you don't need an electrical rough-in or drainage changes. Where DIY gets expensive fast: when you make screening errors and waste material, when you skip anchoring and screens pull loose within a season, or when the project triggers a permit and inspection that you weren't prepared to pass.
Hiring a pro makes more sense when you have complex angles or a non-rectangular patio, when your posts or roof edge need structural reinforcement, or when you want an aluminum-framed system that needs proper mitered corners and anchored tracks. A botched DIY screen job that has to be redone by a contractor ends up costing more than just hiring one the first time.
How to estimate your total cost fast
Don't just price the screen material. The real cost has several components, and missing any of them leads to budget surprises mid-project.
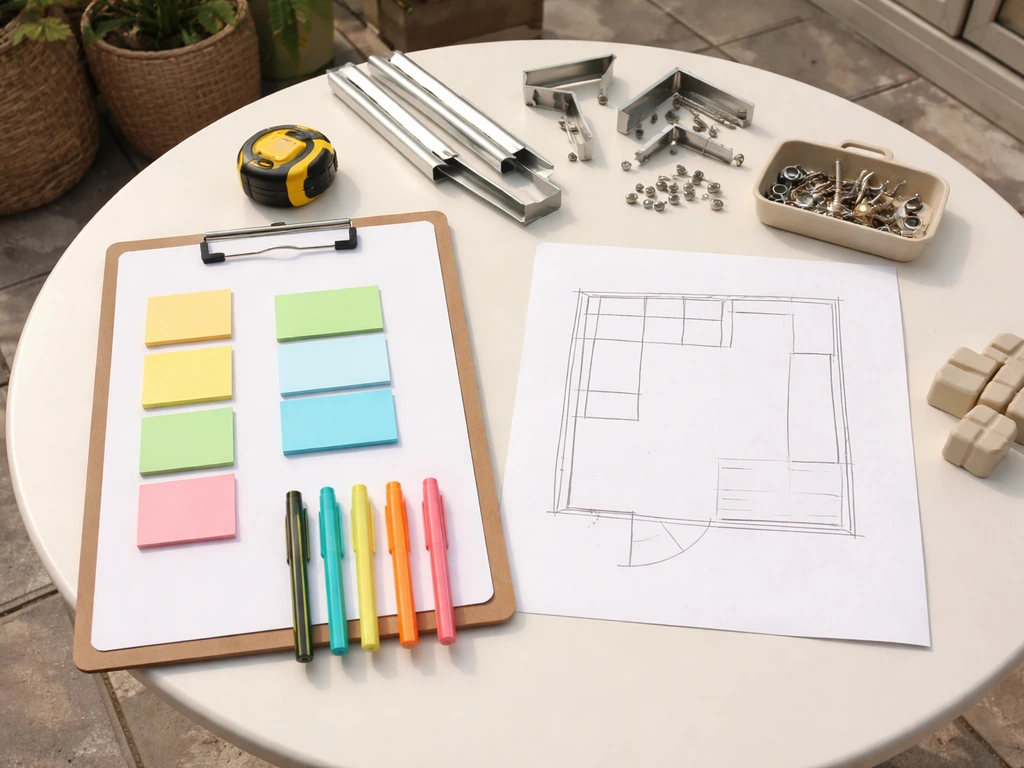
- Frame or track system: For a DIY kit like Screen Tight or EZ Screen, budget $3–$8 per linear foot of track. For a custom aluminum frame built by a contractor, expect $15–$30 per linear foot.
- Screen material: Budget $0.15–$0.50 per square foot depending on type, plus 10–15% waste for cuts.
- Door(s): A basic screen door kit runs $60–$150. An aluminum prehung screen door installed by a contractor is $200–$600 installed.
- Fasteners and hardware: Small but real. Budget $50–$150 for spline, staples, corner brackets, and tension hardware.
- Permit fees: Varies significantly by municipality. Many cities have online fee calculators. Raleigh, NC, for example, provides a fee estimation pathway specifically for screened-in porches and decks. Budget $100–$500 if a permit is required.
- Roof or soffit modifications: If your patio roof doesn't have a clean fascia edge to attach screening to, adding a ledger board or modifying the soffit can add $300–$1,000+ in labor.
- Electrical or lighting adjustments: Rare, but if your ceiling fan or light fixture needs to be repositioned to accommodate screen framing, add $200–$500 for an electrician.
- Wind load considerations: If you're in a high-wind region, your local code (based on IRC structural requirements for screen enclosures) may require heavier framing or specific anchoring. This can meaningfully increase material and labor costs.
A realistic total for a straightforward DIY project on an existing 200-square-foot covered patio: $800 to $1,800. A contractor-installed version of the same project: $2,000 to $4,500. A new screen room built from scratch: $8,000 to $20,000 or more depending on size and finish.
Layout choices that cut cost significantly
How you configure the screening job matters almost as much as what materials you choose. These layout decisions can save you hundreds of dollars without sacrificing function.
- Use your existing structure as the frame: If your patio already has posts and a beam at the roof line, those become your screen frame. You're filling openings, not building structure. This is the single biggest cost-saver.
- Stick to rectangular openings: Every inside corner, angled wall, or non-standard opening requires custom cuts and more material. A simple rectangular patio enclosure is dramatically cheaper to screen than an L-shaped or irregular one.
- Screen fewer sides: If one side of your patio faces a fence or a wall with minimal bug exposure, skip screening it. Partial screening is a real option and reduces material and labor proportionally.
- Put the door on the shortest wall: Doors are the most expensive single element in a screen enclosure. Placing it in the most logical traffic-flow location is obvious, but choosing the wall where the opening is already sized closest to a standard door width avoids extra framing.
- Avoid building a new roof: If your patio isn't covered, adding a roof before screening it is a major cost adder. Instead, consider whether a patio with a roof (or a porch) would be a better starting point, or whether a partial shade structure could serve your needs.
- Limit features: No built-in lighting circuits, no second door, no specialty screen for the first version. Get the basic screening working well, then upgrade later if needed.
Mistakes that drive up the price (and how to avoid them)
These are the issues that turn a $1,200 DIY project into a $3,000 redo. Most of them are avoidable with a little planning upfront.
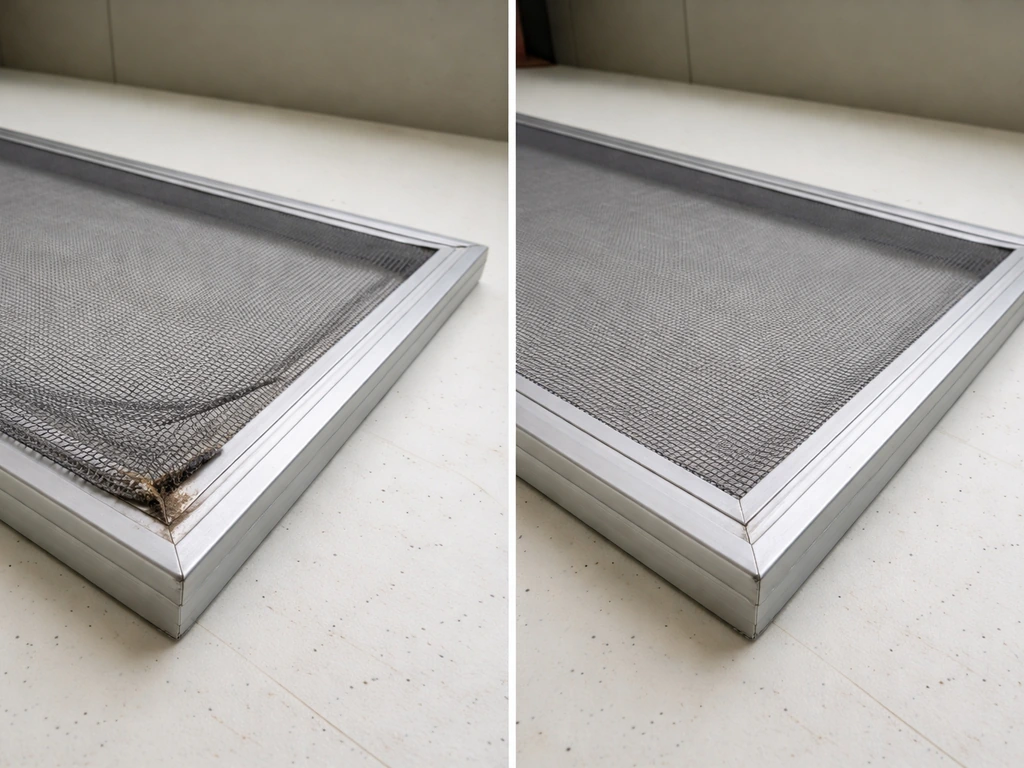
- Buying the wrong screen type: Standard fiberglass screen used in a high-pet or coastal environment tears or corrodes within a year or two. Matching screen type to your actual conditions prevents early replacement costs.
- Skipping proper anchoring: Screen panels that aren't firmly anchored to the structure will flex, pull loose, and fail at the corners. In windy regions, under-anchored screens can be destroyed in a single storm. IRC structural requirements for screen enclosures are real and based on local wind speed data. Check your area's ultimate design wind speed before choosing how light to go on framing.
- Ignoring drainage at the roof edge: If water pools along the fascia where you're attaching screening, it will rot wood framing and corrode aluminum tracks over time. Make sure your roof edge has adequate drip edge and that your framing attachment doesn't trap standing water.
- Soffit and roof attachment problems: Attaching a screen frame to a soffit that isn't structurally supported leads to sagging, gaps at the top edge, and eventually a screen that pulls away from the ceiling. If the soffit isn't solid, you need to attach to the actual fascia board or install a nailer.
- Underestimating the door budget: Cheap screen doors with lightweight aluminum frames and flimsy spring closers fail fast. A quality door with a proper pneumatic closer costs $120–$200 more but lasts much longer and doesn't leave gaps that let bugs in.
- Not checking permit requirements before starting: Some municipalities require permits for any permanent screen enclosure, even on an existing covered patio. Getting caught and required to remove or modify work after the fact is far more expensive than pulling the permit upfront.
- Ignoring HOA rules: If you're in a neighborhood with an HOA, screen enclosure color, material, and style may be regulated. Checking first costs nothing. Removing non-compliant work costs a lot.
Decision checklist and next steps
Before you buy a kit or call a contractor, run through this checklist. It will tell you which path makes sense for your situation and what information you need to move forward.
- Does your patio already have a roof and structural posts? Yes = you're in the cheapest scenario. No = budget significantly more for structural work first.
- Measure your openings: Width, height, and number of open sides. Note any non-rectangular shapes or angles. This is the information every kit system and contractor will ask for first.
- Check your local permit requirements: Search your city or county building department website for 'screened porch permit' or 'patio enclosure permit.' Many have online fee calculators. Know the rule before you start.
- Check HOA guidelines: If applicable, pull your CC&Rs or email the HOA management company with a description of what you're planning.
- Choose your system type: DIY panel kit if you're handy and have standard rectangular openings. Contractor-built aluminum frame if you have complex geometry or want a polished finish. Retractable screens if permit avoidance and open-air flexibility justify the higher cost.
- Get at least two contractor quotes: Ask each contractor to break out the cost of framing, screen material, door(s), and any structural or roof work separately. Bundled quotes make comparison impossible.
- Ask contractors specifically about wind rating and anchoring method: Any contractor who can't answer this question clearly is not one you want doing structural attachment work.
- If DIY: Order 15% more screen material than your measured square footage, buy quality spline and a spline roller tool, and watch at least one installation video for your specific kit system before cutting anything.
- If your patio doesn't have a roof yet: Read up on the differences between building a screened porch with a roof vs screening in an existing covered patio, since the cost and complexity are very different projects.
The bottom line is this: work with what you have. A covered patio with existing posts is worth significantly more than an open slab when it comes to screening costs, because you're adding a finish layer, not building a structure. Start there, keep the layout simple, use fiberglass screen on a DIY kit for the first pass, and you'll spend a fraction of what a full screen room build costs.
If you are specifically wondering how to screen in a patio under a deck, start with the same rule of working with what you have and keeping the layout simple. If you find yourself needing a new roof, complex corners, or electrical work, recalibrate your budget before you start rather than discovering those costs mid-project.
FAQ
What is the cheapest way to screen in a patio if I already have a roof but no screen frame?
For the true “cheapest way,” start by confirming you have a solid roof and existing structural posts, then plan for fixed fiberglass screen panels rather than retractable systems. Retractable enclosures often cost several times more because you are paying for tracks, hardware, and larger installation labor even when the opening sizes are the same.
Should I choose fiberglass or aluminum to keep the total cost down?
Standard fiberglass is usually the lowest upfront material cost, but the more budget-safe approach is to buy a DIY kit that includes the frame parts and tensioning or splines, not just loose mesh. This reduces the chance of gaps around the edges, which is where most “cheap” jobs fail and need rework.
How can I avoid overspending on materials when measuring for patio screening?
Don’t guess on measurements, because screen waste is one of the biggest DIY cost traps. Measure each opening in inches (width and height), include how the kit expects you to overlap or trim at corners, then add a realistic waste factor (often 5 to 10 percent for multiple openings). If your openings are rounded, angled, or have columns, expect higher waste and possible pro-level framing.
What changes if my patio is under a deck instead of a covered roof?
If your patio is under a deck, the cheapest route is often a panel system that attaches to the existing deck underside and walls, rather than building a full perimeter roof. However, you must check clearance for airflow and drainage, and you may need additional edge flashing or standoff hardware so water from the deck can’t run into the screen line.
What is the cheapest option if I have dogs or cats that hit or lean on the screens?
If pets push or lean on the screens, upgrading to thicker or more rigid mesh (and confirming your kit’s frame strength) can be cheaper than replacing damaged panels later. Aluminum is not always required for every pet, but a pet-resistant installation usually means more robust framing and tighter anchoring.
When does DIY stop being the cheapest option?
A DIY job tends to be cheapest when your openings are rectangular and your plan avoids electrical and drainage changes. If you need new gutters, rerouting downspouts, electrical outlets, or a new roof or structural reinforcement, those tasks can trigger separate costs and permit steps, which usually makes hiring a pro more economical than “DIY plus surprises.”
What should I ask a contractor so I can compare quotes fairly?
Start by getting a quote that itemizes more than “screen and labor.” Ask if it includes anchoring method, corner/track components (if any), trim/finish pieces, and disposal of old materials (if replacing). Cheap quotes that omit anchoring or edge flashing often end up costing more once you add missing components during the job.
Are there common patio shapes or layouts that make screening more expensive?
If your layout has odd angles, non-matching openings, or large spans that sag, those are the classic reasons DIY becomes more expensive. In those cases, a pro can redesign the panel layout or add supporting members so the screens stay taut and don’t pull loose, which can prevent repeat purchases of mesh and framing.
Do fixed patio screens usually require a permit?
A permit usually becomes relevant when you are changing the roof structure, adding structural posts, or building an enclosed addition rather than fitting screens to existing openings. If you are unsure, ask your local building department whether fixed screen panels attached to existing posts require approval, and save your existing-post photos and product installation details for faster review.
What are the most common DIY mistakes that make the job cost more later?
The biggest “hidden” expense is redoing a bad installation, usually from loose anchoring or incorrect panel sizing that creates gaps. Use the kit’s recommended fastening points, keep tension consistent where the system uses splines or tensioning, and double-check that the edges seal against the posts and roof edge so insects can’t find pathways.
Next Article
How to Screen in an Apartment Patio: DIY Steps
DIY steps to screen an apartment patio, from HOA and measurements to materials, installation, costs, and maintenance.