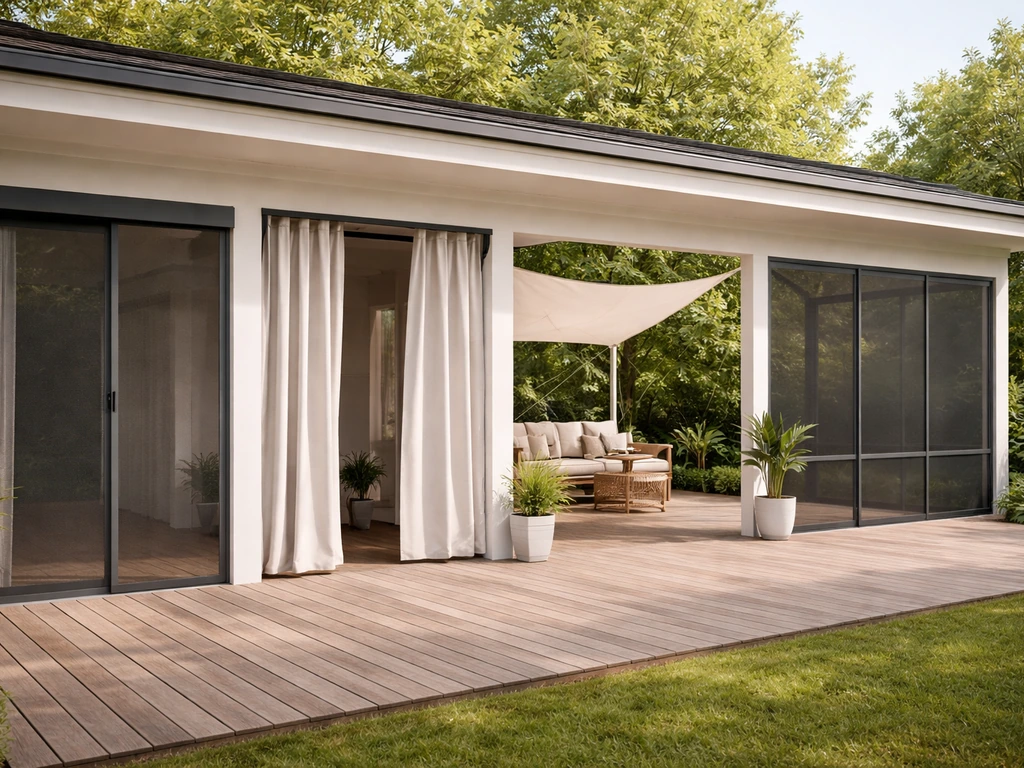
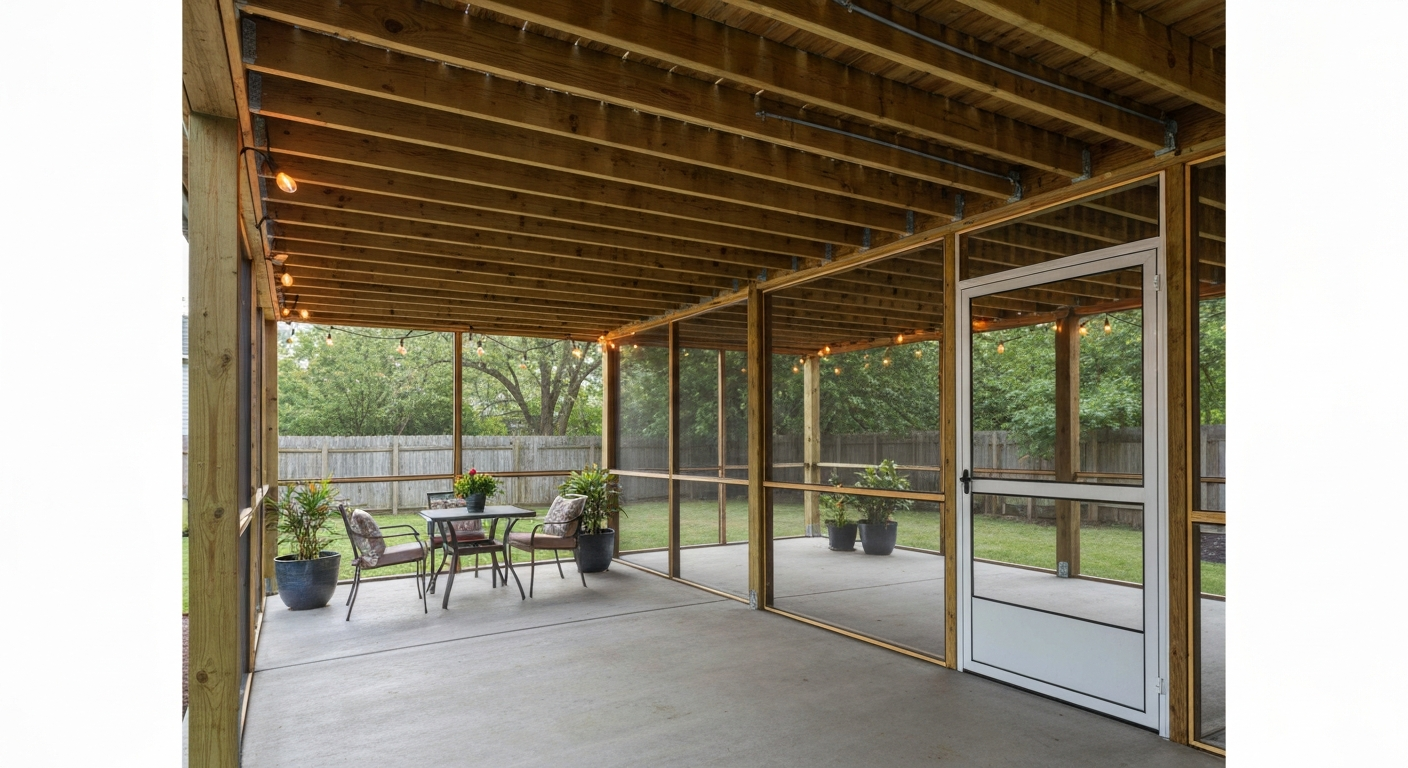
Screening in a patio under an existing deck is one of the more satisfying outdoor projects a homeowner can take on because the deck overhead already solves half the problem: you have a ceiling. You're essentially building three or four screen walls between the deck frame above and the patio slab below, adding a door, and managing the water that falls through the deck boards. Done right, you get a bug-free, shaded outdoor room without touching the deck structure. Done wrong, you end up with a damp, moldy crawl space with screen stapled to rotting 2x4s. This guide walks through every decision point: whether the project even makes sense for your property, what permits you need, which materials hold up, how drainage works, what installation looks like step by step, and what it all costs. For step-by-step instructions on how to screen in a patio with a roof, see our detailed guide. For a step-by-step walkthrough specifically focused on how to screen a patio enclosure, see our detailed how to screen a patio enclosure guide.
How to Screen in a Patio Under a Deck: DIY Guide & Costs

Who this guide is for
This guide is written for homeowners (and renters considering temporary options) who have a concrete, paver, or gravel patio sitting directly beneath an elevated deck. The deck could be attached to the house or freestanding. The patio might be fully shaded by the deck or only partially covered. "Screening in" in this context means framing and screening all open sides of that under-deck space to create an enclosed, insect-resistant outdoor room. It doesn't mean converting it to heated living space or adding windows; this is a screened porch, not a room addition. That distinction matters for permits, code requirements, and cost.
When under-deck screening makes sense (and when it doesn't)
Before spending money on materials or permits, it's worth asking whether this is actually the right solution. Under-deck screening makes strong sense when your deck is at least 7 feet above the patio at its lowest point, the patio is already a usable size (at least 10 by 12 feet or larger), you live in a bug-heavy climate, and you want a shaded outdoor room without building a separate structure. It also makes sense if you want to protect patio furniture from rain without a full roof addition.
It's less compelling when your deck clearance is under 7 feet (more on that below), the patio is awkwardly shaped or too small to furnish, or you're renting and can't get landlord approval for permanent framing. In those cases, alternatives deserve a real look.
| Option | Best When | Main Drawback | Approx. Cost Range |
|---|---|---|---|
| Screen in under-deck patio | Deck height 7+ ft, decent patio size, mosquito/bug issues | Water management required; permits often needed | $1,500–$6,000+ DIY to pro |
| Retractable screen system | You want flexible open/closed control | Higher cost per sq ft; less bug-tight | $2,000–$8,000 installed |
| Patio roof or pergola + screen | No existing deck overhead; want full weather protection | Requires full permit, structural work | $5,000–$20,000+ |
| Full season-room enclosure | Year-round use desired; budget allows | Major construction; permits, insulation, HVAC | $15,000–$50,000+ |
| Lattice or outdoor curtains | Renter or tight budget; temporary solution needed | No real insect exclusion | $200–$800 |
| Do nothing | Bugs are manageable; climate is mild | No upgrade value; ongoing pest annoyance | $0 |
If your main frustration is mosquitoes and you want the simplest fix, under-deck screening typically delivers the best cost-to-benefit ratio of any of these options. If water intrusion from the deck above is severe and you haven't addressed it yet, solve drainage first (or simultaneously) because screens won't fix a dripping ceiling.
Site assessment: what to check before you buy anything
Walk your site with a tape measure and a notepad before ordering a single piece of lumber. Surprises discovered during installation cost far more to fix than surprises found during planning.
Clearance and geometry
- Measure the clear height from patio surface to the bottom of the deck joists at multiple points. IRC Appendix H (Patio Covers) sets a prescriptive minimum ceiling height of 7 feet for habitable and semi-habitable spaces. Many building departments apply this same threshold to screened patios. Below 7 feet, you may face code hurdles or need to document that the space isn't intended as habitable.
- Measure the deck perimeter overhang. If the deck extends past the house wall, you'll need to frame a wall under the cantilevered section, which may require a footer or post.
- Check whether the patio slab is level. Significant slope affects how you set sill plates and how screen-door thresholds drain.
- Note any obstructions: hose bibs, dryer vents, basement egress windows, or HVAC equipment that will affect wall placement or require framed openings.
Deck structure and load
- Identify what the deck is made of (pressure-treated lumber, composite decking, etc.) and whether it's in good structural condition. Rot, insect damage, or failing ledger connections should be repaired before you add a screen wall system that attaches to the deck framing.
- Determine how the deck attaches to the house. A ledger-attached deck means you'll be anchoring screen-wall top plates to the band joist or rim joist. Verify those members are solid.
- Screen walls under a deck don't typically add significant structural load, but any new posts you install for corners or door frames must land on footings or the existing slab (check slab thickness; a 4-inch residential slab is usually adequate for non-load-bearing screen posts with base hardware).
Drainage, utilities, and access
- Look up. If the deck has gaps between boards, water runs through freely. Decide now whether you'll install an under-deck drainage/ceiling system or plan to live with occasional drips.
- Locate any deck post footings or columns that fall within the patio perimeter; these need to be incorporated into your screen-wall framing design.
- Mark electrical outlets, lights, or junction boxes on the exterior wall that fall within the screened area. Plan for interior lighting if the screening reduces daylight significantly.
- Check gas line locations, especially on concrete slabs where lines may be embedded or run along the foundation.
HOA, lease, and rental restrictions
- Pull your CC&Rs or HOA architectural review guidelines. Most HOA architectural review committees require prior written approval for screen enclosures. Typical HOA submittals include a site plan showing dimensions and setbacks, a material/color specification, and sometimes a manufacturer's product sheet. Approval timelines are often 30–60 days, and some HOAs have a fixed meeting schedule for ARC reviews.
- Renters must get landlord written approval before any permanent exterior modification. Standard lease language requires restoration at lease end, meaning you'd need to remove framing and patch any anchor holes. If landlord approval isn't possible, stick to removable or freestanding screen systems rather than anchored framing.
- Even in non-HOA areas, check local zoning for setback requirements. A screened enclosure that extends to the property line or encroaches on a utility easement will fail inspection.
Permits and code: what to expect
Most jurisdictions treat a screened patio enclosure as a structure requiring a building permit. This isn't a bureaucratic formality: inspections catch ledger attachments that would fail in a windstorm and electrical work done unsafely. See Modules, American Wood Council (AWC) (Wood‑frame/deck resources) for AWC guidance on when prescriptive ledger attachments are allowed versus when engineered or freestanding solutions are required Modules — American Wood Council (AWC) (Wood‑frame/deck resources). Pulling the permit also protects your homeowner's insurance and avoids problems at resale.
Common permit triggers
- Adding any framed wall structure to an existing deck or patio (even non-load-bearing screen walls often trigger a permit)
- Any new electrical work (outlets, ceiling fans, or lighting circuits)
- Adding a new door with a threshold or step
- Projects that change the footprint or "use" of an outdoor structure
- Coastal and high-wind zones: product approvals (impact resistance, wind-load ratings) are nearly always required in addition to standard permits
What to ask your building department
- Is a screened patio enclosure under an existing deck a permit-required project in this jurisdiction?
- What code edition is currently adopted (IRC 2018, 2021, 2024, or local amendments)?
- What submittals are required: site plan, structural drawings, product approvals, or a licensed engineer's stamp?
- Are there setback or height-limit requirements that apply to screened porches?
- Will the inspector review the ledger/deck attachment as part of this permit, or is that a separate process?
- What are the egress requirements if the screened area contains an exit door from the house?
Typical submittal package
Based on common municipal checklists, a screened-porch permit submission typically needs: a site plan showing property lines, the existing deck footprint, and the new screened area with dimensions; a floor plan or framing plan of the screen walls and door locations; a list of materials (lumber species and grade, screen product, fastener specs); and for coastal or high-wind areas, a manufacturer's product approval for the screen system and possibly an engineering letter for wind-load compliance. Permit fees vary widely but commonly run $150–$500 for projects in this scope. Plan review can take 1–4 weeks in most suburban jurisdictions.
Egress and electrical notes
If a door from the house opens directly into the screened area, the screened enclosure needs its own exterior door to the yard to satisfy egress requirements. Electrical work inside the screen (outlets, ceiling fans, lights) generally requires a separate electrical permit, GFCI protection for all outlets, and must be inspected. Don't wire anything inside a screened outdoor space to an existing interior circuit without verifying your panel capacity and code compliance.
Materials and products: what you're actually buying
The physical components of an under-deck screen enclosure break into five categories: the frame, the screen fabric, the fasteners and hardware, the door system, and the threshold/sill. Choosing the right combination in each category determines how long your enclosure lasts and how it looks.
Frame materials
| Material | Pros | Cons | Best Use Case |
|---|---|---|---|
| Pressure-treated lumber (ACQ/CA) | Strong, widely available, familiar to DIYers, easy to cut and fasten | Requires stainless or hot-dipped galvanized fasteners; can warp; needs paint/stain | Inland residential, budget builds |
| Aluminum extrusions (screen-room profiles) | Lightweight, corrosion-proof, clean appearance, accepts spline screen without staples | More expensive than lumber; requires miter saw and basic aluminum tools; less DIY-familiar | Coastal environments, cleaner aesthetic, kit systems |
| Cedar or redwood | Naturally rot-resistant, attractive, good for visible areas | More expensive; still needs sealing; harder to source in some regions | Visible framing where appearance matters |
| Composite/PVC trim lumber | Rot-proof, paint-free, low maintenance | Not structural in most applications; higher cost; fastener rules differ | Trim and sill plates only, not main framing |
For most DIY under-deck screen projects, pressure-treated lumber (2x4 or 2x6 depending on span) is the practical choice. The critical caveat: ACQ-treated lumber is corrosive to standard zinc-plated hardware. Every fastener, joist hanger, post base, and bracket must be rated for ACQ contact, meaning hot-dipped galvanized (HDG) or stainless steel. Simpson Strong-Tie publishes fastener compatibility tables that specify exactly which products are approved for each preservative treatment type; check those tables before purchasing hardware.
Fasteners and connectors
For attaching top plates to deck band joists or rim joists, structural screws rated for ACQ contact (such as Simpson SDS or equivalent) are the most reliable option. Standard deck screws or construction screws are not equivalent substitutes. Where posts bear on concrete slabs, use post bases with slab anchor bolts; avoid toenailing into concrete. For screen attachment to wood frames, corrosion-resistant staples (16-oz copper or stainless crown staples) hold longer than standard zinc-plated staples, especially in humid environments.
Doors and thresholds
A single 32- or 36-inch screen door is the standard for most residential applications. For furniture access or a wider opening, a double door (two 24-inch panels) works well. Aluminum screen door frames with heavy-duty spring closers perform better long-term than wood screen doors, which sag and warp with seasonal moisture. Thresholds on concrete patios should be a low-profile aluminum or composite saddle with a rubber seal; they manage water run-in and reduce tripping hazard. If the patio slopes away from the house, the threshold door gap can be minimal; if it slopes toward the house, add a small channel drain at the door sill.
Choosing the right screen fabric
Screen fabric is where a lot of homeowners make the wrong call by defaulting to the cheapest option at the hardware store. The fabric choice affects insect protection, light levels, UV blockage, durability, and how the space feels. Here's how the main options compare.
| Screen Type | Material | Mesh Count (typical) | UV Block | Durability | Best For |
|---|---|---|---|---|---|
| Standard fiberglass | Vinyl-coated fiberglass | 18x14 or 18x16 | ~25–35% | Moderate (5–10 yrs) | Budget builds, low-abuse areas |
| Aluminum screen | Aluminum wire | 18x14 or 18x16 | ~30–40% | Good (10–15 yrs) | High-impact areas, coastal (use aluminum not galvanized) |
| Phifer PetScreen | Vinyl-coated polyester | 17x20 | ~25–30% | Excellent (tear/puncture resistant, 7x stronger than standard) | Households with dogs or cats |
| Phifer SunTex 80 | Vinyl-coated polyester solar screen | ~14x18 | ~80% UV block | Very good (outdoor-rated) | Hot, sunny climates; glare/heat reduction priority |
| Phifer SunTex 90 | Vinyl-coated polyester solar screen | ~14x18 | ~90% UV block | Very good | Maximum solar control; darker interior view |
| No-see-um / fine mesh | Fiberglass or polyester, 20x20 or tighter | 20x20+ | ~20–30% | Moderate | Areas with tiny biting insects (sand flies, no-see-ums) |
For most under-deck patios, standard 18x14 fiberglass screen is adequate if you don't have pets and the space gets moderate shade from the deck above. If you're in a sunny southern climate and heat is a concern, SunTex 80 blocks 80% of UV radiation while still allowing about 20% visible light transmission and maintaining airflow. SunTex 90 blocks more heat but noticeably darkens the space, so try a sample before committing to it for all walls. PetScreen from Phifer is made from vinyl-coated polyester and is roughly seven times stronger in tear resistance than standard fiberglass; it's worth the modest price premium for any home with dogs. For a detailed comparison of options and to find the best screen for patio enclosure, see our guide on best screen for patio enclosure.
One thing worth understanding: mesh count and openness factor are different measurements. An 18x14 mesh has 18 wires per inch in one direction and 14 in the other, which gives a specific openness percentage. Solar screens often have a lower wire count but tighter weave geometry that still blocks UV while allowing some air movement. Phifer's product datasheets document openness factor and solar heat gain coefficient (SHGC) for each fabric, which lets you make apples-to-apples comparisons.
Under-deck drainage and ceiling systems
This is the part most homeowners underestimate. If you enclose the patio without addressing deck drainage, water drips through the board gaps every time it rains and you end up with a wet, unpleasant space and potential mold problems on framing and furniture. Fine Homebuilding's '5 Steps for Flashing a Deck Ledger' details practical house‑to‑ledger flashing methods, self‑adhering membranes, and metal flashings to prevent water intrusion when adding a screened ceiling 5 Steps for Flashing a Deck Ledger — Fine Homebuilding (practical flashing methods). There are three main approaches.
Option 1: Catch-and-divert panel systems
These are the most popular retrofit solution. Systems like Trex RainEscape, TimberTech DrySpace, and DEK Drain consist of troughs or panels installed between or beneath deck joists that catch water coming through the decking and channel it to a gutter at the outer edge of the deck. They create a waterproof ceiling over your screened patio without requiring you to remove or replace deck boards. Trex RainEscape uses a trough-and-downspout system that installs between joists; the manufacturer's installation guide recommends a minimum 1/8-inch-per-foot slope in the trough direction for proper drainage. TimberTech DrySpace similarly uses a membrane-and-trough approach. DEK Drain takes a slightly different approach with overlapping vinyl panels that snap together.
| System | Install Method | Deck Board Removal Required | Warranty (typical) | Notes |
|---|---|---|---|---|
| Trex RainEscape | Trough clips to joists from below | No (installs under boards) | 25 years (Trex) | Works best with consistent joist spacing; full kit available |
| TimberTech DrySpace | Panel system under joists | No | Limited lifetime (TimberTech) | Integrated aluminum gutter at perimeter |
| DEK Drain | Vinyl panels clip between joists | No (retrofit-friendly) | Varies by installer/product | Lower profile; suited for tighter clearances |
| Solid soffit board ceiling | Custom framing; attach boards to joist bottom | No | N/A (custom) | Most finished look; no drainage function without flashing |
| Corrugated metal/polycarbonate roofing | Mounted to ledger and outer beam | Depends on design | Varies | Cheap but industrial-looking; may require permit as roof addition |
For most screened patio projects, a catch-and-divert trough system installed before you screen the walls gives you a dry, finished-looking ceiling without major deck demolition. The key installation requirement is adequate slope; a flat installation will pool water and eventually leak at joints. If your deck is perfectly flat with no pitch, you may need to add a slight shim to the trough system during installation to create the required drainage slope.
Option 2: Suspended ceilings
A suspended or drop-ceiling system hung below the joists using cables or tracks can work in taller spaces (8+ feet clear height), but it reduces your effective ceiling height and still doesn't address water penetration unless combined with a waterproof membrane above. For most under-deck patios, this approach is less practical than trough-based drainage.
Option 3: Solid deck surface above
If you're building or replacing the deck at the same time as screening the patio, installing waterproof deck tiles or a continuous waterproof membrane on the deck surface eliminates water penetration entirely. Products designed for rooftop deck applications (pedestal pavers over a membrane, for example) are the most watertight solution but are also the most expensive and typically require full deck replacement. This is more of a new-construction approach than a retrofit.
Kits vs custom framing vs professional installation
This decision shapes your budget, your timeline, and the quality of your finished result. There's no universally right answer; the right choice depends on your skill level, the complexity of your space, and your budget ceiling.
Screen room kits
Prefabricated screen room kits use aluminum extrusion framing with pre-cut or field-cuttable panels that accept standard screen spline. EasyRoom, Screen Tight, and similar systems are designed for DIY installation and typically include all frame members, screen channels, corner connectors, and door hardware. The advantages are speed, a clean finished appearance, and no need to stretch screen with a staple gun (the spline system grips it cleanly). The limitation is that kits come in modular dimensions; irregular patio shapes, non-standard ceiling heights, or significant out-of-square conditions require field modifications that can frustrate first-timers. Kit costs for a 12x16 patio typically run $1,200–$2,500 in materials, not including drainage system or door hardware upgrades.
Custom lumber framing
Custom framing with pressure-treated lumber gives you complete flexibility for irregular shapes, existing post locations, and non-standard heights. It's the approach most professional contractors use for custom screen porches. You frame walls with 2x4 pressure-treated studs (typically 16 or 24 inches on center), attach a top plate to the deck band joist with structural screws, set bottom plates on the slab, and install screen using a staple-and-batten method (staple screen to studs, then nail a 1x2 or 1x3 batten over the staples to protect edges and keep screen tight). This method is more time-intensive and requires basic carpentry skills, but it's fully adaptable. Material costs for a 12x16 space run $800–$1,800 for lumber, hardware, screen, and door, before any drainage system.
Professional installation
Hiring a screened-porch contractor or deck builder to handle the project typically costs $3,000–$8,000+ for a standard under-deck patio conversion, with significant regional variation (Florida and the Southeast, where screen enclosures are extremely common, tend to have more competitive pricing than the Northeast or Pacific Northwest). Professional installation makes sense when: your site has structural complexities (deck in poor condition, non-standard attachment points, engineered footing requirements); you need a permit with engineering sign-off; you want a fully finished appearance with a ceiling system, interior lighting, and trim; or you simply don't have the time or comfort level for a multi-weekend DIY project.
| Route | Skill Level Required | Material Cost (12x16) | Labor Cost | Timeline | Finish Quality |
|---|---|---|---|---|---|
| DIY kit (aluminum extrusion) | Moderate; basic tools, measuring | $1,200–$2,500 | $0 | 1–2 weekends | Good; clean and consistent |
| DIY custom framing | Moderate-high; carpentry basics needed | $800–$1,800 | $0 | 2–3 weekends | Varies with skill; very flexible |
| Partial DIY + pro for drainage/electrical | Moderate; sub out complex work | $1,500–$3,000 combined | $500–$1,500 | 1–2 weeks total | Good to very good |
| Full professional install | N/A (hire out) | $1,500–$2,500 materials | $1,500–$5,500 labor | 1–2 weeks (including permit) | Very good to excellent |
Step-by-step installation overview
This workflow assumes a basic rectangular patio under an attached deck, custom lumber framing, and a trough-based drainage system. Adjust for kit systems or freestanding decks as needed.
- Obtain permit and HOA approval before purchasing materials or starting work.
- Install under-deck drainage system (trough/channel system like Trex RainEscape or TimberTech DrySpace) before framing walls; it's much harder to install once walls are up. Follow manufacturer slope requirements precisely.
- Mark wall locations on the slab with chalk line. Account for screen door clearance and any existing posts or obstructions.
- Set post bases at all corner locations and door jamb locations using wedge anchors rated for concrete (minimum 3/8-inch diameter, 2-3/4-inch embedment into slab). Verify slab thickness first; minimum 3.5-inch slab needed for most wedge anchors.
- Install pressure-treated sill plates (bottom plates) flat on slab, anchored with powder-actuated fasteners or concrete screws at 24-inch intervals. Use a sill seal gasket under the plate to prevent moisture wicking.
- Set corner posts (4x4 pressure-treated) in post bases; plumb and brace temporarily.
- Install top plates against the deck band joist using structural screws (HDG or stainless, minimum 3-inch penetration into band joist). Pre-drill to avoid splitting.
- Frame intermediate studs at 16 or 24 inches on center between corner posts. Keep openings for screen panels consistent for easier screening.
- Frame door opening to rough-opening dimensions specified by your door unit (typically rough opening = door width + 2 inches, door height + 1.5 inches for pre-hung units).
- Install screen fabric using staple-and-batten method: staple screen tightly to stud faces with corrosion-resistant staples, then nail 1x2 pressure-treated or cedar battens over staples on all four sides of each panel. Pull screen tight as you go; a screen stretcher tool (costs about $30) helps on large panels.
- Hang door unit; adjust hinges for level and plumb operation. Install spring closer. Verify door closes and latches securely.
- Install threshold at door opening; caulk sill plate-to-slab joint with polyurethane caulk.
- Add interior lighting if planned; run wire before installing any ceiling finish.
- Schedule inspections as required by permit.
Low-clearance, irregular spaces, and rental adaptations
A deck that sits only 6 to 6.5 feet above the patio is a real problem for permanent framing. You'll need to verify with your building department whether they apply the IRC's 7-foot prescriptive minimum to screened enclosures in your jurisdiction. Some departments treat screened patios as accessory structures and are more lenient; others apply the full 7-foot rule. If you're stuck at 6.5 feet, a kit system with a lower profile frame may get you close enough, and sloped framing along the house wall (where the deck is often highest) can be designed so the low end is at the outer edge where people are less likely to stand. Ducking at the perimeter is manageable; ducking in the center of the space is not.
For renters or those who can't anchor to the slab: freestanding screen panels using pressure-treated posts with drive-in ground anchors (spikes driven into a gravel or grass surface) work for patios without concrete. On concrete, weighted base plates designed for event tent framing can support lightweight aluminum screen panels without drilling, though they're less wind-resistant. Outdoor insect-netting curtains hung from the deck frame above are the most renter-friendly option: no drilling, no permits, no permanent modification. They won't seal as tightly as framed screen walls, but they reduce insect intrusion dramatically and cost $100–$400 for a full patio coverage setup.
Solving common under-deck problems
Water and drip management
Even with a trough drainage system, some drip at seams is possible during heavy rain. Extend downspouts from the trough system to drain well past the screened perimeter. Make sure gutters on the main house roof are diverting water away from the deck area, not pooling it above your new ceiling. Slope the patio slab or add a perimeter channel drain if water pools on the floor during heavy rain.
Deck access for maintenance
You still need access to the deck above for maintenance, especially to the trough drainage system. Design at least one screen panel as a removable section, or plan your door location so you can reach the deck stairs without going through the main house. If the drainage trough has a cleanout point, locate it at a place you can access from inside the screened area.
Ventilation and mold prevention
Screen walls naturally provide ventilation, which is their biggest mold-prevention advantage over solid enclosures. The risk comes from wet framing. Use pressure-treated lumber for all framing members, don't bury wood in contact with concrete without a sill seal or standoff, and treat any exposed end cuts with end-cut preservative (brush-on copper naphthenate). Leave a small gap between any wood trim and the slab surface so water can escape and air can circulate.
Lighting and electrical
Under-deck patios are inherently shaded. A ceiling fan rated for damp or wet outdoor use (check the UL listing; damp-rated is fine for covered areas) dramatically improves comfort. Ceiling fan weight and vibration require a fan-rated electrical box anchored solidly to framing, not just to a drainage panel. For lower-cost lighting, outdoor-rated LED string lights hung from the trough system or deck joists above are a no-permit solution if you're just plugging into an existing outdoor outlet.
Budget and time estimates
Costs below are for a typical 12x16 under-deck patio conversion in the continental US as of 2026. Labor rates vary significantly by region; Southeast/Gulf Coast labor for screen enclosures is typically 20–30% below Northeast or West Coast rates.
| Component | DIY Cost Range | Pro-Installed Cost Range | Notes |
|---|---|---|---|
| Under-deck drainage system (12x16) | $600–$1,200 | $800–$1,800 installed | Trex RainEscape, DrySpace, or similar |
| Framing lumber and hardware | $400–$700 | Included in labor quote | PT lumber, structural screws, post bases |
| Screen fabric (150 sq ft) | $75–$250 | Included in labor quote | Standard fiberglass to PetScreen or SunTex |
| Door (single screen door) | $80–$200 | $150–$400 installed | Aluminum frame, spring closer |
| Aluminum screen room kit (alternative) | $1,200–$2,500 | N/A (DIY product) | Replaces lumber framing and screen fabric line items |
| Permit fees | $150–$500 | $150–$500 | Homeowner pays regardless of DIY vs pro |
| Ceiling fan (damp-rated) + wiring | $150–$400 | $300–$800 installed | Electrical permit may be separate |
| Total estimate (basic, no ceiling fan) | $1,300–$2,800 | $3,000–$7,500 | Wide range due to drainage system choice and region |
Time estimate for a DIY build: figure two full weekends for a straightforward rectangular patio with no major complications. Weekend one covers drainage system installation and framing. Weekend two covers screening, door installation, and trim. Add a third weekend if you're doing electrical or if anything goes sideways with the permit process.
Maintenance and durability
A well-built under-deck screen enclosure with aluminum framing or properly treated lumber and quality screen fabric should last 10–20 years with minimal maintenance. Annual tasks: inspect screen panels for tears, especially at staple lines and corners; clean screen with mild soap and a soft brush to remove mildew and debris (mildew on screen is mostly cosmetic but can accelerate fabric degradation); check door hinges and spring closer and adjust or lubricate as needed; inspect trough drainage system for debris (leaves and seed pods block channels and cause overflow); check caulk at sill plate and threshold joints and reapply as needed.
Screen fabric is the highest-wear component. Standard fiberglass screen typically needs replacement in 7–10 years in a high-UV southern climate, longer in shaded northern environments. PetScreen and SunTex fabrics hold up better to UV over time. Re-screening individual panels is a straightforward DIY job: remove the batten strips, pull old screen, staple new screen, replace battens. Budget $50–$150 in materials to re-screen a 12x16 patio.
Does screening your under-deck patio add home value?
Screened porches are consistently one of the outdoor features homebuyers respond to positively, particularly in the Southeast, Mid-Atlantic, and Midwest where insects and summer heat are significant. A well-built under-deck screen enclosure adds functional square footage to the home's outdoor living area and photographs well in listings. The Remodeling Magazine Cost vs Value report historically shows screened porch additions recouping 50–75% of cost at sale, though specific returns depend heavily on local buyer preferences and how well the enclosure is finished. A proper permit and inspection record matters here: buyers and their agents will check permit history, and an unpermitted enclosure can become a negotiating issue or a requirement for removal before closing.
Screening alternatives worth considering
Permanent framed screens aren't the right answer for every situation. For renters looking for instructions on how to screen in apartment patio spaces, see our renter-friendly options covering freestanding panels, weighted bases, and insect-netting curtains. If your patio is used only occasionally, if you rent, or if you want maximum flexibility, these alternatives are worth comparing directly. For low-cost options and a cost-first comparison, see our guide on the cheapest ways to screen in a patio. If you need something less permanent, consider a patio screen alternative such as removable insect-netting curtains or freestanding panels that provide insect protection and flexibility without permits.
- Retractable screen systems: motorized or manual screens that roll up when not in use. Brands like Phantom Screens and Wizard Screen offer motorized cassette systems that mount to the deck frame and deploy full-height screens on demand. Cost is high ($2,000–$8,000+ installed for a patio perimeter) but the open-air feel when screens are retracted is unmatched. These work well for homeowners who want flexibility between fully open and fully screened.
- Outdoor insect-netting curtains: lightweight mesh curtains hung from the deck frame above or from curtain rods attached to posts. They are inexpensive ($100–$400), require no permits, and can be removed at season's end. Bug exclusion is imperfect since curtains don't seal tightly, but they reduce mosquito intrusion dramatically in casual use.
- Lattice panels: wood or vinyl lattice provides privacy and partial shade but no insect exclusion. Works better as a visual screen or wind break than a bug barrier. Zero permit trigger in most jurisdictions.
- Shade sails or drop curtains: fabric panels that block sun and rain but not insects. Good for UV and partial weather protection. Not a screening solution but a complement to other approaches.
- Freestanding screen tents or gazebos: pop-up or semi-permanent structures with screen walls that sit on (not attached to) the patio. Require no permits, no drilling, and can be stored in winter. Size and shape options have improved significantly; some freestanding screen structures cover up to 12x12 feet. Wind resistance is limited compared to anchored framing.
If you're weighing a full screen enclosure against just improving the general usability and appearance of your outdoor space, the comparison between patios and decks as an underlying structure choice is also worth understanding, since the features of each affect what enclosure options are even possible. Similarly, the choice of screen fabric type directly affects how much UV protection you get, which matters especially for southern-facing under-deck patios where afternoon sun drives in from a low angle. If you're concerned about sun protection, check the differences in fabrics to see whether patio screens block UV rays and how much each product reduces sun and heat do patio screens block UV rays.
FAQ
What building‑code and permit research is required before advising homeowners on screening a patio under an existing deck?
Check the local building department for permit triggers and submittal requirements (site plan, product approvals, structural calcs) and collect sample municipal permit checklists and online permit records to document typical fees and inspection points. Use the International Residential Code (IRC) as the baseline for definitions and prescriptive limits (including Appendix H/Patio Covers for ceiling‑height and enclosure thresholds). Consult coastal/ high‑wind jurisdiction documents if applicable.
Which authoritative codes and standards should be consulted to determine when an under‑deck screen becomes an enclosed/habitable space?
Reference the current IRC (relevant chapters on building planning and porches) and IRC Appendix H (Patio Covers) for prescriptive minimums and definitions. Also review local amendments to the IRC and any state codes that may change enclosure/habitable classifications or ventilation/egress requirements.
What structural and attachment research is needed to advise on framing/safety/ledger connections?
Collect manufacturer technical guides and structural references: Simpson Strong‑Tie fastening tables, American Wood Council (AWC) wood‑frame/deck modules and design guides, and industry deck construction manuals. Research ledger‑to‑band‑joist rules, approved fastener types and spacings, when engineered or freestanding solutions are required, and typical lateral connection details.
What information should be gathered about ledger flashing and waterproofing to prevent water intrusion when adding an under‑deck ceiling?
Compile builder/how‑to guides and product installation details for house‑to‑ledger flashing, self‑adhering membranes, metal flashings and door pans. Source practical step sequences and recommended products (e.g., Fine Homebuilding flashing guidance) and note common failure modes and required sequencing with under‑deck systems.
Which under‑deck drainage and ceiling systems must be compared and what specs matter?
Gather manufacturers’ installation manuals, spec sheets and independent comparisons for major systems (Trex RainEscape, TimberTech DrySpace, DEK Drain, etc.). Capture claimed flow rates, required deck access (do boards need removal), allowable slopes, drain‑to‑gutter details, installation constraints, warranty exclusions, and any required framing modifications.
What product research is necessary for screening materials and hardware selection?
Collect technical datasheets for screening meshes (fiberglass, aluminum, vinyl‑coated polyester, solar screens), noting mesh/insect rating, openness factor, tensile strength, tear resistance, UV blocking %, and recommended uses. Assemble ASTM specifications (e.g., A740 for hardware cloth) and ICC‑ES reports when available. Include pet/kid‑resistant product specs (Phifer PetScreen) and solar‑control data (Phifer SunTex) for tradeoffs.
Patio Screen Alternative Options: Costs, Pros, and Choice Guide
Compare patio screen alternatives for bugs, shade, privacy, and weather control with costs, DIY tips, tradeoffs, and pic