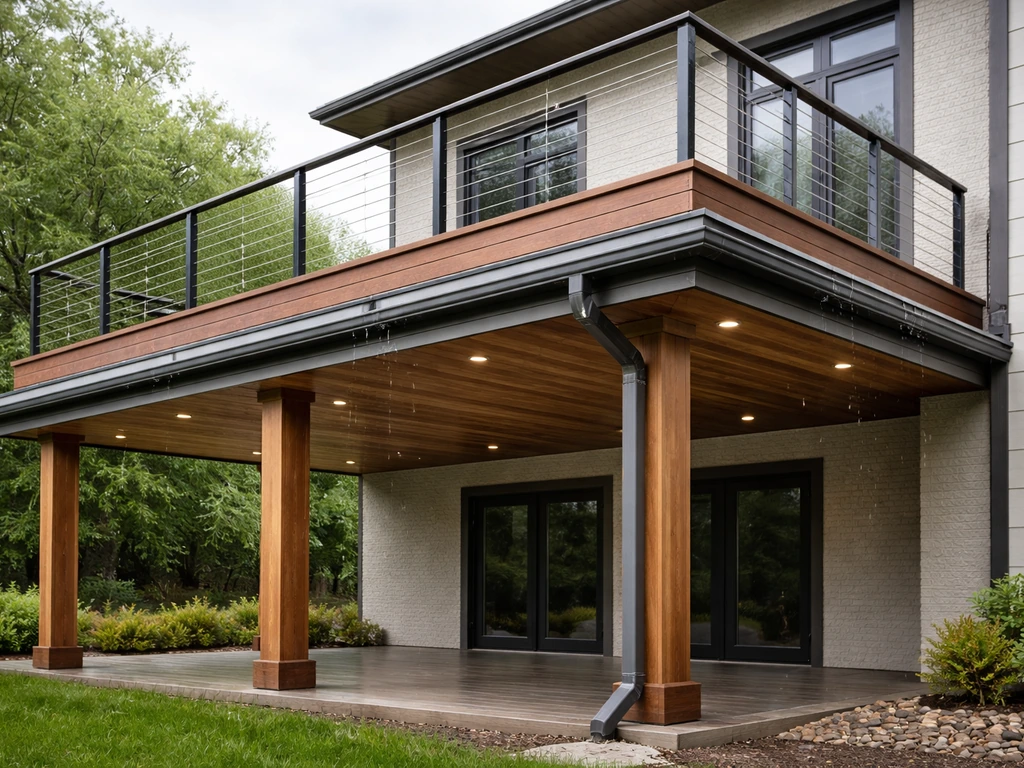
A patio with a deck on top is exactly what it sounds like: a raised deck built over or directly above a ground-level patio area, giving you two usable outdoor spaces stacked on the same footprint. Done right, you get a shaded, sheltered patio underneath and a full open-air deck above. Done wrong, you get a leaking ceiling over your patio and a structural headache that fails inspection. This guide walks through what the project actually involves, what it costs, how to keep water out, and how to avoid the mistakes that cause 90 percent of deck collapses.
Patio With Deck on Top: Planning, Costs, Safety, Waterproofing

Miles Hart
8 Jun 2026
What 'patio with deck on top' actually means (and the layouts you'll choose between)
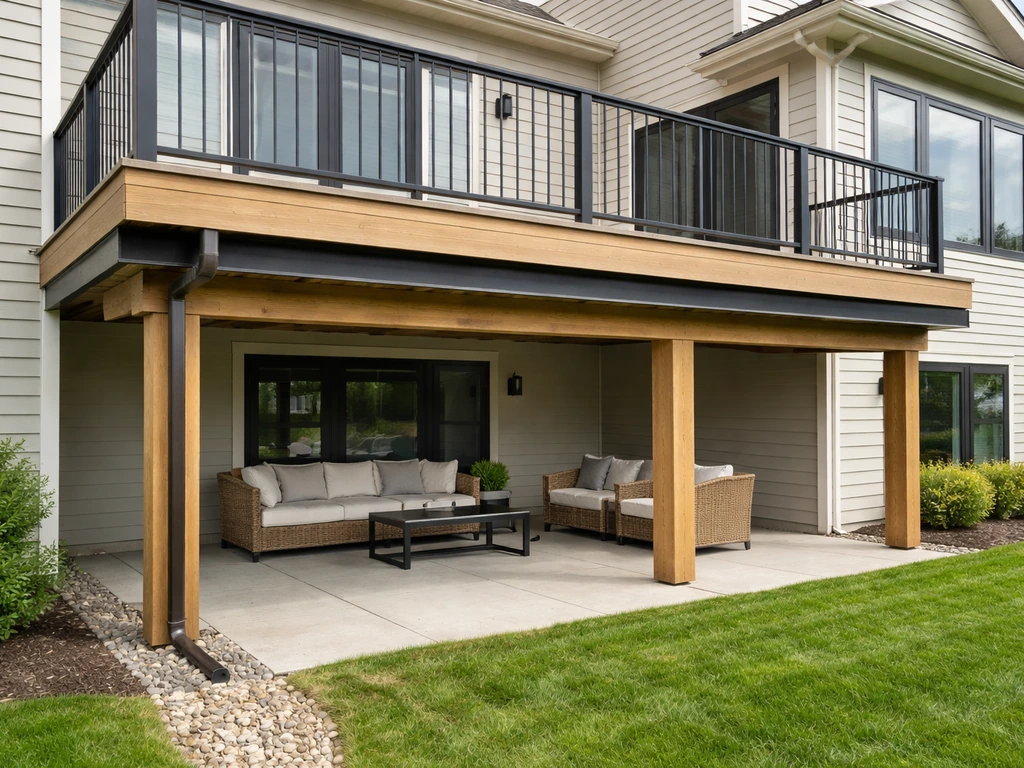
The phrase covers a few different real-world configurations, and which one applies to you changes everything about the build. The most common setup is an elevated attached deck whose underside faces the patio below, like a second-story deck off a walkout basement home where the patio lives at grade and the deck sits 8 to 12 feet up. Another common version is a lower raised deck, maybe 3 to 5 feet above grade, built over a ground-level concrete or paver patio, with enough clearance to use the space underneath. A third option is a freestanding deck platform sitting on its own posts directly above or adjacent to a patio slab, with no structural connection to the house at all.
The attached vs. freestanding distinction matters immediately. An attached deck transfers loads through a ledger board bolted to your house's rim/band board, while a freestanding deck is entirely self-supporting through its own posts and footings. Attached decks are more common and less material-intensive, but they introduce the single biggest failure risk in deck building: the ledger connection. NADRA estimates that about 90 percent of deck collapses trace back to ledger board connection failures, often caused by moisture getting behind the ledger and rotting the connection over time. Freestanding decks avoid that risk entirely but require more posts and footings, which adds cost.
- Attached deck over patio: ledger bolted to house, joists spanning to a beam/rim, posts to footings at the outer edge. Most common layout for two-story homes with a walkout or raised first floor.
- Freestanding elevated deck over patio: all loads go through posts and footings with zero connection to the house. Safer from a ledger-rot standpoint, but more posts and concrete required.
- Low raised platform deck over existing patio slab: deck frame sits 18 inches to 4 feet above the concrete, sometimes using the slab itself as a base. Clearance underneath may be limited for a usable patio space.
- Patio cover structure with decking surface on top: a covered pergola or carport-style structure where the roof surface is actual deck boards or waterproof decking instead of roofing panels, letting you use the top as a walk-on deck and the area beneath as a sheltered patio.
If your patio is below an existing upper-level deck, you may already have configuration one and just need to waterproof the underside, which is a separate but related project. If you're starting from scratch, you're choosing between attached and freestanding, and that decision drives your permit requirements, structural engineering, and budget.
What drives the cost: materials, structure, waterproofing, and code
This project has more cost layers than a standard deck build because you're essentially paying for a deck plus a weatherproofing system to protect the space below. Budget separately for each category so you don't get surprised mid-project.
Deck framing and structure

Elevated decks (wood, at least 3 feet above grade but shorter than a full second story) typically run about $30 to $50 per square foot installed. That range covers framing lumber, beams, posts, hardware, and standard decking boards, but not the waterproofing system or a high-end railing package. A 300 square foot deck in that range puts you at $9,000 to $15,000 for the deck itself before you add anything below.
Under-deck waterproofing system
This is the cost most homeowners underestimate. To keep the patio below actually dry, you need an under-deck drainage system installed between the joists. If your patio is below an upper deck, a properly installed under-deck drainage system and well-flashed ledger area are the main ways to keep it dry. Professionally installed systems run roughly $5,100 to $8,000 total for an average project, which works out to around $10 to $15 per square foot including gutters and downspouts. Material-only costs vary by system type.
| System Type | Approximate Cost (installed) | Notes |
|---|---|---|
| DIY EPDM membrane | $4.50/sq ft | Lowest cost, requires careful seaming, no warranty on labor |
| Trough/channel systems (e.g., DeckDrain) | $7.20/sq ft | Snap-in troughs between joists, drain to downspouts |
| Vinyl panel/ceiling systems | $7–$10/sq ft | Creates finished ceiling look below deck |
| TimberTech DrySpace | $8.80/sq ft | Full-coverage trough system with 25-yr material warranty |
| Trex RainEscape | $9.50/sq ft | Popular trough system, 25-yr warranty, pairs with Trex decking |
| Aluminum ceiling panels | $8–$13/sq ft | Durable, attractive finish, higher material cost |
| Zip-UP UnderDeck | $11.50/sq ft | Full ceiling panel system, good for finished patio appearance |
| Waterproof decking surface (composite) | $10–$15/sq ft | Addresses drainage above-deck rather than below |
Other cost drivers
- Footings and posts: concrete footings for an elevated deck can run $200 to $600 each depending on depth, frost line, and diameter. A 300 sq ft deck may need 4 to 8 footings.
- Railings and guards: required on any deck surface more than 30 inches above finished grade (IRC R312), and good railing systems add $50 to $150 per linear foot installed.
- Ledger flashing and water-resistive barrier materials: critical and often skipped on DIY projects. Budget $200 to $500 in materials alone for proper Z-flashing, peel-and-stick membrane, and sealing tape.
- Permits and inspections: vary widely by jurisdiction but commonly run $200 to $1,500 for residential deck permits.
- Site prep and demolition: if you're working over an existing patio, you may need to adjust drainage, add grading, or remove structures. Budget $500 to $3,000 depending on scope.
- Labor: typically 40 to 60 percent of total project cost for professional builds.
Structural requirements and safety basics for building a deck above a patio

This is where the project gets technical and where cutting corners gets dangerous. An elevated deck over a patio carries the same live and dead loads as any elevated deck (typically 40 psf live load plus 15 psf dead load under residential codes), but the added complexity is that the space below is occupied or intended for use. That means the deck above needs to perform reliably as a weather barrier and as a structure.
Footings and load path
Every load on a deck has to travel somewhere: through the joists to the beam, through the beam to the posts, and through the posts into the footings and into stable soil. If you're building over an existing concrete patio slab, you cannot simply set posts on the slab surface and call it a footing. Most codes require footings to extend below the frost line (which varies from 12 inches in warm climates to over 48 inches in northern states), and the slab itself is rarely designed to carry concentrated point loads from deck posts. You'll likely need to core through the slab and pour new footings, or position footings at the slab perimeter.
Ledger connections
For attached decks, the ledger-to-house connection is the single most important structural detail. IRC prescriptive tables specify bolt size, spacing, and embedment depth based on joist span and lumber species. Using the wrong fasteners, spacing them too far apart, or not going through the rim board into solid framing are all common failures. Even more common is the moisture problem: without proper flashing, water gets behind the ledger, rots the rim board, and the connection fails years later.
Per IRC 2024, the water-resistive barrier at the wall must lap over the vertical leg of the ledger flashing by at least 2 inches to shed water properly. This is not optional detail work. It's the difference between a deck that's standing in 10 years and one that isn't.
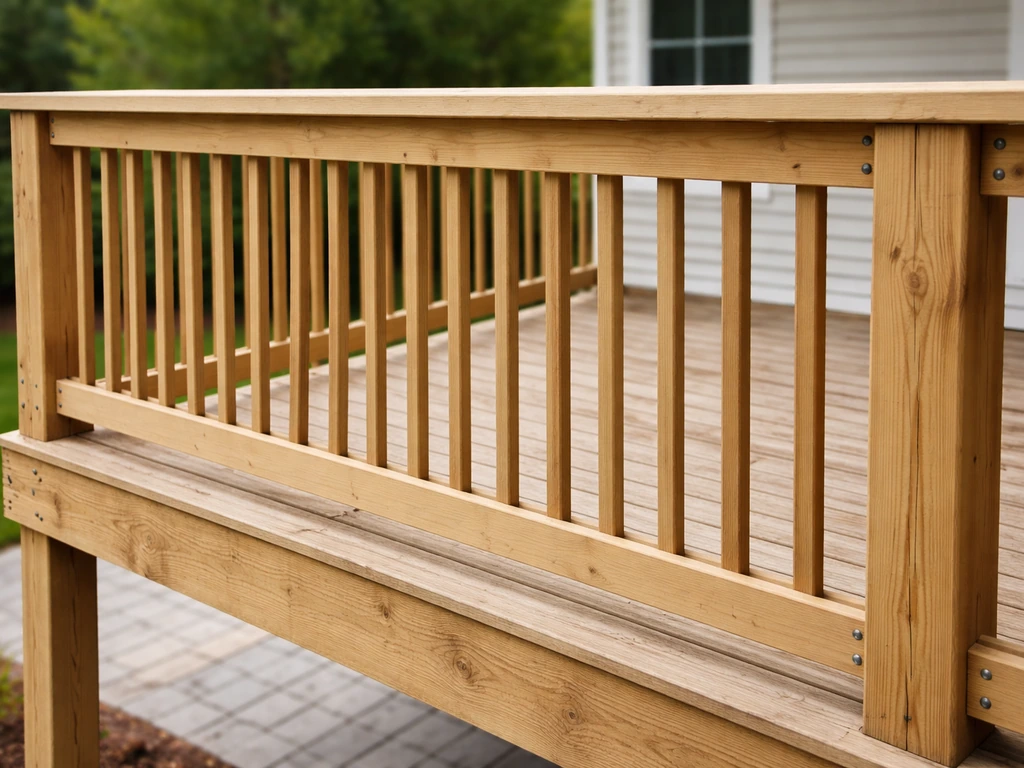
Guards and railings
Guards are required on any deck surface more than 30 inches above finished grade, measured at any point within 36 inches horizontally from the deck edge (IRC R312). The minimum guard height is 36 inches for residential decks, though many jurisdictions require 42 inches, so check locally. Guards must be designed to resist a concentrated 200-lb load applied in any direction at the top rail (IRC R312.1.3), and where guards connect to the deck framing, that load path must run continuously through the framing to the joists. A guard that's only attached to the decking surface and not to the structural frame is a code failure and a safety hazard.
Weatherproofing details: drainage, flashing, and preventing leaks

If you want the patio below to stay dry, waterproofing is where you spend the most careful attention. The IRC requires a minimum slope of 1/8 inch per foot away from the house and ledger for above-deck drainage (IRC 2021 R507.2.4), which works fine for an open deck but doesn't help the patio below. For a covered, dry patio underneath, you need an under-deck system that captures water passing through the deck boards and channels it away before it drips down.
Under-deck drainage systems: how they work
Trough-based systems like Trex RainEscape and DeckDrain install between the joists, sloping toward a central or perimeter gutter, which drains to downspouts at the deck's outer edge. The troughs are covered with the deck boards above, so you don't see them from the top. Vinyl or aluminum ceiling panel systems attach below the joists, creating a finished ceiling on the patio side while channeling any water that gets through to a perimeter gutter. EPDM membrane systems involve gluing a continuous rubber membrane directly to the top of the joists before installing decking, creating a true waterproof layer at the structural level.
Trex's own installation guidance emphasizes starting the butyl tape application at the ledger and working outward toward the downspouts, because the ledger edge is the highest-risk leak point. Any gap at the ledger lets water run directly down the house wall and into the framing. This is why taping seams carefully, especially at the ledger end of every trough, is non-negotiable.
Ledger flashing done right
Proper ledger flashing uses either metal Z-flashing or a peel-and-stick membrane (or both), installed above the ledger board and behind the exterior cladding in a shingle-lapped fashion so water always sheds away from the house. The flashing must extend up behind the siding or cladding, not just sit on top of it, and the water-resistive barrier behind the siding must lap over the top edge of the flashing by at least 2 inches. If you're retrofitting an under-deck drainage system on an existing attached deck, the first thing to check is whether this flashing was done correctly. If it wasn't, fix it before installing anything below.
Common failure points to watch for
- Gaps at the ledger end of drainage troughs, letting water run behind the system and down the wall
- Inadequate slope in trough systems, causing water to pool and eventually overwhelm seams
- Blocked or undersized downspouts that back up during heavy rain and overflow into the patio
- Missing or improperly lapped ledger flashing, the number one cause of structural ledger rot
- No overflow protection, if downspouts clog, water needs somewhere to go that isn't your patio ceiling
- EPDM membrane seams not properly bonded, especially at corners and penetrations for posts or hardware
DIY vs. hiring: what you can handle and what needs a pro
Being honest about this split saves people a lot of money and avoids catastrophic mistakes. Some parts of this project are well within reach for a capable DIYer. Others are not, and getting them wrong means structural failure, failed inspections, or voided homeowner's insurance.
What experienced DIYers can reasonably handle
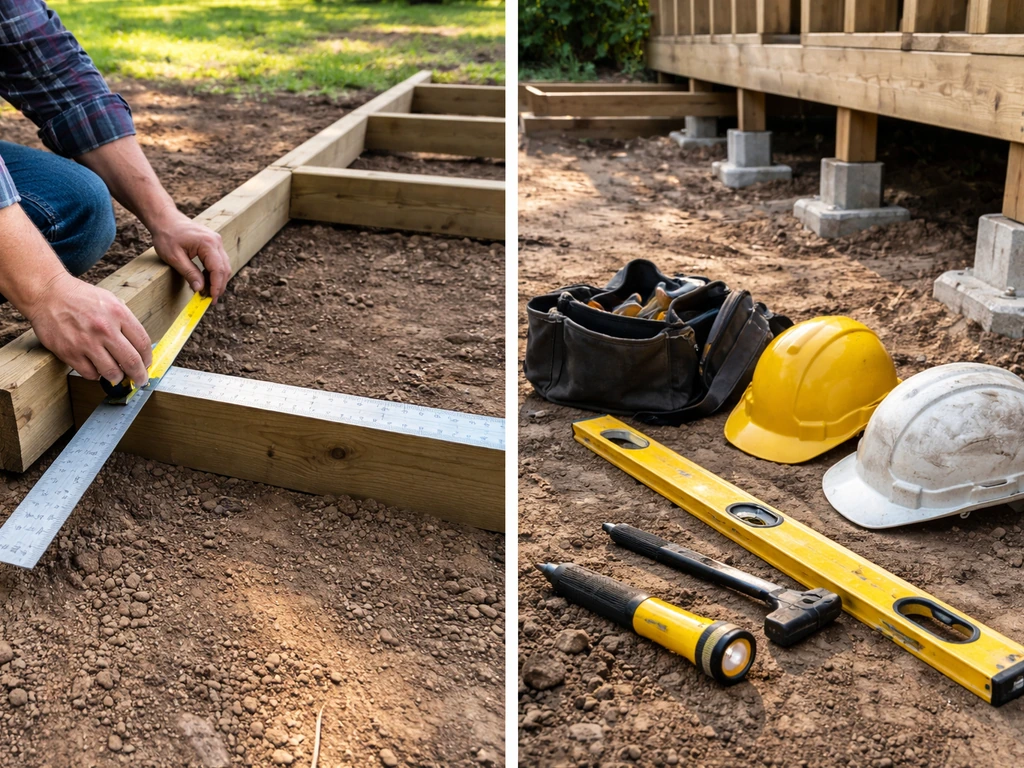
- Layout and site planning: measuring the space, planning post locations, calculating joist spans using span tables
- Decking board installation: once the frame is approved and in place, installing the top surface is straightforward
- Under-deck trough system installation: products like Trex RainEscape and DeckDrain are designed for homeowner installation with detailed guides, as long as the framing slope is correct
- Finishing and trim work: fascia boards, post wraps, and similar cosmetic work
- Basic maintenance tasks: cleaning, re-sealing, inspecting for rot or loose fasteners
What should involve a licensed contractor or engineer
- Footing design and installation: getting below frost line, sizing for load, and placing in the right location requires local knowledge and often a permit inspection before pouring
- Ledger attachment: the structural bolting pattern, hardware selection, and flashing installation at the ledger are where most failures originate, a structural contractor or experienced deck builder should detail this
- Structural beam and post sizing: if you're spanning more than 8 to 10 feet between posts, you need engineered beam sizes, not guesswork
- EPDM membrane installation at penetrations and seams: mistakes here cause leaks that are expensive to fix after decking is installed
- Any work that requires permit inspections: inspectors often need to see framing before it's covered, and if you've already installed decking, you may have to tear it up
A practical middle path for cost-conscious homeowners: hire a contractor for the foundation, framing, and ledger work, get the framing inspection approved, then complete the decking, under-deck system, and finishes yourself. This captures the biggest savings opportunity while keeping the critical structural work in qualified hands.
Permits, zoning, and inspections: the practical reality
For a project like this, assume you need a permit. Decks attached to the home almost universally require one. Decks more than about 30 inches above grade or larger than about 200 square feet trigger permits in most jurisdictions, and your project likely hits all three criteria. Building without a permit doesn't just risk a fine. It can prevent you from selling the home later, void your homeowner's insurance for any damage related to the structure, and leave you personally liable if someone is injured.
Typical inspection checkpoints
- Pre-pour footing inspection: inspector verifies footing depth, diameter, and location before you pour concrete. Do not skip this.
- Framing inspection: inspector checks ledger attachment, joist hangers, beam sizing, post connections, and blocking before you install decking or any covering. This is the most critical checkpoint.
- Ledger flashing inspection: many inspectors specifically check that flashing is properly installed behind cladding and lapped correctly before the wall is closed up.
- Guard and railing inspection: checks height, spacing of balusters (typically 4-inch maximum gap), and connection to framing.
- Final inspection: overall structural review, egress, and code compliance sign-off.
One of the most common reasons projects fail inspection is installing decking before the framing inspection is complete. Once the boards are down, the inspector can't see the joist hangers, ledger bolts, or blocking, and may require you to remove sections to verify compliance. Schedule inspections proactively and don't get ahead of yourself.
Zoning and setbacks
Zoning setback rules limit how close a structure can be to property lines, and decks are usually included. Typical residential setbacks run 5 to 15 feet from side and rear property lines, but they vary significantly by municipality and zoning district. If your planned deck would push past a setback, you'll need a variance, which adds time and may not be granted. Pull your local zoning rules before you finalize any layout.
Maintenance and longevity: keeping it leak-free and looking good
A deck-over-patio setup has more maintenance surfaces than a standard single-level deck, and the consequences of neglect are higher because a leak doesn't just damage the deck, it damages the patio space below. A key point in the covered deck vs covered patio question is that the space below only stays usable if the under-deck waterproofing is done right deck-over-patio setup. Building in a maintenance routine from the start is the most cost-effective thing you can do.
Annual inspection checklist
- Check all ledger flashing annually, look for lifted edges, gaps, or rust staining that indicates water intrusion
- Inspect under-deck trough seams and downspout connections for gaps, sagging, or debris buildup
- Clear all downspouts and gutters before storm season, a clogged downspout on an under-deck system backs water up under the decking
- Look for soft spots or discoloration in wood framing members, especially at the ledger, beam ends, and any post bases near grade
- Check deck board fasteners and any hardware exposed to weather for corrosion
- Inspect guard post connections at the framing level, not just at the surface, for looseness or rot
Re-sealing and surface maintenance
Pressure-treated wood decking should be cleaned and sealed or stained every 2 to 3 years. Composite decking requires less maintenance but still benefits from annual cleaning to prevent mildew and algae buildup, especially in humid climates. For the patio surface below, reseal concrete every 2 to 3 years if it's exposed to any moisture infiltration, and check for efflorescence (white mineral deposits) that can indicate persistent water contact. If you have an EPDM membrane, inspect all seams and field-lap areas every 3 to 5 years and re-bond any lifted sections promptly.
When to call a professional
If you see water staining on the patio ceiling after a rain despite having a drainage system, locate the source before treating the symptom. Water that gets behind the drainage system usually means a flashing failure at the ledger or a seam gap near the house. That's not a caulk-gun fix. Get a deck contractor or waterproofing specialist to open the ledger area and inspect properly. Catching ledger rot early costs a few hundred dollars. Replacing a rotted ledger, rim board, and house framing costs several thousand.
How this setup affects daily living and home value
The practical appeal of this configuration is real. You get two distinct outdoor spaces from one footprint: an open-air deck for grilling, entertaining, and sun exposure, and a sheltered patio below that's usable in light rain and partial shade. If you’re comparing design options, look at examples of decks and patios with similar height and drainage setups to gauge what will work for your space.
If you are weighing whether to go with a backyard patio vs deck, this deck-over-patio setup gives you both levels while still requiring the right waterproofing. If you're comparing a covered deck vs covered patio for daily usability, the waterproofing details under the deck are what ultimately decide which setup will feel truly weatherproof.
If you are comparing options, a deck platform can behave very differently from a traditional patio, especially when it comes to drainage and waterproofing platform deck vs patio. For homes that are short on flat yard space, stacking the two uses vertically is genuinely efficient. The patio below can function as an outdoor dining area, a covered lounge, or even a storage space for cushions and outdoor gear.
On the value side, deck additions consistently return well at resale. The 2024 Cost vs. Value report showed a wood deck addition recouping about 81 percent of its cost at resale, and [more recent 2025 data from Realtor](https://www. realtor.
com/living/personal-finance/is-it-worth-it-adding-a-deck/). com put wood deck ROI as high as 95 percent in strong markets. The under-deck waterproofing system adds cost but also adds to the functional square footage argument, a fully weatherproofed patio space is meaningfully more valuable than a dripping, wet area under a deck. That said, the ROI isn't a blank check.
Overbuilding for the neighborhood, choosing high-end composite decking in a market that doesn't support it, or adding complex custom structures that require expensive ongoing maintenance can push the cost-recoup ratio down.
From a daily usability standpoint, the biggest variable is how well the waterproofing works. A system that keeps the patio truly dry multiplies how often you use both levels. A system that leaks during heavy rain turns the patio into a space you avoid. That's the practical argument for spending properly on the drainage system from the start rather than treating it as a cost-cutting opportunity. The deck itself is what buyers see at a glance, but the patio below is what determines whether the whole setup actually gets used.
Your next steps: how to move forward today
Start by identifying which configuration you're building: attached or freestanding, new build or retrofit over an existing patio. That single decision determines your permit path, structural requirements, and waterproofing complexity. Then take three measurements: the area of the intended deck surface, the clearance height from patio to the underside of where the deck frame will sit, and the distance from the house to the outer edge of the deck (your span). With those numbers, you can get meaningful contractor quotes and start checking local permit requirements.
- Confirm your configuration (attached vs. freestanding, new vs. over existing patio) and sketch a basic layout with dimensions
- Contact your local building department to confirm permit requirements, setback rules, and whether a site plan or engineered drawings are required
- Get at least two contractor quotes that separately break out framing, waterproofing system, railings, and permits so you can compare apples to apples
- Choose your under-deck drainage system before framing begins, because the system affects joist spacing and slope requirements
- Plan your ledger flashing strategy first if you're building an attached deck, get this detailed before anything else goes up
- Schedule footing and framing inspections before covering any structural work, this is not a step to skip
FAQ
Do I need waterproofing under a patio with deck on top even if I use composite or “waterproof” deck boards?
Yes. Deck boards slow water penetration but they do not stop it. Rain can still pass through gaps, around fasteners, and at cut edges, so the under-deck system and correct flashing at the ledger are still what protects the patio ceiling below.
What’s the safest way to locate downspouts when the deck drains over a patio with deck on top?
Aim the drainage so it discharges away from the patio slab and any foundation wall. Avoid dumping near the house side where water can re-enter behind siding or the ledger area, and use splash blocks or drains if your site slopes toward the home.
Can I set deck posts directly on the existing patio slab for a deck over patio?
Usually no. A code-compliant footing typically needs to extend below the local frost line, and patio slabs are rarely engineered to take concentrated point loads. Plan on coring through the slab and pouring new footings, or placing footings at slab perimeter areas where the structural support is verified.
How do I know whether my project is “attached” or “freestanding” when the deck partly connects to the house?
If there is a ledger board transferring structural loads to the house framing or rim/band board, treat it as attached. If there is no structural connection to the house, it is freestanding. Mixed details can be a permit and engineering issue, so confirm load paths before quoting.
What should I check first if I see water staining under the patio after rain?
Treat it like a leak source problem, not a finishing problem. The most common cause is a flashing or seam gap at the ledger area, even when a drainage trough is installed. Have the contractor open the ledger section and inspect flashing continuity before resealing or caulking.
Is sealing the underside ceiling panels enough if I want a dry patio under the deck?
No. Ceiling panels can create a finished look but they do not replace a real drainage and capture system. For a truly dry patio, you need water captured at the joist level (trough channels or membrane) and directed to gutters and downspouts.
What guard height should I plan for on a patio with deck on top?
Use local requirements, but many jurisdictions require 42 inches even though 36 inches is common for residential decks. Measure from the deck walking surface to the guard top at the relevant points, and do not assume a lower guard will pass if your inspection checks a higher adjacent grade point.
Does the deck need extra structural stiffness because someone will stand or place furniture on the deck above a patio?
Often, yes. While the deck must meet general residential load requirements, adding seating, grills, and hot tubs increases localized loads and vibration. If your plan includes heavy concentrated items, ask your contractor to verify beam and joist sizing for that use case, not just the minimum code span.
Can I install decking before the framing inspection if it’s a retrofit over an existing patio?
Generally, no. If boards cover ledger bolts, hangers, and blocking, inspectors may require removal to verify compliance. The common failure mode is building over the parts they must see, so schedule inspections early and keep decking work staged.
What maintenance matters most for the under-deck drainage system?
Keep gutters, downspouts, and trough outlets clear of debris so water does not back up into seams. Include an annual check after leaf season, and look for overflow staining beneath the patio during heavy rain to catch partial blockages early.
If I install an under-deck system, do I still need to slope the deck for drainage?
Yes, but the “slope” concept is different. The deck surface primarily sheds water off the walking layer, and the under-deck system handles what passes through. Your plan should include surface drainage away from the house and a properly directed under-deck outlet path so captured water reaches downspouts.
How do I estimate waterproofing cost more accurately for my patio with deck on top?
Start with the deck surface area plus an allowance for the system extent (entire coverage vs partial areas near the ledger), the number of downspout drops, and any needed structural modifications (blocking, gutters, or ceiling framing). Also budget for opening and repair if you are retrofitting an existing deck where flashing condition is unknown.
Next Article
Patio Cover With Deck on Top: Design, Cost, Code, Build Guide
Plan, cost, code tips, and step-by-step checklist for a patio cover with deck on top that stays dry and safe.