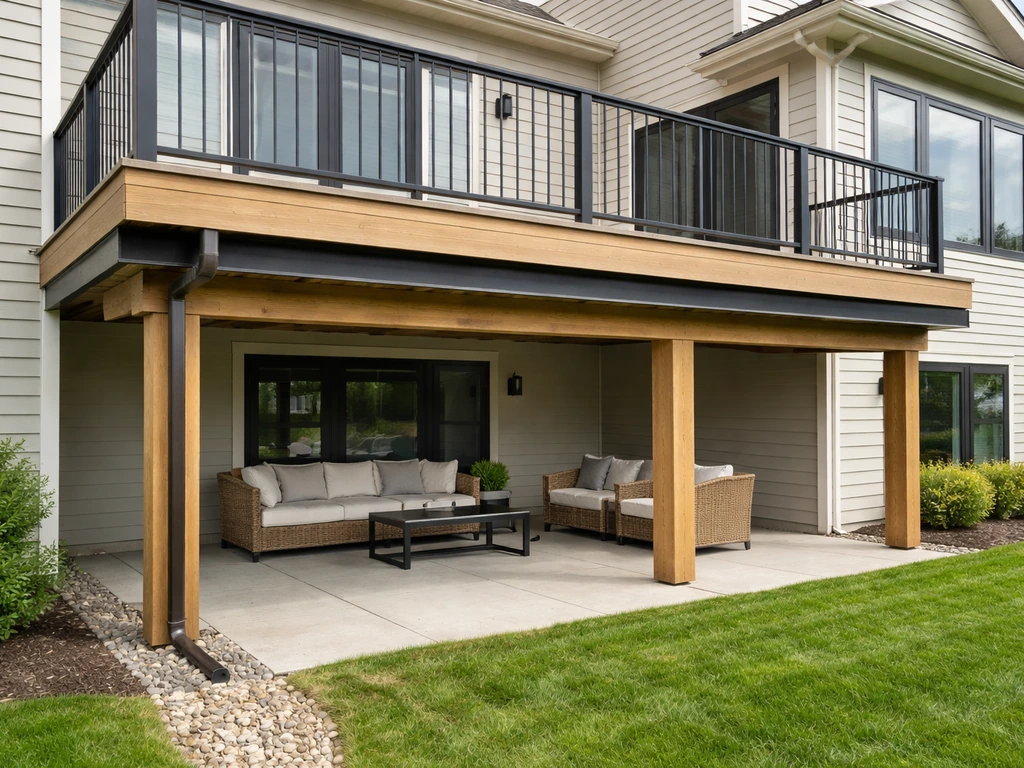
Yes, you can build decking on top of an existing patio, and it works well when the slab or paver base is in decent condition. A covered deck or covered patio is often chosen to create usable outdoor space while protecting flooring and furniture from sun and rain covered deck vs covered patio.
Decking on Top of Patio: DIY Guide, Costs, and Options

Miles Hart
10 Jun 2026
The two main systems are sleepers (pressure-treated lumber or composite spacers laid directly on the concrete, then decking on top) and a full joist frame elevated slightly above the slab surface. Both are proven approaches, but which one makes sense depends on how level your patio is, how close your door threshold sits to the finished deck surface, whether drainage is a concern, and what your local building department requires.
Get those four things right and this is a very achievable project.
Three ways to approach this project
Before you start pricing lumber, it helps to be clear about what you're actually trying to do. "Decking on top of patio" covers three genuinely different projects, and choosing the wrong one wastes money.
Option 1: Deck over the patio (keep the slab, add framing and boards)
This is the most popular approach. You leave the concrete or paver base exactly where it is and build a low-profile deck frame on top of it. The slab becomes your support base. This works beautifully when the patio is structurally sound but looks dated, is hard to keep clean, or gets uncomfortably hot in summer. You avoid the cost and mess of demolition, and the slab gives you a solid, stable subbase. The finished deck sits roughly 3 to 6 inches above the current patio surface depending on the framing system you choose.
Option 2: Replace the patio instead of building over it
Sometimes the smarter move is demolition. If the slab is heavily cracked, heaved by tree roots, or drains toward the house, building over it just buries those problems. Demo and repour typically runs $1,500 to $4,000 for a standard patio, but you get a clean start and full control over slope and drainage. If your patio is a paver system that's just settled or shifted, releveling the pavers (or adding a compacted gravel base below a new pedestal system) can be cheaper than full replacement. The replacement route makes the most sense when structural problems are widespread rather than isolated.
Option 3: Freestanding platform deck adjacent to (or over) the patio
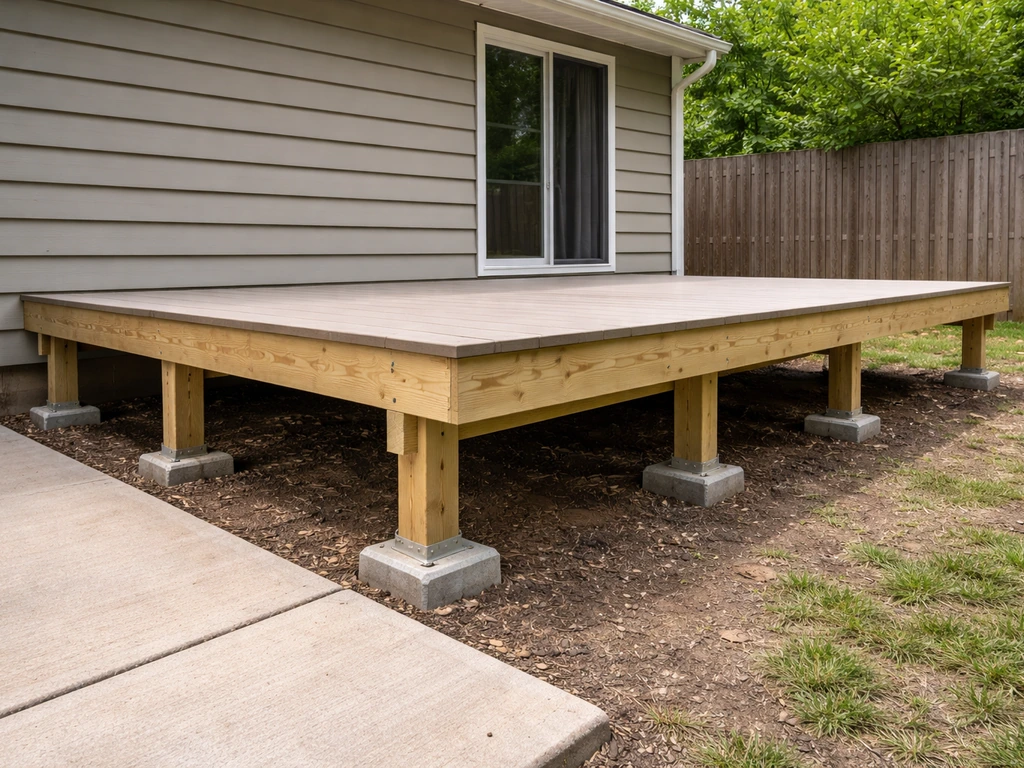
A freestanding platform deck uses its own post-and-beam structure and doesn't rely on the patio slab for support at all. It can be positioned to float over the patio, sit alongside it, or replace it entirely.
This is the right call when you need to raise the deck significantly (say, to match a door threshold that's 12 or more inches above the current patio surface), when the patio is too compromised to support a frame, or when local code won't allow you to attach to the house ledger. Freestanding builds require footings, more materials, and usually a permit, but they give you the most design flexibility.
If you're comparing platform deck and patio options, this option sits between the two worlds. Freestanding platform deck options sit alongside or even above an existing patio, so you can compare platform deck vs patio setups before choosing a layout platform deck and patio options.
Inspect your patio before you buy a single board
The condition of your existing patio determines which option is feasible and which system to use. Walk through this checklist before you do anything else.
- Cracks: Hairline cracks in concrete are normal and not a problem. Cracks wider than 1/4 inch, cracks that run the full width of the slab, or cracks where one side has shifted up or down (called differential settlement) are red flags. A deck built on an unstable slab will rack and develop uneven boards over time.
- Slope and drainage: Concrete patios should slope away from the house at roughly 1/8 to 1/4 inch per foot. Measure this with a 4-foot level. If the patio slopes toward the house or has low spots that puddle, you need a drainage plan before decking over it.
- Surface condition: Spalling (flaking surface), pitting, or major surface deterioration doesn't necessarily mean the slab is structurally bad, but it can make anchoring sleepers harder. Tap the slab with a hammer in several spots. A hollow sound indicates delamination or voids below the surface.
- Paver condition (if applicable): Check that individual pavers aren't loose, rocking, or severely uneven. A variation greater than 3/8 inch between adjacent pavers will need to be addressed before framing over them.
- Distance to door threshold: Measure from the top of your existing patio surface to the bottom of your door threshold or the interior floor height. That gap determines how thick a framing system you can use. If there's less than 4 inches, a sleeper system may be your only option.
- Moisture and staining: Look for white efflorescence (mineral deposits), rust stains, or green algae. These indicate chronic moisture, which means you'll need serious ventilation in your deck framing to avoid rot and mold.
- Proximity to house: Note where the slab meets the house foundation. Any gap where water could pool or enter the foundation needs addressing before you trap it under decking.
If the slab passes this checklist with minor issues, you're good to proceed with a deck-over approach. If you find significant settlement, drainage toward the house, or widespread structural cracking, seriously consider the replacement route before investing in framing and decking materials.
Drainage, moisture, and ventilation: the part most DIYers underestimate
Trapping moisture between your deck and the patio is the single biggest cause of failure in deck-over-patio projects. Wood rots, mold grows, and in cold climates, trapped water that freezes and expands can shift your entire framing system. Getting this right isn't complicated, but it requires deliberate planning.
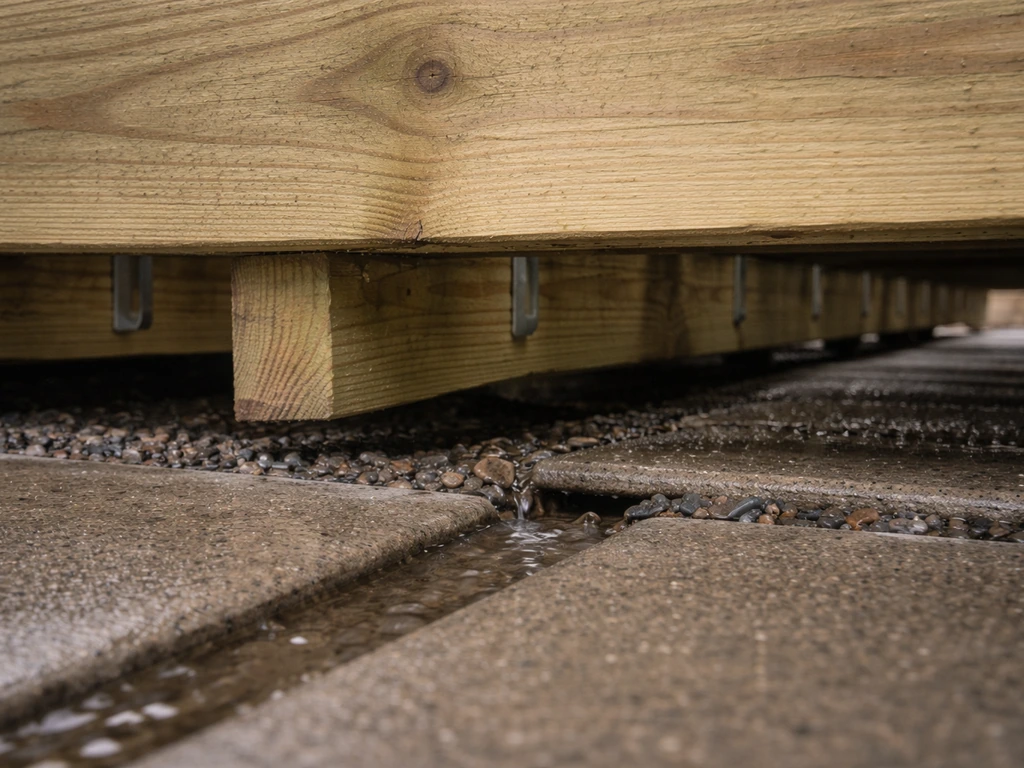
Air gaps and drainage channels
Any framing system you use should create a minimum 1-inch air gap between the bottom of your sleepers or joists and the patio surface. This allows air to circulate and moisture to evaporate. If you're using composite decking with hidden fasteners, the boards themselves create small gaps between them, which helps. Don't let leaves and debris accumulate in the cavity under the deck. Design your perimeter so water has a clear path out from under the frame on at least two sides.
Drainage direction and slab slope
If your slab already slopes away from the house correctly, you're in good shape. If it has low spots, you have a few options: fill them with hydraulic cement or self-leveling compound before framing, use adjustable pedestals (more on those below) to create a level plane even over an uneven surface, or build your sleeper heights to compensate. What you don't want to do is trap a standing-water zone under a section of your deck.
Freeze-thaw and cold-climate considerations
In climates where temperatures drop below freezing, water in the cavity under your deck can freeze and cause boards to lift or fasteners to pop. Concrete itself expands and contracts with temperature changes. Use stainless-steel or hot-dipped galvanized fasteners throughout (not zinc-plated), keep drainage clear so water doesn't accumulate, and use pressure-treated lumber rated for ground contact (UC4A or UC4B) where any wood touches concrete directly.
Moisture barriers on concrete
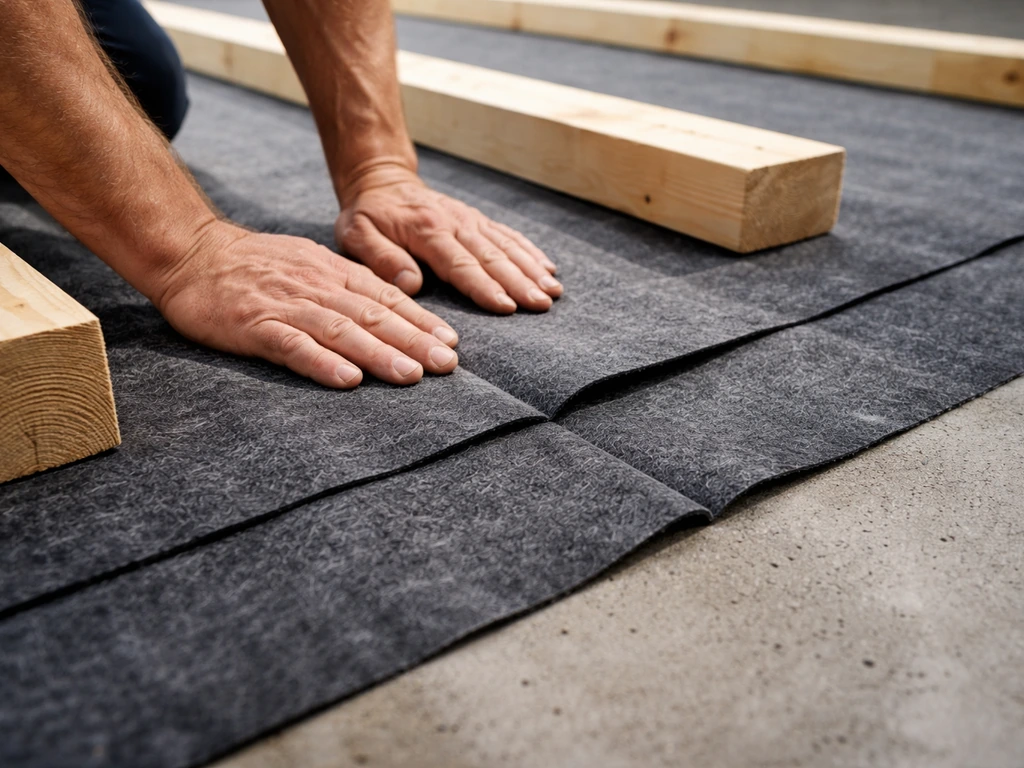
Concrete is porous and wicks moisture upward. If you're using wood sleepers directly on concrete, placing a layer of roofing felt, EPDM rubber, or purpose-made composite shims under each sleeper reduces the direct concrete-to-wood contact and slows moisture transfer. Some builders use strips of composite deck board or plastic spacers as sleepers for this exact reason. They don't absorb water at all.
Framing systems: sleepers vs. joists vs. pedestals
The framing system is the structural skeleton between your patio surface and your deck boards. Each approach has real trade-offs.
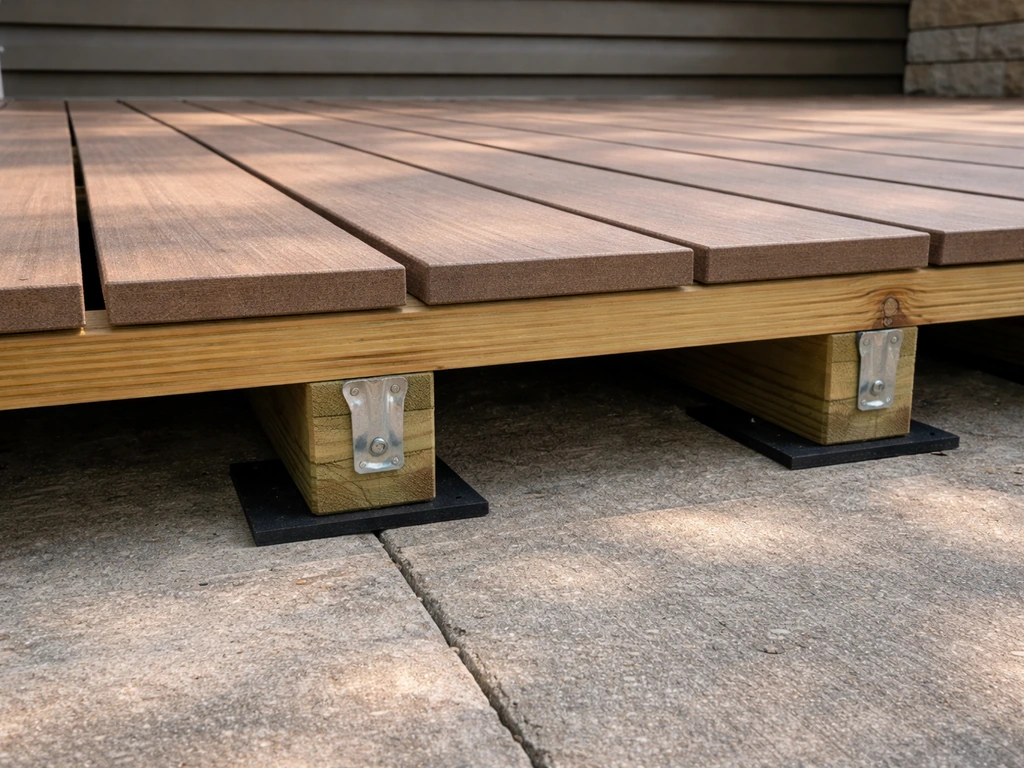
Sleeper system
Sleepers are boards (typically 2x4 or 2x6 pressure-treated lumber) laid flat directly on the concrete, running perpendicular to the direction of your deck boards. Deck boards then fasten directly to the sleepers. This is the lowest-profile system, adding roughly 2.5 to 3.5 inches to your patio height. It's the fastest and cheapest method when your slab is level and in good shape. The weakness: if your slab has low spots or unevenness, the sleepers inherit those flaws. Shimming individual sleepers helps, but it's tedious on a badly uneven surface.
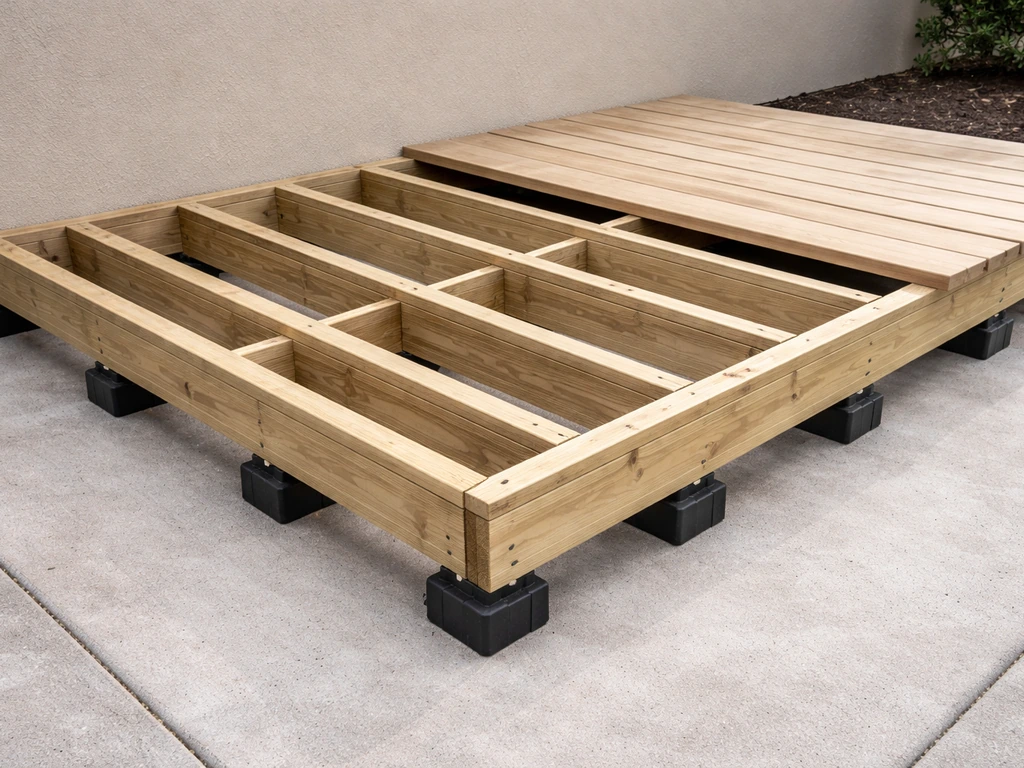
Joist-over-slab framing
A full joist frame (2x6 or 2x8 joists on 12-inch or 16-inch centers, typically attached to a ledger board at the house and a beam at the outer edge) gives you more structural control and allows you to span over problem areas without them transferring to the deck surface. This adds 5 to 7 inches of height and is the better choice when your slab has some unevenness, when you need to handle more load (hot tub, heavy planters), or when your local building department requires it. Fastening to the concrete uses concrete anchors or powder-actuated fasteners every 16 to 24 inches.
Pedestal (raised tile/deck) system
Adjustable pedestals are plastic or composite support feet that screw up or down to create a perfectly level surface over an uneven patio. They're used with both wood and composite deck panels (often 2x2-foot or 4x4-foot modular tiles or full deck boards spanning between pedestals). Pedestals are excellent for uneven pavers or concrete with moderate slope variation. They're also the easiest to work with around rooftop terraces or balconies where drilling into structure is limited. They're more expensive than lumber sleepers but easier for a solo DIYer to level accurately. Many systems require no fasteners at all, which simplifies the project significantly but may not satisfy code in some jurisdictions.
| System | Height Added | Best For | Weaknesses |
|---|---|---|---|
| Sleepers (flat) | 2.5–3.5 in | Level slabs, tight threshold clearance | Inherits slab unevenness; shimming needed for imperfect slabs |
| Joist frame | 5–7 in | Uneven slabs, heavier loads, code-required builds | More height, more material cost, usually needs permit |
| Adjustable pedestals | 2–12+ in (adjustable) | Uneven pavers, rooftop terraces, no-drill situations | Higher material cost; may not satisfy all code requirements |
Permits, codes, and the door-threshold problem
Permit requirements for decking over a patio vary a lot by jurisdiction. Many municipalities exempt low-profile platforms (under 30 inches above grade) from full deck permits, but some don't. Before you start, call your local building department and describe what you're planning: adding a wood or composite deck platform over an existing concrete patio, the finished height above grade, and whether you'll be attaching to the house. That single 10-minute call can save you from a stop-work order.
Structural load and guardrail requirements
Residential decks are typically engineered for a live load of 40 pounds per square foot (psf). If you're planning anything heavy like a hot tub (which can weigh 150 to 200+ psf when filled), you need to confirm your slab and framing can handle it, which usually means a structural engineer's sign-off.
For guardrails, IRC-based codes require them on any deck surface that is 30 inches or more above grade, and the rail must be at least 36 inches high measured from the deck surface to the top of the guard. Decks.
com summarizes IRC-based guardrail guidance that requires guardrails to be at least 36 inches high, measured from the deck surface to the top of the guard for open sides the rail must be at least 36 inches high measured from the deck surface to the top of the guard. Check your local code, as some jurisdictions have adopted stricter requirements.
The door threshold clearance issue
This is the most common planning mistake in deck-over-patio projects. If you want more ideas, see our examples of decks and patios for inspiration on styles and layouts deck-over-patio projects. When you add framing and decking on top of your existing patio, you're raising the finished floor height.
A patio with deck on top is achievable as long as you confirm the slab condition, plan for drainage, and choose the right framing system for the clearance to your door threshold When you add framing and decking on top of your existing patio, you're raising the finished floor height. . A patio cover with deck on top can raise your finished floor, so measuring threshold clearance before you choose a framing system is essential.
If your door threshold is already close to the patio surface, adding 3 to 6 inches might mean the new deck surface is at or above the threshold, creating a trip hazard or a situation where the door can't swing open properly. A covered deck and a covered patio can feel similar, but their structure, roof details, and attachment considerations are usually different covered deck vs covered patio.
IBC and IRC egress rules govern the maximum allowable height difference between an interior floor level and an exterior landing. When deck height changes, the ICC Safe digital codes address egress and threshold concepts relevant to exterior door and landing elevation relationships [IBC and IRC egress rules govern the maximum allowable height difference between an interior floor level and an exterior landing. ](https://codes. iccsafe.
org/content/IBC2024V2. 0/chapter-10-means-of-egress). Measure the gap between your current patio surface and your door threshold before you pick a framing system. A sleeper system may be your only option if clearance is tight.
If the gap is too small for any framing system, you'll either need to raise the interior threshold (a significant carpentry project), add a step down to the deck, or reconsider the approach entirely.
Anchoring to concrete and attachment rules
If your deck will be attached to the house (ledger-attached), you'll almost certainly need a permit and inspections in most jurisdictions. Ledger attachment requires proper flashing to prevent water intrusion at the house wall, lag bolts into the band joist at specified intervals, and often an inspection before decking is installed. If you're building a floating/freestanding deck over the patio, the rules are typically more relaxed, but you still need to anchor the frame to prevent lateral movement. Tapcon-style concrete anchors work well for securing sleepers and rim joists to concrete.
Wood vs. composite: which decking material makes sense here
Material choice matters especially in a deck-over-patio build because the cavity below the deck has more moisture exposure than a traditional elevated deck. Here's a practical comparison.
| Factor | Pressure-Treated Wood | Composite Decking |
|---|---|---|
| Upfront cost (materials) | $2–$5 per linear foot | $4–$12 per linear foot |
| Moisture resistance | Good if properly treated (UC4A or better for ground contact) | Excellent; most composites won't rot or absorb water |
| Maintenance | Annual sealing or staining recommended | Low; periodic cleaning only |
| Heat retention | Moderate | Can get hot in direct sun (lighter colors help) |
| Lifespan | 15–25 years with maintenance | 25–30+ years with minimal care |
| Splinters/feel underfoot | Possible, especially as wood ages and checks | Smooth; more consistent feel |
| DIY workability | Easy to cut, fasten with common tools | Requires specific hidden fastener systems; cuts cleanly |
| Best for this application | Budget-conscious builds; good for substructure | Decking surface over concrete where moisture is a concern |
My practical recommendation: use pressure-treated lumber for your substructure (sleepers, joists, rim boards) because it handles the moisture-heavy environment at the slab level, and consider composite deck boards for the surface if budget allows. Composite boards sitting in a semi-enclosed cavity will outlast wood boards significantly in wet climates. If you go all-wood, use 5/4x6 decking boards rated for above-ground use and apply a penetrating sealer at all cut ends before installation.
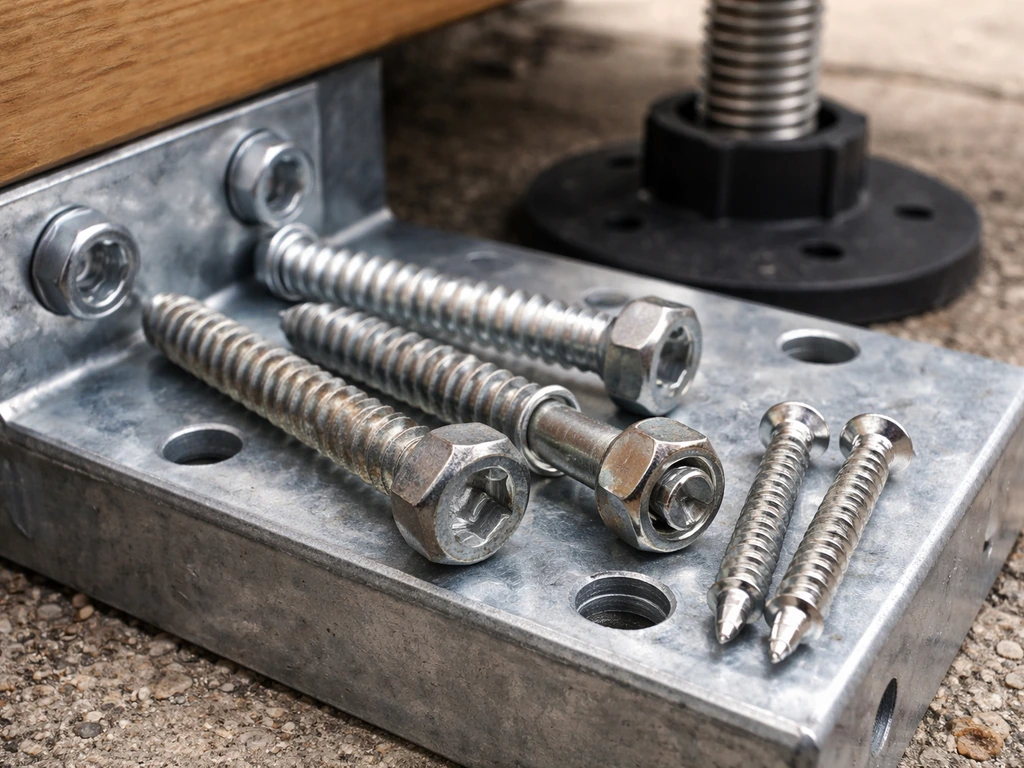
Hardware and fasteners
Don't cut corners on fasteners. Any fastener touching pressure-treated lumber or sitting near concrete must be rated for that exposure. Use hot-dipped galvanized (HDG) or stainless-steel joist hangers, hurricane ties, and structural screws. For composite decking, use the hidden fastener clips specified by the manufacturer, because using the wrong fastener can void the warranty and cause gapping or cupping. For anchoring to concrete, use 3-inch Tapcon screws minimum, or Simpson Titen HD anchors for higher-load connections. Pre-drill pilot holes in the concrete to avoid cracking.
What it costs and when to hire a pro
Typical cost ranges
A DIY sleeper-system deck over a concrete patio using pressure-treated lumber and composite decking typically runs $8 to $15 per square foot in materials. A 200-square-foot patio project lands at roughly $1,600 to $3,000 in materials. If you upgrade to premium composite decking and hidden fasteners, that rises to $12 to $20 per square foot in materials, or $2,400 to $4,000 for 200 square feet. A full joist-frame build with composite decking runs $15 to $25 per square foot in materials.
Hiring a professional deck builder to do the complete job (labor plus materials) typically runs $25 to $50 per square foot for a basic deck-over-patio build, and $45 to $75 per square foot for a higher-end composite build with trim and railings. On a 200-square-foot project, that's $5,000 to $15,000 all-in depending on your region and complexity. Labor tends to run roughly 40 to 60 percent of total project cost when you hire out.
What drives the cost up
- Slab repair before framing (crack filling, leveling): add $300 to $1,500
- Permit and inspections: $150 to $500 depending on jurisdiction
- Guardrails and post anchors: $30 to $80 per linear foot installed
- Step construction if the new deck height requires steps: $200 to $600 per step set
- Premium composite decking with capped four sides: adds $4 to $6 per linear foot vs. basic composite
- Structural engineer fee if required for load calculations: $500 to $1,500
DIY vs. hiring out: an honest breakdown
A sleeper-system build over a flat, level concrete patio is genuinely within reach for a capable DIYer with basic carpentry experience and the right tools (circular saw, drill, level, chalk line, concrete bit set). If your slab is in good shape and the threshold clearance works, you could complete a 200-square-foot project in a long weekend. A joist-frame build is more involved but still DIY-friendly if you're comfortable reading a plan and working with concrete anchors.
Hire a pro when: the slab has significant problems that need diagnosis; you need a ledger attachment to the house (flashing errors here cause expensive water damage); your deck will require guardrails or steps that trigger a full permit and inspection process; you're in a region with strict codes and the inspector will want engineered drawings; or you're putting anything heavy like a hot tub on the deck. The cost of a framing mistake or a failed inspection is almost always higher than the money saved by DIYing the framing.
Does it add home value?
A well-built deck consistently shows a return of 65 to 80 percent of project cost in resale value according to industry cost-vs-value studies. A deck-over-patio build is no exception, especially if it improves the look and usability of an otherwise bland or cracked concrete patio. If you are deciding roi patio vs deck, the biggest factors are the condition of your existing surface and how much you invest in materials and build quality deck-over-patio.
A well-chosen backyard patio or deck approach can improve how you use the space day to day. The bigger value driver is quality of materials and workmanship, not the specific construction method. A sloppy wood deck over a patio will hurt value. A clean composite build that expands usable outdoor living space will help it.
Your step-by-step build roadmap
Here's the practical sequence to follow once you've decided to move forward. This applies to a sleeper or joist-over-slab build. A freestanding platform deck with its own footings requires a few additional steps (footing layout, concrete work) but follows a similar logic.
- Inspect and document the patio: Walk through the inspection checklist above. Photograph cracks, measure slope with a 4-foot level, and measure the threshold gap at every exterior door adjacent to the project.
- Determine your system: Based on slab condition and threshold clearance, decide between sleepers, a joist frame, or an adjustable pedestal system.
- Check permits: Call or visit your local building department. Describe the project, ask whether a permit is required, and ask specifically about ledger attachment rules and guardrail height requirements.
- Design and measure: Sketch your deck layout. Note the direction your deck boards will run (perpendicular to sleepers/joists), how the frame will terminate at the perimeter, where steps will go, and where guardrails are needed. Calculate materials from the sketch.
- Order materials and allow for delivery time: Include 10 percent overage on decking boards for cuts and waste. Order all structural hardware at the same time.
- Repair the slab if needed: Fill cracks wider than 1/4 inch with hydraulic cement. Fill low spots with self-leveling concrete compound. Let cure fully per manufacturer specs (typically 24 to 72 hours) before framing.
- Snap layout lines on the slab: Use chalk lines to mark sleeper or joist positions. Confirm layout is square using the 3-4-5 triangle method.
- Install moisture barrier strips (if using wood sleepers): Cut roofing felt or composite shim strips and place them under each sleeper location.
- Install sleepers or rim joists: Anchor to concrete with Tapcon screws or similar concrete anchors at 16-inch intervals. Check level constantly. Shim as needed.
- Install interior joists (for joist-frame builds): Hang using joist hanger hardware, confirm all are level and properly spaced.
- Install blocking: Add blocking between joists every 6 to 8 feet for lateral stability and to give nailers for the perimeter.
- Inspect the frame before decking: This is your last easy chance to fix level problems, add blocking, or address moisture issues before boards go down.
- Install deck boards: Start from the house side, maintain consistent spacing (1/8 inch for wood, per manufacturer spec for composite), and fasten per your fastener system. Cut the outer edge with a chalk line after installation for a clean finish.
- Install steps and guardrails: Follow local code for rise/run dimensions (typically 7-inch max rise, 11-inch min run per IRC) and guardrail height (36 inches minimum for most residential decks at this height).
- Final inspection and cleanup: If your project required a permit, schedule the final inspection. Clean the patio cavity along the perimeter to ensure drainage isn't blocked.
Common mistakes to avoid
- Skipping the threshold measurement until after materials are ordered: This is the most common planning error. Measure first, choose your system second.
- Using standard (untreated or above-ground-only) lumber where it contacts concrete: Any wood touching concrete needs ground-contact pressure treatment (UC4A minimum). Using the wrong grade leads to rot within a few seasons.
- Not pre-drilling concrete anchors: Forcing Tapcon screws into undrilled concrete cracks the slab and strips the anchor. Always drill a pilot hole with a hammer drill and masonry bit sized to the anchor manufacturer's spec.
- Installing deck boards too tight: Wood needs room to expand. Leaving no gap between boards causes cupping, buckling, and pushed fasteners in summer heat.
- Blocking perimeter drainage: If your frame traps water at the edges with a continuous rim board that has no drainage gaps, you'll get pooling. Leave weep holes or cut slots in the rim every 4 to 6 feet.
- Assuming a floating deck doesn't need a permit: In many jurisdictions, any platform over 200 square feet or 30 inches above grade requires a permit regardless of attachment method. Check first.
- Ignoring slab movement in problem soils: If your slab has heaved due to expansive clay soil or tree roots, building over it without addressing the root cause means you'll deal with the same problem again on the deck surface within a few years.
FAQ
How do I measure the door threshold clearance correctly before planning decking on top of a patio?
Measure from the outside face of the interior door threshold to the patio surface at the exact point where the deck will meet the door, then account for the substructure thickness plus the decking board thickness. Also check the door swing, because even if the deck height clears the threshold, the door may hit the new landing if the tolerance is tight.
What is the minimum air gap I should keep under the deck to prevent trapped moisture?
Plan for at least a 1-inch continuous air space between the underside of the sleepers or joists and the patio surface. The gap should not be blocked by packed debris, insulation, or pressure-treated offcuts, and you should design so water can drain out from the cavity on at least two sides.
Can I build decking over a patio that slopes toward the house?
You can, but it is usually riskier because low spots can trap water in the under-deck cavity. The safer approach is to either re-slope the area before framing (self-leveling or hydraulic cement as appropriate) or use adjustable pedestals to create a flat plane, then verify that runoff can exit the perimeter.
Do I need to treat the patio surface or add a waterproof layer under the deck?
In most deck-over-patio builds, you focus on ventilation and drainage rather than sealing the concrete from below. Adding roofing felt or EPDM shims under sleepers helps reduce direct concrete-to-wood moisture transfer, but fully waterproof “ponding” layers can increase condensation or trap moisture if water gets under the framing.
What should I do if my patio pavers are uneven or rocking?
Releveling pavers can work when movement is minor, but rocking indicates an unstable base. If you cannot restore a firm, even support, consider switching to adjustable pedestals (for moderate variation) or plan for demolition and a new compacted base/pedestal system so the deck does not stress and deform over time.
Can I use standard deck screws and fasteners around concrete and pressure-treated lumber?
No. Fasteners that contact pressure-treated wood or sit near concrete need appropriate corrosion resistance, typically hot-dipped galvanized or stainless steel rated for treated lumber and exterior exposure. Mixing fastener types incorrectly can cause staining, premature corrosion, and early structural loosening.
Will composite decking in a deck-over-patio cavity last longer than wood boards?
Often, yes. Composite boards generally perform better in moisture-heavy cavities because they do not absorb water like wood, reducing swelling and rot risk. If you choose all-wood, use boards rated for above-ground exterior use and seal end cuts thoroughly since end grain is where moisture intrusion accelerates.
How do I prevent leaves and debris from collecting under the deck?
Use design details that discourage buildup, such as keeping the underside perimeter open for drainage and avoiding tight, boxed-in areas that trap organic debris. Periodically sweep out the cavity, and consider simple perimeter screens or barriers if your climate has heavy leaf fall and you cannot keep up with maintenance.
What load should I plan for if I want to add heavy items like a hot tub or large planters?
Do not rely on general deck assumptions. Confirm live-load capacity (and, if needed, dead-load and distribution) for your specific framing spacing and connection method, and be prepared for a structural engineer sign-off, especially for hot tubs where the filled weight can far exceed typical outdoor furniture loads.
How often should I inspect the deck-over-patio understructure?
At least once per year, and after major freeze-thaw seasons. Look for fastener popping, board lifting, visible mold odor, standing water signs, and any areas where the air gap seems to have been blocked by debris. Early correction is far cheaper than replacing rotted sleepers after the problem becomes obvious.
Do I need a permit for every decking-on-top-of-patio project?
Not always, but permits depend on height above grade, attachment method (ledger-attached versus freestanding), guardrail/step requirements, and local code interpretations. When in doubt, call your building department with your finished height measurement and whether you will attach to the house, since a ledger connection often triggers more scrutiny.
If my deck needs guardrails, how do I figure out whether the height triggers code?
Measure from the finished deck walking surface to the ground below at the relevant area. If that distance meets or exceeds the common 30-inch trigger, guardrails typically become required, and rail height is usually measured from the deck surface to the top of the rail, commonly 36 inches, but local amendments can differ.
Is a sleeper system always cheaper than a full joist frame on top of a patio?
Not always once leveling complexity is included. If your patio has significant unevenness, you may spend extra time and materials shimming a sleeper system or risk transferring unevenness into the deck. In those cases, a full joist frame or adjustable pedestal approach can reduce rework and improve long-term performance even if the raw materials cost is higher.
Next Article
Patio With Deck on Top: Planning, Costs, Safety, Waterproofing
Plan and cost a deck over a patio: safety, waterproofing, permits, drainage, and DIY vs pro guidance.