Yes, you can absolutely keep a patio dry under an upper deck, and the right approach depends on how much water you're dealing with, your budget, and whether you're working with new construction or an existing setup. For most homeowners, a properly installed under-deck drainage trough system (like Trex RainEscape or TimberTech DrySpace) combined with correct ledger flashing is the sweet spot: it handles rain reliably, costs roughly $3,000–$10,000 installed depending on deck size, and doesn't require major structural changes. If you need a fully weatherproof surface that can handle standing water or support tile, a topside membrane waterproofing system is the more robust (and more expensive) route. Quick fixes like deck gutters or slope corrections are worth trying first if the problem is minor, but they rarely solve chronic water intrusion on their own.
Patio Below Upper Deck: How to Keep It Dry & Waterproof

Can you keep a patio dry under an upper deck?
The good news is that a deck overhead can function almost like a roof over a patio if you manage the water correctly. The bad news is that a standard deck, with its open board gaps, is basically a colander. Rain hits the deck surface, finds every gap between boards, and drips directly onto whatever is below. If your patio is already there and you want it to stay dry, you have two fundamental strategies: intercept the water beneath the deck framing before it falls (drainage tray and trough systems), or prevent it from getting through the deck surface in the first place (topside membrane waterproofing). A third hybrid approach pairs a drainage system underneath with a finished ceiling, turning the under-deck space into a usable outdoor room.
The recommended starting choices in plain terms: if you're planning new construction or a full deck rebuild, integrate a trough drainage system during framing because it's far easier and cheaper to install at that stage. If you're retrofitting an existing deck, vinyl or aluminum trough systems (often called under-deck drainage systems or under-deck ceilings) are your most practical option, and many are genuinely DIY-friendly for a single-story deck. If the patio is going to be used as a finished living space, or if the deck above needs to support tile or heavy planters, then a bonded topside membrane with proper flashing is worth the extra investment.
How water reaches a patio under a deck
Water gets to a patio below an upper deck through more paths than most homeowners expect. The most obvious route is straight-down drip-through: water lands on the deck boards, runs between the gaps, and falls to the patio. But there are several other entry points that are easy to miss until a problem develops.
- Board gaps: Standard deck boards have 1/8" to 1/4" gaps that allow rainfall to pass directly through, especially during heavy or wind-driven rain.
- Ledger connection: Where the deck attaches to the house, water can wick behind the ledger board, rot the rim joist, and seep into the house structure and onto the patio area below. This is one of the most common failure points.
- Post bases and beam connections: Water pools around hardware, corrodes fasteners, and can migrate downward along structural members into the patio area.
- Missing or improperly integrated flashing: If the flashing at the ledger isn't lapped correctly over the house's weather-resistive barrier (WRB), water gets behind the siding and travels downward.
- Deck slope or ponding: If the deck surface doesn't drain quickly, standing water finds every small gap and crevice.
- Perimeter drip: Rain blows in from the open sides of the deck and lands on the patio even if the deck above is otherwise watertight.
Simple diagnostic checklist
Before spending money on a solution, spend 20 minutes diagnosing exactly where the water is coming from. This will tell you whether a cheap fix will work or whether you need a full system.
- Run a garden hose on the deck surface for 5 minutes and watch where drips appear on the patio below. Mark the wet spots with chalk.
- Check the ledger board from inside or from a ladder: look for staining, soft wood, rust streaks, or gaps in the flashing.
- Inspect all post bases and beam-to-post connections for rust, pooled water marks, or wood discoloration.
- Look at the deck surface itself: does it drain toward the house or pond in the center? Either condition worsens drip-through.
- Check where the gutters (if any) on the upper floor of the house discharge. Gutters dumping onto the deck surface instead of being piped away will overwhelm any drainage system.
- Note which direction rain comes from when the patio gets wet: is it purely overhead drip, or is it blowing in from the sides?
Decision checklist for homeowners
Before picking a solution, work through these questions. The answers will narrow down what actually makes sense for your situation.
| Factor | Questions to Ask | How It Affects the Decision |
|---|---|---|
| Site and structure | How high is the deck above the patio? What are the joist spans and spacing? | Low decks limit access for installation; wide joist spans may require additional blocking for trough systems. |
| New vs. retrofit | Is the deck being built new, or does it already exist? | New construction allows trough systems to be built in during framing at much lower cost. Retrofits cost more and have more complexity. |
| Water volume | Is it a light drip-through or heavy ponding/lateral intrusion? | Light drip-through suits trough systems. Heavy intrusion or lateral water needs topside membranes or enclosure. |
| Intended use | Is the patio a casual hangout or a finished outdoor room with furniture/electronics? | Finished outdoor rooms justify full waterproofing and a finished ceiling. Casual use can get by with a trough system. |
| Budget | What is your budget for installation and ongoing maintenance? | Quick fixes: under $500. Trough systems: $1,500–$10,000. Full membrane waterproofing: $8,000–$25,000+. |
| DIY vs. pro | Are you comfortable working at height with framing and flashing details? | Simple trough systems are DIY-feasible. Ledger flashing repairs and membrane systems strongly favor a pro. |
| Aesthetics | Do you want to see the deck framing above, or do you want a finished ceiling? | Trough systems alone leave framing visible. Panel ceiling systems create a finished look but add cost. |
| Permits and structure | Has anyone looked at the deck's ledger connection and joist sizing recently? | Any structural modification or new drainage system attached to the house may trigger a permit review in your jurisdiction. |
| Maintenance tolerance | How often are you willing to clean gutters and check seals? | Trough systems need annual cleaning. Membranes need inspection every few years. Quick fixes need the most monitoring. |
| Timeline | Do you need this done before the next rainy season? | Quick fixes and trough kits can be installed in a weekend. Full membrane systems require professional scheduling and dry weather curing time. |
Prioritized solution options at a glance
Think of the solutions in three tiers. The right tier depends on the severity of the water problem and how you want to use the space. Most homeowners end up in Tier 2, but it's worth understanding all three before committing.
| Tier | Solutions Included | Best For | Typical Installed Cost | DIY Feasible? |
|---|---|---|---|---|
| Tier 1: Quick fixes | Deck gutters at perimeter, ledger flashing repairs, slope correction, sealants | Minor drip-through, tight budgets, temporary relief while planning a bigger fix | $100–$800 | Yes, with basic tools |
| Tier 2: Drainage trough systems | Under-deck vinyl/aluminum trough and gutter systems (Trex RainEscape, TimberTech DrySpace) | Most retrofit and new-construction situations with moderate rain; patio used as a functional outdoor area | $1,500–$10,000 | Yes for single-story; pro recommended for complex layouts |
| Tier 3: Full waterproofing | Topside membranes (EPDM, TPO, PVC), bonded flashing assemblies, under-deck waterproofing systems for near-interior grade | Finished outdoor rooms, tile/stone decking, high-rainfall climates, rooftop deck applications, any deck near conditioned space | $8,000–$25,000+ | No; requires professional installation |
Quick fixes and low-cost options
If the water problem under your deck is relatively minor, or you need something done before the weekend barbecue while you plan a bigger project, these options are worth trying. Just know their limits going in.
Deck-edge gutters
A gutter mounted along the outer edge of the deck catches water that runs off the deck surface and routes it to a downspout. This works well when the deck slopes properly away from the house and the water mostly exits at the outer edge. It does nothing for water dripping straight through the board gaps over the center of the patio. Standard K-style aluminum gutters in 5" or 6" widths are the most common choice. Sizing matters: the rule of thumb is one downspout for every 30–40 linear feet of gutter, sized against your local design rainfall. Undersized gutters overflow in heavy rain, defeating the purpose entirely. Cost for materials alone is typically $5–$12 per linear foot; professional installation adds $3–$8 per foot.
Slope correction
If your deck surface ponds water rather than shedding it, adjusting the slope helps every other solution work better. Deck framing should slope away from the house at a minimum of 1/8" per foot (some installers prefer 1/4" per foot). On an existing deck, minor slope problems can sometimes be corrected by shimming joists or adding a tapered sleeper layer under composite deck boards. This is not a standalone fix for significant drip-through but it reduces the dwell time of water on the surface, meaning less total volume falls through.
Ledger flashing repairs
If your diagnosis points to water coming from the ledger area, fixing the flashing is non-negotiable before adding any drainage system. Self-adhered flashing membranes like VYCOR Plus or similar Henry/GCP products are the standard tool for this repair. The correct installation sequence is critical: the flashing must integrate with the house's weather-resistive barrier (WRB) in a shingled, overlapping pattern so water is always directed outward and downward, never behind the WRB. IRC Section R507 and standard building science guidance (Building Science Corporation) both emphasize this. A botched flashing repair can actually make things worse by trapping moisture. If you're not confident in this detail, hire a carpenter or building contractor for this specific task even if you DIY everything else.
Sealants and caulk
Sealants applied to deck board gaps are occasionally suggested as a budget fix, but they're largely ineffective for ongoing water management. Deck boards expand, contract, and flex seasonally, so sealant in the gaps cracks and fails within one or two seasons. The more useful application of sealant is at specific hardware penetrations, post base flashings, and where the deck meets a house wall, as a secondary defense behind proper flashing. Don't rely on caulk as your primary water control strategy.
Under-deck drainage trays and channel systems
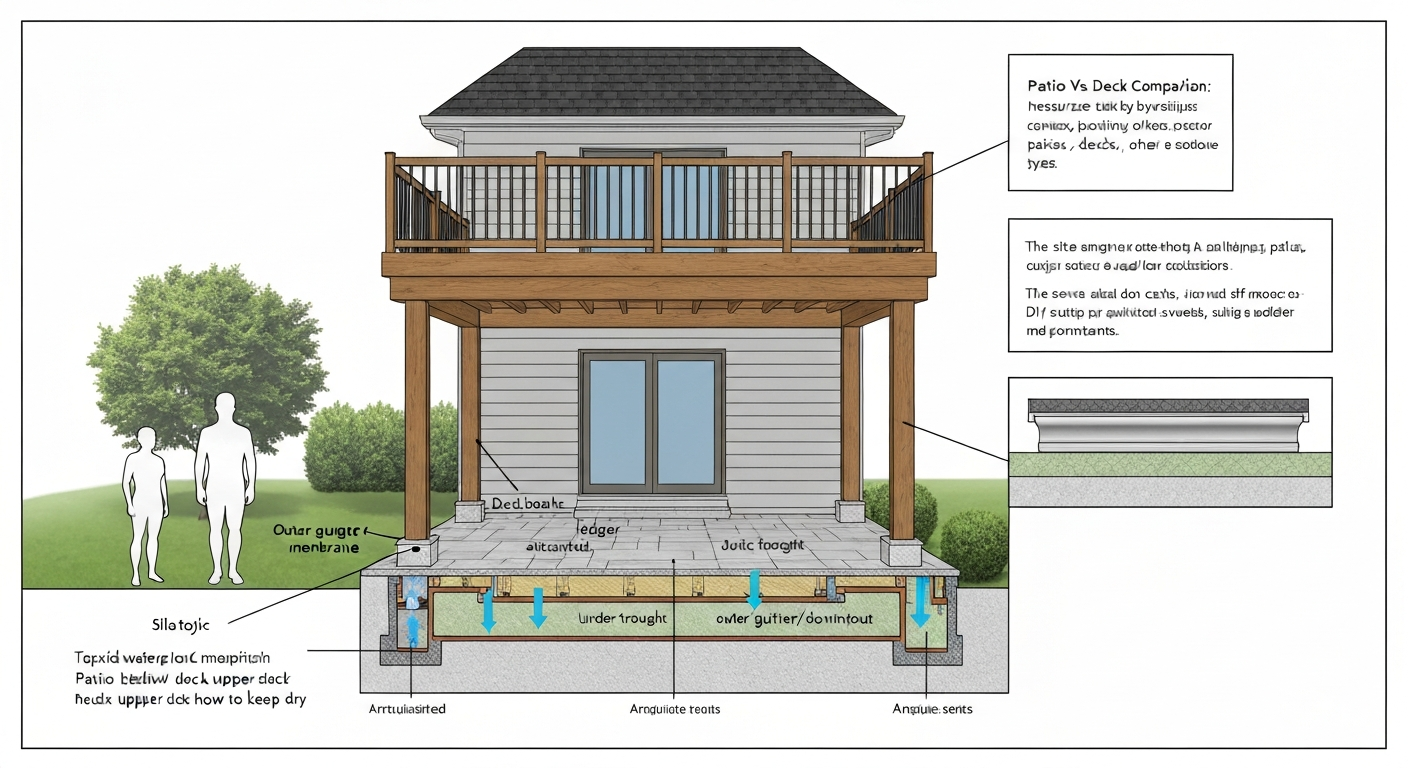
This is where most homeowners land, and for good reason. Under-deck drainage systems intercept water that falls through the deck boards and redirect it to gutters and downspouts at the perimeter. They don't stop water at the surface; they catch it underneath and channel it away before it reaches the patio. The result is a patio that stays dry during rain and a deck overhead that still breathes and drains freely.
How they work
The systems suspend troughs, panels, or channels between the deck joists, angled slightly (typically 1/8" per foot minimum) toward a collection gutter at the outer edge of the deck. That gutter connects to a downspout that carries water to grade or into a drainage system. The key detail is the ledger end: all water that collects on the patio side of the troughs must be directed away from the house, not toward it. Every reputable system's installation guide (including Trex RainEscape and TimberTech DrySpace) specifies ledger/house flashing integration as a required first step before any troughs are installed.
Types of systems
| System Type | Materials | Example Products | Pros | Cons |
|---|---|---|---|---|
| Vinyl trough/channel panels | Extruded PVC or vinyl | TimberTech DrySpace, StayCool DeckDrain | Lightweight, DIY-friendly, retrofit-able to existing decks, available in multiple colors | Can sag over wider joist spans; must stop 3" from beams per manufacturer specs; perimeter must remain unenclosed |
| Aluminum trough system | Extruded aluminum troughs + gutter | Trex RainEscape | Durable, handles high water volumes, clean look, integrates with standard gutter accessories | Heavier than vinyl; requires careful splice/joint sealing per installation guide; slightly higher material cost |
| Engineered panel systems | Aluminum, composite, or custom framed panels | Custom under-deck ceiling contractors | Can include lighting, fans, finished ceiling aesthetic; highest performance | Most expensive; typically requires professional installation; permits often required |
| Simple drip-edge metal trays | Galvanized or aluminum sheet metal | Contractor-fabricated or basic kit products | Very low cost; can be site-fabricated | Labor-intensive to install properly; less uniform appearance; not widely available as packaged systems |
Installation highlights and DIY feasibility
For a vinyl trough system like TimberTech DrySpace, the general installation sequence is: verify ledger flashing is correct and intact, install the collection gutter on the outer joist or beam, snap or clip the trough panels to the joists at the required pitch, connect the gutter to a downspout, and run a water test before closing anything up. Trex RainEscape's installation guide specifically requires a post-install water test to verify watertightness before the deck boards go on, which is a useful discipline even if your manufacturer doesn't mandate it. Most competent DIYers with basic carpentry skills can handle a single-story, straightforward deck layout. Where it gets tricky: working around interior posts and beams, managing the ledger flashing detail correctly, and cutting panels accurately around obstructions. If your deck is two stories up, hire a pro.
Fastener and connector material is worth mentioning here. Any hardware you add to an existing deck, including brackets and clips for trough systems, needs to be blank" rel="noopener noreferrer">corrosion-resistant and galvanically compatible with any existing metal hardware. Simpson Strong-Tie and similar connector suppliers specify hot-dip galvanized, stainless, silicon bronze, or copper fasteners depending on exposure and whether the framing lumber is preservative-treated (ACQ, MCQ, or copper azole treatments are particularly aggressive toward standard zinc coatings). Stainless steel fasteners are the safest choice in any coastal or high-moisture exposure.
Full waterproofing systems for a deck above a patio
When trough systems aren't enough, or when you need the deck surface itself to be genuinely watertight, full topside waterproofing is the answer. This is the approach used for rooftop decks, decks over conditioned living space, and any situation where the patio below absolutely cannot get wet. It's also the right choice if you plan to install tile, pavers, or heavy stone as the deck surface, since those materials require a continuous waterproof substrate underneath.
Single-ply roofing membranes
EPDM (ethylene propylene diene monomer), TPO (thermoplastic polyolefin), and PVC membranes are the same materials used in commercial roofing, applied to a structural deck substrate to create a fully waterproof surface. Manufacturers like Carlisle produce plaza-deck and rooftop membrane assemblies specifically designed for pedestrian traffic, with published thicknesses (typically 45–90 mil for EPDM; 45–80 mil for TPO/PVC) and seaming methods that include adhesive bonding, heat welding, or special mechanically fastened attachment. These systems require a clean, structurally sound, properly sloped substrate, correct drain placement, and professional installation for the seams to hold long-term. EPDM is the most forgiving for DIY on simple geometries, but for a deck with posts, ledger connections, drains, and perimeter flashings, professional installation is strongly recommended.
Bonded flashing assemblies
Any topside membrane system lives or dies by its terminations and transitions. At the ledger, around post bases, at drains, and at the perimeter, the membrane must be continuously bonded and integrated with the house's WRB using compatible self-adhered transition flashings. Self-adhered products like VYCOR Plus are commonly used at these terminations. The flashing must be lapped correctly: house WRB laps over the top of ledger flashing, ledger flashing laps over the deck membrane at the bottom. Get this sequence wrong and you've created a perfect water trap.
When full waterproofing is required
- The deck is over conditioned living space (a room, garage, or basement), not just an open patio.
- You're installing tile, stone, or concrete pavers that require a waterproof substrate.
- The patio below is enclosed or semi-enclosed and any moisture intrusion causes damage.
- Local code requires a waterproof membrane assembly for your deck type (this varies significantly by jurisdiction).
- The deck is in a high-rainfall climate and drainage trough systems have already failed or are insufficient.
- There is a history of structural moisture damage at the ledger or rim joist that requires a more robust long-term solution.
Cost and permitting realities
Full topside waterproofing systems installed professionally typically run $8,000–$25,000 or more for a standard residential deck, depending on size, membrane type, substrate condition, and drain complexity. This is a significant investment, and it usually involves permits. Most jurisdictions require drawings with ledger connection details, flashing integration specs, joist spans, and drainage routing when any structural modification or new waterproof assembly is being added to an existing deck. See the municipal checklist titled "Information Required for Residential Deck Building Permits, East Hartford CT (sample permit checklist)" for an example list of required drawings and specifications Information Required for Residential Deck Building Permits — East Hartford CT (sample permit checklist). Sample permit checklists from municipalities (East Hartford CT, Fort Collins CO, and Bel Air MD publish good examples) show the typical submittal items. The IRC's Section R507 governs deck construction requirements including ledger fastener materials per Table R507.9.1.3(1), and the American Wood Council's DCA-6 guide provides the prescriptive tables most jurisdictions reference. If you haven't had your deck's ledger connection reviewed recently and you're planning a significant waterproofing project, getting a permit and inspection is a worthwhile safety check.
Under-deck finished ceilings and drainage panels
There's a meaningful difference between an under-deck drainage system (which is primarily functional) and an under-deck ceiling system (which adds a finished aesthetic on top of the drainage function). If you want the space under your deck to feel like an actual outdoor room rather than the underside of a structure, a finished ceiling system is worth the extra cost.
Creating a living ceiling
The best under-deck ceiling systems combine a waterproof drainage layer (to intercept and route water) with a finished ceiling panel below it. The drainage layer catches water and channels it to gutters at the perimeter; the ceiling panel below provides the finished look and can conceal wiring for lighting and fans. Common ceiling materials include vinyl beadboard panels, composite panels (similar to composite decking in durability and color options), aluminum soffits, and in some custom builds, painted pressure-treated lumber or IPE. Vinyl and composite panels are the most practical choices for outdoor use because they don't rot, warp, or need painting.
Routing water to downspouts
The drainage layer in a ceiling system must have a clear, unobstructed path to the perimeter gutter. This means ceiling panels must accommodate the slope of the drainage troughs (1/8" per foot minimum), posts and structural members require careful flashing and panel trimming around them, and the perimeter gutter must be properly sized for the deck's area and local rainfall intensity. Using the gutter sizing methodology from NSPC/IPC tables, a 200 square foot deck in a moderate-rainfall area typically needs a 5" K-style gutter and at least one 3"x4" downspout, assuming standard 2" per hour design rainfall. In higher-rainfall regions, bump those numbers up. Overflow at the gutter means water back-spilling onto the patio, which defeats the entire system.
Aesthetic options and added features
Finished ceiling systems open up options that plain drainage troughs don't. Recessed LED lighting can be integrated into the ceiling panels, ceiling fans can be installed (check that the fan is rated for damp or wet outdoor locations), and in some builds, a separate enclosed soffit section along the house wall conceals the gutter run and creates a cleaner architectural line. Engineered panel systems from specialty under-deck contractors can include all of these features, but they're at the top of the cost range: professionally installed systems with lighting, fans, and composite panels typically run $6,000–$25,000+ depending on deck size and feature set. A basic DIY vinyl trough-plus-beadboard ceiling on a modest deck can be done for $1,500–$4,000 in materials if you're comfortable with the work.
Comparing the full solution spectrum side by side
| Solution | Water Performance | Typical Cost (installed) | DIY Possible? | Permit Likely? | Maintenance | Best Scenario |
|---|---|---|---|---|---|---|
| Deck-edge gutters | Low (outer drip only) | $300–$800 | Yes | Rarely | Annual cleaning | Deck slopes well; water exits at perimeter |
| Slope correction | Low-moderate (reduces ponding) | $200–$1,500 | Yes with shimming | Sometimes | Low | Supplement to other systems |
| Ledger flashing repair | High for ledger-specific leaks | $300–$1,200 | Intermediate | Sometimes | Inspect every 2–3 years | Ledger area is the identified leak source |
| Vinyl trough system (e.g., DrySpace) | High for drip-through | $1,500–$6,000 | Yes (single-story) | Sometimes | Annual gutter cleaning | Most retrofits; moderate rainfall; casual patio use |
| Aluminum trough system (e.g., RainEscape) | High for drip-through | $2,000–$8,000 | Intermediate | Sometimes | Annual gutter cleaning | Higher water volumes; clean aesthetic priority |
| Finished ceiling + drainage panels | High for drip-through + aesthetics | $4,000–$15,000 | Partial (ceiling finish is harder) | Often | Annual cleaning + inspect ceiling panels | Outdoor room; want finished look |
| Topside membrane (EPDM/TPO/PVC) | Very high; fully watertight surface | $8,000–$25,000+ | No; professional required | Yes | Inspect seams every 2–3 years | Deck over conditioned space; tile/stone surface; high rainfall |
Permitting and structural red flags to know before you start
Many homeowners are surprised to learn that adding a drainage system to an existing deck can require a permit, especially when it involves attaching hardware to the house, modifying the ledger flashing, or adding a ceiling system that changes the load on the deck framing. The rule of thumb: if you're attaching anything to the house structure or modifying how the deck connects to it, check with your local building department first. The cost of a permit ($150–$600 in most jurisdictions) is trivial compared to the cost of having to redo work that fails inspection.
A few specific structural red flags to watch for. First, if you haven't confirmed that the existing ledger connection meets current IRC Section R507 requirements (corrosion-resistant fasteners per Table R507.9.1.3(1), proper flashing, correct fastener spacing), address that before spending money on a drainage system. Water damage at the ledger is the most common serious structural problem in residential decks, and a leaky patio is often the first symptom. Second, if you're planning to add a membrane waterproofing system that will change the drainage pattern significantly, the existing deck framing needs to be evaluated for the additional load. Third, if the deck was built without a permit (common in older homes), any permit you pull now may trigger a full deck inspection, which can surface problems. Better to know about them, but budget for the possibility.
Maintenance checklist to keep the system working
Whichever system you install, it only works as long as it's maintained. Here's a practical annual and periodic checklist.
- Every spring: clean gutters and downspouts. Debris (leaves, seed pods, dirt) is the number one cause of drainage system failure. For trough systems, flush with a hose from the ledger end toward the downspout.
- Every spring: run a hose test on the deck surface for 5 minutes and verify no drips reach the patio. Catch small failures before they become big ones.
- Every 2–3 years: inspect all ledger flashing for cracking, separation, or gaps. Self-adhered flashings can peel at the edges over time, especially at corners and penetrations.
- Every 2–3 years: check all hardware (joist hangers, beam connections, post bases) for rust. Replace any hardware that shows significant corrosion before it compromises structural connections.
- For membrane systems: inspect all seams, terminations, and drain boots annually. Look for bubbles, lifting edges, or cracks. Professional re-inspection every 5 years is worth the cost for systems over conditioned space.
- After any major storm: check downspout discharge points to confirm they're clear and water is routing away from the house foundation.
- Every 5 years: recaulk any sealant applications at hardware penetrations, post base flashings, and wall-to-deck transitions.
How this affects home value and the deck-vs-patio decision
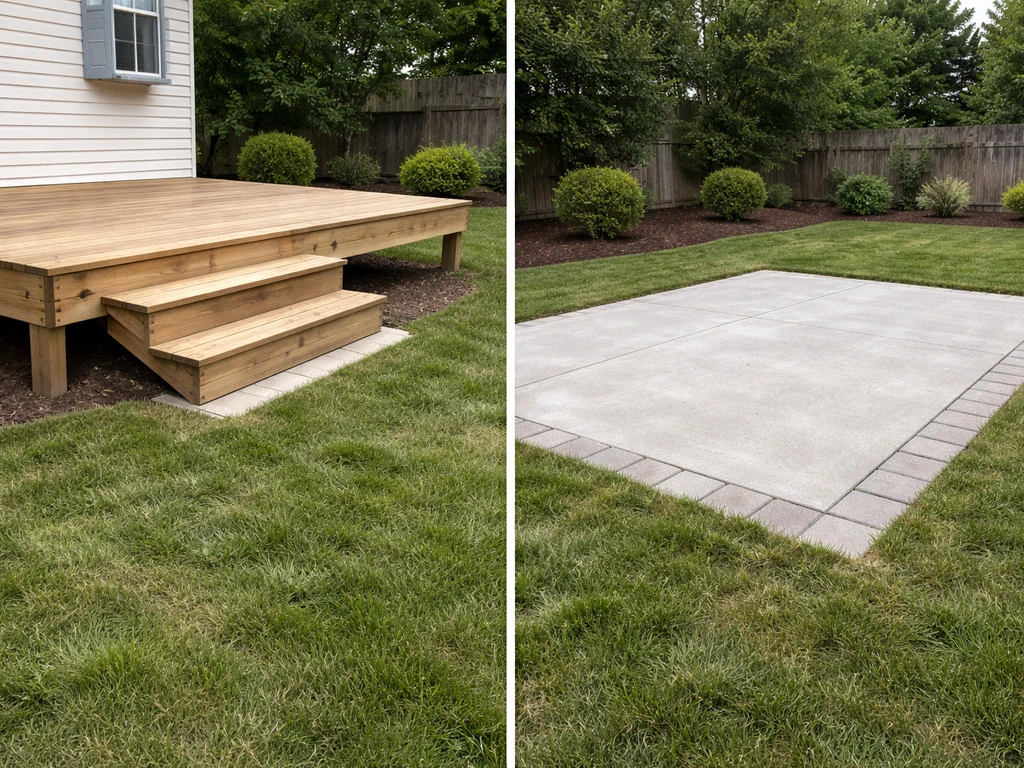
A properly waterproofed and finished under-deck space meaningfully increases the usable square footage of your outdoor living area, and buyers notice that. A dry, finished under-deck patio with a ceiling, lighting, and drainage is a genuine selling point in most markets. The ROI difference between a basic deck and one with a functional under-deck outdoor room is real, though it varies significantly by region, home price range, and how well the space is finished. What hurts value is the opposite: visible water damage at the ledger, stained or rotted framing visible from the patio, and drainage systems that have clearly failed. If you're considering whether to build a deck over an existing patio, or evaluating a patio cover with a deck on top of it, the drainage and waterproofing plan should be part of the initial design conversation, not an afterthought. For visual comparisons and layout ideas, see examples of decks and patios to help evaluate what will work best for your site and budget. For design examples and planning tips for a patio with deck on top, see our dedicated guide to help you integrate drainage and waterproofing from the start. See our guide to decking on top of a patio for practical steps and product recommendations. Systems that are integrated during construction cost significantly less than retrofits, and they perform better.
The broader comparison between a backyard patio vs. a deck, or a covered deck vs. a covered patio, often comes down to how much weather protection the space actually delivers. For a detailed comparison to help decide which fits your needs, see our platform deck vs patio guide. For a detailed comparison of a covered deck vs covered patio, pros, cons, and which delivers better weather protection, see our guide on covered deck vs covered patio (internal link). For a focused comparison to help decide which is right for your property, see our guide on backyard patio vs deck. A deck that drips on the patio below is the worst of both worlds: you've spent the money on elevated structure but still can't use the ground level in the rain. Getting the drainage right resolves that trade-off and makes the stacked deck-over-patio layout genuinely work as a multi-level outdoor living system. For another relevant comparison, see patio cover with deck on top.
FAQ
What are the practical options for keeping a patio dry beneath an upper deck—from quickest fixes to full waterproofing?
Options range from simple to comprehensive: 1) Add deck gutters/downspouts to catch water at the deck edge; 2) Correct deck slope so water sheds away from the house; 3) Install under‑deck troughs/drainage trays (DIY kits) that sit between joists; 4) Fit an under‑deck ceiling/drainage panel system (e.g., Trex RainEscape, TimberTech DrySpace) that collects water and routes it to gutters; 5) Install a continuous waterproof membrane on the top of deck framing (single‑ply or liquid‑applied) under finished decking or as the deck surface (plaza/deck membrane); 6) Full flashing/detail work at the ledger and WRB combined with one of the above for code‑compliant protection. Each step up increases performance, complexity and cost.
How do these approaches compare for performance (how dry will the patio stay)?
Gutter only: reduces splash and edge runoff but won’t stop water falling through decking gaps. Slope correction + flashing: improves overall drainage and reduces pooling near the house. Under‑deck troughs/kits: good for light to moderate runoff; effectiveness tied to correct installation and sealing at the ledger. Branded under‑deck drainage panels (Trex RainEscape, TimberTech DrySpace): high reliability when installed per instructions—collects most water and routes it to downspouts. Topside waterproof membrane (plaza membrane or sealed deck): highest waterproofing—keeps virtually all water off patio but may change deck finish and require engineered details. Combination of correct flashing + drainage panels gives best practical balance for living spaces below.
Which solutions are suitable for DIY versus requiring a professional?
DIY candidates: adding gutters, simple under‑deck trough kits, fixing minor slope issues, routine flashing repairs if comfortable working at height. Pro strongly recommended: branded under‑deck systems for larger spans (to meet pitch and guttering specs), installation of waterproof membranes or plaza decking, ledger flashing/structural ledger repairs, and any job requiring structural alteration or changes to ledger attachments. Complexity, working at height, and building code/permit needs often favor hiring a licensed contractor.
What are ballpark costs and how do they scale with system choice and size?
Approximate installed cost ranges (subject to region/complexity): - Gutters only: $200–$1,200 for deck edge gutters/downspout runs. - DIY under‑deck trough kits: $300–$1,500 small; materials only. - Professionally installed under‑deck panel/drainage system: $6,000–$25,000+ depending on square footage, access, and added features (lights, fans). - Topside waterproof membrane/plaza system: $15,000–$50,000+ for extensive work and deck rebuilds. Smaller patios and simple retrofits fall at lower end; complex ledgers, multi‑story or high‑finish installations raise price.
What product examples and key manufacturer installation constraints should homeowners know?
Product examples: Trex RainEscape (troughs + gutters + downspout system) requires correct pitch and installation sequence and prohibits improper splices; TimberTech DrySpace (extruded panels) requires minimum slope (typ. 1/8"/ft), clearances from beams, and specific mounting brackets. Membranes: EPDM/TPO/PVC single‑ply (Carlisle) used for plaza decking with specified seam/attachment methods. Self‑adhered flashing (Vycor, Grace) should integrate with WRB. Always follow the manufacturer’s required pitch, fastening, clearances and testing steps; incorrect installation often voids warranty.
What structural and permit issues should I watch for?
Permits commonly require ledger connection details, flashing integration, joist spans, guardrail details and sometimes engineered drawings for large or cantilevered decks. IRC Section R507 and AWC DCA‑6 contain prescriptive ledger and joist guidance. Red flags requiring structural review: rotten or poorly flashed ledger, inadequate ledger fasteners, unsupported cantilevers, changes to drainage that add loads, or converting the space below to conditioned living area. Use corrosion‑resistant fasteners per code (hot‑dip galvanized or stainless); consult local building department early.
Platform Deck vs Patio: Costs, Build, Maintenance, and Fit
Compare platform decks and patios for costs, build steps, maintenance, drainage, durability, and fit for your yard.