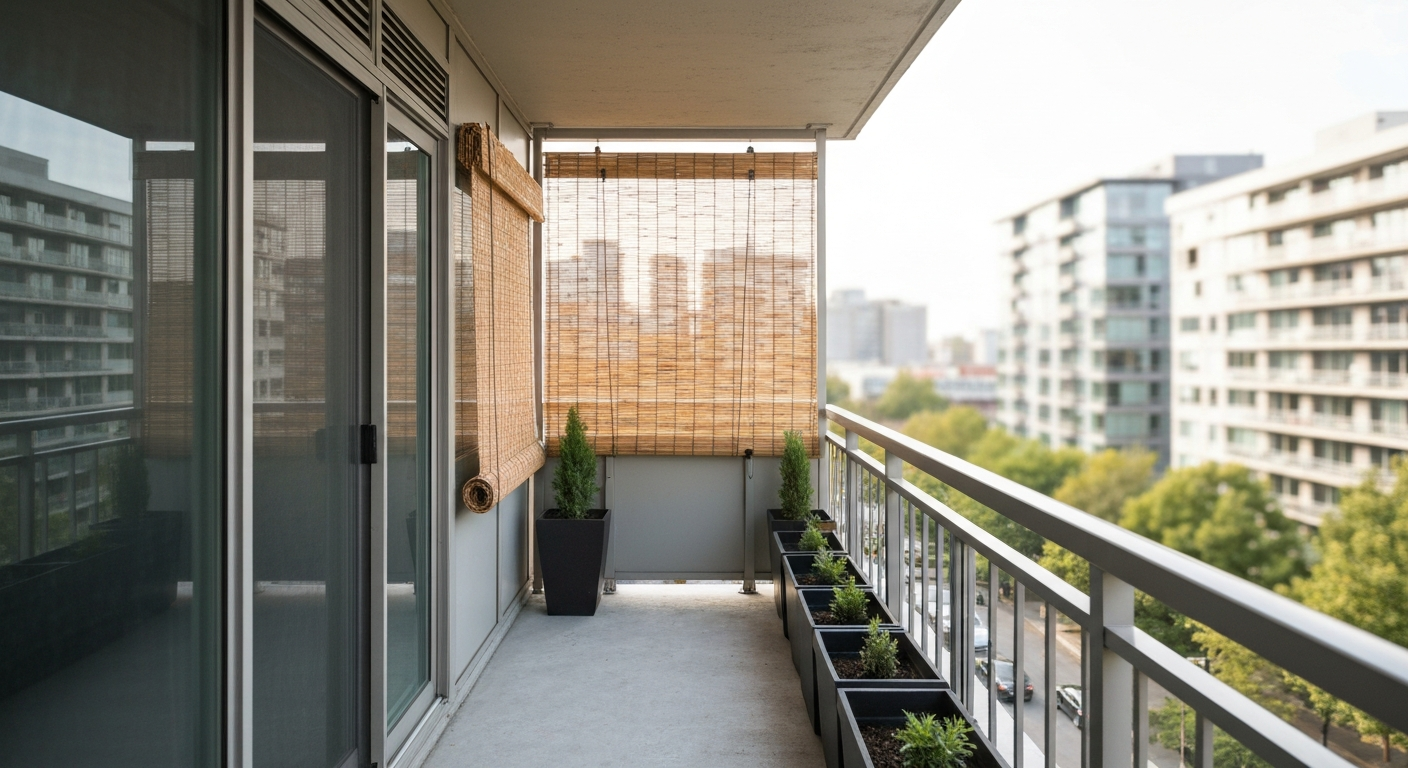
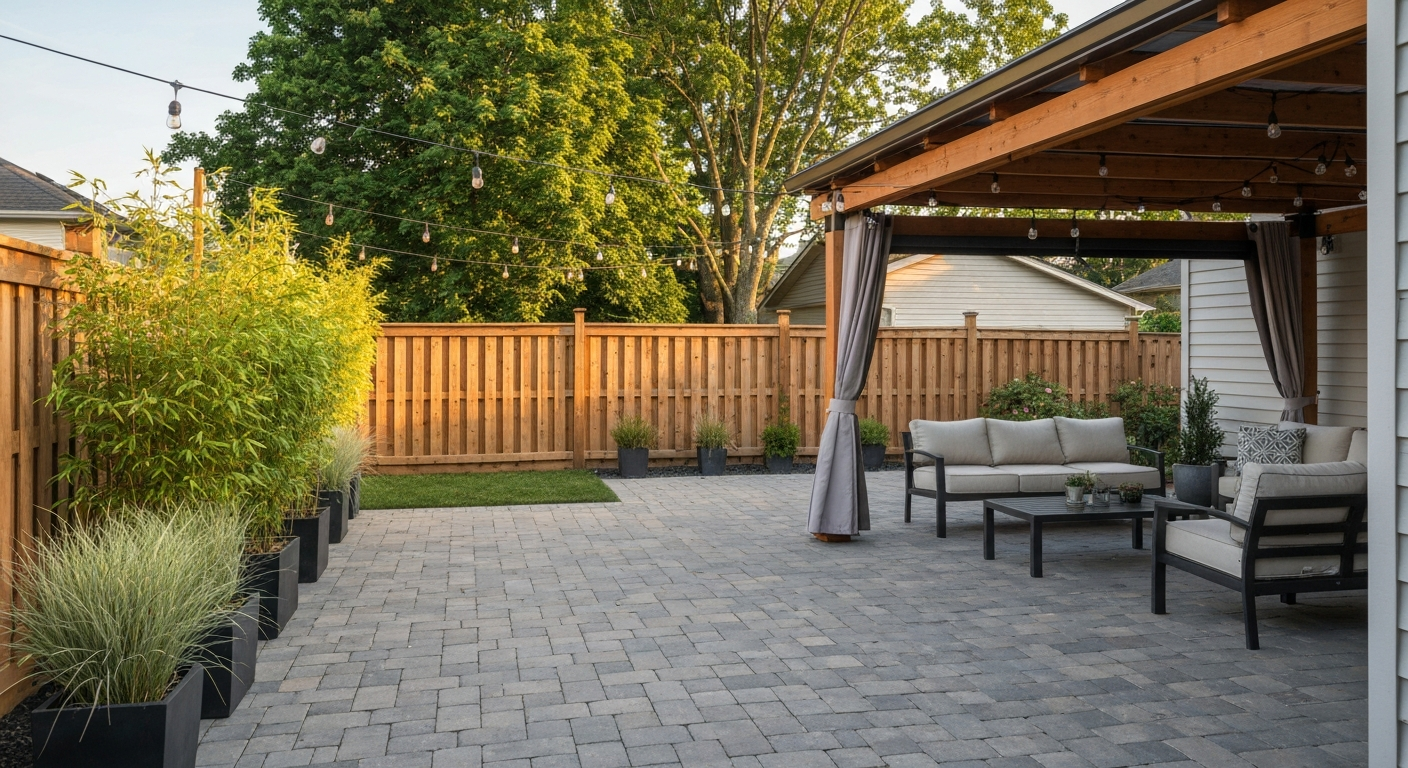
The most practical things to put around a patio for privacy are wood or vinyl privacy fences (the most common and affordable permanent fix), pergolas with lattice or shade fabric (great for overhead coverage plus side screening), retractable screens or outdoor curtains (best for renters and flexible setups), tall hedge plantings or container shrubs (low-cost and HOA-friendly), and modular privacy panels or trellises with climbing plants (ideal for patios where permanent fencing is off the table). Which one makes sense for your space depends on your property type, budget, HOA or landlord rules, and how much sightline blockage you actually need. For a concise, option-by-option overview, see the guide on what can I use for privacy on my patio.
What to Put Around a Patio for Privacy: 25 Smart Options

What you're really solving for (and what to watch out for)
Privacy around a patio comes down to blocking specific sightlines, not surrounding the whole space with walls. Before spending anything, figure out where the visibility problem actually comes from: a neighbor's second-story window, a shared fence line that falls short, a driveway with direct line-of-sight, or foot traffic along a side yard. The fix for a neighbor who can see you from an upstairs window is completely different from the fix for pedestrians walking past your fence line.
There are also three real constraints that trip up homeowners before they even buy anything. First, permit rules: most jurisdictions require permits for privacy fences over 6 feet tall in the rear yard, and some cities (like San Francisco, under Planning Code Section 136) limit front-setback fence heights even lower. Los Angeles County, for example, exempts smaller fences but requires permits for anything over 6 feet. Second, HOA CC&R documents often restrict fence heights, materials, and colors, and require Architectural Review Committee (ARC) approval with submitted drawings before you build. See the Sample ARC Modification Application, Oak Harbor / Grand Champions (example HOA ARC form) for an example ARC application requiring fence materials, height, and sketches blank" rel="noopener noreferrer">Sample ARC Modification Application — Oak Harbor / Grand Champions (example HOA ARC form). See a Sample Declaration of Covenants, Conditions and Restrictions (CC&R), example HOA template for typical language that limits fence heights, requires ARC approval, and specifies permitted materials and colors blank" rel="noopener noreferrer">HOA/CC&R documents and Architectural Review Committee (ARC) applications are the primary authoritative source for private‑community restrictions (height limits, permitted materials, color and finish rules, attachment restrictions, and required approval processes).. If your community has an HOA, pull the CC&Rs first. Third, renters face the most restrictions: standard leases prohibit permanent alterations without written landlord consent, so for apartments, condos, and townhouse rentals, the focus shifts almost entirely to non-destructive solutions. For renters, see our guide on how to make an apartment patio private for practical, non‑destructive options.
Quick decision guide by property type and budget
Use this as a starting point before diving into individual options. The right solution changes dramatically depending on whether you own a ground-level backyard, rent an apartment balcony, or have a rooftop patio with weight and structural limits.
| Property Type | Best Low-Budget Option (under $500) | Best Mid-Budget Option ($500–$3,000) | Best High-Budget Option ($3,000+) |
|---|---|---|---|
| Ground-level backyard patio (owned) | Container shrubs or tall ornamental grasses | Modular no-dig wood privacy panels or partial fence run | Full wood/vinyl/composite privacy fence or pergola |
| Rooftop or 2nd-floor patio (owned) | Outdoor curtains on tension rods or freestanding screen panels | Shade sail with engineered anchors or retractable screen | Custom pergola with retractable canopy or fixed privacy screens |
| Apartment balcony (rented) | Outdoor fabric panels clipped to railing, potted bamboo | Balcony privacy screen (HDPE mesh) tied to railing | Not applicable (landlord/fire code limits permanent installs) |
| Condo patio (owned or rented) | Container plantings, freestanding trellis with climbers | Retractable screen or modular privacy panels (ARC-approved) | Pergola or permanent screen wall (requires ARC + permit) |
| Townhouse patio (owned) | Tall planters with hedging shrubs, bamboo in containers | Lattice trellis with climbing plants or fabric panels | Permanent fence or pergola (check HOA and party-wall rules) |
Rooftop and balcony setups face the most engineering and code constraints. The American Society of Civil Engineers' ASCE 7 standard governs wind loads for rooftop attachments, and anything you anchor into a rooftop deck or balcony structure may need engineering sign-off depending on your local jurisdiction. For multi-family buildings, the International Fire Code (IFC) restricts combustible materials and attachments on balconies that serve as egress paths, so always check with your building management before installing fabric panels, curtain systems, or screens on a shared-building balcony.
Full catalog: every main patio privacy option at a glance
Here are the main categories with their ideal use case in a single view. Detailed cost and installation breakdowns follow in the sections below.
| Privacy Solution | Best For | DIY Friendly? | Approx. Cost Range | Permit Usually Required? |
|---|---|---|---|---|
| Wood privacy fence | Ground-level owned backyard | Yes (with effort) | $15–$35/linear ft installed | Often yes, over 6 ft |
| Vinyl fence | Low-maintenance owned backyard | Moderate | $20–$40/linear ft installed | Often yes, over 6 ft |
| Metal/composite fence or panel | Modern look, high durability | Moderate to no | $25–$60/linear ft installed | Often yes, over 6 ft |
| Pergola with lattice/side panels | Overhead + partial side privacy | Moderate (kits) | $3,000–$10,000 installed | Often yes (structure) |
| Retractable screen | Flexible coverage, patios and porches | Moderate | $600–$2,500 per opening | Rarely |
| Outdoor curtains / fabric panels | Renters, apartments, quick installs | Yes | $50–$400 per section | No |
| Shade sail | Overhead privacy/sun, open patios | Yes (small sails) | $150–$800 DIY; more for large | Sometimes (large/anchored) |
| Living wall / green wall system | Aesthetic, rental-friendly option | Moderate | $200–$1,500+ DIY panel systems | Rarely |
| Hedge / tall shrubs in ground | Permanent natural screen (owned) | Yes | $10–$80 per plant + labor | No |
| Container plantings / bamboo pots | Renters, no-damage installs | Yes | $100–$500 for a full screen setup | No |
| Trellis with climbing plants | Gradual natural cover, rental-OK if freestanding | Yes | $50–$400 DIY | No (freestanding) |
| Modular privacy panel / planter combo | Renters, decks, patios without digging | Yes | $200–$800 per section | No |
Hard fences and permanent screens
A traditional wood privacy fence is still the most cost-effective permanent solution for a ground-level backyard patio. Installed costs typically run $15 to $30 per linear foot for pressure-treated pine, or $25 to $35 per linear foot for cedar, according to contractor aggregator data from HomeAdvisor and Angi. That means a 50-foot fence run covering one side of a 20x20 patio will cost roughly $750 to $1,750 for wood, not counting any permit fees. DIY installation is realistic for most homeowners who can dig post holes, set posts in concrete, and cut boards, though expect a full weekend for 50 linear feet.
Wood fences
Cedar and redwood are the gold standard for privacy fences because they resist rot and insect damage naturally. Pressure-treated pine is cheaper upfront ($15–$20/linear ft installed) but requires staining every 2 to 3 years to stay looking good. Board-on-board style (alternating boards on each side of the rail) gives full privacy from both sides and handles wind better than solid board fences because gaps between boards reduce pressure. A solid board fence at 6 feet will block most sightlines from ground level, but won't help much if neighbors have second-floor views. The main trade-off with wood: it needs regular maintenance, can warp in wet climates, and fence boards will eventually need replacing after 10 to 20 years depending on species and finish.
Vinyl fences
Vinyl privacy fences run $20 to $40 per linear foot installed and need virtually zero maintenance beyond an occasional rinse with a garden hose. They won't rot, warp, or need painting. The downside is that vinyl looks obviously synthetic to many people, and quality varies significantly. Cheap vinyl panels can become brittle in extreme cold climates over time. Vinyl also isn't as rigid as wood for long fence runs, so posts need to be set in concrete at correct spacing (typically 6 to 8 feet on center) to prevent sagging. For most suburban patios, vinyl is a genuinely good long-term investment if low maintenance is the priority.
Metal and composite options
Aluminum and steel privacy panels give a modern, architectural look but cost significantly more: expect $30 to $60 per linear foot or more for powder-coated aluminum slat fencing. Composite fence panels (wood fiber combined with plastic) split the difference between wood appearance and vinyl durability, typically running $25 to $45 per linear foot installed. Both metal and composite options tend to require professional installation because post-setting and panel alignment are less forgiving than wood. These materials shine on contemporary patios or where HOA rules require specific color/finish matches. One important note on all permanent fences: many jurisdictions require permits for fences exceeding 6 feet in the rear yard, and front or side-yard fences often have lower height limits. Always verify with your local building department before setting posts.
| Material | Cost Installed (per linear ft) | Maintenance | Lifespan | Best For |
|---|---|---|---|---|
| Pressure-treated pine | $15–$25 | High (stain every 2–3 yrs) | 10–15 years | Budget backyard privacy |
| Cedar / Redwood | $25–$35 | Medium (stain every 3–5 yrs) | 15–25 years | Natural look, moderate climate |
| Vinyl | $20–$40 | Low (rinse only) | 20–30 years | Low-maintenance suburban patio |
| Composite | $25–$45 | Low | 20–25 years | Wood look, less upkeep |
| Aluminum / Steel slat | $30–$60+ | Very low | 30+ years | Modern/contemporary design |
Pergolas, arbors, and overhead structures
A pergola solves a privacy problem that a fence can't touch: overhead exposure. If neighbors can see your patio from a second-story window or elevated deck, a fence at grade level does nothing. A pergola adds vertical posts and a roof structure that, depending on how it's built, can block top-down sightlines with lattice, fabric inserts, polycarbonate panels, or a retractable canopy. Pergolas also serve as anchors for hanging curtains and shade panels on the sides, making them one of the most versatile privacy solutions available.
Installed costs for pergolas range from roughly $3,000 to $10,000 for a professionally built structure, based on cost-guide data from FixUpFirst and similar contractor aggregators. Prefab pergola kits from national retailers drop the cost dramatically: expect $800 to $3,000 for a DIY kit covering a 10x12 to 12x16 foot patio space, with materials included. Cedar and redwood kits are common in the $1,500 to $2,500 range. Aluminum pergola kits with powder-coated finishes tend to run higher, $2,500 to $5,000 for the kit alone, but require almost no maintenance. Most pergola installations do require a permit because they are attached or freestanding structures, and some jurisdictions classify a pergola with a solid roof as a room addition. Always check locally before building.
The main limitation of a pergola for privacy is that the standard open-roof design offers only partial shade and virtually no side privacy on its own. To get real privacy, you need to add lattice panels to the sides, hang outdoor curtains from the beams, or attach shade fabric between the rafters. An arbor (a smaller, arched gateway structure) works for defining a patio entry or corner but won't screen a full seating area. For serious overhead privacy, a pergola with a retractable canopy is the most functional combination.
Retractable screens, fabric panels, and outdoor curtains
Retractable screen systems are the most flexible permanent-feeling option, especially for screened-in porch conversions, covered patios, and situations where you want privacy only sometimes. Motorized or manually operated retractable screens mount inside an overhead track and roll down from the ceiling/beam to the floor, creating an enclosed wall of mesh or solid fabric on demand. They're popular for converting open patios into bug-free, semi-private spaces without building a full enclosure.
Installed costs for quality retractable screens run $600 to $2,500 per opening depending on width, fabric type, and whether the system is motorized. Manual systems are less expensive ($600 to $1,200 per opening) and reliable for most homeowners. Motorized systems with solar shades or privacy fabric run $1,200 to $2,500 or more per opening. For a 12-foot-wide patio opening, expect to pay somewhere in the $900 to $1,500 range for a manual screen with decent privacy fabric. DIY installation is possible but the track mounting and tensioning requires precision, and most manufacturers' installation guides (like those from Coolaroo and similar shade-product brands) recommend professional installation for larger spans to ensure proper anchor points and wind resistance.
Outdoor curtains are the most renter-friendly and budget-friendly option in this category. All-weather polyester curtain panels (typically 54 to 96 inches wide, 84 to 108 inches long) run $30 to $80 per panel. A single 10-foot side of a patio might need two or three panels, bringing material cost to $100 to $240. Hang them from a tension rod between posts, from a pergola beam, or from a wire cable system tensioned between anchors. For renters, tension rod systems avoid wall damage entirely. The trade-off: curtains move in wind, provide inconsistent privacy when they blow around, and require removal and storage in winter climates. For moderate-wind areas or covered patios, they work great.
HDPE mesh privacy panels and fabric privacy screens (the rectangular panels sold in bulk on spools or as pre-cut panels at Home Depot and Lowe's) bridge the gap between curtains and permanent fencing. Products like the Casafield 48x48-inch vinyl privacy panel (around $30 to $60 per panel at major retailers) attach to existing fence frames, railings, or temporary posts with zip ties or grommets and provide 90% or better sightline blockage. They're lightweight, easy to cut to size, and genuinely portable. For apartment balconies and rental patios, this is often the most practical option that requires no drilling and can be removed at move-out.
Shade sails and overhead fabric
Shade sails are tensioned triangular or rectangular fabric canopies that span between anchor points to provide overhead coverage. They're popular for patios that need sun protection more than vertical privacy, but a well-placed shade sail does block top-down views from elevated neighbors or second-story windows. They come in sizes from around 8x8 feet (around $50 to $150 at retail) up to commercial-grade sails exceeding 20 feet per side (which can run $300 to $800 or more for the sail fabric alone, not counting anchoring hardware and posts).
The critical issue with shade sails that most homeowners underestimate is the anchoring. A shade sail under wind load behaves structurally like a sail on a boat: all the wind force concentrates into the anchor points. ASCE 7 engineering standards (which govern minimum wind loads for structures) make clear that even a modestly sized shade sail in a high-wind zone generates substantial pull-out forces at each anchor. Manufacturer installation guides consistently require either through-bolted anchors into structural members (a concrete wall, structural post, or framing), properly engineered footings for freestanding posts, or professional assessment for larger installations. A shade sail attached to a deck railing or screwed into fascia trim without proper anchoring is a wind event waiting to happen.
For a typical ground-level patio, a DIY shade sail installation with two steel posts set in concrete footings and one anchor point on the house is realistic for most handy homeowners. Budget $200 to $500 for a quality sail, $50 to $150 per post (galvanized steel), and $30 to $50 in concrete per footing. Total DIY budget for a single sail covering a 12x12 foot patio: roughly $400 to $800. Professional installation (which includes engineered footings and hardware) adds $300 to $600 in labor. For rooftop patios or balconies, treat any shade sail as a structural attachment and consult your building management or a structural engineer before drilling anchors.
Living walls and vertical gardens
A living wall or green wall system uses a modular panel framework to grow plants vertically, creating a lush, natural privacy screen. They work well for patios where HOA rules or lease terms rule out hard structures, because a freestanding planter-based green wall technically doesn't require any permanent attachment to the home. Aesthetically, they're hard to beat: a well-grown living wall with ferns, succulents, or flowering vines looks genuinely beautiful in ways that a vinyl fence never will.
On the practical side, living walls have real trade-offs. Privacy performance grows over time as plants fill in, which means you won't have full sightline blockage for the first growing season. Maintenance is significantly higher than any hard screen: plants need watering (some systems include drip irrigation, which helps), fertilizing, seasonal replanting, and occasional pest management. In cold climates, the plant selection is limited to annuals or hardy perennials, and the structure may need to be emptied and stored during winter. For year-round solid privacy, living walls work best in mild climates.
DIY panel systems for living walls range from $200 to $600 for a freestanding modular setup covering a 4x6 foot section, with larger or irrigated systems running $800 to $1,500 or more for DIY. Professional green wall installations with irrigation, structural backing, and quality plants can run $1,000 to $3,000 per section and are primarily a premium aesthetic choice. For most homeowners focused on privacy first, living walls work better as a supplement to a fence or trellis than as a standalone solution. For renters, a freestanding modular planter-wall system that doesn't touch the building is often the most creative and landlord-approved option available. If you're comparing approaches for a small rental patio specifically, the container planting strategy covered in the next section gives similar results at lower cost.
Hedges, shrubs, container plantings, and trellises
In-ground hedges and tall shrubs are the classic natural privacy screen for owned backyard patios. Arborvitae (Thuja Green Giant) is the most popular hedge plant in the US for this purpose: it grows 3 to 5 feet per year when established, reaches 20 to 40 feet at maturity, and creates a dense, year-round evergreen screen. Planted 5 to 6 feet apart in a row along a patio boundary, a row of 6-foot arborvitae starts at around $40 to $80 per tree at a nursery. A 30-foot hedge run using 6 plants costs $240 to $480 in plants alone. Established in 2 to 3 years, you have a fence-quality screen with zero maintenance costs beyond mulching and occasional trimming.
For renters, apartment patios, and anyone who can't plant in the ground, container plantings in large pots (15-gallon and larger) filled with bamboo, ornamental grasses, or tall evergreen shrubs can create a portable privacy screen along a patio edge. Clumping bamboo (non-invasive varieties like Fargesia species) grows 6 to 12 feet tall in a large container. A row of five 15-gallon bamboo containers along a 10-foot fence line costs roughly $150 to $400 total. The visual effect of potted bamboo as a privacy screen is actually very good, and the plants move with you when you leave. The downside: containers need more frequent watering than in-ground plants, especially in summer heat.
A trellis with climbing plants is the lowest-cost path to a natural-looking privacy screen for ground-level patios. A freestanding cedar or metal trellis panel (4 to 6 feet wide, 6 to 8 feet tall) costs $50 to $150. Add fast-growing climbing plants like clematis, morning glory (annual), climbing roses, or hops, and within one to two growing seasons you have a dense, attractive screen. For owned patios, attach the trellis to a fence to add height beyond the fence. For rented patios, keep the trellis freestanding so it remains a portable piece of furniture rather than a permanent alteration. Total cost for a freestanding trellis-with-climbers setup: $100 to $400 for a 10-foot screen run.
Comparing all the main options side by side
Here's a consolidated look at how the most popular patio privacy solutions compare across the factors that actually matter for a purchase decision.
| Solution | Privacy Level | Renter-Friendly? | HOA Risk | Typical Total Cost (DIY) | Maintenance Level | Time to Full Privacy |
|---|---|---|---|---|---|---|
| Wood privacy fence | High (full block) | No (permanent) | High (approval needed) | $10–$25/linear ft | Medium-High | Immediate |
| Vinyl fence | High | No | Medium-High | $18–$30/linear ft | Low | Immediate |
| Composite/metal panel | High | No | Medium | $25–$50/linear ft | Low | Immediate |
| Pergola + panels/curtains | Medium-High | No (usually) | Medium | $1,500–$5,000 | Low-Medium | Immediate after build |
| Retractable screen | High (when closed) | Sometimes | Low-Medium | $600–$2,000 | Low | Immediate |
| Outdoor curtains | Medium | Yes | Low | $100–$400 | Low-Medium | Immediate |
| HDPE mesh/fabric panel | High (90%+) | Yes | Low | $50–$300 | Low | Immediate |
| Shade sail | Overhead only | Sometimes | Low-Medium | $300–$800 | Low | Immediate |
| Living wall system | Low-Medium (grows in) | Yes (freestanding) | Low | $300–$1,500 | High | 1–2 seasons |
| In-ground hedge | High (when mature) | No | Low-Medium | $200–$600 for row | Low-Medium | 2–4 years |
| Container plantings | Medium | Yes | Low | $150–$500 | Medium | 1–2 seasons |
| Freestanding trellis + climbers | Medium-High (when grown) | Yes | Low | $100–$400 | Low-Medium | 1–2 seasons |
Special considerations for apartments, condos, and rooftops
Balcony and rooftop patios in multi-family buildings have a layer of constraints that ground-level homeowners don't deal with. Start with your lease and HOA/condo docs before buying anything. For specific, step-by-step tips on how to make a condo patio more private, see our condo-focused guide. Lease agreements typically prohibit permanent alterations without written landlord consent. However, renters with disabilities may have additional rights: HUD and DOJ guidance on reasonable modifications requires landlords to allow (at the tenant's expense) modifications needed for accessibility, even when the lease says otherwise.
The International Fire Code adds another layer for apartment and condo balconies. Balconies that serve as egress paths have strict rules about what can be stored or attached there, and combustible materials (including certain fabric types) face restrictions in multi-family buildings under IFC Chapter 10. Some municipalities go further: many condo associations and local fire codes explicitly ban storage of combustible materials and certain grill types on apartment balconies. Before attaching any fabric panel, screen, or structure to a shared-building balcony, ask your building manager about fire code compliance and any restrictions in your lease or condo association rules.
For rooftop patios specifically, any anchored structure (pergola, shade sail post, screen system) may be subject to wind-load engineering requirements under ASCE 7. Rooftop wind speeds are meaningfully higher than at grade level, and anchoring into a roof deck membrane without proper waterproofing and engineering can cause both structural and water damage. Local building departments (using NYC DOB guidelines as one example) often require registered design professionals and plan review for balcony and rooftop structure modifications. For most rooftop patios, the practical reality is: freestanding weighted-base solutions and non-anchored fabric systems are far safer to install without professional involvement.
How to measure your patio for the right coverage
Getting the measurements right before buying anything saves money and frustration. Here's a straightforward process for most patios.
- Stand where you sit most often on the patio and identify the specific sightlines you're trying to block. Note the direction and estimated height of the exposure (eye-level from a neighbor's yard, window height on a second floor, etc.).
- Measure the linear footage of each boundary where you need coverage. For a fence or panel run, measure the full length and add 10% for overlap or waste.
- For height, measure from the patio surface up to the sightline you're blocking. A neighbor's eye-level at grade typically requires a 6-foot fence. A second-story window 15 feet up requires either a very tall fence/hedge or an overhead structure (pergola or shade sail).
- For overhead coverage (shade sails, pergola canopies), measure the full patio footprint you want covered, plus 1 to 2 feet of overhang on each side for shade/privacy angle.
- Note any anchor point locations: existing posts, walls, structural beams, or fence posts that can accept hardware. This determines what shade sails or screen systems are practical without adding new posts.
- Check your local code's setback requirements: most jurisdictions require fences to be set 1 to 3 feet inside the property line, which affects how close to the boundary you can build.
Permits, HOA approval, and landlord consent: a practical checklist
Before building or buying, run through this checklist to avoid costly mistakes.
- Identify your property type: owned single-family, owned condo/townhouse with HOA, or rented. This determines which rules apply.
- For HOA properties: pull your CC&R documents and Architectural Review Committee (ARC) guidelines. Most require a formal ARC application with drawings, material specs, heights, and colors submitted before any exterior modification. Many HOA CC&Rs limit fence heights to 6 to 8 feet maximum and specify approved materials and colors.
- For city permits: contact your local building department or check their online portal. Rear-yard privacy fences over 6 feet commonly require a permit. Pergolas, shade structures, and screen rooms almost always require permits because they are classified as structures. Small retractable screens and fabric panels usually do not require permits.
- For renters: get written landlord consent for anything that attaches to the building or can't be removed without damage. For accessibility-related modifications, ask about your rights under HUD reasonable-modification guidelines.
- For multi-family balconies: confirm fire code compliance with your building manager before installing any fabric attachment, screen, or combustible material.
- For rooftop patios with anchored structures: consult a structural engineer or your local building department about wind load requirements (ASCE 7) before drilling any anchor.
Styling and decorating ideas that integrate privacy
Privacy doesn't have to look defensive. The best patio privacy setups feel like intentional outdoor room design rather than fortification. A pergola with white outdoor curtains and string lights creates a cozy, enclosed atmosphere that happens to block sightlines. For ideas specific to yards without a built patio, see how to decorate a backyard without patio for practical styling approaches. A trellis covered in climbing roses or jasmine adds fragrance and beauty while providing screening. A row of uniform black planters with tall ornamental grasses (like Miscanthus or pampas grass) doubles as sculpture and privacy. Mixing a low fence (4 feet) with tall container plantings above it gives the visual effect of height without triggering permit requirements in many jurisdictions.
For townhouse and condo patios where space is tight, vertical emphasis is your best friend. Tall, narrow planters stacked against a wall, a wall-mounted trellis with climbing vines, or a vertical modular planter system creates the feeling of enclosure without eating into usable patio square footage. If you're decorating a townhouse patio specifically, layering privacy solutions (low hardscape elements at one level, mid-height plantings at another, and an overhead pergola above) creates a genuinely finished outdoor room feel that adds real perceived value to the space.
Does patio privacy work affect home value?
Generally yes, but with caveats. A well-built privacy fence, pergola, or thoughtfully landscaped patio border adds to perceived outdoor livability and can support home sale prices, particularly in suburban markets where outdoor space is a selling point. Real estate agents consistently report that defined, private outdoor spaces photograph better and show better to buyers. However, a poorly maintained fence, an over-built structure that dominates a small yard, or a privacy solution that violates HOA rules can actually become a negotiating liability at sale (buyers may require it to be brought into compliance). The ROI on privacy improvements is real but tied closely to quality and proportion. A $2,000 to $4,000 pergola on a property with a $400,000 value is a much easier sell than the same pergola on a $150,000 townhouse.
Recommended next steps by scenario
Here are concrete starting points based on the most common homeowner and renter situations. For step-by-step instructions and project ideas, see our guide on how to make patio private.
- Ground-level backyard, own the home, $500 or less: Start with no-dig modular privacy panels or a row of container shrubs. You can add to it later without wasting money.
- Ground-level backyard, own the home, $1,000 to $3,000: Price out a partial fence run (cover just the exposed side) or a DIY pergola kit. Both are genuine weekend-scale projects.
- Ground-level backyard, own the home, $3,000+: Get two to three contractor quotes for a full privacy fence or pergola with side screens. Cedar board-on-board at 6 feet hits the sweet spot of cost and performance for most yards.
- Apartment or condo balcony (renting): Start with HDPE mesh privacy panels zip-tied to your existing railing (no damage, totally removable) and potted bamboo in large containers for additional height. These are the safest moves for most leases.
- Condo or townhouse (owned, HOA): Pull your ARC application requirements first. Submit for approval before buying anything structural. While you wait, freestanding trellis-and-climbers or container plantings will give you interim privacy without triggering the HOA.
- Rooftop or second-floor patio: Focus on non-anchored solutions (freestanding screens with weighted bases, potted bamboo) until you've confirmed what anchored installations your building allows. The engineering and fire-code constraints are real.
If you're still deciding between a patio and a deck as the starting point for your outdoor space, or weighing whether to enclose your patio into a screened room, the solutions covered here apply across both surface types. The privacy options for a ground-level patio and a ground-level deck are largely interchangeable, though deck construction often provides built-in anchoring points that make retractable screens and pergola attachments easier to install.
FAQ
What primary building codes and technical standards must I consult to make accurate, safe patio-privacy recommendations?
Consult the model and technical codes that govern guard heights, structural loads, fire and egress, and wind loads: - International Residential Code (IRC) — for residential guardrail heights (commonly 36 in. for decks/balconies) and related residential building planning provisions. - International Building Code (IBC) — where applicable for commercial/other occupancies (IBC commonly requires 42 in. guard heights). - International Fire Code (IFC) and NFPA guidance — for combustible-material limits, egress/means-of-egress rules, and restrictions on enclosing or adding combustible elements to multi‑unit balconies. - ASCE 7 (Minimum Design Loads for Buildings and Other Structures) — for wind and lateral-load criteria used when sizing anchors, posts, and attachments (awnings, shade sails, screens). Use the specific edition adopted by your jurisdiction and any local amendments.
Which local authorities and municipal documents are required for accurate, site-specific guidance?
Always check local sources because jurisdictions adopt code editions and add amendments: - Local building department / Department of Buildings website (permit triggers, plan‑check requirements, required drawings, licensed professional requirements). - Local fire department advisories and municipal code sections on balconies/rooftop work and grill/open‑flame prohibitions. - Local planning or zoning department pages for fence height/setback restrictions. - Local bulletins/technical notes (plan‑check or loading bulletins) that clarify railing and anchor loads for balconies. Example: NYC DOB bulletins or LA County building FAQ pages. Use the municipality’s searchable code or contact the permit counter for ambiguous cases.
What private‑community and landlord/tenant documents must be reviewed for homeowners and renters?
Include any legally binding private documents: - HOA CC&Rs, bylaws, and ARC/ACC application requirements and checklists (height, materials, color, approval steps). - Sample ARC application forms to see required drawings/specs. - Lease agreement language and landlord permission requirements for renters; state tenant guides for general renter rights. - Consider federal/state accessibility guidance (DOJ/HUD/ADA) about reasonable modifications for disabled tenants which can create exceptions to alteration bans. These documents determine whether proposed privacy solutions are allowed, require approval, or need restoration on move‑out.
Which manufacturer and product sources provide authoritative installation, anchoring, and maintenance details?
Use manufacturer installation manuals and technical guides for product-specific installation, anchor spacing, recommended fasteners, tensioning procedures, weight limits, and maintenance intervals. Relevant sources include: - Shade-sail/awning manufacturers (installation & anchor guidelines). - Retractable screen and roller-shade manufacturer manuals. - Pergola/kit suppliers and prefab privacy-panel vendors. Manufacturer manuals are authoritative for practical anchoring and warranty compliance and are necessary when checking whether through-bolting to structure or engineered footings are required.
Where can I get reliable cost ranges for DIY vs professional installation?
Combine retailer pricing and national cost-aggregators: - Retailer product pages (Home Depot, Lowe’s) for MSRP of modular privacy panels, planters, and ready-made screens. - Contractor-aggregator and cost-guide sites (HomeAdvisor, CostHelper, FixUpFirst, LawnLove) for typical installed price ranges for fences, pergolas, living walls, and professional labor estimates. Use these as regional starting points and supplement with written local contractor estimates for site-specific pricing.
What engineering and safety considerations require consulting a licensed professional?
Consult a licensed structural engineer or architect when: - Anchoring screens, pergola posts, or shade sails to rooftop slabs or building framing where wind loads from ASCE 7 and uplift forces may exceed simple-anchoring assumptions. - Alterations could change the balcony/guardrail system or create new loads on existing structure. - Work may affect means of egress or load-resisting elements. Engineers will provide anchor sizing, footing design, and connection details required by plan review in many jurisdictions.
How to Make a Condo Patio More Private: 10 Smart Ideas
Code-aware, renter-friendly ways to make your condo patio more private, HOA-safe options, costs, DIY steps.