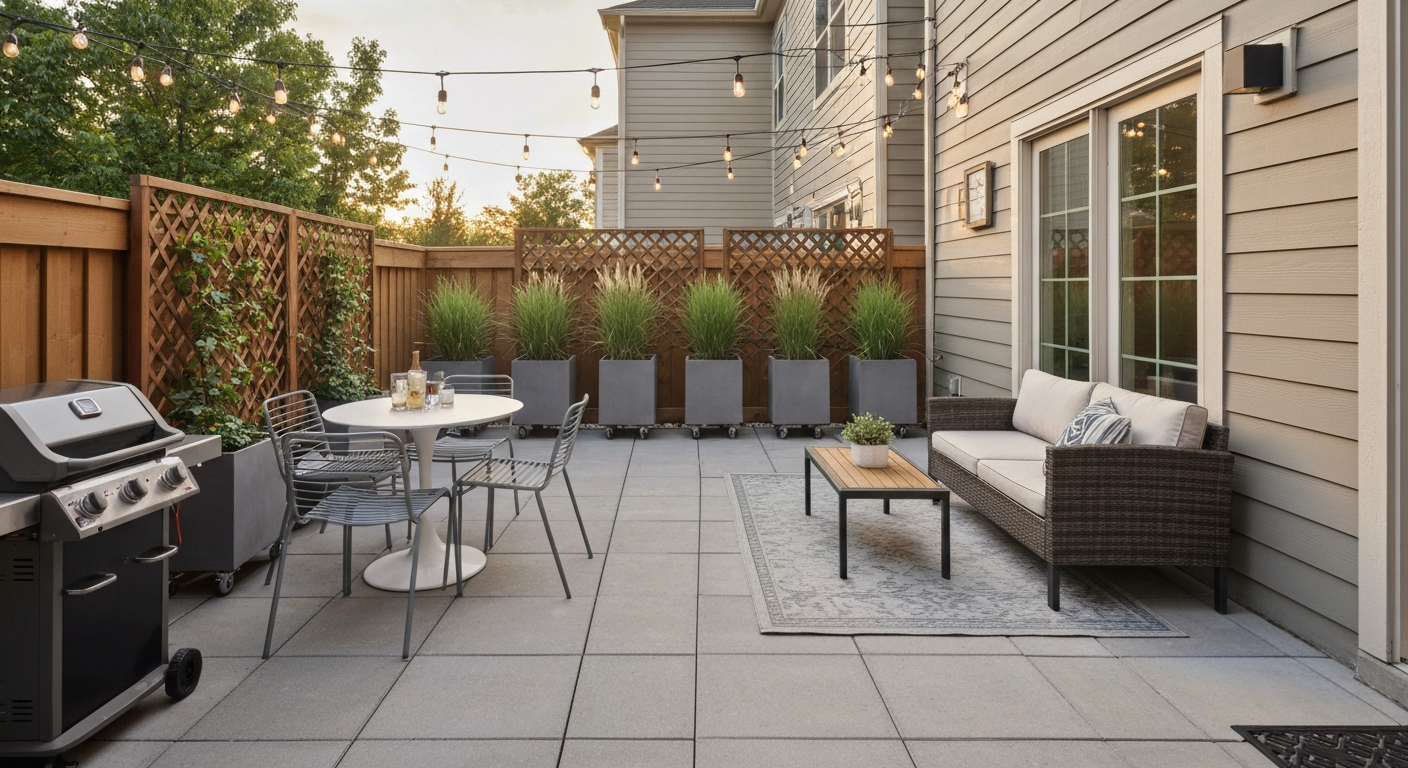
You can create a fully functional, good-looking outdoor living space without ever pouring a single square foot of concrete. Gravel, pavers, interlocking deck tiles, artificial turf, and even well-placed mulch can all serve as patio substitutes, and most are cheaper, faster, and easier to pull up if your situation changes. The key is matching the surface, layout, and decor to your actual yard conditions, your budget, and whether you own the place or rent it.
How to Decorate a Backyard Without Patio: 8 Smart Options

Miles Hart
13 Jul 2026
Who this guide is for (and what you'll come away with)
This article is written for homeowners who want patio-style outdoor living but don't want the cost or commitment of a poured slab, and for renters, condo residents, and townhouse owners who can't permanently alter their outdoor space. If a formal poured concrete or natural-stone patio isn't an option right now because of budget, rental restrictions, HOA rules, or a yard that simply doesn't suit it, you're in the right place. By the end you'll have a clear picture of which surface makes sense for your situation, how to plan the layout, what furniture and decor hold up outdoors, how to add shade and privacy without major construction, and exactly what to check before you spend a dime.
Start here: assess your site before buying anything
University cooperative extension services recommend a formal site analysis as the very first step in any landscape project, and it's advice worth taking seriously even for a simple gravel seating area. Skipping this step is how people end up with a soggy fire-pit area or furniture that tips because the ground isn't level. Spend an hour walking the yard and noting everything below before you open a browser tab to shop.
Site assessment checklist
- Measured dimensions: length and width of the usable area, total square footage, and any obstacles (AC units, downspouts, cleanouts, trees)
- Slope and drainage: use a line level or a simple water test to find which direction water runs; note any low spots that pond after rain; target a finished surface that sheds water roughly 1/4 inch per foot (about 2%) away from the house foundation
- Soil type and drainage: push a screwdriver 6 inches into damp soil — easy penetration means loose/sandy soil, hard resistance means clay or compaction; for planting areas, get a basic soil test through your county extension office (0–6 inch samples from each distinct area)
- Sun and shade mapping: walk the yard at 8 a.m., noon, and 4 p.m. and note which areas are full sun, part shade, or deep shade — this determines where dining vs. lounging zones make sense and whether you need shade structures
- Prevailing wind direction and any noise sources (neighboring HVAC units, roads, neighbors)
- Utilities: call 811 (USA) before any digging; note above-ground utility boxes, meters, and any known underground lines or irrigation
- Access points and gate widths: measure gates if you'll be hauling in gravel, pavers, or furniture
- Property setbacks and easements: check your plat for setback distances from property lines, utility easements, or HOA-designated buffer zones
- HOA, CC&R, and landlord rules: note what requires written approval (more on this below)
- Budget and permanence preference: decide upfront whether you want something you can take with you when you move, or something that adds lasting value
Mapping all of this on a rough sketch, even a hand-drawn one with approximate dimensions, makes every later decision easier. You'll refer back to it when picking surface materials, planning drainage, and figuring out where to put furniture zones.
Quick decision guide: surface and privacy for your budget, space, and rental status
Before diving into each option in detail, here's a fast-reference overview. Use this to narrow down which sections are most relevant to you.
| Surface / Approach | Approx. Cost (sq ft) | DIY Difficulty | Renter-Friendly | Permanence |
|---|---|---|---|---|
| Gravel / crushed stone | $1–$4 installed | Beginner | Yes (with edging) | Semi-permanent |
| Compacted stone base + flagstone look | $3–$8 installed | Beginner–Intermediate | Possible with approval | Semi-permanent |
| Concrete pavers | $5–$25+ installed | Intermediate | Possible with approval | Permanent-ish |
| Interlocking deck tiles (wood/composite) | $3–$10/sq ft material | Beginner | Yes | Fully removable |
| Modular patio tiles (loose-lay) | $2–$8/sq ft material | Beginner | Yes | Fully removable |
| Artificial turf | $2–$7 DIY / $8–$15 installed | Intermediate | Possible with approval | Semi-permanent |
| Mulch / wood chips | $0.50–$2/sq ft installed | Beginner | Yes | Seasonal/removable |
| No-dig privacy screens / planters | $100–$800+ total | Beginner | Yes | Fully removable |
| Shade sail / umbrella | $50–$600 | Beginner | Yes | Fully removable |
Surface options, compared
Gravel and crushed stone
Gravel is the lowest-cost, most beginner-friendly patio alternative available. A well-built gravel area looks sharp, drains well, and handles heavy furniture without heaving in freeze-thaw cycles. The critical mistake most people make is skipping proper prep: without compacted base material and edge restraints, gravel migrates under furniture legs and disappears into lawn grass within a season or two. The Home Depot's installation guidance and most trade sources agree on 4–6 inches of compacted crushed stone base under 2–3 inches of finish gravel, plus landscape edging around the perimeter. You can rent a plate compactor for around $60–$80 per day from most home centers. For another relevant comparison, see how to decorate a townhouse patio.
- Pros: lowest installed cost ($1–$4/sq ft), excellent drainage, beginner-friendly, no permits typically required for small residential areas, wide variety of stone types and colors
- Cons: gravel shifts under chair legs (use pea gravel furniture pads or choose crusher run/compacted fines for seating areas), barefoot comfort varies by stone type, needs re-raking and occasional top-dressing every 1–3 years, pea gravel is not wheelchair- or stroller-friendly
- DIY difficulty: beginner — the main effort is moving weight; a plate compactor rental handles compaction
- Permit notes: rarely required for a residential gravel ground cover that doesn't alter drainage or impervious cover significantly, but check locally; in some municipalities adding any hardscape over a certain square footage triggers a stormwater review
- Maintenance: re-rake after heavy rain, pull weeds (a weed barrier under the base reduces but doesn't eliminate weeds), add a half-inch of fresh gravel every few years
Compacted crushed stone base as the finished surface (flagstone look without the slab)
Crusher run, decomposed granite (DG), and compacted limestone fines are different from loose pea gravel, they bind and harden when compacted and moistened, giving you a near-solid surface that looks clean and handles furniture well. This is often called a 'flagstone dry-lay look' when you set large stepping stones or fieldstones directly on a compacted DG or crusher-run base rather than mortar or a concrete slab. It reads as a real patio surface from 10 feet away and costs a fraction of a full slab.
- Pros: sturdier underfoot than loose gravel, handles patio furniture well, excellent drainage, mid-range cost ($3–$8/sq ft installed depending on stone type and region), looks polished
- Cons: requires proper compaction to firm up (plate compactor is essential), DG can soften and track into the house if it gets saturated without good drainage design, not truly removable without significant rework
- Installation tip: excavate 4–6 inches, add base compacted in 2-inch lifts, finish with 2–3 inches of DG or crusher run, wet thoroughly and compact again, then add any stepping stone accents on top
- Maintenance: re-compact and top-dress annually or after severe erosion; pull weeds or spot-spray; resetting stepping stones that shift is straightforward
Concrete pavers and natural stone pavers
A dry-laid paver patio (no mortar, no concrete slab) is the closest you'll get to a 'real' patio without pouring concrete. Done correctly with a properly compacted aggregate base, screeded bedding sand, edge restraints, and polymeric joint sand, it looks indistinguishable from a professionally installed hardscape. The Interlocking Concrete Pavement Institute (ICPI) is the technical authority here: their specs call for the compacted aggregate base, roughly 1 inch of screeded bedding sand, proper edge restraint on all sides, and joint sand swept and compacted in. Interlocking Concrete Pavement Institute (ICPI), tech specs and installation guidance recommend excavation, a compacted aggregate base, roughly 1" of screeded bedding sand, proper edge restraints, and polymeric or joint sand-filled joints to prevent shifting and failure Interlocking Concrete Pavement Institute (ICPI) — tech specs and installation guidance recommend excavation, a compacted aggregate base, roughly 1" of screeded bedding sand, proper edge restraints, and polymeric or joint sand-filled joints to prevent shifting and failure.. Missing any one of those steps leads to shifting and sinking.
- Pros: durable, high-end appearance, many styles and price points, adds real home value if installed well, can be fully removed and reinstalled or repaired section by section
- Cons: most expensive DIY option in this category ($5–$12/sq ft in materials alone; $10–$25+ per sq ft contractor-installed); intermediate-level DIY (plate compactor, screeding, edge restraints all required); a small 12x12-foot area can take two people a full weekend; poor-drainage soils or steep slopes may require engineered base and professional help
- Renter and condo considerations: installing pavers involves excavation and grade change, which most leases and HOA rules classify as a permanent alteration requiring written approval
- Upgrade path: a dry-laid paver area is the easiest surface to convert later into a true patio — a contractor can add a concrete base underneath the existing pavers, or lift and relay them over a new base
- Maintenance: sweep polymeric sand back into joints annually, pull weeds, pressure-wash every couple of years; replace cracked or sunken pavers individually
Interlocking deck tiles (wood and composite)
Snap-together deck tiles, sold under brands like NewTechWood, Ipe Clip, and dozens of others, are the go-to renter-friendly surface. They install over existing flat ground, concrete, or a thin gravel base without any fasteners or adhesives. Manufacturer guides typically advise a level, firm sub-surface and an optional geotextile or moisture barrier underneath. In freeze-thaw climates, seasonal removal and dry storage is recommended to prevent warping or cracking. They genuinely are beginner territory: most homeowners can tile a 10x12-foot area in an afternoon.
- Pros: fully removable and renter-safe, no permits, quick installation, looks like a real deck, available in teak, acacia, and composite materials
- Cons: cost adds up faster than gravel ($3–$10/sq ft in materials, more for premium hardwood); wood tiles require oiling annually; composite holds up better but costs more; must be installed on a very level surface or tiles will rock; not suitable for sloped ground without leveling work first
- Renter note: take photos before installation and store the original surface condition documentation; these tiles leave no mark and go with you when you move
- Maintenance: hose off seasonally, re-oil wood tiles annually, check for cracked tiles and replace individually
Modular patio tiles and loose-lay stone pavers
This category covers rubber patio tiles, foam-core outdoor tiles, thin concrete stepping-stone squares set in a grid, and similar products designed to be placed directly on grass, dirt, or gravel without excavation. They sit at the most temporary end of the spectrum. They work well for condo patios, apartment outdoor areas, and rental yards where you absolutely cannot alter the ground. The tradeoff is that a loose surface on uneven or soft ground will shift and look sloppy, so a light layer of leveling sand or gravel underneath helps significantly.
- Pros: ultra-low commitment, zero tools required, $2–$8/sq ft in materials, can be lifted and taken to a new home, great for defining a dining zone on grass
- Cons: not suitable as a primary surface over large areas on soft or uneven ground; grass beneath will die and require restoration when you remove them; thin concrete squares crack under heavy loads; aesthetic is limited compared to pavers or deck tiles
- Best use: defining a small dining zone (8x10 feet or so) or creating a path between zones
Artificial turf
Synthetic grass has moved well beyond the carpet-green look of earlier generations. Modern products have varied blade heights, multi-tone coloring, and a reasonably natural feel underfoot. Installed cost varies considerably: national sources cite a rough midrange of $8–$15 per square foot installed, with material-only running $2–$7 per square foot for standard residential products, and specialized systems reaching $15–$25 per square foot installed. Smaller areas cost more per square foot because site prep and edging are fixed costs. Drainage is the make-or-break installation issue: poorly prepared sub-bases lead to puddling and odor, especially in pet areas.
- Pros: low ongoing maintenance, looks consistently green year-round, pet- and kid-friendly surface, no mowing or watering once installed
- Cons: heat retention in full sun is significant — turf surface temperatures can reach 150–180°F on hot days, making it uncomfortable barefoot; active research (including a 2024 systematic review in PMC) identifies potential for microplastic and rubber infill release to stormwater and leachate concerns; typically not fully reversible without regrading; not renter-safe without landlord approval
- Pet note: solid waste must be removed promptly; urine drains through but odor builds up in infill over time — enzyme-based cleaning products and proper drainage layers help; infill replacement every 5–8 years is typical for pet-heavy areas
- Lifespan: 10–20 years for quality residential products with proper installation and basic maintenance
- Permit note: many municipalities track impervious or semi-impervious surface totals; some require a permit or stormwater review for turf installations over a certain area
Mulch, wood chips, and bark
Mulch is often overlooked as a patio-substitute surface, but a well-edged mulch zone with a simple bistro table on a flat stone or paver pad reads as an intentional outdoor room, not an unkempt garden. Cedar and hardwood bark hold up better than shredded pine for foot-traffic areas. Keep mulch depth to 2–3 inches (deeper is not better, it suffocates plant roots and can harbor pests). Edging is critical to prevent blowout into the lawn.
- Pros: lowest cost of any surface ($0.50–$2/sq ft installed, free if you have a local tree service contact), beginner-friendly, soft underfoot, good for play areas, insulates plant roots nearby, fully removable
- Cons: decomposes over time (needs annual top-dressing), not suitable under furniture without a hard surface insert (stepping stone, tile, or small paver pad), can harbor slugs and insects if kept too wet, tracked indoors more than hard surfaces, not durable for high-traffic zones
- Seasonal maintenance: rake and redistribute each spring, add 1-inch fresh layer annually, check edging and reset as needed
Layout and zoning for small yards and rentals
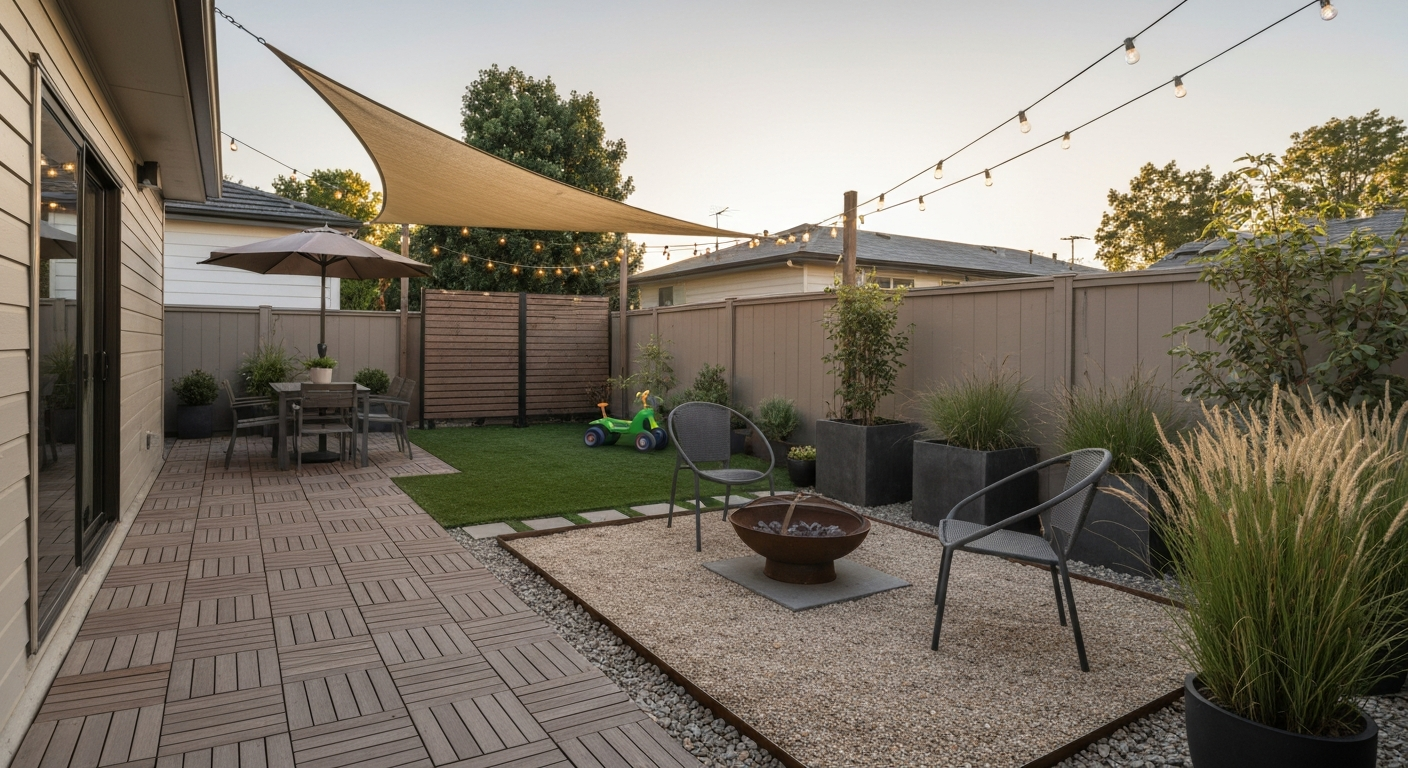
The difference between a backyard that feels cluttered and one that feels like a real outdoor living space is almost always zoning. Even a 15x20-foot yard can have two or three distinct areas if you're deliberate about it. The mental model that helps most is to think in rooms: a dining zone, a lounging zone, and optionally a fire-pit or play zone, connected by a path.
- Dining zone: needs a level, hard surface of at least 10x12 feet to fit a table for four with chair pull-out room; position it near the house door if possible for ease of carrying food; a shade structure overhead (umbrella or shade sail) makes midday dining comfortable
- Lounging zone: can be softer underfoot (mulch, turf, or a separate gravel area); needs at least 10x14 feet for a 3-piece seating set with a coffee table; this is the zone most worth investing in screening or a trellis for privacy
- Fire-pit zone: requires a non-combustible surface (gravel, pavers, or compacted stone — never mulch or artificial turf); check clearance requirements (commonly 10–15 feet from structures and overhangs); keep at least 36 inches of clear walking space around the pit
- Play area: mulch or artificial turf works well; position it where it has sightlines from the dining or lounging zone; use low edging to define boundaries
- Circulation: leave a 3-foot minimum path between zones; wider (4–5 feet) if it's a main walkway from door to gate
- Scale tip: in small yards, one large surface anchored by a rug reads as more intentional than several small disconnected elements — resist the urge to fill every inch
Furniture, textiles, and durable decor
Outdoor furniture materials matter a lot more in a no-patio setup than they would on a covered porch, because everything is fully exposed. The hierarchy from most to least durable for uncovered outdoor use is roughly: powder-coated aluminum or stainless steel, then HDPE (recycled plastic lumber), then teak or ipe hardwood (with annual oiling), then all-weather wicker (resin over a metal frame), then painted steel (rust-prone without quality coating), and finally natural wood without treatment (not recommended outdoors without a cover).
- For renters and small spaces: look for folding or stackable furniture that can be stored in a garage or shed during off-season; a folding bistro set takes up almost no storage space and is easy to move
- Rugs: outdoor rugs define zones visually and add comfort underfoot; look for polypropylene or recycled PET construction (they drain, resist mold, and fade slowly); avoid natural fiber (sisal, jute) outdoors — they rot when wet
- Cushions and pillows: Sunbrella or comparable solution-dyed acrylic fabrics resist UV and mildew far better than standard polyester; store cushions in a deck box or garage when not in use to extend life by years
- Anchoring: in windy yards, use furniture with wide bases or weighted feet; umbrellas need a base rated for their diameter (a 9-foot umbrella typically needs a 50-lb base minimum); lightweight chairs should be stored inside during any storm warning
- Decor accents: outdoor-rated lanterns, ceramic or metal planters, and galvanized or rust-proof metal accents all hold up without special treatment; avoid uncoated terracotta in freeze-thaw climates (it cracks)
- Small-space strategy: choose multi-use pieces (storage benches, side tables that double as coolers, chairs that stack) to keep the space feeling open
Privacy solutions for yards, townhouses, and condos
Privacy is one of the most-asked-about pieces of outdoor living, especially for townhouse and condo owners with close neighbors. The good news is that some of the most effective privacy solutions are also the most renter-friendly. For ideas on what to put around a patio for privacy, see our guide covering fences, screens, plantings, and renter-friendly options. If you’re asking what can I use for privacy on my patio, check our renter-friendly options for temporary screens, freestanding planters, and trellises that don’t require permits or permanent attachment (see internal guide 8d1b0818-9076-4b70-a09f-3b14ff0556b1). For renter- and condo-friendly tactics, see how to make a condo patio more private. For step-by-step ideas on how to make an apartment patio private, see our guide. The challenge is that HOA CC&Rs and lease agreements frequently restrict fences, permanent posts, and structures that alter grade or are attached to a building. Aesthetic Standards / ARC rules (example HOA: Ladera Ranch), shows common HOA triggers like fire pits, patio covers and trees requiring approval blank" rel="noopener noreferrer">Aesthetic Standards / ARC rules (example HOA: Ladera Ranch) — shows common HOA triggers like fire pits, patio covers and trees requiring approval. Always check your specific rules before buying materials.
- Freestanding privacy screens: powder-coated metal or composite screens stand without being anchored to a wall or fence; some use weighted bases; prices range from $100 for a simple 3-panel screen to $800+ for a full modular system; fully renter-safe
- Bamboo roll fencing: rolls attach to an existing fence, railing, or freestanding frame and create instant visual screening; $30–$80 per roll for a 6-foot height; works well for townhouse patios with existing perimeter railings
- Planter and trellis combinations: large planters (18–24 inches wide) with climbing plants or tall ornamental grasses create a living privacy wall; takes a season or two to fill in but is visually appealing year-round with the right plant selection; no ground anchoring required
- Living walls and vertical planter panels: modular panel systems mount on a freestanding frame and support plants or artificial greenery; look for systems with self-contained irrigation if you want real plants
- Tall container plants: columnar evergreens (arborvitae, sky pencil holly), ornamental grasses (miscanthus, pennisetum), or bamboo in large containers provide immediate screening; containers can go with you when you move
- Lattice panels on freestanding posts: a wood or vinyl lattice panel on a weighted post doesn't require digging if you use a post anchor plate and concrete ballast; grows climbing plants beautifully; check HOA height limits
- Traditional fence additions: if you own the property and a fence is already there, adding height extensions (where code allows) or attaching privacy slats to chain-link is lower cost than replacing it entirely
The same principles apply whether you're dealing with a full backyard or a tight townhouse patio. If you're interested in more specific privacy tactics for smaller outdoor spaces, the sibling guides on making a patio private and what to put around a patio for privacy go deeper on specific product options and plant selections.
Shade solutions without permanent construction
Shade is the single quality-of-life upgrade that makes outdoor spaces actually usable on hot afternoons, but permanent shade structures like pergolas and attached awnings often require permits and HOA approval. Here's the range from most to least commitment.
| Option | Approx. Cost | Permit Usually Required? | DIY Difficulty | Renter-Friendly |
|---|---|---|---|---|
| Patio umbrella (9–11 ft) | $80–$400 | No | None | Yes |
| Cantilever umbrella (13 ft) | $200–$800 | No | None | Yes |
| Shade sail (triangle or rectangle) | $50–$300 DIY | Rarely for temporary | Beginner | Yes if posts are freestanding |
| Freestanding pergola kit | $500–$3,000+ | Often yes over 200 sq ft | Intermediate | With landlord approval |
| Retractable awning (wall-mount) | $600–$3,500 installed | Sometimes | Intermediate–Pro | Generally no |
| Outdoor curtain panels on rod | $50–$200 | No | None | Yes |
Shade sails are the sweet spot for most no-patio setups: relatively inexpensive, visually modern, and fully removable. The catch is that they need anchor points with structural integrity, a wood fence post rated for tension, a buried post in a weighted base, or an existing masonry wall. Never anchor a shade sail to a lightweight garden stake or a gutter. For renters, freestanding shade sail poles with weighted bases ($80–$200 per pole) solve the anchoring problem without any attachment to the property.
Freestanding pergola kits (aluminum or vinyl) have become widely available in the $500–$3,000 range and sit on surface footings rather than buried posts in many cases, making them technically non-permanent in some jurisdictions. But 'non-permanent' doesn't mean 'no permit required': many municipalities require permits for any structure over 100–200 square feet or any structure attached to a house, regardless of how it's anchored. Check with your local building department and HOA before assembling.
Lighting, planting, and finishing touches that make a no-patio space feel real
The difference between a backyard with some furniture on grass and a space that genuinely feels like an outdoor room is almost entirely about the finishing layer: lighting, planting, and a few well-placed hardscape accents. These elements cost relatively little but have a disproportionate visual effect.
Lighting
- String lights: outdoor-rated (IP44 or higher) LED string lights on a pergola, fence, or overhead cable create an enormous ambiance impact for $30–$100; plug-in versions require no permit and are fully renter-friendly
- Solar stake lights: define paths and zone edges, zero wiring required, $15–$60 for a set; longevity varies with battery quality — look for brands with replaceable batteries
- Low-voltage path lighting: runs on a plug-in transformer (no hardwiring, no permit for most jurisdictions); bury the cable 3–6 inches along zone edges; timer-equipped transformers keep it automatic
- Hardwired lighting: any 120V outdoor circuit, new outdoor outlet, or buried low-voltage cable connected to a sub-panel typically requires an electrical permit; check your local authority having jurisdiction (AHJ) before running new wire
Planting and container gardens
- Large containers (18–24 inch diameter) anchor the corners of a space and add color, fragrance, and softness without any ground disturbance
- In-ground planting beds at the perimeter (if you own the space) blur the boundary between the living area and the lawn and make the overall yard feel larger
- Edging between surface materials and lawn areas (metal, composite, or stone) gives the whole space a finished look for $1–$3 per linear foot
- Focal points: a simple birdbath, a large urn, a piece of outdoor-rated art, or a small water feature gives the eye a place to rest and makes the space feel designed rather than assembled
Fire pits and outdoor heating: portable options, safety, and rules
Portable fire pits are one of the most popular additions to no-patio backyards, and also one of the most frequently restricted by HOAs and local fire codes. The International Fire Code defines a recreational fire as burning material in a container up to 3 feet in diameter and 2 feet in height, beyond those dimensions, or with certain fuel types, a burn permit is typically required. Local fire marshal rules vary significantly, so check with your municipality and HOA specifically before buying anything.
- Surface compatibility: a fire pit must sit on a non-combustible surface — gravel, pavers, or compacted stone are all fine; artificial turf, mulch, and wood decking tiles are not appropriate fire-pit surfaces
- Clearance: most manufacturers and fire codes recommend at least 10 feet of clearance from structures, fences, overhangs, and overhead utility lines; check your specific unit's manual for its required clearance
- Propane vs. wood-burning: propane fire pits are cleaner, controllable, and banned by fewer HOAs than wood-burning; wood-burning pits produce embers and are prohibited in many urban and HOA-governed areas
- Portable electric fire pits and tabletop units: zero-emission, fully indoor/outdoor rated units are available for $100–$600; ideal for renters and condo owners; no clearance requirements beyond standard fire safety
- Patio heaters (propane tower type): need stable, level placement and should not be used under low overhangs; tip-over safety switches are required by modern units; store propane tanks according to local code
- HOA note: CC&Rs in many communities require ARC approval for fire features of any kind, even portable ones; get written approval before your first use
Installation basics and maintenance checklist
Regardless of which surface you choose, the installation sequence is largely the same. Rushing any of these steps is the most common reason DIY backyard projects look great for one season and then deteriorate.
- Call 811 (USA) or your local utility-locate service before any digging; wait the required number of days for marking
- Clear vegetation and grade the area; remove sod and topsoil to the required excavation depth for your chosen surface (gravel/pavers: 6–8 inches; tiles on existing level ground: minimal prep)
- Check and correct slope: verify water will run away from the house at approximately 2% (1/4 inch per foot); adjust by adding or removing base material
- Install a weed barrier (optional but helpful for gravel and mulch areas); overlap sections by 6 inches and secure with landscape staples
- Install edge restraints before adding base material; use steel or heavy-duty polymer edging staked into undisturbed soil
- Add and compact base material in 2-inch lifts (plate compactor rental for anything over 50 sq ft); skip this step and your surface will sink
- Install finish surface according to its specific method (screeded sand for pavers, raked gravel, snapped-together tiles, rolled turf)
- Add any finishing details: polymeric joint sand for pavers, edge plantings, lighting, furniture
Ongoing maintenance varies by surface but a spring and fall walkthrough covers most of it: check edging for separation, top-dress gravel or mulch as needed, re-sweep joint sand into paver joints, clean or store seasonal furniture and cushions, and check drainage after the first heavy rain of the season.
Permits, HOA, and landlord rules: what actually requires approval
This section trips up more DIYers than any technical question. The general pattern in most U.S. municipalities is that you need a permit when you: significantly alter drainage or impervious surface coverage, build a structure over a certain square footage (commonly 100–200 sq ft depending on jurisdiction), install hardwired electrical, or build within a setback. But local rules vary enormously, and HOA rules are often stricter than municipal code.
- What commonly triggers a municipal permit: any structure attached to the house, fences over a certain height (typically 6 feet), electrical work including new circuits or hardwired lighting, adding impervious surface over a threshold area, grading changes that alter drainage patterns
- What commonly triggers HOA/ARC review: any exterior hardscape change, fences and screens, shade structures, fire features, landscape changes that alter grade or drainage, paint or material choices that differ from community standards; many CC&Rs require prior written ARC submission with product specs, color samples, and site plan
- Renters: standard lease language requires landlord written approval for permanent alterations and property restoration on departure; get approval in writing and specify which surfaces you plan to use; federal fair housing guidance supports reasonable modifications for disability-related needs, but ordinary aesthetic improvements require standard landlord approval
- Documentation to keep: a copy of your permit, ARC approval letter, product spec sheets, any before-and-after photos, and written landlord approval if renting
- The safe approach if uncertain: call your local building and zoning department, describe the project, and ask specifically what threshold triggers a permit requirement — most will answer this question over the phone
When and how to upgrade to a real patio or deck
A no-patio solution isn't necessarily a forever solution. If you've lived with a gravel or paver tile area for a season or two and find yourself wishing for something more durable, more level, or more polished, that's a reasonable signal to consider a permanent patio or deck. The decision between a patio and a deck comes down to your yard's slope, your house's layout, your budget, and how much structural work you want to take on. A flat yard almost always favors a patio, it's typically cheaper to build and maintain. A sloped yard where the ground drops away from the door may favor a deck, which can be built level on posts above the uneven grade.
| Factor | Permanent Patio | Deck |
|---|---|---|
| Typical installed cost | $8–$20/sq ft (concrete) or $15–$40/sq ft (natural stone) | $15–$35/sq ft (pressure-treated) to $35–$60+/sq ft (composite or hardwood) |
| Best suited for | Flat or gently sloped yards | Sloped yards or elevated entry points |
| Permit requirement | Almost always yes | Almost always yes |
| DIY feasibility | Possible for simple concrete slabs; more complex for stone | Possible for experienced DIYers; structural elements typically require engineer review |
| Maintenance | Low for concrete; moderate for stone joints | Moderate to high for wood; low for composite |
| Home value impact | Positive; adds livable outdoor square footage | Positive; typically valued similarly to patio per sq ft |
The signals that suggest it's time to upgrade from a DIY surface to a full patio or deck: you've outgrown the size of your current setup, you find yourself wishing for a level surface that doesn't need annual maintenance, you're planning to sell in 3–5 years and want the value added, or your gravel or tile area has drainage problems that a proper engineered slab would solve. If you're weighing those options, the detailed patio vs. deck comparison guides on this site walk through costs, structural considerations, and home value impacts in much more depth.
Actionable next steps and your decision checklist
Here's what to do before you spend anything. Work through this list in order and you'll avoid the most common and expensive mistakes.
- Measure your usable outdoor area and sketch a rough base map with dimensions, access points, slopes, shade zones, and utility locations
- Check your lease, HOA CC&Rs, or municipal zoning rules to find out what requires approval; make a note of height limits, setback distances, and impervious surface thresholds
- If renting or in an HOA: draft a short written request to your landlord or ARC describing the materials and confirming it's non-permanent; get a written response before purchasing anything
- Run a basic soil drainage test (dig a 12-inch hole, fill with water, and time how fast it drains — faster than 1 inch per hour is well-drained; slower than 0.2 inches per hour is poorly drained and affects surface choices significantly)
- Decide on permanence: are you planning to stay 5+ years and own the home? A dry-laid paver area or compacted stone base is worth the investment. Moving in 1–2 years or renting? Stick with interlocking tiles, gravel, or modular surfaces you can take with you
- Get material cost estimates for your square footage using the per-sq-ft ranges in this guide; add 10% overage for waste and cuts
- Identify what tools you have vs. what you'll need to rent (plate compactor, line level, sod cutter) and add those costs to your budget
- Plan the zones on paper before you order anything: dining footprint, lounging footprint, any fire or play area, and the paths between them
- Order or shop for surface material, edging, and weed barrier in one trip to avoid mid-project delays
- After installation: photograph everything before you add furniture, and keep your permits, product receipts, and HOA approval letters in one folder
The buying list for a basic gravel or tile setup on a 12x16-foot area (192 sq ft) is manageable: landscape edging (60 linear feet), weed barrier (roughly 220 sq ft), base material (about 1 ton of compacted gravel per 50 sq ft at 4-inch depth), finish material, and two bags of landscape staples. Plate compactor rental for a half day adds $40–$80. Total material cost for a gravel installation at this scale is typically $250–$600 before furniture. Tile or paver installations at the same scale range from $600 to $2,400 depending on material choice. Both are a long way from the $5,000–$20,000 cost of a professionally installed poured concrete or full stone patio, and either one can serve as a satisfying, functional outdoor space in the meantime.
FAQ
What primary site-assessment facts must the article include?
Measured property dimensions and usable square footage; property lines, setbacks and easements; house footprint and access/gate widths; existing utilities (above- and below-ground) and cleanouts; slope/grade measurements and drainage flow arrows; soil type, compaction and infiltration/drainage test results; existing vegetation and tree drip-lines; prevailing winds and microclimate (sun/shade mapping by hour); impermeable-area totals and current hardscapes; noise/views and privacy sightlines; HOA/municipal restrictions or required approvals. (Cite: land-grant extension site-analysis guidance: UGA, MSU, Oregon State.)
Which authoritative sources should be cited for site-assessment methodology?
University cooperative-extension publications on site analysis and landscape design (e.g., Mississippi State Extension, UGA Extension, Oregon State Extension, Penn State Extension). These provide base-map and overlay methods, slope/drainage guidance, and soil-testing recommendations.
What factual details are required about alternative surface options (gravel, crushed stone, pavers, patio tiles, mulch, artificial turf, decking tiles)?
For each material include: typical construction/installation method (required sub-base depth/compaction, edging, drainage, geotextile use), durability and load-bearing characteristics, maintenance needs, lifespan expectations, typical installed cost ranges (per sq ft), DIY difficulty level, climate/soil suitability, common failure modes (e.g., migration, sinkage, frost heave), and renter/HOA friendliness (removable vs permanent). (Cite: ICPI for pavers, Home Depot/HomeAdvisor/contractor guides for gravel and costs, manufacturer install guides for deck tiles and turf.)
What specific technical guidance must be quoted for pavers and compacted gravel installations?
Paver guidance: excavation, compacted aggregate base, geotextile when specified, screeded bedding sand (~1"), edge restraints, joint filling, and plate compaction—failures result from poor base or missing edge restraints (ICPI). Gravel/compacted stone: edge restraints, 4–6" compacted crushed-stone base (varies by load and soil), optional weed barrier, and periodic topping/raking to maintain grade (trade/DIY sources like Home Depot).
What safety, drainage and grading facts are essential?
Design hardscape surfaces to slope away from structures (recommended ~1/4" per foot or ~2%); map and account for existing drainage paths; avoid installing impermeable or compacted surfaces that create ponding near foundations; test subsoil infiltration; warn that improper slope or base causes water intrusion and structural issues. (Cite: Oregon State Extension slope/drainage guidance.)
Which cost and budget information should the article include and what sources back these ranges?
Provide typical installed cost ranges per material (example ranges to state as approximate): gravel ~$1–$4/sq ft installed; basic interlocking pavers ~$5–$12/sq ft DIY to $10–$25+/sq ft contractor-installed; artificial turf commonly ~$8–$15/sq ft installed (market varies). Note small-area premiums and prep/grading impact costs. Use aggregated cost guides from HomeAdvisor, Home Depot and similar industry resources, and state ranges as estimates rather than guarantees.
Next Article
How to Decorate a Townhouse Patio: HOA & Rental-Friendly Tips
How to decorate a townhouse patio: step-by-step, HOA-friendly ideas, layouts, privacy, budget plans.