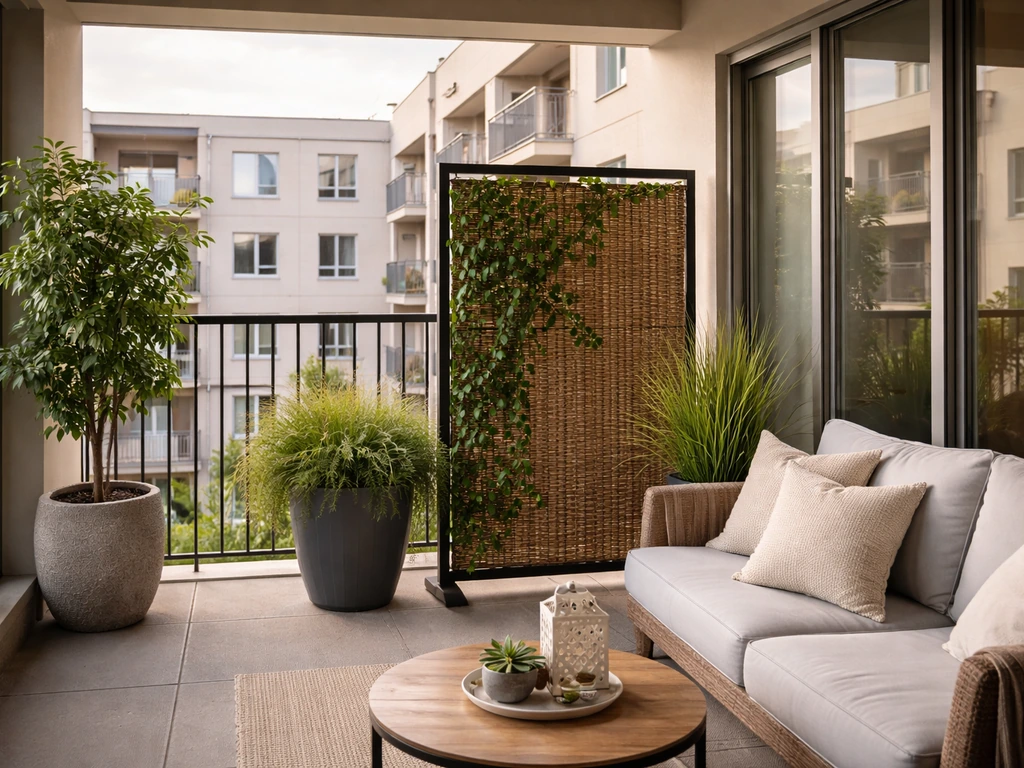
You can absolutely transform a townhouse patio into a space you actually use, even if it's small, hemmed in by neighbors, or governed by an HOA. The key moves are: set a clear goal for the space, check your CC&Rs before buying a single thing, lay out furniture at the right scale, add privacy where you need it, and layer in flooring, shade, lighting, and plants to make it feel finished. Whether you're working with a 6x10 concrete slab or a 15x20 rear patio, the process is the same, just the scale changes.
How to Decorate a Townhouse Patio: HOA & Rental-Friendly Tips

Miles Hart
13 Jul 2026
Who this guide is for and what you'll walk away with
This guide is written for townhouse, condo, and apartment dwellers, owners and renters, who want a patio that looks intentional and works hard for them. You might be starting with bare concrete, a gravel strip, or a small balcony-style patio with neighbors on both sides. Maybe your HOA has rules you haven't read yet, or you're renting and can't drill into anything. All of that is addressed here. By the time you finish, you'll have a realistic plan: a layout that fits your actual square footage, privacy options that won't get you a violation notice, furniture choices scaled to your space, a flooring strategy, and a budget range for low-, mid-, and high-investment makeovers.
Set your goals and constraints before you spend anything
The single most common mistake on small patios is buying furniture or decor before deciding how the space should actually function. A patio that tries to be a dining room, a lounge, a garden, and a storage area all at once ends up being none of those things. Spend 10 minutes with this checklist first.
- Primary use: What will you do here most often? Dining with guests, solo morning coffee, container gardening, kids' play, grilling, working outside?
- Secondary use: What's the second priority if space allows? Lounging, storage, a small herb garden?
- Number of people: How many people do you typically host? Two, four, six? This drives furniture size directly.
- Budget ceiling: What is your total budget — not per item, but for the whole project? $200, $1,000, $5,000?
- Access: How many doorways open onto the patio? Are there steps? Does a main walkway cut through it?
- Privacy needs: Do you have neighbors above, beside, or directly facing you? Which directions need screening?
- Sun and shade: When do you use the patio most? Is it in full sun at that time? Does it get afternoon glare?
- Maintenance tolerance: Are you willing to seal pavers, water plants, or oil wood furniture seasonally? Or do you need near-zero maintenance materials?
- Rental or ownership status: Are you renting? If so, anything permanent, drilled, or structural is off the table without landlord approval.
- HOA or building rules: Does an HOA, condo association, or co-op board govern exterior changes? (More on this below.)
Once you've answered these, circle your single primary use and budget. Everything else flows from those two decisions.
Measure and map your space before anything else
Grab a tape measure and spend five minutes getting real numbers. Measure length, width, and any irregular corners or bump-outs. Note where doors, steps, gas lines, hose bibs, and electrical outlets are. Then sketch a rough to-scale floor plan on grid paper (1 square = 1 foot works well). Most people are surprised by how much space standard furniture actually eats.
Very small patios (under 80 sq ft)
On a patio under roughly 8x10 feet, you have room for one primary zone only. A bistro table with two chairs or a loveseat with a small side table is about the limit before traffic flow gets awkward. The general rule is to leave at least 24 to 36 inches of walking clearance around seated furniture. On a 6x8 slab that means your furniture footprint can be roughly 4x5 feet at most. Keep sightlines open toward the door so the space doesn't feel like a corridor. Wall-mount or hang items (lights, small herb planters, a mirror) to add interest without taking up floor space.
Medium patios (80 to 250 sq ft)
A 12x16 or 10x20 patio gives you real flexibility for two zones. A common layout is a dining area near the door or grill, and a lounge corner toward the back or a side fence. Plan a clear 3-foot path between zones and from the door to the yard. Sketch this on your floor plan before ordering furniture. If neighbors can see directly into a lounge corner from the side, that's your priority privacy location, flag it now and you'll address it in the privacy section below.
Check rules and permissions before you buy or build anything
This step is non-negotiable if you live in a governed community. CC&Rs (Covenants, Conditions and Restrictions) are legally binding documents recorded with your property deed. They commonly restrict fences, awnings, screens, shade structures, and other exterior changes, and they typically require prior written approval from the association's board or architectural control committee (ACC or ARC) before you make any change. Sample CC&R language often explicitly forbids exterior fixtures or structures (including awnings, screens, clotheslines, and similar items) except as authorized by the Association, and holds the owner financially liable for damages caused by unapproved exterior alterations. Violations can result in fines, required removal at your expense, and complications at resale.
Design review standards vary considerably by community. Some HOAs set maximum heights for privacy screens or fences, a six-foot maximum is a common example. For example, the Winslow Farm sample CCR (Approved CCR: Section 9. Fences, Walls, Screens) states patio screens/privacy fences are limited to no higher than six feet without prior approval blank" rel="noopener noreferrer">For example, the Winslow Farm sample CCR (Approved CCR: Section 9. Fences, Walls, Screens) states patio screens/privacy fences are limited to no higher than six feet without prior approval.. Others define and regulate patio enclosures specifically, controlling permitted materials, colors, and configurations. The Amended and Restated Residential Design Guidelines (Walnut Creek Community Association) specifically define 'patio enclosures' and set approval requirements blank" rel="noopener noreferrer">The Amended and Restated Residential Design Guidelines (Walnut Creek Community Association) specifically define 'patio enclosures' and set approval requirements.. Getting approval is usually straightforward if you submit a written request with a description, dimensions, and sometimes a photo or product spec sheet. The approval timeline is often 30 to 60 days, so plan ahead.
On the municipal building code side, semi-permanent structures like pergolas, permanent awnings, and any enclosure with walls or a roof typically require a building permit. Permit costs for small awning or shade installations often range from roughly $25 to $100, but larger or more complex structures with plan review can run higher. Outdoor electrical work, including adding outlets for string lights or a motorized awning, must comply with the National Electrical Code, which requires GFCI protection for all outdoor receptacles and weatherproof in-use covers on wet-location outlets. If you're adding any electrical, hire a licensed electrician and pull the permit.
- Pull your CC&Rs and read the sections on exterior alterations, fences, screens, and patio enclosures
- Identify whether you need ACC/ARC written approval and what the submission process is
- Check height limits for privacy screens, fences, or trellises in your community's design standards
- Contact your local building department to ask whether a permit is required for your specific project
- If you're renting, get written landlord approval for any semi-permanent change — not just verbal agreement
- Check for any utility easements or setbacks that affect where structures can be placed
- For electrical additions, confirm your local NEC adoption and hire a licensed electrician
Layout templates for common patio use cases
Here are four practical layout patterns that work well for townhouse patios. Scale these up or down based on your measurements. All dimensions are approximate starting points, not rigid rules.
| Layout Type | Best Patio Size | Key Furniture | Notes |
|---|---|---|---|
| Entertaining / social | 150–250 sq ft | 4–6 person dining table, side chairs, side table | Keep a 3-ft path from door to seating; position table away from direct sightlines of neighbors |
| Lounging / relaxing | 80–150 sq ft | Loveseat or 2 lounge chairs, small coffee table | Orient seating away from highest-traffic neighbor view; add a side privacy screen or trellis |
| Dining only | 60–120 sq ft | Bistro table (2) or compact 4-person table | Round tables save space and allow easier traffic flow on narrow patios |
| Storage + function | Any size | Bench with storage lid, vertical planters, wall hooks | Good secondary zone in a corner; combine with a shade sail or umbrella to define the space |
A note on scale: standard outdoor dining tables are typically 36 to 40 inches wide and 60 to 72 inches long for four to six people. On a 10x12 patio that leaves very little room for chairs to pull back, a path to the door, and a grill. Compact tables (32x48 inches for four people) or round pedestal tables (42-inch diameter seats four comfortably) are much more practical on constrained patios.
Privacy solutions that actually work for townhouses, condos, and apartments
Privacy is usually the first problem to solve on a townhouse patio, neighbors are close, and the walls or fences that come with the unit rarely give you full screening. The good news is that there are more options than most people realize, and several of them are reversible enough for renters and HOA-governed owners. If you're wondering what to put around a patio for privacy, common solutions include outdoor curtains, freestanding screens, trellises, large planters, and living walls. For a concise list of practical privacy options and where each works best, see what can I use for privacy on my patio. For detailed, practical ideas on how to make a condo patio more private, see our section on how to make a condo patio more private for renter- and HOA-friendly solutions. For more step-by-step, renter- and HOA-friendly options, see a focused guide on how to make an apartment patio private. For detailed step-by-step ideas on how to make patio private, see our guide how to make patio private.
Outdoor curtains
Weatherproof outdoor curtains hung from a tension rod, curtain wire, or a freestanding curtain frame are one of the most flexible privacy options available. They soften the space visually, provide screening when drawn, and can be removed entirely. Look for 100% solution-dyed acrylic or polyester fabrics rated for outdoor use, these resist mildew and UV fade. Freestanding curtain stands (no drilling required) work well for renters. Cost is roughly $30 to $80 per panel for quality outdoor fabric.
Privacy screens and panels
Freestanding privacy screens in metal, wood composite, or bamboo are available in heights from 4 to 6 feet and widths from 2 to 4 feet per panel. They fold, link together, or stand independently with a weighted base. They're fully removable and leave no marks. Bamboo roll screens attached to an existing fence or railing with zip ties or hooks are another no-damage option, though they're less durable (typically 3 to 5 years before UV breakdown).
Trellises and lattice
A trellis or lattice panel provides partial privacy now and more coverage as climbing plants grow in. You can lean a trellis panel against a wall or fence without fastening it, though you'll want to anchor it to prevent wind tipping. Cedar and pressure-treated wood lattice panels are available at most home centers for $20 to $60 per 4x8 panel. Powder-coated steel trellises are more durable and often more visually refined. The tradeoff: lattice is only partially opaque until plants cover it, budget a full growing season before it provides real screening.
Large planters and plant screens
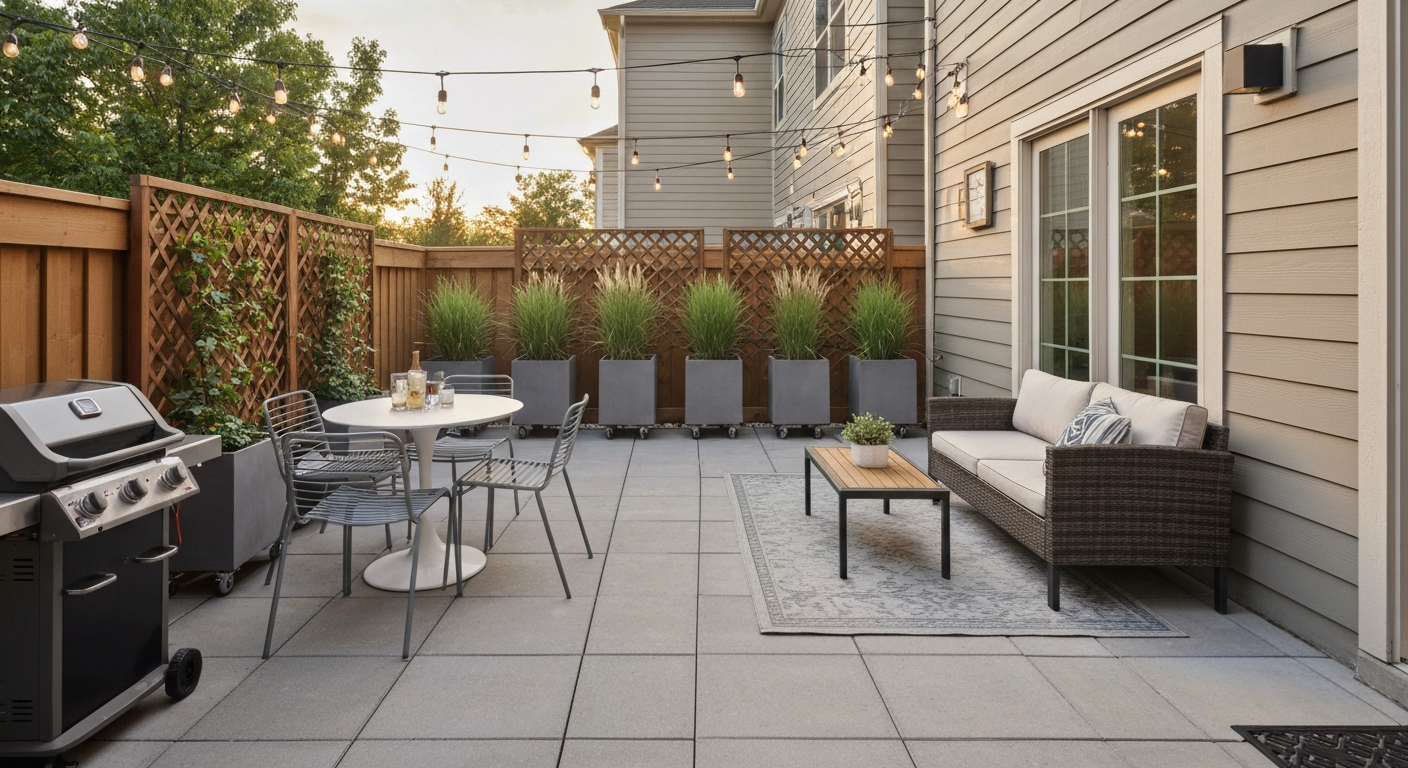
A row of large planters (18 to 24 inches in diameter, 18 to 24 inches tall) filled with tall grasses, bamboo (clumping varieties only, running bamboo spreads aggressively), or columnar evergreens like Italian cypress can create a living privacy wall. Place planters on furniture dollies for easy repositioning. This option is renter-friendly, HOA-friendly in most cases, and adds greenery, the main tradeoff is watering commitment and winter care in cold climates. For faster coverage, choose arborvitae (grows 12 to 18 inches per year in good conditions) or 'Sky Pencil' Japanese holly.
Living walls and vertical planters
Modular living wall panels or pocket planters mounted on an existing fence or wall add greenery and partial screening. Freestanding living wall frames on feet require no attachment at all. These work best in climates with reliable rainfall or if you're willing to set up a drip irrigation line. Succulents and drought-tolerant herbs (rosemary, thyme) work well in dry climates; ferns, pothos, and trailing plants suit shadier or humid environments.
Freestanding fences
A freestanding fence section, metal or composite panels in a weighted base, provides solid screening without digging postholes or fastening to an existing structure. These products are commonly marketed for patios and event spaces. They typically come in 6-foot height sections with weighted feet or ground spikes. Confirm your HOA's height limit before buying; six feet is a commonly cited maximum in many community standards.
Rental- and HOA-friendly privacy fixes
If you're renting or subject to strict HOA oversight, the priority is reversibility, nothing that requires drilling, digging, permanent adhesive, or structural modification. The options below leave no permanent trace and can typically be removed before a move-out inspection or brought to a new property.
- Freestanding privacy screens with weighted bases (no anchoring needed)
- Bamboo or reed roll screens attached with zip ties or removable hooks to existing railings or fences
- Outdoor curtains on freestanding curtain rod stands or tension rods in existing openings
- Large planters on wheels or casters with tall grasses, bamboo, or arborvitae
- Shade sails attached to existing fence posts, railing posts, or a freestanding umbrella stand (check that attachment points can handle wind load)
- Outdoor rugs to define zones — fully portable, zero damage
- String lights on outdoor-rated hooks with adhesive or pressure clips rather than screws
Before installing anything, even something reversible, check four things with your landlord or HOA: (1) whether any exterior addition needs written approval, (2) height limits for any screen or planter arrangement, (3) whether roof or overhead attachments are permitted (relevant for shade sails), and (4) whether specific materials or colors are prohibited. Getting this in writing protects you. For condos and apartments, the rules around what constitutes your private patio versus limited common area also affect what you're allowed to modify, check your condo declaration or lease carefully.
Choosing furniture that fits a small patio
Most standard outdoor furniture is sized for suburban decks and backyards, not townhouse patios. Buying the wrong scale is the fastest way to make a small space feel cramped and frustrating. Here's how to approach it.
Scale and proportion
For patios under 100 square feet, limit yourself to pieces with a maximum seat depth of 28 to 30 inches (standard lounge chairs often run 32 to 36 inches deep, that adds up fast). Bistro chairs at 16 to 18 inches deep are dramatically more space-efficient. Round or square tables take up less visual and physical space than rectangular ones on a narrow patio. Always measure the furniture footprint, add the space needed to pull chairs out (24 inches minimum behind each chair), and check that against your floor plan before ordering.
Materials for outdoor durability
| Material | Durability | Maintenance | Best for | Approx. cost range |
|---|---|---|---|---|
| Powder-coated steel/aluminum | High (rust-resistant if coating intact) | Low — wipe clean, check for chips | Bistro sets, modern patios | $80–$400 for a set |
| All-weather wicker (resin) | Good — UV-stable resins last 5–10 yrs | Low — occasional rinse | Lounge chairs, sofas | $150–$800 per piece |
| Teak wood | Excellent — 20+ years with minimal care | Low-medium — oil annually or let silver | Premium dining, accent pieces | $300–$2,000+ per piece |
| Cedar or pine (pressure treated) | Medium — 8–15 yrs with sealing | Medium — seal every 1–2 years | DIY built-ins, benches | $50–$200 in lumber |
| Polypropylene / plastic | Good — lightweight, UV-stabilized | Very low | Stackable chairs, budget sets | $20–$120 per chair |
Compact and multi-functional pieces
On small patios, multi-functional furniture earns its keep. A storage bench with a hinged lid holds cushions, tools, or a gas grill cover and also provides extra seating. Folding bistro chairs hang on a wall hook when not in use. Stackable chairs nest in a corner and come out only when you have guests. A side table with a shelf underneath doubles storage. Nesting tables (two or three tables that slide together) function as a coffee table and pop out as serving surfaces when you need them. These aren't compromises, they're smart choices for the space.
Furniture placement tips
- Anchor seating with an outdoor rug to define the zone — this also makes the arrangement look intentional rather than random
- Float furniture slightly away from walls (6 to 12 inches) to avoid a cramped, pushed-in look
- Place the largest piece (sofa or dining table) first, then work outward — don't try to fit everything and then squeeze in the biggest piece
- Orient seating toward your best view or focal point (a garden, a planted wall, a feature planter) and away from the neighbors' direct sightline
- Leave the path from the door clear — a blocked doorway makes the whole space feel inaccessible
Flooring options: what to put down and what it costs
Most townhouse patios come with bare concrete, existing pavers, or in some cases gravel. The flooring choice sets the tone for the whole space and has real implications for renters, HOA owners, and budget.
| Flooring Option | Permanence | Renter/HOA-Friendly | DIY Install | Approx. Cost (per sq ft) |
|---|---|---|---|---|
| Outdoor rug | Portable, no install | Yes | Yes — lay it down | $1–$4 |
| Interlocking snap tiles (composite/plastic) | Temporary, removable | Yes — no penetration | Yes — tool-free | $2–$6 |
| Interlocking wood-slat tiles | Temporary, removable | Usually yes | Yes — tool-free | $3–$8 |
| Pavers (laid loose or on sand) | Semi-permanent | Check HOA | Yes — moderate skill | $4–$12 |
| Concrete overlay / stain | Permanent | Rarely (renter); check HOA | Moderate — prep matters | $2–$8 (DIY); $6–$18 (pro) |
| Composite decking tiles / boards | Semi-to-permanent | Check HOA | Moderate | $5–$15 |
Interlocking snap tiles deserve a closer look for renters and HOA residents. Products like 12x12-inch composite or polypropylene interlocking tiles install tool-free directly over existing surfaces, have drainage slots built in, and unsnap for removal. They're sold at major home centers by the piece or in packs covering 10 to 30 square feet. They won't shift or slide the way an outdoor rug can, and they transform the look of bare concrete dramatically. The tradeoff is cost: covering a 150-square-foot patio runs roughly $300 to $600 in tiles, compared to $150 to $600 for an outdoor rug of the same area.
Shade solutions: umbrellas, pergolas, sails, and awnings
Shade is often the difference between a patio you actually use in summer and one that sits empty from June through August. The right solution depends on your space, your rules, and your budget.
- Patio umbrella (freestanding or table-mount): lowest cost ($50–$400), most portable, fully reversible, no permits required. Adequate for a single dining or lounge zone. Needs a weighted base (50 lbs minimum) for stability.
- Shade sail: moderate cost ($100–$400 DIY or up to $1,000 installed), requires anchor points that can handle wind loads — verify your fence posts or wall attachments can bear the tension before installing. Dramatic visual effect. Many HOAs require approval; some do not.
- Retractable awning: installed retractable awnings run roughly $1,000 to $3,500 for typical consumer sizes. Motorized units require electrical work (GFCI-protected outdoor circuit). Usually requires a permit and HOA approval. Best for consistent shade over a fixed zone like a dining table or door.
- Freestanding pergola: mid-to-high cost ($500–$3,000 DIY kit, more for custom). Creates structure and can support curtains, shade cloth, or climbing plants. Many jurisdictions require a permit for anything attached to the structure; freestanding pergolas sometimes avoid this — check locally.
- Shade cloth stretched between poles: inexpensive ($50–$200), very functional, not the most polished look but practical for a working or gardening patio.
Permanent awnings and pergolas are in a different category from umbrellas and shade sails when it comes to HOA and permit requirements. If your space is covered by CC&Rs, submit for approval before purchasing. For renters, freestanding options (umbrella, freestanding pergola kit, shade sail on freestanding poles) are the only realistic choices unless your landlord explicitly approves something more permanent in writing.
Lighting, textiles, and decor to finish the space
Once layout, privacy, flooring, and shade are sorted, the finishing layer, lighting, cushions, plants, and accessories, is what makes a patio feel like a real room rather than a concrete pad with chairs on it.
Outdoor lighting
String lights (also called bistro lights) are the easiest win on a patio. Solar-powered versions require no wiring at all. Plug-in versions need an outdoor GFCI outlet, if you don't have one, a licensed electrician can add one (pull a permit and use weatherproof in-use covers per NEC requirements). Hang string lights overhead across the patio zone, from a pergola, or along a fence line. Avoid clipping them to soft materials that sag. For task lighting near a grill or dining table, a weather-rated wall sconce or a battery-powered lantern works well.
Cushions and textiles
Outdoor cushions in solution-dyed acrylic (Sunbrella is the most recognized brand, but many comparable products exist) handle rain, UV, and mildew far better than indoor fabric. For small patios, solid colors or simple geometric patterns in two or three colors work better than busy prints that can make the space feel chaotic. Store cushions in a storage bench or a waterproof cushion bag when not in use, this dramatically extends their lifespan.
Plants and containers
Container plants are one of the most flexible design tools on a patio. They add color, texture, privacy, and life without any permanent installation. A few practical plant choices for patio containers: lavender (drought-tolerant, fragrant, pollinators love it), dwarf citrus in warm climates, ornamental grasses for height and movement, petunias or calibrachoa for cascading color, and herbs like basil, rosemary, and thyme if you cook. Group containers in odd numbers (three or five) at varying heights for a more composed look. Use pot feet or risers to allow drainage and prevent staining on concrete.
Budget makeover plans: low, mid, and high
Here are three realistic budget scenarios with rough cost ranges and shopping priorities. These are starting points based on typical retail prices as of mid-2026, regional variation, sales, and material choices will shift the numbers.
Low budget: $200 to $500
- Outdoor rug to define the zone ($50–$150)
- Two folding bistro chairs and a small table ($80–$200 for a set)
- Two outdoor cushions in weather-resistant fabric ($30–$60)
- Freestanding patio umbrella with weighted base ($80–$180)
- Solar string lights ($20–$50)
- Two large planters with tall grasses or arborvitae for partial privacy ($40–$100)
- Total estimated range: $300–$740 depending on sales and choices
Mid budget: $500 to $1,500
- Interlocking composite or wood-slat deck tiles over existing concrete ($300–$600 for 100–150 sq ft)
- Compact 4-person outdoor dining set or a loveseat with two accent chairs ($400–$800)
- Freestanding privacy screen or bamboo trellis panels with climbing plants ($100–$200)
- Shade sail with freestanding post anchors ($150–$350)
- Plug-in string lights (with existing GFCI outlet) plus two lanterns ($60–$120)
- Container plants, cushions, and an outdoor rug ($100–$250)
- Total estimated range: $1,110–$2,320 — trim by prioritizing flooring or furniture, not both
High budget: $1,500 to $5,000+
- Freestanding pergola kit with shade cloth or curtains ($800–$2,500 installed DIY, more for custom)
- Premium aluminum or teak furniture set ($1,000–$3,000)
- Retractable awning (if permitted and approved) ($1,500–$3,500 installed)
- Professional concrete overlay or paver installation ($800–$2,500 for a medium patio)
- Hardwired outdoor lighting with GFCI circuit added by an electrician ($300–$800 including permit)
- Living wall installation or mature screening plants ($200–$600)
- Total estimated range: $4,600–$12,900 — at this level, professional installation for some components makes sense
Alternatives if you don't have a fixed patio
Some townhouses and apartments don't have a defined patio slab, just a grass strip, gravel area, or small yard. The same principles apply, but you're defining the zone first before decorating it. A 10x12 outdoor rug on gravel or grass immediately creates a defined patio-like area. Interlocking tiles laid over gravel (use a weed barrier first) create a more solid surface. A freestanding pergola or shade sail can anchor the space overhead. If you're working from a blank-slate backyard without any hardscaping, the process is closer to creating a patio than decorating one, starting with flooring definition, then furniture, then shade and privacy. If you're working from a blank-slate backyard and need step-by-step ideas for creating zones without a slab, see our guide on how to decorate a backyard without patio for layouts, flooring alternatives, and low-cost anchoring strategies.
Maintenance and seasonal care
A patio looks good at the beginning of every season, the work is keeping it that way with minimal effort. Here's a simple maintenance schedule that covers most materials.
| Task | Frequency | Notes |
|---|---|---|
| Rinse furniture and cushions | Monthly in use season | Hose down frames; hand-wash cushion covers if removable |
| Clean outdoor rug | Every 4–6 weeks | Hose off, scrub with mild soap, let dry fully before rolling back down |
| Check interlocking tiles for debris buildup | Monthly | Pop up a few tiles to clear leaves or standing water underneath |
| Inspect string lights and connections | Monthly | Look for frayed insulation, corroded sockets, or loose connections |
| Oil or seal wood furniture / wood tiles | Annually (spring) | Teak can go longer; pine/cedar needs annual attention |
| Winterize cushions and textiles | Before first hard frost | Store in a shed, garage, or weatherproof cushion bag — do not leave in a leaky bin |
| Check planters and drainage holes | Monthly in growing season | Blocked drainage causes root rot; lift planters seasonally to prevent concrete staining |
| Inspect privacy screens and anchors for wind damage | After major storms | Tighten hardware, replace damaged bamboo rolls, re-anchor freestanding screens |
DIY vs. hiring a pro: when to call someone
Most of what's covered in this guide is genuinely DIY-friendly: laying interlocking tiles, hanging outdoor curtains, assembling pergola kits, planting containers, and installing string lights on an existing outlet are all weekend-afternoon projects. Where it makes sense to hire a pro: any electrical work (adding outlets, running circuits for motorized awnings), any structural attachment to the house (wall-mounted pergola beams, through-wall awning mounts), and any paver or concrete work on a large or sloped area where drainage needs to be engineered correctly. Getting those parts wrong is expensive to fix, the permit and contractor cost upfront is almost always less than the remediation cost later.
If you're deciding between upgrading a patio versus building a deck or converting to a covered porch, those involve meaningfully different costs, permitting requirements, and structural considerations. A patio is generally the lowest-complexity and lowest-cost starting point, but the right answer depends on your property and goals.
FAQ
What is the first step when planning to decorate a townhouse patio (especially if you rent or live in an HOA)?
Start with a short goal-setting checklist: 1) Define primary uses (entertaining, dining, lounging, storage, gardening). 2) Measure the patio (length, width, clearances, door swing). 3) Note fixed elements (railings, posts, electrical outlets, drainage). 4) Check legal limits: read your lease and any CC&Rs/ARC/ACC/HOA guidelines for exterior changes and get written approval for fixtures or enclosures if required. 5) Set a realistic budget and timeline. 6) Identify must-haves vs flexible items. This prevents wasted purchases and avoids violations.
How should I approach layout for very small vs medium townhouse patios?
Use a simple layout framework: 1) Define a circulation path (minimum 30–36" recommended for walkways where possible). 2) Choose a dominant function and size furniture accordingly (e.g., two small chairs + side table for tiny patios; a 48" bistro set or compact loveseat for medium patios). 3) Use multi-purpose pieces (storage bench, folding tables). 4) Visual tricks: orient seating toward views, place taller planters at the back or edge to preserve floor area, and use vertical elements (trellises, shelves) to keep floor space open. 5) Sketch to scale or use an online room planner with measured dimensions.
What privacy solutions work best for townhouses, condos and apartments while staying rental- and HOA-friendly?
Options ranked by invasiveness and HOA/rental friendliness: 1) Non-penetrating/temporary: tall freestanding planters, bamboo screens on planters, portable lattice panels, outdoor curtains hung from tension rods or ceiling hooks if permitted. 2) Semi-permanent but often acceptable: clip-on balcony screens or edge-attached balcony privacy screens that don’t alter structure (check HOA rules). 3) Permanent: attached enclosures, fences or fixed lattice usually require HOA/ARC approval and possibly permits. Always check CC&Rs and lease rules for height limits (commonly 6 ft caps), material/color constraints and approval processes before installing anything attached to the building.
Which plants are best for patio privacy and low maintenance?
Choose species based on light, climate, weight tolerance (for balconies), and container size: 1) Fast-growing evergreen screens: dwarf bamboo (clumping varieties for containers), evergreen hollies (compact types), boxwood or yew in larger planters. 2) Climbing privacy: clematis, star jasmine, or noninvasive clematis cultivars on trellises. 3) Tall ornamental grasses for screening: miscanthus (dwarf types) or carex. 4) For balconies, prefer lightweight, shallow-rooting container plants and use adequate drainage trays. Avoid heavy soil loads on upper-level balconies; consult building management.
What furniture, textiles and lighting choices are best scaled to patios?
Furniture: choose pieces scaled to the footprint—slim-profile metal or rattan chairs, narrow benches, folding bistro sets, multi-use storage benches. Measure door clearances before buying. Textiles: outdoor cushions and rugs made from solution-dyed acrylic or olefin for UV and mildew resistance; pick small-format rugs sized to leave a 6–12" border around edges. Lighting: battery or solar-powered string lights, hardwired fixtures only if installed per code and with HOA/landlord permission; use GFCI-protected outdoor outlets for plug-in lighting. Use layered light sources—task (lantern/table lamps), ambient (strings), and accent (spotlights for plants).
How do flooring and shade choices compare (cost, DIY suitability, permanency)?
Common options: 1) Outdoor rugs: lowest cost, renter-friendly, DIY (no-permit), seasonal. 2) Interlocking deck tiles (composite/wood-look/plastic): moderate cost, tool-free snap systems, removable—good for rentals. 3) Composite or pressure-treated decking overlays: higher cost, more permanent, may require HOA or permits. 4) Pavers/concrete overlays: permanent, high cost, likely need approval/permits. Shade: umbrellas (low cost, portable), shade sails (moderate cost, anchors may need engineering), pergolas/permanent awnings (high cost, likely require permits/HOA approval; motorized awnings add electrical work). Choose based on budget, permanence preference and code/HOA constraints.
Next Article
How to Make an Apartment Patio Private: Step-by-Step
Step-by-step ways to make an apartment patio private now and long-term, factoring HOA rules, sightlines, and balcony ins