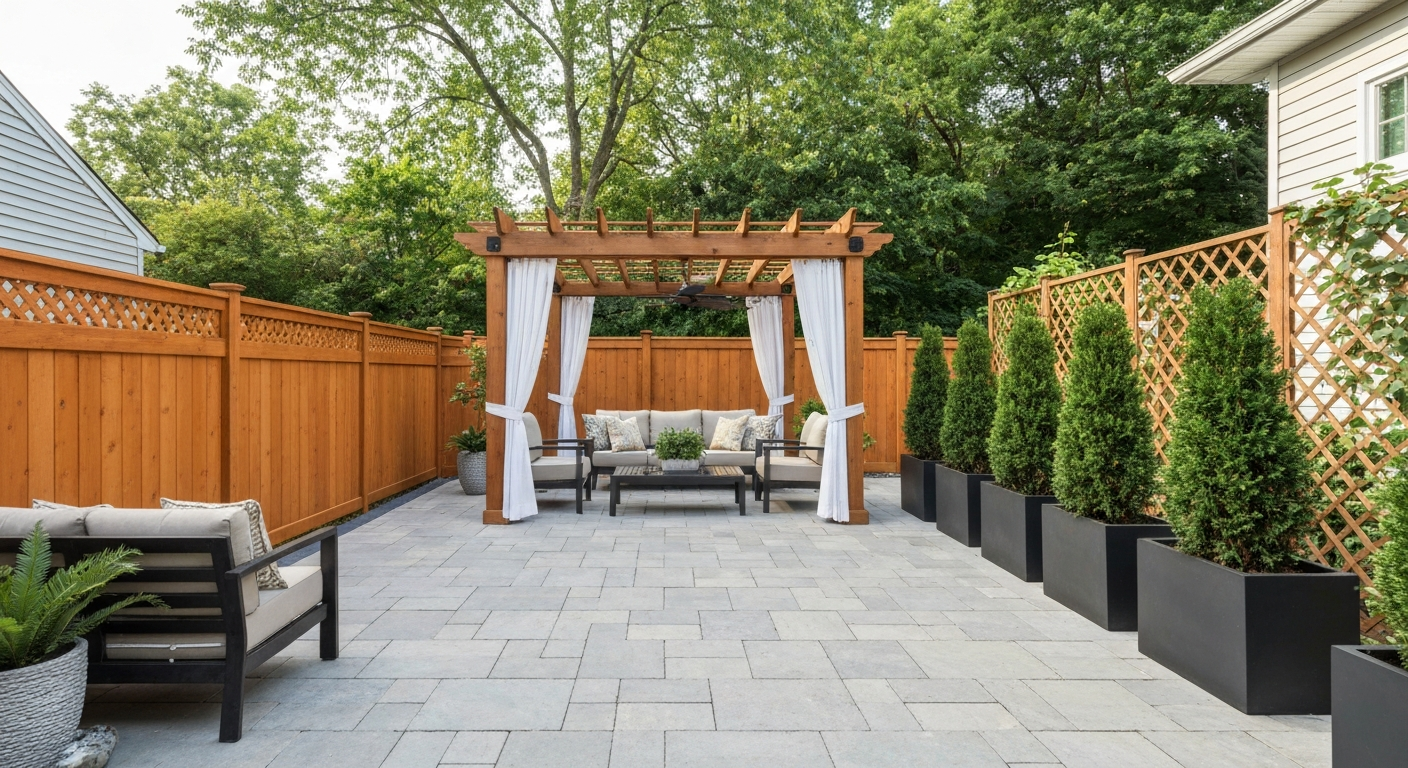
You can make a condo patio more private with options ranging from a $30 bamboo roll shade to a $10,000+ screened enclosure, but the single most important step happens before you buy anything: check your HOA's CC&Rs, your lease (if you rent), and your local building department to find out what's actually allowed. Most condo and townhouse residents have more options than they think, but jumping straight to installation without that check is how people end up removing work they just paid for.
How to Make a Condo Patio More Private: 10 Smart Ideas

Miles Hart
8 Aug 2026
Who this guide is for and how to use it
This guide is written for condo owners, townhouse residents, and renters who have a patio, balcony, or terrace and want more privacy without violating building rules or triggering unexpected costs. For quick ideas on what to put around a patio for privacy, review the temporary, semi-permanent, and permanent solution sections below. For step-by-step tips on how to make an apartment patio private, see our detailed guide on common solutions and permitting considerations. Whether you're on a ground-floor patio surrounded by neighbors, a third-floor balcony with no visual barrier from the street, or a rooftop terrace in a dense city, the process is the same: assess what's allowed, measure your space, choose the right solution tier, then install or hire out. Work through the sections in order the first time through. Once you know your constraints from the checklist section, you can skip to the cost table and the solution category that fits your situation.
Before you do anything: site, HOA, permit, and structural checklist
Every condo privacy project runs through the same set of gatekeepers. Missing one of them is the most expensive mistake you can make. Go through this checklist before purchasing materials or hiring anyone.
HOA and building rules
- Pull your CC&Rs and Architectural Review Committee (ARC) guidelines. Look specifically for language on balcony enclosures, exterior modifications, color restrictions, and material restrictions.
- Confirm whether your HOA requires prior written ARC approval for any exterior change — most do, with review timelines of up to 30 days. Unauthorized work can result in mandatory removal at your cost.
- Check whether the HOA has a pre-approved materials list. Some associations allow only specific screen colors or frame finishes to maintain a uniform building appearance.
- If you rent, get explicit written permission from your landlord before doing anything beyond a freestanding screen. Federal fair-housing regulations (24 CFR §100.203) require landlords to permit reasonable modifications for residents with disabilities, but standard aesthetic changes are at the landlord's discretion.
- Ask your HOA or management company whether the balcony structure itself is your responsibility or common-element responsibility. This affects what you can attach to it.
Building permits and local code
- Freestanding, non-attached screens and roll shades generally do not trigger a permit. Anything attached to the building, adding a roof or cover, or enclosing a space usually does.
- Municipal permit checklists commonly treat lanai, terrace, and balcony enclosures as separate permit types requiring structural plans and sometimes fire-sprinkler submittals.
- In New York City, DOB requires paperwork or a permit to legalize glazing or weather-resistant enclosures on balconies. Other large cities have similar requirements. If work was done without permits previously, there can be legalization penalties.
- Some jurisdictions (including certain resort and seasonal municipalities) restrict when balcony enclosures can be in place and require council approval or conditional-use permits.
- Small-to-mid-sized jurisdictions commonly charge $100–$500 for screened porch or balcony enclosure permit plan review. Budget for this if your project triggers a permit.
- Open-flame cooking: California Fire Code and similar state adoptions of IFC/NFPA provisions prohibit charcoal burners and open-flame cooking devices on combustible balconies or within 10 feet of combustible construction. If your privacy project includes any structure, check your fire code too.
Structural limits
- Residential balconies under the International Residential Code (IRC) carry a minimum uniform live load of 40 pounds per square foot (psf). Under the International Building Code (IBC), balconies are often designed at 1.5 times the interior live load they serve, commonly producing a 60 psf design load.
- IBC-required guards must be at least 42 inches high. Do not attach privacy screens or panels to guardrails in a way that adds concentrated load or compromises their structural integrity without an engineer's sign-off.
- Heavy planters, water features, and large built-in furniture can approach or exceed balcony load limits faster than people expect. Get a structural engineer review before adding anything that concentrates significant weight in one spot.
- Any enclosure that attaches to the building structure or adds a roof typically requires engineered/stamped plans in most jurisdictions.
- Photograph existing conditions before any installation. This documents the original state if you need to restore it, and is useful for ARC applications and permit submittals.
How to measure and sequence your installation
Measure the perimeter of your patio or balcony at railing height, mid-height, and at the top of any existing wall or fence. Note which sides need privacy (it is rarely all four) and which direction each side faces, since sun exposure affects material choice. Measure the height from the floor to the underside of any overhead structure. Take photos from outside looking in, from neighboring units' lines of sight, and from inside looking out. These photos tell you exactly where the sight lines are and prevent you from overbuilding.
Follow this sequence for any project beyond a freestanding screen: (1) complete the checklist above and get any required ARC or permit approvals in writing; (2) measure and document existing conditions with photos; (3) select your solution tier and confirm material availability and lead times; (4) prepare the surface (clean, repair any damaged railings or concrete); (5) install in sections from the most visible side inward; (6) test stability and load before finishing. For permanent or semi-permanent installs, do not anchor into concrete or railings until you have confirmed the material, load, and any HOA approval.
Temporary privacy options
Temporary solutions are the right starting point for renters, people in HOAs with restrictive rules, or anyone who wants to test privacy before committing to a larger project. If you’re wondering "what can I use for privacy on my patio", this guide summarizes practical options from temporary screens to permanent enclosures. They require no permits, are generally reversible, and can be installed in an afternoon.
Roll-up bamboo or reed shades
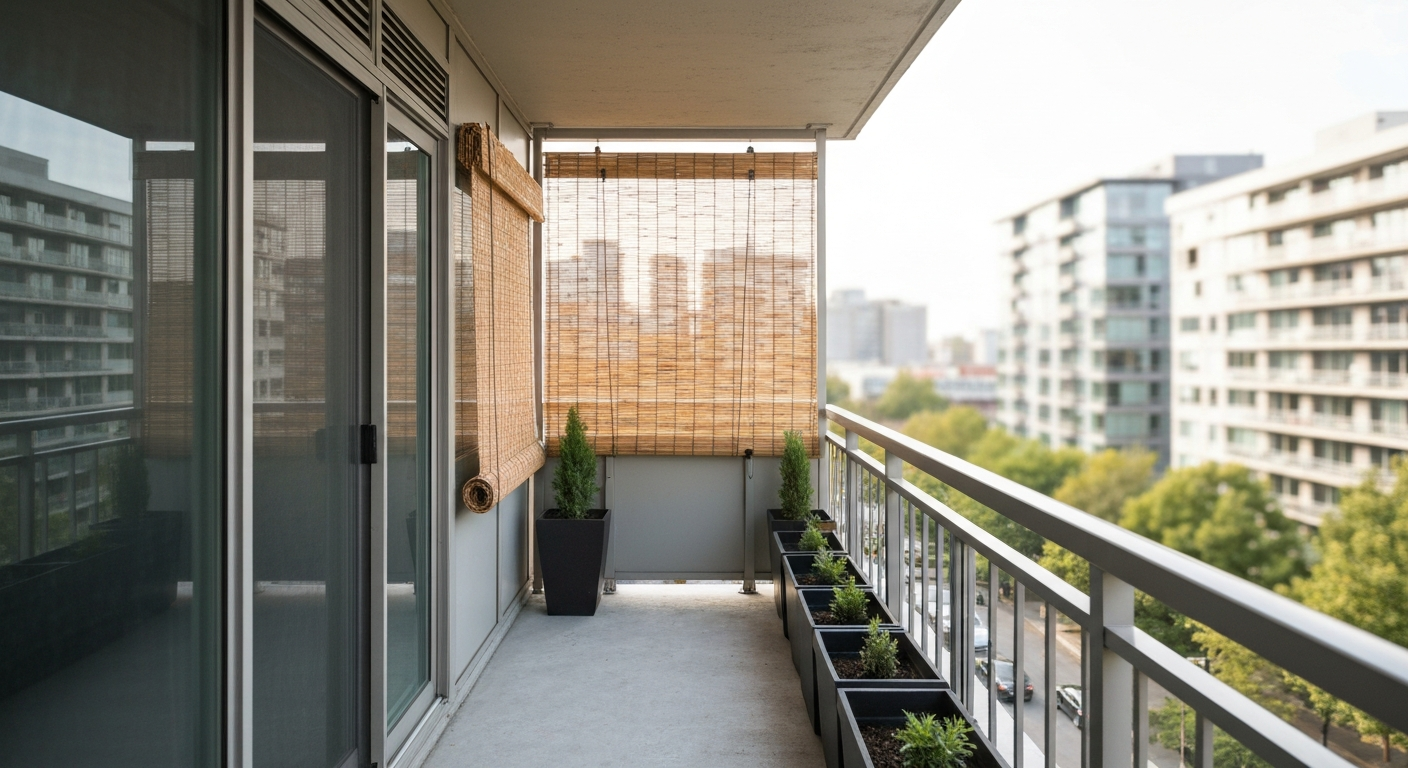
Bamboo and reed roll shades are the most common quick fix and for good reason. They attach to a railing or overhead beam with zip ties, hooks, or thin cable, roll up when not needed, and cost $20–$80 per panel depending on size. Privacy is solid when unrolled (roughly 80–90% visual block), but they do filter light and create a warm amber tone rather than a bright open view. The tradeoff: in a humid climate or with regular rain, untreated bamboo degrades in one to two seasons. Synthetic reed (plastic) lasts longer but looks less natural. Neither handles wind well without tie-down points on the bottom rail. Maintenance is minimal, just rinse with a hose periodically and check the ties annually.
Outdoor curtains
Outdoor curtains work well on covered balconies with an overhead beam or curtain rod. They offer the most flexible privacy: open them and you have a full view, close them and you block sightlines completely. Look for solution-dyed acrylic fabric (Sunbrella is the most recognized brand) rated for outdoor UV exposure. These resist fading, mildew, and rain better than standard canvas. A pair of panels wide enough to cover a 6-foot railing section runs $60–$150. The catch is wind: curtains require tie-backs or weighted hems to stay in place. On an exposed balcony above the third floor, they are difficult to use in windy conditions. Also, they need a mounting point overhead, which can be a tension rod between walls or a ceiling-mounted curtain track, both of which may need HOA approval.
Freestanding privacy screens
Freestanding folding screens, typically three to five panels in wood, metal, or composite, stand without anchoring and can be repositioned as needed. A quality powder-coated steel or teak screen runs $100–$350. Privacy is good directly in front of the panel (70–85% visual block depending on slat spacing), but the edges and gaps between panels reduce effectiveness. They work best for blocking a single sightline on a ground-level patio rather than wrapping an entire balcony. Tip: add decorative planters at the base to prevent tipping in light wind. No maintenance beyond occasional cleaning and, for wood screens, annual oil or sealant.
Lattice panels
Vinyl or wood lattice panels hung or leaned against a railing provide a partial visual screen while letting air and light through. They are lightweight and inexpensive ($25–$60 for a 4x8 sheet), but their privacy level is lower than solid screens, roughly 50–60% visual block depending on diamond or square pattern size. The main benefit is that climbing plants can be trained onto lattice over time, gradually increasing privacy without additional panels. For temporary use, lean lattice against the railing and brace with zip ties. If you want to mount it more securely, that often crosses into semi-permanent territory and may need HOA review.
Semi-permanent privacy options
Semi-permanent solutions offer better aesthetics and durability than temporary options while still being reversible if you move or if HOA requirements change. Most require ARC approval and some surface preparation, but they stop short of structural permits in most jurisdictions.
Planter walls
A row of large planters along the railing or patio edge is one of the most popular condo privacy solutions because it is visually attractive, adds greenery, and is clearly reversible. Use planters that are at least 24 inches tall and fill them with columnar plants (arborvitae, bamboo in contained pots, boxwood, or ornamental grasses) for privacy that reaches 5–6 feet above the floor. A row of four to six 18-gallon planters with established plants costs $200–$800 depending on plant species and container quality. The critical caveat is weight: a large ceramic planter with wet soil and a mature plant can weigh 80–150 pounds. On a balcony, line planters up along the structural perimeter edge (over the beam, not in the middle of a span) and avoid clustering heavy planters in one spot. If in doubt, use lightweight fiberglass or fabric grow bags instead of ceramic or concrete. Maintenance includes watering, seasonal plant replacement, and checking that planters haven't shifted or blocked drainage.
Trellis with climbing plants
A freestanding or railing-mounted trellis planted with fast-growing climbers (jasmine, clematis, climbing roses, or in warmer climates, bougainvillea) creates a living privacy screen over one to two growing seasons. The trellis itself (powder-coated steel or cedar, 6 feet tall by 4–8 feet wide) costs $80–$250; plants add $20–$80. Privacy builds gradually rather than immediately, which is the main tradeoff. Light and airflow remain good through a mature plant screen. Maintenance is moderate: plants need pruning, watering, and occasional fertilizing. In freezing climates, deciduous climbers drop leaves in winter, eliminating privacy seasonally. If you want year-round coverage in a cold climate, combine evergreen plants or use a solid panel behind the trellis.
Modular fence panels
Purpose-built modular privacy fence panels in cedar, composite, or aluminum can be configured to your patio's dimensions and mounted to posts set in weighted bases (no concrete needed for lighter panels). This gives you a fence-like result without permanent anchoring. Cedar panels are attractive and affordable but require annual sealing. Composite panels (PVC or wood-plastic composite) are low maintenance but cost more upfront, typically $100–$200 per 6-foot panel plus hardware. Aluminum louver systems allow you to adjust the angle of the slats, giving variable privacy and airflow. Most ARC processes will want to see a drawing of panel placement and material spec before approval. Privacy is high at 85–95% depending on panel style. Because panels sit in weighted bases rather than concrete, they can be moved or removed, which usually keeps them out of permit territory.
Privacy fabric systems
Privacy screen fabric stretched on a frame or cable system is a middle ground between curtains and solid panels. Products like Phifer's SunTex 90 screen fabric (approximately 10% openness factor) deliver close to full visual privacy while still allowing air movement and filtering rather than blocking daylight. SunTex 80 has roughly 25% openness, providing less privacy but more natural light. These are often used in cable-tensioned systems on railings or in aluminum frame kits. Material cost is $3–$8 per square foot for the fabric; a complete framed system for a 10-foot balcony section runs $150–$400 DIY. They handle wind better than curtains and are lighter than solid panels. UV-rated fabrics hold color well, but the mesh can collect dust and pollen and should be cleaned seasonally with a brush and mild soap.
Permanent and professional privacy options
Permanent solutions deliver the best privacy, durability, and potential resale impact, but they almost always require permits, structural review, and HOA approval. Many U.S. jurisdictions require engineered/stamped plans when an enclosure adds a roof or habitable space, attaches to the building, supports concentrated loads (e.g., hot tubs), or exceeds prescriptive span/cantilever limits, see PermitMint, When permits / engineered plans are required for decks, porches, and enclosures Many U.S. jurisdictions require engineered/stamped plans when an enclosure adds a roof or habitable space, attaches to the building, supports concentrated loads (e.g., hot tubs), or exceeds prescriptive span/cantilever limits — see PermitMint — When permits / engineered plans are required for decks, porches, and enclosures.. Budget for professional installation, engineered plans where required, and permit fees. These are the options that most directly compare to a screened porch or deck renovation in terms of commitment and cost.
Privacy glazing and glass enclosures
Frameless or aluminum-framed glass panels can enclose a balcony while maintaining a light, open feel. Frosted, fritted, or tinted glass provides privacy without blocking natural light entirely. Multiwall polycarbonate is a lighter-weight alternative: products like Lexan Thermoclear multiwall polycarbonate offer published UV coatings and light-transmission data, 10–20 year limited warranties depending on the product, and are significantly lighter than glass (important on load-sensitive balconies). Both glass and polycarbonate enclosures typically require permits in most cities, engineered plans, and ARC approval. In New York City and similar dense urban markets, even open-screen enclosures above certain heights require DOB paperwork. DOB requires paperwork or a permit to legalize balcony or glazing enclosures: open‑screen enclosures above certain heights and most weather‑resistant enclosures typically trigger DOB permitting/legalization steps (older pre‑2011 open screens may be grandfathered but generally need documentation) NYC Department of Buildings — Project requirements; DOB guidance and façade/enclosure enforcement summaries. Cost ranges from $3,000–$12,000 installed depending on balcony size, material, and jurisdiction. Privacy is high to complete, light retention is very good (especially with polycarbonate or clear glass), but views are filtered depending on the glazing choice.
Fixed privacy fences and walls
A fixed privacy fence or masonry/CMU half-wall built along the patio perimeter delivers the most durable and complete privacy. This is a professional-install job in a condo setting: anchoring into a concrete slab or attaching to the building structure requires permits, engineering review, and ARC approval in virtually every jurisdiction. Cedar, redwood, composite, and aluminum are the common materials. A professionally installed 20-linear-foot cedar privacy fence on a ground-level patio runs $1,500–$4,000 depending on height, materials, and site access. Masonry walls are higher ($4,000–$8,000+) but essentially permanent and low-maintenance. Once installed, you are unlikely to remove and reinstall, so be certain of HOA approval before committing.
Built pergolas
A pergola adds overhead structure, defines the patio space, and can support side curtains, shade sails, or climbing plants for a layered privacy solution. On a ground-level condo or townhouse patio, a pergola is a realistic project. On a balcony, it is rarely structurally viable without significant engineering. A freestanding aluminum pergola kit (10x12 feet) costs $2,000–$5,000 installed; a custom cedar or hardwood build runs $5,000–$15,000. Pergolas alone do not provide wall-level privacy, but they provide overhead privacy from above (important on upper-floor units or townhouses with neighboring upper floors looking down) and create the anchor point for curtains, screens, and plants. Permits are typically required when a pergola is attached to the building.
Screened enclosures
A screened enclosure converts a patio or balcony into a fully enclosed but ventilated outdoor room. This is the option that most directly compares to a screened porch addition in terms of function, cost, and permit requirements. Expect full permit and plan review, HOA approval, and sometimes fire-sprinkler review if your building has suppression systems. Cost ranges from $4,000 for a basic screen-room kit on a ground-level patio to $15,000+ for a custom aluminum-framed enclosure with a solid roof section. Privacy is complete from the sides; overhead remains open or screened. The upside is that you gain an all-season usable outdoor room, which does have measurable resale value impact, though exact values depend heavily on market and building type. If you are seriously considering a screened enclosure, it is worth comparing it against a broader porch or deck renovation to understand total cost and return, which is the kind of comparison this site is built around.
Cost ranges, timeframes, and difficulty at a glance
| Solution | Typical Cost (DIY Materials) | Installed Cost (Pro) | Privacy Level | Permit Likely? | DIY Difficulty | Approx. Timeframe |
|---|---|---|---|---|---|---|
| Bamboo/reed roll shades | $20–$80 per panel | N/A (DIY only) | High (when down) | No | Easy | 1–2 hours |
| Outdoor curtains | $60–$150 per section | $150–$350 installed | High (when closed) | No | Easy | 2–4 hours |
| Freestanding screens | $100–$350 | N/A (DIY only) | Moderate–High | No | Easy | 30–60 min |
| Lattice panels | $25–$60 per sheet | $100–$200 installed | Moderate (50–60%) | No | Easy–Moderate | 2–4 hours |
| Planter walls | $200–$800 (plants + containers) | N/A or $300–$900 with planting service | Moderate–High (grows over time) | No | Easy | Half day |
| Trellis with climbers | $100–$330 (trellis + plants) | $250–$600 installed | Low initially, High at maturity | No (usually) | Easy–Moderate | Half day + growing season |
| Modular fence panels | $300–$800 (panels + bases) | $600–$1,500 installed | High (85–95%) | Possibly (check HOA) | Moderate | Half–full day |
| Privacy fabric systems | $150–$400 (framed kit) | $400–$900 installed | High (90% openness blocked) | No (usually) | Moderate | Half day |
| Privacy glazing / polycarbonate | $800–$2,500 (materials) | $3,000–$12,000 installed | High–Complete | Yes | Pro only | 1–3 weeks (permit + install) |
| Fixed fence or masonry wall | $500–$1,500 (materials) | $1,500–$8,000 installed | Complete | Yes | Pro only | 1–4 weeks |
| Built pergola | $2,000–$5,000 (kit) | $5,000–$15,000 installed | Overhead only | Often yes | Moderate–Pro | 1–3 days to weeks |
| Screened enclosure | $1,500–$4,000 (kit) | $4,000–$15,000+ installed | Complete (sides) | Yes | Pro only | 2–6 weeks (permit + install) |
Labor versus material cost splits vary considerably. For temporary solutions, nearly all cost is materials since installation is a solo half-day job. For semi-permanent modular systems, labor typically adds 40–60% on top of material cost when professionally installed. For permanent glazed enclosures and screened rooms, labor, permits, and engineering can account for 50–70% of total project cost. If you are getting quotes, ask contractors to break out material, labor, permit fees, and any engineering plan fees separately so you can compare apples to apples.
Which solution fits your situation
Small upper-floor balcony
Weight and HOA restrictions are your main constraints. Start with privacy screen fabric in a cable or frame system: it adds minimal weight, handles wind reasonably well, and gives 85–90% visual privacy. Outdoor curtains work well if you have an overhead beam to mount to. Avoid heavy planters unless you place them at the structural perimeter. Skip any solution that requires anchoring into the railing or building facade without engineering review.
Ground-level condo or townhouse patio
You have the most options here: planter walls, modular fence panels, trellis systems, pergolas, and even screened enclosures are all viable. A planter wall with tall columnar plants is the best starting point if you want a natural look with no permit risk. Modular panels are the fastest path to full visual privacy. If you want long-term value and are willing to go through the permit and HOA process, a screened enclosure or pergola with screen panels is worth comparing against the cumulative cost of simpler solutions.
Rooftop terrace
Rooftop terraces are often subject to the strictest building and HOA rules because any structure affects the building envelope. Freestanding weighted screens and planter walls (using lightweight containers and potting mix) are usually the safest options. Any fixed structure on a roof typically requires a structural engineer and building permit, and many HOAs specifically prohibit permanent rooftop modifications. Wind loads at rooftop level are also significantly higher than at grade, which limits the viability of light curtains or unsecured panels.
Townhouse patio
Townhouse patios usually have more structural flexibility than upper-floor condo balconies, but CC&R restrictions on fencing height, material, and appearance are common. A modular composite fence system or cedar privacy panels are typically the cleanest solution aesthetically and durably. Get ARC approval before any installation since exterior fence changes are among the most frequently cited HOA enforcement issues. For step-by-step ideas and styling tips, see our guide on how to decorate a townhouse patio. A well-designed townhouse patio privacy fence also supports adding decorative elements or planters over time, giving you a layered result without a single large project.
When a bigger renovation is the better answer
If you have spent more than $800–$1,000 on temporary and semi-permanent solutions over a few years and still feel like the patio is not usable the way you want, it is worth running the numbers on a screened porch or deck enclosure instead. A screened enclosure at $5,000–$12,000 installed delivers complete privacy, weather protection, and usable square footage for three to four seasons depending on your climate. Compared against replacing bamboo shades annually, buying new planters, and adding curtain hardware, the permanent option often pays back in improved use and, depending on your market, resale appeal. The comparison between a screened porch, a pergola, and a partial privacy fence is exactly the kind of decision this site is designed to help you work through, including cost per square foot, permitting reality, and how each affects property value. If you are considering that step, it is worth reading through how the costs and trade-offs differ between a covered porch addition and a simpler deck before committing. For related ideas on creating usable outdoor space without built decking, see our guide on how to decorate a backyard without a patio.
A few practical notes before you buy
- Buy one panel or curtain section before purchasing the full quantity. Light, color, and privacy level often look different in person than in product photos.
- Check HOA rules again after you select a product: even HOA-approved 'privacy screens' often have color restrictions (no black mesh facing the street, for example).
- For any solution on a balcony above the second floor, test wind resistance with a temporary mock-up before permanent install. A screen or curtain that works fine on a still day can become a sail in gusty conditions.
- If you are renting and the landlord approves a modification, get the approval in writing and clarify whether you are required to restore the original condition when you leave.
- Document every step with photos: before, during, and after. This protects you with the HOA, the building department, and the landlord.
FAQ
What quick checklist should I run before planning any condo patio privacy project?
Site, rules and safety checklist: (1) Measure patio dimensions, balcony load rating (if available), railing height, and distance to neighbors/egress path. (2) Read your CC&Rs/HOA architectural rules for exterior changes and ARC submission process (timelines, required drawings). (3) Check local building/fire codes and municipal permit triggers (enclosures, added roof, structural attachments, or concentrated loads like hot tubs). (4) Confirm structural limits — balconies are commonly designed to 40 psf interior or 60 psf design per IBC practice; get a structural review before adding heavy planters, hot tubs, or attached roofs. (5) Check fire rules (open‑flame bans on combustible balconies, grill rules). (6) If you’re a renter or person with a disability, review lease, landlord permission, and 24 CFR §100.203 on reasonable modifications. (7) Take photos, note utilities/drainage/fixtures, and draft a simple layout before choosing solutions.
What are the main categories of privacy solutions and when is each appropriate?
Three practical categories: Temporary (renter‑friendly, low cost): freestanding screens, outdoor curtains, bamboo rolls, tall planters — good for seasonal use, low HOA involvement. Semi‑permanent (owner preference, reversible): tension‑mounted screens, attached planters, lattice panels anchored to railings, shade sails — balance permanence, light control and usually require HOA notification. Permanent/professional (requires permits/engineering): framed glazing/enclosures, pergolas with screening, built-in privacy walls, rooftop guard changes — chosen when long‑term value and weather protection are priorities and when HOA/permit approval is secured.
How do I compare privacy vs. light and view for different materials?
Tradeoffs by material: (1) Opaque panels (cedar, composite, cementboard): high privacy, low light/view; maintenance varies (wood needs staining). (2) Lattice and slatted wood: moderate privacy, filtered light, partial view preserved. (3) Mesh/sunscreen (SunTex 80/90): variable openness — SunTex 80 ≈ 25% openness (more privacy) and SunTex 90 ≈10% (even more privacy); allows day light while blocking view. (4) Frosted/clear polycarbonate glazing: good weather protection, retains brightness; frosted options reduce direct view. (5) Plants/green screens: high aesthetics, variable density and seasonal gaps; needs watering and pruning. Choose based on required visibility, natural light needs, and maintenance willingness.
What are realistic cost ranges and difficulty ratings for common privacy options?
Ballpark ranges (materials + typical labor if hired): Temporary: $20–$300 (curtains, bamboo rolls, freestanding screens) — difficulty: Easy. Semi‑permanent: $200–$2,000 (rail-mounted planters, tension screens, installed lattice) — difficulty: Low–Medium. Permanent/professional: $2,000–$25,000+ (framed balcony glazing, pergola with screening, built privacy wall) — difficulty: Medium–High; may require engineer, permit and licensed contractor. Note: localized labor/permit fees can move these ranges; engineered enclosures, structural changes and rooftop work are at the high end.
Which options are best for renters versus owners?
Renters: temporary and reversible solutions only — outdoor curtains with tension rods, freestanding screens, balcony planters, vertical plant trellises, adhesive privacy film on sliding doors. Always get landlord permission for anything attached. Owners: any option subject to HOA and permit rules — can consider semi‑permanent and permanent choices like attached lattice, glazed enclosures, pergolas, integrated planters, or professional screening systems after approvals.
What HOA, permit and structural approvals are commonly required?
HOA: Most CC&Rs require prior written ARC/board approval for exterior changes; expect 30‑day review windows and requirements for drawings/photos. Permits: Municipal permits commonly required for enclosed balconies, added roofs, structural attachments, and work that changes egress or fire protection; engineered/stamped plans are often required if the enclosure adds roof/cover, supports concentrated loads, or alters structural performance. Structural: If the balcony was not designed for added loads (hot tubs, large planters, heavy glazing), a structural engineer review is recommended and commonly required for permits.
Next Article
What Can I Use for Privacy on My Patio: 12 Best Options
Patio privacy ideas: fences, screens, pergolas, plants & more, compare costs, permits, HOA tips to pick your solution.