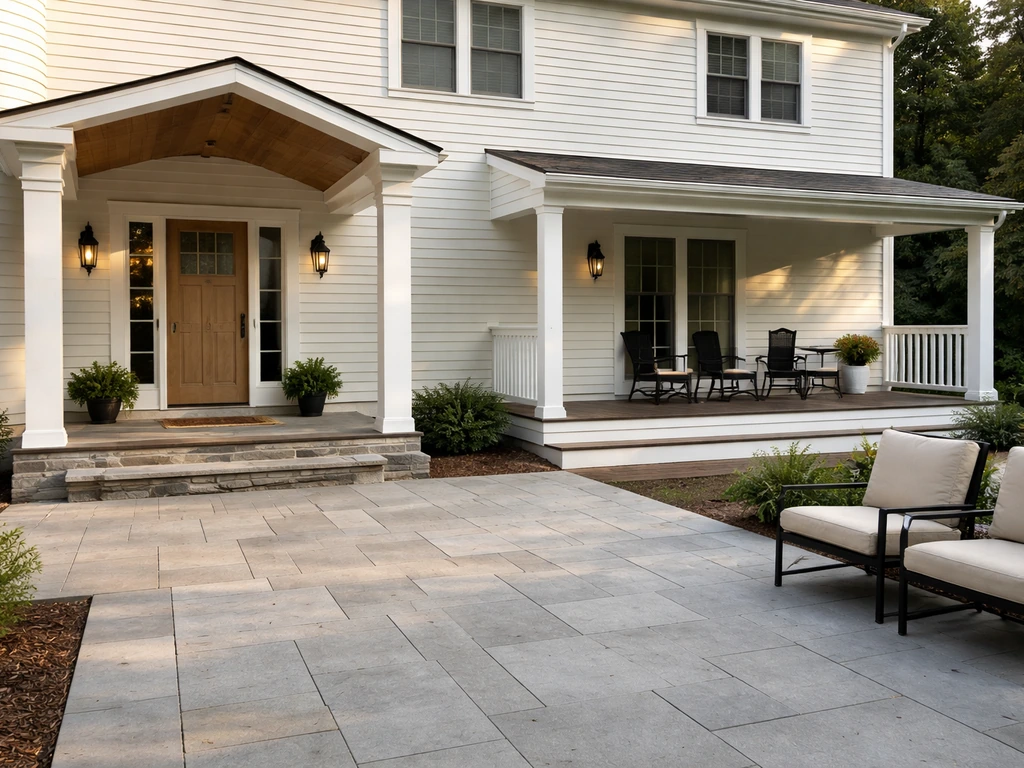
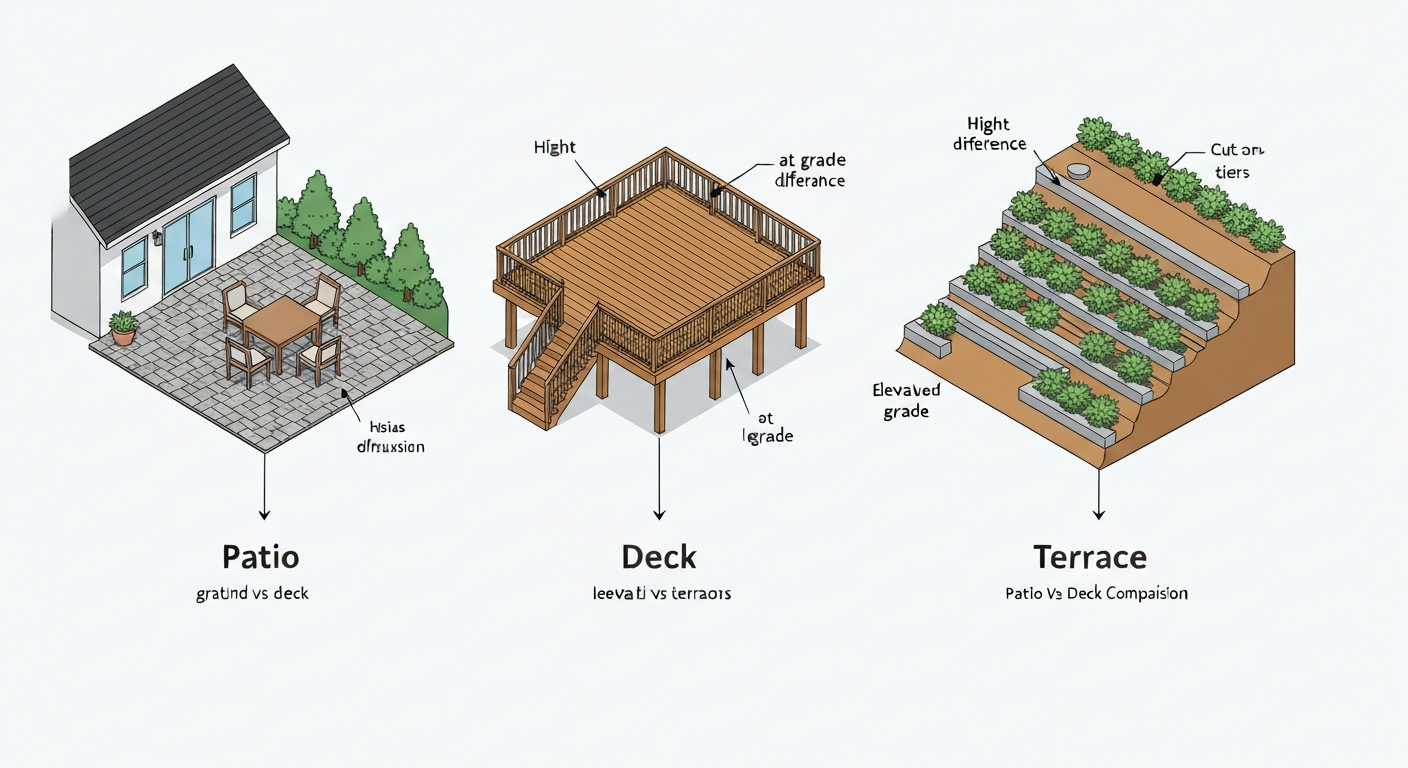
A patio sits on the ground, a deck is elevated on a framed structure, and a terrace is a leveled outdoor platform cut into or built up from a slope. Those three sentences cover the core distinction, but the real decision is more layered. Cost, your yard's grade, your local permit rules, how you plan to use the space, and what return you want at resale all push you toward one option or another. This guide walks through every angle: definitions, construction basics, per-square-foot cost ranges, maintenance realities, permit triggers, and the decision criteria that actually matter when you're standing in your backyard trying to figure out what to build.
Patio vs Deck vs Terrace: Homeowner Selection Guide & Costs

Miles Hart
12 Jul 2026
Quick At-a-Glance Comparison
| Structure | One-Line Summary | Typical Starting Cost (installed) |
|---|---|---|
| Patio | Ground-level finished surface (concrete, pavers, stone) adjacent to the home | $4–$30/sq ft depending on material |
| Deck | Elevated platform framed with posts and joists, attached to or freestanding from the home | $30–$60+/sq ft installed |
| Terrace | Leveled outdoor platform created by grading a slope, often with retaining walls | $15–$50+/sq ft depending on grading and walls |
| Porch | Covered structure attached to the home's facade, with a roof overhead | $20–$60/sq ft (front or back) |
| Portico | Small covered entry structure, typically over a front door | $5,000–$20,000 project cost |
| Sunroom | Fully enclosed addition with glazed walls (≥40% glazing per IRC definition) | $30,000–$80,000+ project cost |
Definitions and Key Differences
Patio
A patio is a finished, ground-level outdoor surface directly adjacent to a home. Many municipal codes are specific about this: Santa Barbara's code defines a patio as a finished surface no more than 10 inches above existing grade, and Sacramento ties it to a level surfaced area adjacent to the principal building. In practical terms, a patio has no framing and no structural floor system. It sits on a prepared subbase (gravel, compacted aggregate, or a concrete slab) and the surface can be poured concrete, segmental pavers, natural stone, brick, or tile. Because it's at grade, a patio doesn't require guardrails and, in most jurisdictions, doesn't trigger the same permit process as a deck.
Deck
A deck is a framed, elevated platform. It has posts, beams, joists, and decking boards, and it's typically attached to the house's rim joist with a ledger board (or freestanding with its own perimeter framing). The IRC organizes prescriptive deck provisions in Section R507, which specifies load assumptions (40 psf live load is the common prescriptive standard), connector requirements, and footing sizing. A critical threshold: in most U.S. jurisdictions, a deck requires a building permit when it's attached to the dwelling, when the walking surface is 30 inches or more above grade, when it's larger than 200 sq ft, or when it serves an egress door. Guardrails are required at that same 30-inch height. Freestanding, uncovered decks under 200 sq ft with walking surfaces under 30 inches above grade may be permit-exempt in some areas, but you need to confirm that with your local building department before starting.
Terrace
A terrace is a leveled platform created by reshaping the land. On a sloped lot, you either cut into the hill (creating a retaining cut) or build up with fill material and a retaining wall to establish a flat usable surface. The finished surface of a terrace can be anything a patio uses: pavers, concrete, stone, or gravel. The structural cost of a terrace comes from the grading work and any retaining walls required to hold the leveled area in place. On a modest 2:1 slope, a simple 12x16 terrace might need only grading and a single 18-inch retaining wall. On a steep lot, you can end up with a multi-tiered terrace system with poured concrete or segmental retaining walls that cost more than the surface finish itself.
Porch (Front and Back)
A porch is a covered, attached outdoor structure with a roof that's part of or continuous with the home's roofline. The distinction between a front porch and a back porch is mostly about use and placement: front porches face the street and serve as transitional entry spaces, while back porches typically function as private outdoor living rooms. For a focused comparison of entry-style porches and ground-level patios, see front porch vs patio. Both have a structural roof, which makes them more complex and more expensive to build than uncovered decks or patios. Because a porch has a roof, it's generally treated as a building addition for permitting purposes in most jurisdictions.
Portico
A portico is a small, covered entry structure, typically consisting of a roof supported by columns directly over a front door. It's smaller than a full front porch and its primary function is weather protection at the entry rather than outdoor living space. Porticos are often seen on traditional and colonial-style homes. Project costs generally run $5,000 to $20,000 installed depending on scale and material.
Sunroom
The IRC defines a sunroom as an addition where at least 40% of the combined wall and ceiling area is glazed. That glazing threshold is what separates a sunroom from a standard room addition. Sunrooms are fully enclosed, conditioned or semi-conditioned spaces, and they're treated as building additions for permitting, structural, and energy-code purposes. They represent the highest cost and complexity in this category but also function year-round in most climates. Installed costs typically run $30,000 to $80,000 or more for a professionally built structure.
Covered, Enclosed, or Open: Picking Your Exposure Level
One of the most practical decisions you'll make is how much weather protection you want. There's a spectrum from fully open to fully enclosed, and each step up adds cost and complexity.
- Open/uncovered patio or deck: Lowest cost and simplest to build. Full sun and rain exposure. Best in climates with mild weather or when shade trees provide natural cover.
- Retractable awning: Manual or motorized fabric or aluminum cover over a patio or deck. Installed cost typically $1,500–$5,000. Provides shade and light rain protection. Not a permanent roof, so in most jurisdictions it avoids the structural/permit requirements of a roof addition.
- Pergola with shade cover: Open lattice or beam structure with or without a fabric, polycarbonate, or louvered panel system. Adds definition and partial shade without full enclosure.
- Patio cover with solid roof: Attached or freestanding roof structure over a patio or deck. Treated as a building addition in most jurisdictions. Costs escalate significantly because framing, roofing, and drainage must be properly engineered.
- Screen room: A porch or patio area enclosed with screened panels on aluminum or wood framing. Keeps insects out while maintaining airflow. Installed costs typically $5,000–$15,000 for a basic aluminum-frame screen enclosure.
- Three-season room: Insulated glass or glass-and-screen panels that can be swapped seasonally. More expensive than screen rooms, usable in shoulder seasons, but not typically heated/cooled year-round.
- Four-season sunroom/full enclosure: Fully insulated, glazed, conditioned addition. Requires full permitting, foundation, HVAC rough-in, and energy code compliance. Highest cost and best year-round utility.
The jump from an uncovered patio to a covered patio cover is often where homeowners underestimate costs. Adding a proper roof over an existing slab might cost $8,000–$25,000 depending on span, material, and how it ties into the existing roofline. If you think you'll want a covered space eventually, it's worth framing that into the initial design rather than retrofitting later.
Use Cases and Pros and Cons by Purpose
Entertaining and Dining
For entertaining, a larger patio is often the most practical option. Concrete or paver surfaces handle furniture, grills, and foot traffic well, and there's no height concern for people moving around with drinks or food. Decks work well too, but furniture legs can damage softer wood decking over time, and large gatherings put real loads on a framed structure (40 psf live load is the design assumption, which handles normal use but should give you pause about adding a spa or outdoor kitchen without an engineer's review). A terrace can create a visually striking outdoor dining room, especially when it's tiered to take advantage of a view.
Maximizing a View
This is where a deck has a clear functional advantage over a ground-level patio. If you have a view that's two or three feet above your current yard level, an elevated deck puts you at the right height to see it. A second-story deck off a walkout basement can be particularly effective. The trade-off is the permit requirement, the structural cost, and the maintenance load that comes with a framed elevated structure.
Gardening and Landscape Integration
Terraces excel here. A tiered terrace system converts an unusable slope into productive planting beds, growing areas, and flat circulation paths. The retaining walls that define each terrace level also create raised bed edges that work perfectly for kitchen gardens or ornamental plantings. Patios can be integrated with planting beds by leaving unpaved areas within the hardscape, which is easier and less expensive than building raised planters on a deck.
Everyday Access and Traffic
If the primary purpose is getting from the back door to the yard or creating a transition space, a basic poured concrete patio or simple paver pad is the most cost-effective solution. Decks create a step up that can be a tripping hazard for kids and elderly family members, and they require stairs for yard access. A grade-level patio with a gentle slope away from the house is the most accessible and lowest-maintenance solution for this use case.
| Primary Use | Best Option | Reason | Caution |
|---|---|---|---|
| Entertaining/dining | Large patio or deck | Flat, load-bearing surface; flexible furniture layout | Deck needs load check for heavy features like hot tubs |
| View capture | Elevated deck | Raises sightlines above grade obstructions | Requires permit at 30+ inches above grade; guardrails required |
| Gardening/landscape | Tiered terrace | Creates planting levels on slopes; integrates hardscape and beds | Retaining walls add significant cost on steep grades |
| Everyday access/traffic | Patio (concrete or pavers) | At-grade, accessible, low trip hazard | Must slope away from foundation (minimum 1/4" per ft) |
| Year-round use | Screened porch or sunroom | Weather protection extends seasonal use | Screened room adds $5K–$15K; sunroom adds $30K–$80K+ |
Materials and Finishes
Concrete
Poured concrete is the most common patio base material because it's durable and relatively inexpensive. A basic broom-finished slab typically runs $4–$8 per sq ft installed. Colored, stamped, or exposed-aggregate finishes push that to $8–$12 per sq ft or more. Concrete is strong and monolithic, but it cracks over time (especially in freeze-thaw climates), and a cracked slab is either a repair job or a full replacement. Sealing every 2–3 years extends the life. Expect 20–30 years with reasonable maintenance.
Segmental Pavers and Permeable Pavers
Paver patios cost more upfront ($10–$30 per sq ft installed) but offer flexibility that concrete doesn't. Individual units can be removed and reset if a utility line needs access or if frost heaving shifts the surface. The Interlocking Concrete Pavement Institute (ICPI) sets the industry standard for subbase depth, edge restraint, bedding material, and jointing requirements. A properly built ICPI-compliant base in a cold climate typically requires 6–10 inches of compacted aggregate base, 1 inch of bedding sand, and set edge restraints. Permeable interlocking concrete pavers (PICP) are an EPA-recognized stormwater best management practice, but they require regular maintenance: vacuum sweeping and inspection one to two times per year, with more frequent checks after heavy storms. Clogging from fines and organic debris is the main failure mode, so they're not ideal in areas with heavy tree canopy. Permeable interlocking concrete pavers (PICP) require regular maintenance, vacuum sweeping and inspection 1–2 times per year and more frequent checks after heavy storms; their typical failure mode is clogging from fines and organic debris Permeable interlocking concrete pavers (PICP) require regular maintenance — vacuum sweeping and inspection 1–2 times per year and more frequent checks after heavy storms; their typical failure mode is clogging from fines and organic debris..
Natural Stone and Flagstone
Natural stone (bluestone, flagstone, travertine, slate) typically starts at $15 per sq ft installed and goes up from there depending on stone thickness, pattern complexity, and local supply. It's attractive and durable but variable: different stones have different absorption rates, hardness, and freeze-thaw tolerance. Travertine and softer limestone, for example, can spall in cold climates without proper sealing. Dense bluestone or granite hold up better in northern climates.
Pressure-Treated Lumber
Pressure-treated pine is the most common framing material for decks and is widely used for decking surfaces as well. It's the lowest-cost entry point for deck construction and works well with the right fasteners (stainless steel or hot-dipped galvanized are required since modern PT lumber chemistry is corrosive to standard fasteners). Surface life ranges from 10 to 25 years depending on climate, maintenance, and how well the deck is detailed for water drainage and airflow. Annual cleaning and a coat of penetrating sealer every 2–3 years are necessary to keep it looking good and structurally sound.
Cedar and Redwood
Cedar and redwood are naturally rot-resistant, dimensionally stable, and look better than pressure-treated pine in most people's opinion. They cost more (roughly 30–50% premium over PT lumber for decking boards) and have a service life of 15 to 25+ years with maintenance. Both are softer than pressure-treated wood and show wear from heavy use or furniture more readily.
Composite and Capped PVC Decking
Capped composite and capped PVC decking are the premium end of the deck surface market. Manufacturers like Trex offer tiered limited residential warranties of 25, 35, and in some product lines up to 50 years. The warranties are product-line specific and have scope exclusions, so read the fine print. The real advantage of capped composite is dramatically reduced maintenance: no staining, no sealing, just occasional cleaning. The upfront cost is higher ($5–$12 per sq ft for decking boards versus $1.50–$4 for PT pine), but the 20-year total cost of ownership is often comparable when you factor out ongoing maintenance labor and material costs.
Tile and Porcelain
Large-format porcelain tile over a concrete slab can produce a very clean, contemporary patio surface. The key installation requirement in cold climates is a frost-rated tile (high density, low water absorption) set in a flexible polymer-modified mortar over a properly crack-isolated slab or mortar bed. Standard ceramic tile will not survive a northern climate on an exterior slab. Properly specified, tile patios look sharp and last 20+ years; improperly specified, they fail in the first winter.
| Material | Typical Installed Cost (per sq ft) | Approx. Lifespan | Maintenance Level | Best Climate |
|---|---|---|---|---|
| Poured concrete (basic) | $4–$8 | 20–30 years | Low (seal every 2–3 yrs) | All climates (expansion joints critical in freeze-thaw) |
| Stamped/colored concrete | $8–$12+ | 20–30 years | Low-moderate | All climates |
| Segmental pavers (concrete) | $10–$20 | 25–40+ years | Low (resettable) | All climates |
| Natural stone/flagstone | $15–$30+ | 25–50+ years | Moderate (sealing varies) | Choose stone grade for climate |
| Pressure-treated lumber | $3–$6 (boards only) | 10–25 years | High (annual cleaning, periodic sealing) | All; higher maintenance in humid climates |
| Cedar/redwood | $4–$8 (boards only) | 15–25+ years | Moderate-High | Best in dry climates |
| Capped composite/PVC | $5–$12 (boards only) | 25–50+ years | Low | All climates |
| Porcelain tile (exterior-rated) | $8–$20 | 20–30+ years | Low (if properly installed) | Cold climates require frost-rated tile |
Construction Basics: Foundation, Framing, and Cover Systems
Patio Slab and Subbase
A concrete patio starts with site prep: strip topsoil (typically 4–6 inches), compact the subgrade, and install a 4-inch minimum gravel base. For standard residential slabs, 4 inches of concrete (3,000–4,000 psi mix) is typical. In freeze-thaw climates, the gravel base depth increases to 6–8 inches or more to allow drainage and reduce frost-heave. Control joints are cut or formed every 10–12 feet in both directions to manage cracking. Vapor barrier under the slab is optional for an outdoor patio but standard practice in many regions. For a paver patio, the ICPI-standard subbase in a cold-climate installation is typically 6 inches of compacted Class II aggregate or equivalent, 1 inch of coarse bedding sand, and edge restraints secured with spikes into native soil.
Deck Footings and Framing
Deck posts sit on footings that must extend below the local frost depth (which can range from 12 inches in the deep South to 48 inches or more in Minnesota or northern New England). Prescriptive residential code practice assumes a minimum allowable soil bearing pressure of approximately 1,500–3,000 psf for typical soils. If your site has poor soils (expansive clay, fill, organic material), that assumption may not hold, and you'll need engineered footings or helical piers. Common footing types for residential decks are poured concrete tubes (Sonotube-style), precast piers, and helical steel piers for challenging soils or where excavation is impractical. The IRC's R507 provisions (or equivalent prescriptive tables) specify footing diameter and depth based on tributary load area. Above the footings, deck framing follows standard structural carpentry: posts support beams, beams support joists, and joists support decking. ASCE 7 environmental load maps (snow, wind) inform the structural requirements for any roofed deck structure.
Terrace Retaining Structures
On a sloped lot, terracing requires either cutting the slope and using the natural cut face (only suitable for stable, well-drained soils with shallow slopes) or constructing a retaining wall to hold the leveled fill. Common retaining wall systems include segmental retaining wall blocks (Allan Block, Versa-Lok, and similar interlocking systems), poured concrete walls, timber walls (6x6 pressure-treated), and natural stone dry-stack walls. Segmental block walls under 4 feet in most jurisdictions are DIY-feasible; walls over 4 feet typically require an engineer's stamp and a building permit. Drainage behind the wall (a gravel backfill and perforated drain pipe at the footing) is critical to prevent hydrostatic pressure buildup, which is the most common cause of retaining wall failure.
Roof and Cover Systems
Adding a roof over a patio or deck requires a structural frame (either attached to the house or freestanding) and a roofing system that integrates with existing drainage. When attached to the house, the ledger connection, flashing, and the way the new roof intersects the existing wall or roofline are the details that most often go wrong. A flat or shed-roof patio cover needs positive slope (minimum 1/8 to 1/4 inch per foot) toward a gutter or away from the house. Polycarbonate roofing panels are a popular mid-cost option for patio covers and pergolas because they're lightweight and admit light. Solid aluminum patio cover systems are lower maintenance than wood but limit design flexibility. Any roofed structure attached to the home will require a building permit in nearly all U.S. jurisdictions.
Drainage, Grading, and Site Prep You Can't Skip
Drainage is the single most common source of callbacks, failures, and disputes in outdoor hardscape projects. The standard guidance from ICPI and residential contractors is clear: all patio surfaces must slope away from the home's foundation at a minimum of 1/4 inch per foot (about 2% slope). This keeps surface water from pooling against the foundation and eventually migrating into the basement or crawlspace. If your existing grade already runs toward the house, correcting it before installing a patio is mandatory, not optional.
Surface Runoff and Perimeter Drainage
For large patio areas, a single 2% slope toward the yard may not handle heavy storm events without concentrated runoff damaging plantings or neighboring properties. Channel drains (linear drains) set into the patio surface and connected to a daylight outlet or dry well are a common solution. On paver patios, the open joints allow some infiltration, but that capacity is limited (especially once joints fill with fines) and shouldn't be your primary drainage strategy. Permeable pavers (PICP) significantly increase infiltration capacity but require the subsoil infiltration rate to be adequate, and they need the regular maintenance described earlier.
Frost Considerations
In freeze-thaw climates, water in the subbase freezes, expands, and lifts the surface. This is frost heave, and it affects every outdoor hardscape material. Concrete slabs crack and tilt. Pavers shift and pop up. Deck footings that don't extend below frost depth will heave seasonally. The mitigations are: deep drainage aggregate base (for patios and pavers), footings below frost depth (for decks and retaining walls), and expansion joints in concrete to allow movement without cracking across the full slab. The local frost depth is typically listed in your municipal building code or available from the building department, and it varies dramatically by region (12 inches in coastal South Carolina vs. 48 inches in northern Wisconsin).
Slope, Fill, and Retaining Walls
On sloped sites, the choice between a deck (which bridges over the slope on posts) and a terrace (which reshapes the slope) often comes down to how much you're willing to spend on earthwork vs. framing. A deck over a slope is structurally straightforward and avoids the drainage complexity of filling and terracing. A terrace integrates better with the landscape but requires careful drainage design: the fill behind a retaining wall must have a gravel drainage layer and a perforated pipe outlet to prevent hydrostatic pressure. FEMA flood zone designations and local stormwater regulations may also restrict grading and filling in certain areas, so check with your municipality before moving significant amounts of soil.
Cost Estimates and What Drives the Final Number
The most important thing to know about outdoor structure costs is that national averages mask enormous regional variation. A paver patio that costs $14 per sq ft installed in the Midwest might cost $22 per sq ft in the San Francisco Bay Area or coastal New England. Labor rates, material transport costs, and local permitting fees all vary. Use the ranges below as a starting framework and get at least three contractor bids before committing to a budget.
| Structure/Surface | Low End (per sq ft) | High End (per sq ft) | Notes |
|---|---|---|---|
| Concrete patio (basic broom finish) | $4 | $8 | Simple slab on prepared base |
| Concrete patio (stamped/colored) | $8 | $12+ | Finishes and decorative work add cost |
| Paver patio (concrete pavers) | $10 | $20 | Complex patterns and premium pavers push higher |
| Natural stone/flagstone patio | $15 | $30+ | Stone type, thickness, and local supply vary widely |
| Pressure-treated deck | $30 | $50 | Includes framing, decking boards, footings, and basic rail |
| Composite deck (mid-grade) | $40 | $60+ | Premium composites and complex designs exceed $60/sq ft |
| Basic terrace (grading + pavers) | $15 | $50+ | Retaining wall cost is the main variable |
| Screen room addition | — | $5,000–$15,000 project | Aluminum frame enclosure on existing slab or deck |
| Sunroom addition | — | $30,000–$80,000+ project | Fully engineered, permitted, glazed addition |
Remodeling Magazine's 2025 Cost vs. Value report gives a useful resale perspective. Remodeling Magazine's 2025 Cost vs. Value Report, Remodeling (national averages & regional table) provides national and regional job-cost and resale-value figures for projects like wood and composite deck additions and backyard patios 2025 Cost vs. Value Report — Remodeling (national averages & regional table). A wood deck addition nationally averaged a job cost of $18,263 with a resale value of $17,323, recouping about 95%. A composite deck addition averaged $25,096 in cost with $22,199 in resale value, about 89% recouped. A backyard patio came in at a much lower national recoup rate, around 46%. Those are national averages, and the regional tables in that report often tell a different story, particularly in markets where outdoor living space is a strong buyer priority. The core takeaway: decks tend to recoup better at resale nationally than patios, but the right answer for your specific market depends on the local buyer pool.
Permits, Codes, and HOA Considerations
The permit picture for outdoor structures is more variable than most homeowners expect. Here's a general framework based on common U.S. model-code practice, but you must verify with your local building department because thresholds and requirements vary significantly by municipality.
| Structure | Typically Requires Permit? | Key Triggers | Notes |
|---|---|---|---|
| Patio (ground level, no cover) | Often no | Some jurisdictions require permits for impervious surface over a certain size | Check stormwater/impervious cover limits in your municipality |
| Uncovered deck, under 200 sq ft, under 30" height, freestanding | Often exempt (varies) | Must not serve an egress door; not attached to dwelling | Confirm with local building dept before starting |
| Deck attached to home, any size/height | Yes, nearly always | Ledger attachment to dwelling triggers permit requirement | Structural connection to home = building permit |
| Deck with walking surface ≥30" above grade | Yes | Guardrail and permit requirements kick in at 30" threshold (IRC/model code) | Guardrails required at ≥30" above grade or floor below |
| Porch with roof | Yes | Roof structure attached to home is a building addition | Energy codes may also apply in some jurisdictions |
| Retaining wall >4 feet | Yes (most jurisdictions) | Structural failure risk at height triggers engineered design requirement | Some areas require permits at 3 feet or less |
| Sunroom | Yes | Full building addition; structural, energy, and glazing requirements apply | IRC defines sunroom as ≥40% glazed wall/ceiling area |
HOA restrictions are a separate layer entirely. Even if your city doesn't require a permit for a small deck, your HOA may prohibit certain materials, colors, sizes, or setbacks from property lines. Most HOAs require an Architectural Review Committee (ARC) approval before any exterior project begins. Setback requirements in zoning codes (typically 5–10 feet from property lines, more from streets) also apply to permanent outdoor structures. Confirm both building code and HOA requirements before finalizing your design.
DIY Feasibility: What You Can Realistically Do Yourself
Most of the outdoor projects in this category have some DIY-accessible components and some that are better left to pros. Here's an honest breakdown.
| Task | DIY Feasibility | Estimated Hours (typical project) | When to Hire a Pro |
|---|---|---|---|
| Paver patio installation (small, under 300 sq ft) | High for handy homeowners | 40–80 hours | Poor drainage, large complex areas, poor subsoil |
| Poured concrete slab | Low-moderate | Prep is DIY; pour often needs pro crew | Any pour over ~200 sq ft or in freeze-thaw climate |
| Pressure-treated deck (simple, ground level) | Moderate | 60–120 hours | Elevated decks, complex geometry, ledger attachment to home |
| Composite decking installation | High (surface boards only) | 20–40 hours (boards on existing framing) | Framing and footings require structural competence |
| Small retaining wall under 2 feet (segmental block) | High | 20–40 hours | Walls over 4 feet, poor drainage, slopes over 30% |
| Pergola/freestanding shade structure | Moderate-High | 30–60 hours | Any structure attached to home's roofline |
| Screen room enclosure | Low-moderate | 40–80 hours | Complex framing, roof integration, or large spans |
| Sunroom addition | Low | N/A (not DIY recommended) | Always hire a licensed contractor with engineering review |
The DIY risk most homeowners underestimate is drainage and grading. Getting the slope wrong on a patio or mis-sizing a drainage system doesn't just mean an ugly puddle: it can mean water intrusion into the foundation, which is a repair that costs multiples of what the original project cost. If you're doing any significant grading, take the time to establish proper grades with a transit level or laser level before pouring or laying anything.
Maintenance and Lifespan Comparison
Maintenance is where the true long-term cost of each option reveals itself. A pressure-treated deck that costs $35 per sq ft installed will need cleaning, staining, and periodic board replacement over its life. A capped composite deck at $55 per sq ft installed needs almost none of that. Over a 25-year window, the total ownership cost of those two options is often very close.
- Poured concrete patio: Seal every 2–3 years (~$0.10–$0.30/sq ft in materials). Repair cracks as they appear. Life expectancy 20–30 years before resurfacing is considered.
- Paver patio: Re-sand joints every few years as needed. Reset individual sunken pavers as required. Life expectancy 25–40+ years with good base prep; individual units can be replaced indefinitely.
- Pressure-treated deck: Clean annually, apply penetrating sealer or stain every 2–3 years. Inspect and replace damaged boards, connectors, and ledger flashing every 5–7 years. Life 10–25 years.
- Cedar/redwood deck: Similar maintenance to PT lumber; apply finish annually or every 2 years to prevent graying and checking. Life 15–25+ years.
- Capped composite deck: Annual cleaning with soap and water or composite cleaner. Virtually no staining or sealing. Inspect fasteners and framing every 5 years. Life 25–50+ years per manufacturer warranty.
- Screened room (aluminum frame): Inspect and replace screen panels every 8–12 years. Touch up paint on frame as needed. Frame itself can last 20–30+ years.
- Sunroom: Maintain glazing seals, re-caulk as needed (every 5–7 years), clean gutters and drainage channels, maintain HVAC system if conditioned.
Site Suitability: Matching Structure to Your Lot
Before choosing a structure type, honestly evaluate your site. These are the factors that most often force a change in direction mid-project.
- Slope: Lots with more than a 2–3 foot grade change across the project area push toward either a deck (which bridges the grade on posts) or a terrace with retaining walls. A patio on a sloped lot requires significant grading and fill, which adds cost and drainage complexity.
- Soil bearing capacity: Soft soils, clay, expansive soils, or fill areas may require engineered footings for a deck. Prescriptive code tables assume soil bearing of 1,500–3,000 psf; if your site doesn't meet that, standard footing tables may not apply.
- Drainage: Does water currently run toward your house? Is there a high water table? These conditions affect subbase design for patios and footing depth for decks.
- Shade and sun: A south or west-facing patio in a hot climate without existing shade is going to be unusable in summer afternoons without an awning, pergola, or cover system. Factor this into the initial design.
- Access and circulation: Where are the doors that connect to the outdoor space? How do guests move from the driveway to the patio? These traffic patterns affect size, layout, and whether stairs are needed.
- FEMA flood zone: Properties in FEMA Special Flood Hazard Areas (AE, AO, VE zones) face restrictions on below-grade construction and may require specific foundation types for any elevated structure. Check FEMA's Flood Map Service Center for your parcel.
- Tree canopy: Large roots can damage paver subbase and concrete slabs over time. Consider root barriers or alternative surfaces near large trees.
How to Decide: A Practical Flow
After working through all the factors above, most homeowners find the decision narrows down to a few practical filters. Here's how to apply them.
- Check your lot's grade first. If you have more than 2–3 feet of slope across the project area, decide between bridging it (deck) or reshaping it (terrace). A patio on significant grade requires expensive grading work that often costs more than the patio itself.
- Set a realistic budget before looking at materials. Below $10,000 for a typical project realistically limits you to a basic concrete patio or a small PT wood deck. Between $10,000 and $25,000 opens up pavers, composite decking, and pergola additions. Above $25,000 puts a large composite deck or basic screen room in reach.
- Decide on your exposure preference early. If you want to use the space in rain or intense sun, design for cover from the start. Retrofitting a roof over an existing slab or deck is expensive and technically complicated.
- Pull up your local permit requirements before finalizing the design. A deck you planned at 32 inches above grade needs guardrails and a permit; knowing that before design is final saves re-work.
- Check your HOA documents if applicable. ARC approval processes can take 30–60 days and may require specific material types or colors.
- Get three contractor bids with the same scope of work. The spread between bids on outdoor projects is often 30–50%, and the low bidder isn't always cutting corners, but you need to understand what each proposal includes or excludes.
- For any deck over 200 sq ft or over 30 inches high, budget for a permit and the required inspections. In most jurisdictions, the permit cost is $100–$600 and is small relative to the project cost. Skipping it creates liability at resale.
Sample Project Timelines
| Project Type | Typical DIY Timeline | Typical Pro Timeline | Key Variables |
|---|---|---|---|
| 300 sq ft paver patio | 3–5 weekends | 3–7 days | Base prep, drainage, pattern complexity |
| 200 sq ft poured concrete patio | 2–3 days (prep) + 1 day pour | 2–4 days | Cure time (28 days full strength); form removal day 1–2 |
| 16x20 pressure-treated deck (ground level) | 4–6 weekends | 5–10 days | Footing cure, framing, decking, railing |
| 16x20 composite deck (elevated, permit required) | 6–10 weekends | 7–14 days | Permit timeline can add 1–4 weeks before work starts |
| Tiered terrace with retaining walls | 4–8 weekends (small scale) | 5–15 days | Excavation, wall courses, drainage, backfill |
| Screen room enclosure on existing slab | 3–5 weekends | 3–7 days | Framing, panel installation, roof integration |
| Sunroom addition | Not recommended as DIY | 6–12 weeks | Permitting, foundation, framing, glazing, HVAC |
Planning Checklist: Before You Break Ground
- Measure your available space and establish existing grades with a level and stakes.
- Identify your budget range and break it into rough material/labor percentages (materials are typically 40–60% of total for most patio and deck projects).
- Determine whether a permit is required by contacting your local building department with your structure type, size, height, and attachment method.
- Review HOA ARC requirements and submit for approval before purchasing materials.
- Confirm site drainage: where does rainwater currently go, and where will it go after the project?
- Locate underground utilities (call 811 in the U.S. before any excavation).
- Check setback requirements in your zoning code for permanent outdoor structures.
- Request contractor bids with written, itemized scopes of work. Verify contractor licensing and insurance.
- If going DIY, source all materials before starting and plan for material curing/drying time in your schedule.
- Document the project with photos at each stage, especially subbase, footing, and drainage details that get buried under the finished surface.
Related Comparisons Worth Reading
The comparison between a patio and a deck is often just the starting point. If you're considering a covered outdoor space, the back porch vs. patio question becomes relevant, particularly if you want a roof over the space without going all the way to an enclosed addition. For a focused comparison, see our back porch vs patio guide for pros, cons, and costs. If you're thinking about a front entry structure, the portico vs. porch vs. patio distinction matters for both budget and curb appeal. For a focused comparison of entry and outdoor options, see portico vs. porch vs. patio for side-by-side definitions, costs, and use cases. Homeowners who want year-round use will want to look at sunroom vs. See our detailed sunroom vs patio comparison (internal resource eb92eaa9-c9e4-41e4-913d-525894f22fa2) for costs, permitting differences, and year‑round use tradeoffs. patio comparisons in detail, since the cost and permitting gap between those two options is substantial. And if you're still sorting out the terminology between a deck, a patio, and a porch, the full breakdown of the deck patio porch difference covers every overlapping case.
FAQ
What are the clear, code‑friendly definitions of patio, deck, terrace, porch, portico, and sunroom I should use when planning or permitting a project?
Use model‑code and municipal definitions as the baseline: patio = ground‑level finished outdoor surface adjacent to the house (often limited height above grade in local codes); deck = elevated walking surface supported by posts/piers or attached to the house (codes reference guard requirements when ≥30" above grade); terrace = often a stepped or leveled outdoor area on a slope or series of platforms/retaining walls (terminology varies by locality); porch = roofed, attached exterior platform at an entrance (can be front or back porch); portico = small covered entry supported by columns, generally decorative and not full‑size living space; sunroom = predominantly glazed, enclosed addition (codes often define by a glazing percentage, e.g., ≥40% glazed area). Always confirm local building department definitions because municipal codes can change thresholds and use different wording.
What authoritative codes and standards should I consult right away to determine permit triggers, structural loads, and enclosure rules?
Start with these primary references: International Residential Code (IRC) Chapter 2 and R507 (deck provisions), your local municipal code (definitions and permit thresholds), ASCE 7 for wind and snow loads (adopted by IBC/IRC), and local building‑department handouts (permit exemption and guardrail triggers). For drainage and pavement practice consult ICPI (Interlocking Concrete Pavement Institute) and EPA stormwater BMP guidance for permeable pavements. If in doubt about soils or bearing capacity, consult a licensed geotechnical engineer or local code official.
What realistic cost ranges and per‑sq‑ft estimates should I budget for patios, decks and terraces?
Nationally typical installed ranges (labor + materials): patio — poured concrete $4–$12/sq ft (basic to acid‑stain/stamped), segmental pavers $10–$30+/sq ft, natural stone $15+/sq ft; deck — pressure‑treated wood $20–$35/sq ft, mid‑range composite $35–$60/sq ft, high‑end hardwoods/complex designs $50+/sq ft; sunroom/enclosed additions — $150–$400+/sq ft depending on system and HVAC. Use local contractor bids for regionally accurate pricing; factors that materially change costs include access, slope/retaining work, railings, stairs, electrical/lighting, and roofing/insulation for enclosed structures.
How do lifespans and maintenance compare for common materials (concrete, pavers, wood, composite, stone)?
Typical service lives (approximate and site‑dependent): poured concrete slab 30–50+ years with cracking repair/maintenance; concrete pavers/stone 30–50+ years when properly installed and maintained; pressure‑treated wood decking 10–25 years depending on exposure and upkeep; cedar/redwood 15–25+ years with staining/sealing; capped composite/PVC decking 25–50+ years depending on product and detailing. Maintenance: concrete/pavers require joint cleaning and occasional resealing; permeable pavers need vacuum sweeping 1–2×/yr; wood needs annual/biannual staining or sealing and periodic board replacement; composites require cleaning and occasional board replacement at longer intervals.
What are the typical foundation and drainage differences between patios, decks and terraces?
Patio = typically slab‑on‑grade or compacted subbase (pavers require subbase + edge restraints); must be sloped away from house (min 1/4" per ft) and include compaction, subgrade prep and drainage/weep provisions. Deck = elevated on post/piers or attached ledger screwed/flashed to house with footings sized per soil bearing capacity and frost depth; requires ledger flashing, drainage under deck (ventilation) and proper connector hardware. Terrace = often involves terracing and retaining walls/stepped slabs with engineered footings/retaining measures for slope stabilization. Soil bearing capacity and site slope may force pier/engineered footings or retaining systems — consult geotech or engineer for poor soils or steep sites.
When is a permit likely required and what are common local thresholds I should check?
Common permit triggers (varies by jurisdiction): any deck attached to the dwelling, decks over ~30" above grade, decks larger than ~200 sq ft, enclosed or roofed structures, and significant grading/retaining walls typically require permits. Patios generally exempt if at grade and within local height thresholds (e.g., under 10" above grade in some municipalities). Always check your local building department; get a written confirmation of exemption when applicable. Also check HOA rules and zoning setbacks before starting.
Next Article
Portico vs Porch vs Patio: Definitions, Costs, and Picks
Portico, porch, patio explained with real cues, costs, uses, and a checklist to choose the best covered outdoor upgrade.