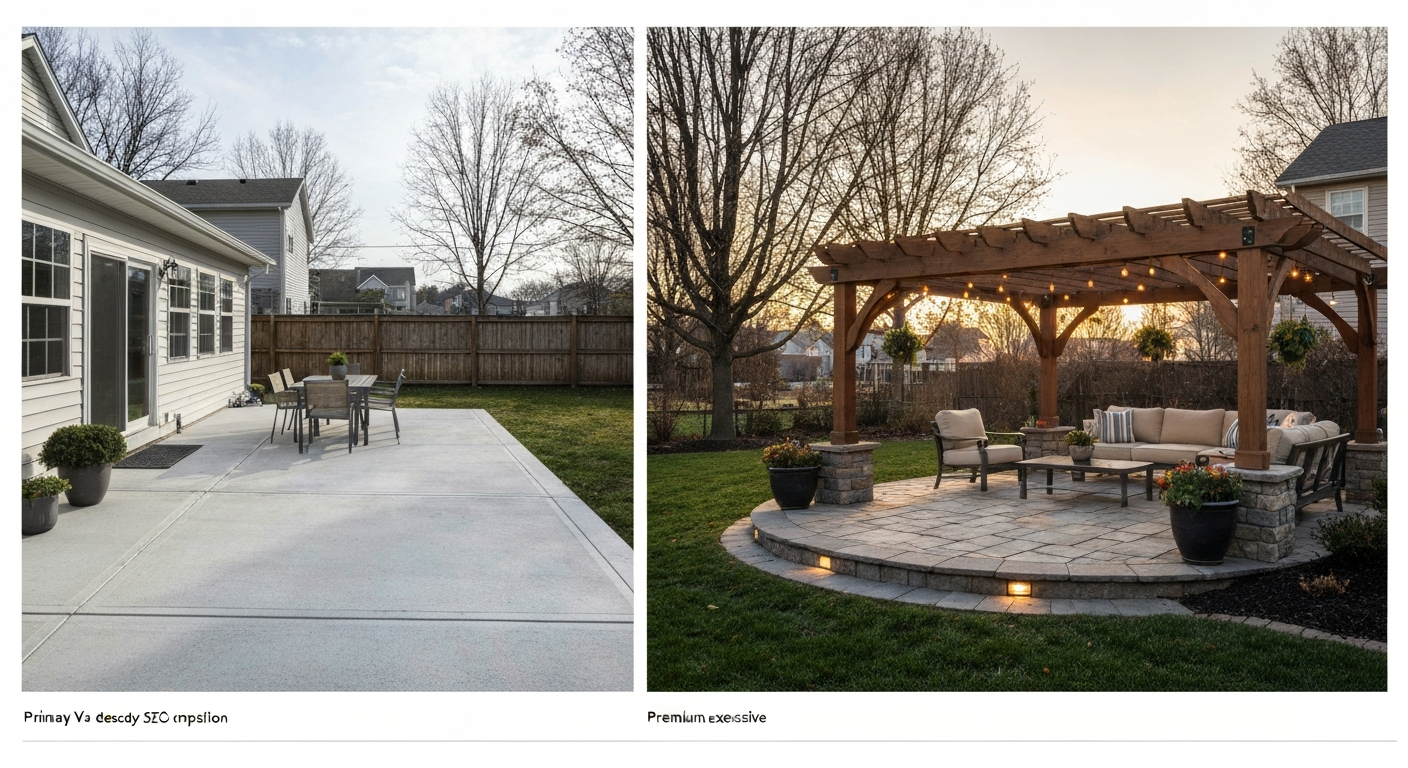
Patio enclosures are not cheap, but they are not uniformly expensive either. A basic aluminum-framed screened porch attachment can run $8,000 to $15,000 installed. HomeAdvisor/Angi reports patio enclosure projects commonly quote $8,000–$25,000 for smaller aluminum/glass enclosures and screened‑porch projects commonly fall in the $10,000–$35,000 range HomeAdvisor/Angi reports patio enclosure projects commonly quote $8,000–$25,000 for smaller aluminum/glass enclosures and screened‑porch projects commonly fall in the $10,000–$35,000 range.. A proper three-season sunroom typically lands between $20,000 and $50,000. A fully insulated four-season room with HVAC can push $35,000 to $70,000 or more. Where your project falls in that range depends on size, glazing type, frame material, foundation work, labor rates in your area, and the permits your municipality requires. If you are comparing a patio enclosure to a plain open patio or a wood deck, the enclosure will almost always cost more upfront, but you also get weather protection and year-round usability that those alternatives simply cannot deliver.
Is Patio Enclosures Expensive? Real Costs, Comparison, DIY & ROI

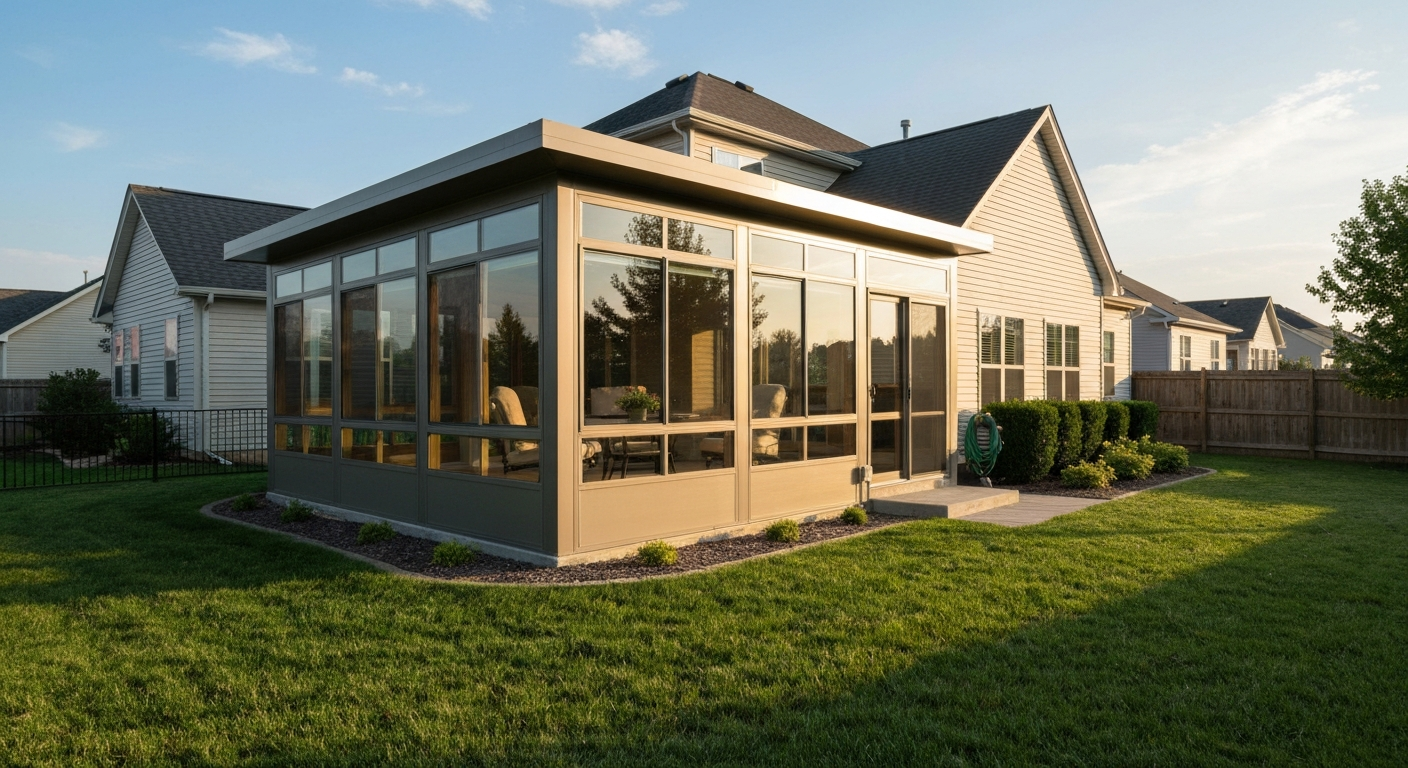
Low, typical, and high cost ranges
Breaking costs into three tiers makes it easier to set a realistic budget before you call anyone. These are all-in installed prices at the national level, meaning materials, labor, and basic permits are included. They do not include significant site prep like tree removal or major grading.
- Low end ($8,000 to $15,000): A prefabricated aluminum or vinyl screen enclosure attached to an existing covered patio or deck, with minimal structural work needed. Often 100 to 150 square feet, basic hardware, and no electrical or HVAC.
- Typical range ($15,000 to $45,000): A screened porch addition or three-season sunroom with solid framing, quality windows or insulated panels, basic lighting, and a foundation footing or deck-level slab. This is where most homeowners actually land.
- High end ($50,000 to $70,000+): A fully conditioned four-season sunroom with double or triple-pane low-E insulated glass units, climate control, custom roofline integration, electrical, and finish work to match interior living space standards.
Prefab kit sunrooms sit at the low end of per-square-foot cost at roughly $50 to $75 per square foot, but they require a prepared slab and a homeowner willing to manage installation or hire a general contractor who is comfortable with the kit system. Custom-built sunroom additions run $130 to $300 per square foot once the whole project is accounted for. Screened porches fall in the middle, commonly $80 to $300 per square foot depending on the structural complexity and finish level.
Sample costs by enclosure type and size
The table below pulls from published estimator data and shows realistic installed price ranges for common project sizes. Use it as a starting point, not a quote. Your local labor market and material costs will shift these numbers in either direction.
| Enclosure Type | ~10×12 (120 sq ft) | ~12×20 (240 sq ft) | ~20×20 (400 sq ft) |
|---|---|---|---|
| Prefab screen/aluminum enclosure | $5,000 – $9,000 | $10,000 – $18,000 | $18,000 – $30,000 |
| Screened porch (new addition) | $6,000 – $21,000 | $15,000 – $36,000 | $25,000 – $55,000 |
| Three-season sunroom | $9,000 – $25,000 | $20,000 – $45,000 | $35,000 – $65,000 |
| Four-season / insulated sunroom | $15,000 – $36,000 | $31,000 – $60,000 | $50,000 – $90,000+ |
A 12×20 footprint is about the most popular size for attached enclosures because it fits a standard patio or back door layout without requiring major structural changes to the house. At 240 square feet, it gives enough room for a seating area and a small table. The price gap between a screened version and a full four-season sunroom at that size can easily be $20,000 to $40,000, which is why picking the right type before you start shopping is worth the time.
What actually drives the price up (or down)
Understanding the cost levers helps you have a smarter conversation with contractors and spot bids that are suspiciously low or unexpectedly high.
Enclosure type and glazing
The single biggest variable is whether you are buying screen panels, single-pane acrylic, or true insulated glass units (IGUs). Installed double-pane low-E IGUs typically run $35 to $55 per square foot just for the glazed wall sections. Tempered glass panels add another $4 to $6.50 per square foot on top of standard IGU pricing. Specialty vacuum insulated glass (VIG), used in historically sensitive applications, can reach $120 to $220 per square foot installed. Screen panels, by contrast, cost a fraction of that, which is why screened enclosures sit at the low end of the price spectrum.
Frame material
Aluminum is the most common framing material for patio enclosures and pool cages. It is lightweight, corrosion-resistant, and relatively low-maintenance. However, aluminum commodity prices are volatile: in 2026, LME benchmark aluminum has been trading in the $3,000 to $3,600 per tonne range, and that feeds directly into extrusion costs. Vinyl frames are competitive on price and offer good insulation value but have less structural rigidity over long spans. Wood framing costs depend heavily on lumber markets, the Random Lengths framing composite has traded around $400 to $500 per thousand board feet in 2026, and any big swing in that number gets passed on to homeowners through contractor contingency pricing.
Foundation and structural work
Converting an existing concrete patio to an enclosure is the most economical starting point because the slab is already there. Pouring a new footing-supported slab for a ground-level addition adds $5 to $15 per square foot before framing starts. If the enclosure goes on top of an existing wood deck, the deck framing may need reinforcement to handle the additional load and the wind uplift from enclosed panels, which can add $2,000 to $8,000 to the project depending on the deck's condition and local wind codes.
Labor, location, and permits
Labor typically accounts for 30% to 40% of a patio enclosure project cost, so where you live matters enormously. RSMeans city cost indices show substantial variation between markets, a contractor in coastal California or the New York metro area will price the same scope of work significantly higher than one in a mid-size Midwest or Southeast city. Building permit fees are also location-specific; cities like Los Angeles use valuation-based fee tables where permit costs can represent 5% to 8% of the project value for mid-size residential additions. Smaller jurisdictions and states like Texas often publish tiered flat-rate schedules. Budget $150 to $1,500 for permits on smaller projects and up to several thousand dollars for larger additions, plus separate plan-check and inspection fees.
Add-ons and upgrades
Electrical outlets and ceiling fans, recessed lighting, ceiling fans, a ceiling-mounted mini-split, tile flooring, or an integrated shade system all add to the base price. These upgrades are easy to justify for a four-season room but are often unnecessary for a basic screened porch. The contractor overhead and profit margin adds another 10% to 20% on top of materials and labor, and a realistic contingency for surprises (unexpected soil conditions, hidden rot, permit delays) should be another 5% to 10% of the total budget.
Four example projects with real numbers
Small screened porch: $12,000 to $18,000
A 12×12 screened porch attached to the back of a ranch home, converting an existing concrete patio. The scope includes aluminum framing, fiberglass screen panels, a shed roof tied into the existing roofline, a ceiling fan rough-in, and one permit. The existing slab handles the foundation. Labor runs about 35% of the total. This is a realistic weekend-living upgrade for a mid-range budget. For more variety, see examples of patio enclosures that illustrate different sizes, materials, and budgets.
Three-season room: $25,000 to $40,000
A 12×20 three-season addition with vinyl framing, single or storm-panel windows (not full IGUs), a solid insulated roof panel, concrete footings, basic electrical, and a tile floor. Usable from early spring through late fall in most climates. Not conditioned for winter, but well-suited for mild-climate homeowners who want a true enclosed room feel without the full heating/cooling cost.
Sunroom conversion: $20,000 to $35,000
Converting an existing covered porch or three-season room into a conditioned space by upgrading the glazing to double-pane low-E IGUs, adding weatherstripping, insulating the knee walls, and tying the HVAC into the existing system or adding a mini-split. The conversion route is almost always less expensive than a ground-up addition because the structural shell already exists.
High-end glass sunroom: $55,000 to $80,000+
A 16×20 four-season room with a full glass roof, thermally broken aluminum frames, triple-pane low-E IGUs on all walls, radiant floor heat, a dedicated mini-split system, recessed lighting, tile flooring, and custom trim to match the interior of the house. This is the project where the per-square-foot cost can push $200 to $300 or more. It functions as additional conditioned living space and is the type of project that earns the higher end of the resale recoupment range.
DIY vs professional installation
A prefab screen enclosure kit is a realistic DIY project for someone comfortable with basic framing, a circular saw, a drill, and a level. Manufacturers like Eze-Breeze and similar brands sell systems designed for homeowner installation, and the skill level required is more "organized and careful" than "experienced carpenter." At $50 to $75 per square foot for a prefab kit vs. $130 to $300 per square foot for a custom-built addition, the savings on a 150-square-foot project could realistically be $10,000 to $15,000 in labor if you do it yourself competently.
The risks are real, though. Anything requiring a footing pour, roofline modifications, electrical, or structural attachment to the house framing involves permit inspections and building codes that expect licensed contractor work in most jurisdictions. If your enclosure is installed without permits or fails an inspection, you may have to tear out and redo work. Structural errors in screen panels that fail under wind load can cause injury. For anything beyond a simple screen kit on an existing slab, professional installation is almost always the safer choice, and it protects resale value because the work will have permits on record.
If you want to save money while using a pro, consider doing the finish work yourself after the structure is roughed in. Painting, flooring, trim, and ceiling fans are all work most homeowners can handle, and that can shave $3,000 to $6,000 off a mid-range project.
Financing options and ways to keep costs down
Most homeowners financing an enclosure use one of three paths: a home equity line of credit (HELOC), a home equity loan, or a contractor financing program. HELOCs are flexible and often carry lower interest rates than personal loans, but they require equity and a decent credit score. Contractor financing (offered by companies like Patio Enclosures, Champion, and others in the branded sunroom space) is convenient but tends to carry higher effective rates, especially on longer terms. If you have the equity, a HELOC is usually the better deal. Some energy-efficient glazing upgrades may qualify for federal tax credits under current IRA provisions, which is worth checking with a tax adviser if you are installing high-performance IGUs.
- Get at least three bids: pricing on the same scope can vary 20% to 40% between contractors in the same metro area.
- Start with an existing slab or deck: avoiding a new foundation pour saves $3,000 to $8,000.
- Choose a three-season room over a four-season room if your climate allows: the HVAC and upgraded glazing alone can add $10,000 to $20,000.
- Order in the off-season: contractors in northern climates often have more schedule flexibility in late fall and winter, which can translate to better pricing.
- Separate the screen or panel system from the structural work: some specialty enclosure companies charge a premium over local contractors who can frame the room and order panels direct.
- Avoid major structural changes to the roofline if possible: a simple shed or attached gable roof is far less expensive than modifying the main roof ridge.
How to evaluate a patio enclosure company
The branded patio enclosure market includes national companies that franchise or operate regional branches, and a large number of local contractors who do similar work under their own name. Before signing with anyone, run through a consistent set of checks regardless of how polished their showroom looks. The company with the nicest brochure is not always the one whose installation crew shows up reliably or whose warranty gets honored.
- Check their BBB profile: look at the rating, the number of complaints, and how the company responded to each complaint. A company with dozens of unresolved complaints is a warning sign no marketing material can paper over.
- Read third-party reviews on Google, Yelp, and Houzz: focus on reviews that mention the installation experience, timeline, and what happened when something went wrong. Positive reviews about the sales rep are less useful than reviews about the crew and post-install support.
- Verify their license and insurance with your state contractor licensing board: most states have an online lookup tool. Confirm the license is active, covers the work type, and has no disciplinary actions.
- Ask for references from projects completed in the last 12 months and actually call them: ask specifically whether the project came in on budget, whether the crew cleaned up after themselves, and whether any warranty issues came up.
- Review the warranty in writing before signing: understand what is covered (materials vs. labor vs. glass seal failure), the duration, whether the warranty is transferable to a future buyer, and which entity actually backs it (the manufacturer, the dealer, or both).
- Confirm their service area and local office: a company that does not have a local installation team or service presence means warranty work may depend on scheduling a crew from hours away.
If you are specifically evaluating the national brand called Patio Enclosures, you can check their standing through the same channels above. That brand operates through regional branches and has been active in the market for decades. For a deeper look at reviews and what customers report about the company's quality and service, the sibling topic on patio enclosure reviews covers the landscape in more detail.
How to verify company ownership and credentials
When you are spending $20,000 to $50,000 with a contractor, it is reasonable to know who actually owns the company and whether it has a stable operating history. This is especially relevant for national franchise-style operations where the local branch may be independently owned and operated under a licensed brand name.
- Search your state's Secretary of State business entity database using the company's exact legal name or trade name. This will show you the registered agent, the date of formation, and whether the entity is in good standing.
- Search the contractor licensing board in your state for the individual qualifier on the license: that person's license history, any complaints, and whether their bond and insurance are current.
- Look up the company's federal tax ID (EIN) through FEIN lookup tools or verify it on any contract they provide: legitimate contractors will have no issue providing their EIN.
- If the company operates as a franchise or licensee of a national brand, ask directly: are you the franchise owner or an employee of the national company? This matters for warranty enforcement and contract accountability.
- Check UCC filings and any state court records for judgment liens against the business: a contractor with multiple unsatisfied judgments is a credit and reliability risk.
- Verify that the local office address is a real physical location, not just a mail drop or a residential address.
For the specific question of who owns the Patio Enclosures brand and how it is structured corporately, that detail is worth looking into before signing a large contract. The sibling topic on who owns Patio Enclosures covers that ownership and operating structure in detail.
Verifying 'Patio Enclosures' specifically: step-by-step checks
Whether you are evaluating the national brand called Patio Enclosures or a local company using similar branding, these are the neutral, non-assumption-based steps to verify what you are actually dealing with before committing.
- Confirm the exact legal entity name on the contract matches the licensed entity in your state's contractor database. Brand names and legal business names are not always the same.
- Look up Patio Enclosures (or its parent company) in the Secretary of State database for the state where your project is located. Note the formation date, registered agent, and current status.
- Run the company name through the BBB national database and look at their profile, accreditation status, and complaint history over the past 36 months.
- Request a copy of the company's certificate of general liability insurance and workers' compensation coverage, not just a verbal assurance. Confirm the policy is active and the coverage limits are adequate for your project value.
- Ask specifically whether the warranty on your project is backed by the national brand, the local branch, or a third-party warranty administrator, and get the answer in writing in the contract.
- Search for court cases in your county or state courts under the company's legal name: this can surface patterns of disputes that do not appear in review platforms.
- Call the references provided and ask the same set of questions: did the project stay on schedule, was the crew supervised on site, and did the company respond to any post-completion issues?
Patio Enclosures vs Champion: how to compare them fairly
Both Patio Enclosures and Champion are national brands in the sunroom and patio enclosure space with long operating histories. A fair comparison focuses on the things that actually matter to your project rather than marketing claims.
| Comparison Factor | What to Look For | Where to Check |
|---|---|---|
| Product range | Do they offer the enclosure type you need (screen, 3-season, 4-season)? | Company website, local showroom visit |
| Warranty terms | Duration, what is covered, who backs it, transferability to buyer | Written contract and warranty document |
| Installation model | Are installers company employees or subcontractors? | Ask directly; check subcontractor licenses |
| Local presence | Is there a local branch with its own crews and service staff? | State contractor license board lookup |
| Pricing transparency | Will they provide itemized quotes showing materials vs. labor? | Request in writing before signing |
| BBB and reviews | Complaint volume, resolution pattern, overall rating | BBB.org, Google reviews, Houzz |
| Financing terms | APR, loan duration, early payoff penalties | Read the financing agreement, not just the monthly payment |
Neither brand is universally better than the other because the quality of a specific installation depends heavily on the local branch management and the crew assigned to your job. A homeowner in Ohio may have an excellent experience with one brand while a homeowner in the same state has the opposite experience with the same brand at a different branch. Use the comparison framework above as a consistent lens, and do not let brand recognition replace the verification steps. There is a detailed side-by-side breakdown of these two brands in the sibling topic comparing Patio Enclosures vs Champion if you want to go deeper.
Questions to ask contractors before signing anything
- What is the legal name of the entity I am contracting with, and is it licensed in this state for this type of work?
- Who specifically will be doing the installation: your employees or subcontractors? If subcontractors, are they licensed and insured?
- What does the project timeline look like from signed contract to completion, and what are the most common causes of delay?
- What is included in the quoted price, and what is explicitly excluded (site prep, electrical rough-in, permit fees, disposal)?
- Can you provide an itemized breakdown of materials, labor, and overhead?
- What happens if the actual cost exceeds the quoted price, and is the quote a firm fixed price or an estimate?
- Who pulls the permits, and who is responsible if the project does not pass inspection?
- What exactly does the warranty cover, for how long, and who honors it if the local branch closes?
- Can you provide three references from projects completed in the past 12 months in this area?
- What is the payment schedule, and how much of the total is due at signing versus at completion?
Permits, inspections, and code issues to expect
Almost any enclosed patio addition will require a building permit in the United States. The common exceptions are temporary screen kits and very small prefab structures below a square footage threshold set by your local jurisdiction, but even then, some municipalities require a zoning review or accessory structure permit. Do not assume because a contractor says "we handle the permits" that the project is actually permitted correctly. Ask for the permit number before work starts and verify it with your local building department.
Typical code issues that come up in patio enclosure permits include: setback compliance (how close the structure can be to property lines), impervious surface coverage limits (some jurisdictions cap the percentage of your lot that can be covered), structural load calculations for wind and snow, electrical code compliance for any circuits added, and energy code compliance for conditioned spaces (usually the IECC or a state energy code equivalent). A four-season sunroom that is being conditioned by the home's HVAC system will typically need to meet the same insulation and glazing U-value requirements as the rest of the house in most states.
Permit fees vary widely. Smaller projects in most jurisdictions will fall in the $150 to $1,500 range for the building permit itself, but plan-check fees and multiple inspection fees (foundation, framing, electrical, final) can add another $200 to $800. In cities with valuation-based fee schedules like Los Angeles, a $40,000 enclosure addition could generate permit costs of $2,000 to $3,200 before plan-check fees. Budget these costs into your project from the start so they do not come as a surprise.
Maintenance, warranties, and lifespan
| Enclosure Type | Typical Lifespan | Main Maintenance Needs | Warranty to Expect |
|---|---|---|---|
| Aluminum screen enclosure | 20–30+ years | Screen replacement every 7–15 years, frame cleaning, hardware lubrication | Frame: 10–25 years; screen: 1–5 years |
| Vinyl-framed three-season room | 20–30 years | Window cleaning, seal inspection, caulk refresh every 5–7 years | Frame: lifetime limited; glass seal: 5–10 years |
| Wood-framed sunroom | 25–40 years with maintenance | Annual painting or staining, wood inspection for rot, gutter management | Varies by contractor; typically 1–5 years labor |
| Prefab aluminum/glass sunroom | 15–25 years | Gasket and seal inspection, glass cleaning, frame re-caulking | System warranty: 10–20 years; glass: 5–10 years |
| Four-season custom sunroom | 30–50 years | HVAC maintenance, IGU seal inspection, roofing membrane checks | Labor: 1–2 years; components: manufacturer terms |
IGU (insulated glass unit) seal failure is the most common maintenance issue in glazed enclosures. When the seal between the two panes fails, moisture gets in and the glass fogs permanently. Most IGU manufacturers warrant their seals for 5 to 10 years. After that period, foggy panes are a homeowner expense, typically $200 to $600 per unit to replace. This is worth asking about when comparing bids: some companies use higher-quality IGUs with better seal durability, and that difference matters over a 20-year ownership period.
ROI, resale value, and energy impact
Industry cost-vs-value analysis (based on Remodeling Magazine's historically published benchmarks) puts the average resale recoupment for a sunroom addition in the 30% to 60% range nationally. A midrange four-season addition in a market where extra living space is in high demand can approach the upper end of that range. A screened porch or three-season room in a warm-climate market where buyers specifically want that feature can also recoup well. The lowest recoupment tends to come from expensive glazed additions in cold climates where buyers discount the energy cost of maintaining them.
On energy impact: a poorly insulated three-season room attached to the house can actually increase heating and cooling costs by creating a large thermal bridge. A well-built four-season room with high-performance low-E IGUs and proper insulation can act as a buffer zone and reduce heat loss through that side of the house in winter. The practical advice is to insulate the wall between the new enclosure and the existing living space well regardless of how the enclosure itself is built, and to use a mini-split rather than extending the home's main HVAC system into a lightly insulated room.
Patio enclosure vs patio vs deck vs porch: side-by-side
| Structure | Typical Cost (200 sq ft, installed) | Weather Protection | Year-Round Use? | Permit Usually Required? | Resale Recoupment (approx.) |
|---|---|---|---|---|---|
| Open patio (concrete/pavers) | $3,000 – $12,000 | None | No | Sometimes | 50–75% |
| Wood or composite deck | $8,000 – $25,000 | None | No | Yes | 50–70% |
| Screened porch | $12,000 – $35,000 | Insects/light rain | No (seasonal) | Yes | 40–60% |
| Three-season sunroom | $20,000 – $50,000 | Full weather | No (most climates) | Yes | 40–55% |
| Four-season sunroom | $35,000 – $75,000+ | Full weather + climate control | Yes | Yes | 40–60% |
| Covered porch (no enclosure) | $6,000 – $20,000 | Rain/sun only | Limited | Yes | 50–65% |
An open patio is the least expensive entry point and recouped at one of the higher rates in resale data, partly because the cost is low and buyers perceive the space as flexible. A patio enclosure costs significantly more but adds usability that an open patio cannot. The decision is not purely financial: if you live in an area with mosquitoes, afternoon thunderstorms, or cold springs and falls, an enclosure pays for itself in the quality of time you actually spend outside. If your climate is mild and dry, a well-built open patio or deck may deliver more satisfaction per dollar. The are patios expensive topic is a useful complement to this article if you are still deciding between a bare patio and an enclosed structure.
Decision checklist: is an enclosure right for your project?
- Do you have an existing patio slab or deck that can serve as the foundation? (Yes = lower cost, easier project.)
- What is your realistic budget, and does it cover the enclosure type you actually want (not just the cheapest option)?
- How often does weather currently prevent you from using your outdoor space, and would an enclosure change that enough to matter to you?
- Do you need year-round use, or would a three-season room meet your actual needs at a lower cost?
- Does your HOA permit enclosures, and if so, are there design restrictions on materials, roof pitch, or colors?
- Are you planning to sell in the next three to five years? If so, factor in the local market's appetite for enclosed outdoor spaces.
- Can your home's existing electrical panel support added circuits for lighting, outlets, and a potential mini-split?
- Is the wall of your house where the enclosure attaches structurally sound and ready for attachment (no rot, correct ledger board situation for decks)?
- Have you gotten at least three bids and verified the contractor's license, insurance, and references?
- Have you confirmed what permits are required with your local building department before signing a contract?
Simple cost checklist and project timeline
A typical patio enclosure project from first contractor contact to final inspection runs 8 to 16 weeks for a mid-size project, though supply chain delays and permit processing times can extend that. Here is the rough cost component breakdown and sequence to use as a planning reference.
| Project Phase | Typical Timeline | Cost Component (% of total) |
|---|---|---|
| Design, quote, and contract signing | Weeks 1–3 | 0% (pre-project) |
| Permit application and plan check | Weeks 2–6 (concurrent with design) | 1–5% (permit and plan-check fees) |
| Site prep, demolition, foundation/slab | Week 6–7 (after permit issued) | 5–15% |
| Framing and structural work | Weeks 7–9 | 15–25% |
| Glazing, screen, or panel installation | Weeks 9–11 | 20–35% |
| Electrical, HVAC rough-in | Weeks 10–11 (concurrent) | 5–15% |
| Insulation, drywall, ceiling finish | Weeks 11–13 | 5–10% |
| Flooring, trim, hardware, cleanup | Weeks 12–14 | 5–10% |
| Final inspection and punch list | Weeks 14–16 | Contractor overhead/profit: 10–20% of total |
Keep a written contingency of 10% to 15% of the contract price in your budget for surprises. The most common unplanned costs on enclosure projects are: discovering the existing slab is not level or cracked and needs repair, finding rot in the house wall where the ledger attaches, or permit delays that push the project into a season when the contractor's scheduling changes. None of these are catastrophic, but they are common enough that every homeowner going into an enclosure project should expect the possibility.
Suggested images and where they add the most value
A few well-chosen images make this type of article far more useful than text alone. Here is where they fit best in the article layout. Near the top, a side-by-side image showing a screened porch, a three-season room, and a glass four-season sunroom helps readers immediately understand the spectrum they are navigating before they get into the cost table. Immediately following the cost table, a before-and-after image of a patio-to-sunroom conversion reinforces the value proposition better than any text description. In the materials section, a close-up of aluminum extrusion framing next to vinyl framing next to wood framing gives the cost driver discussion a concrete visual anchor. A permit document or building inspector photo near the permits section normalizes the permitting process for readers who find it intimidating. Finally, a photo showing the difference between a fogged IGU seal failure and a new panel is genuinely useful for the maintenance section since most homeowners have never seen this before and do not know what to look for.
FAQ
Is a patio enclosure expensive compared with alternatives (deck, patio, porch)?
Short answer: It can be, but ranges overlap. Low‑end aluminum or prefab screened enclosures can be comparable to a mid‑range deck or stamped concrete patio, while custom insulated (four‑season) sunrooms are closer to a small home addition in cost. Expect screened porches and basic aluminum/glass enclosures to be the least expensive; three‑season sunrooms midrange; four‑season/insulated sunrooms highest cost and closest to an indoor addition in price and permitting complexity.
What are realistic cost ranges (low / typical / high) for common patio enclosure types (installed, all‑in)?
Typical national all‑in ranges: - Screened porch / basic screened‑in patio: $6,000–$21,000 (low to typical for small to medium). - Aluminum/glass or kit patio enclosure: $8,000–$40,000. - Three‑season sunroom (unheated, insulated shell limited): $20,000–$50,000. - Four‑season (insulated, conditioned) sunroom: $35,000–$70,000. These reflect national guidance and will vary with size, finish, and local labor/permit costs.
Compact sample cost table by enclosure type and common sizes (estimates)
Example installed ranges by type/size (approximate): - 10×12 (120 ft²): screened $6k–$18k; three‑season $9k–$30k; four‑season $15k–$45k. - 12×20 (240 ft²): screened $12k–$36k; three‑season $18k–$48k; four‑season $31k–$72k. - Prefab small kits (80–150 ft²): $4k–$18k depending on finish. Use per‑ft² heuristics (prefab $50–$75/ft²; custom $130–$300/ft² for full additions) to scale to other sizes.
What are the main cost drivers that change a quote?
Primary drivers: - Type: screened vs three‑season vs four‑season (insulation, HVAC). - Size: square footage and fenestration area. - Materials: frame (aluminum/vinyl/wood), glazing (single/double/Low‑E/triple), roofing (solid vs glass). - Foundation: slab, footings, or conversion from deck. - Labor and location: local wage and market multipliers. - Site prep: grading, tree work, demolition. - Permits, inspections, and design/engineer costs. - Add‑ons: HVAC, electrical, plumbing, built‑ins, flooring, insect screens, custom trims, windows/doors, and warranties.
How do glazing and framing choices affect cost?
Glazing: insulated double‑pane Low‑E units materially increase cost vs single pane; expect IGU installed costs to add dozens of dollars per ft² (and specialty glazing much more). Framing: aluminum is typically less costly and low‑maintenance; vinyl and wood are more expensive and can raise labor/finish costs. Roof glazing, tempered glass, or high‑performance windows drive the price up significantly.
Example project summaries (quick case studies)
1) Budget screened porch (12×12): convert an existing deck to a screened enclosure, basic aluminum framing, insect screens, minor roof tie‑in — estimated $8k–$15k, minimal permit in many jurisdictions. 2) Midrange three‑season sunroom (12×20): insulated floor, vinyl windows, solid roof with skylight option, electrical for fans/outlets — estimated $25k–$45k, plan check required. 3) High‑end four‑season addition (20×20): poured footing/slab, full HVAC tie‑in, double‑pane Low‑E glass walls, finished drywall, flooring — estimated $45k–$90k+, requires full permitting and possibly engineering.
Are Patios Expensive? Cost Guide, Materials & ROI
Compare patio costs, materials, enclosures, and ROI, real budgets, DIY vs pro tips, and how to vet installers.