A patio does not need to be flush with the grass, and in most yards it probably shouldn't be. The ideal finish depends on your drainage slope, soil type, and how you plan to use the space. The one rule that does apply everywhere: the patio surface must slope away from your house at roughly 2% (about 1/4 inch per foot) to keep water off the foundation. Beyond that, flush, raised, and sunken patios all work well when built correctly. If your yard drains well, a flush or near-flush patio is the cleanest look and the easiest to maintain. If your yard holds water or sits in a low spot, a slightly raised patio keeps your seating area dry. The sections below lay out the decision criteria, construction practices, and step-by-step fixes for every scenario.
Should Patio Be Flush with Grass? Drainage, Safety & Fixes

Quick answer: should a patio be flush with the grass?
For most residential yards, a patio surface that sits roughly 1 to 2 inches above the surrounding lawn is the sweet spot. It is close enough to grade to look flush from a distance, it keeps surface water from pooling on the patio, and it prevents lawn mower scalping along the edge. A perfectly level-with-the-soil patio is manageable if you have excellent drainage and keep the lawn graded to shed water away, but it demands more maintenance and more precise installation. A raised patio of 6 inches or more looks intentional and solves serious drainage problems, but adds retaining-edge work and sometimes steps. A sunken or lowered patio creates a sheltered feel but requires the best drainage engineering of the three.
Use this quick checklist to find your starting point before committing to any elevation.
- Drainage: does your yard drain away from the house naturally, or does water pool near the patio area after rain?
- Soil: clay soil drains slowly and pushes moisture toward any low slab edge; sandy or loamy soil is more forgiving of a flush finish.
- Accessibility: is the patio used by anyone with mobility limitations? A step-free or near-step-free transition matters here.
- Aesthetics: do you want the patio to blend into the lawn, or do you want it to read as a defined raised platform?
- Cost: flush patios are generally cheapest to install; sunken patios typically cost the most because of excavation and drainage.
- Resale: broadly level, accessible patios tend to appeal to the widest range of buyers.
- HOA and local code: some neighborhoods restrict raised structures or require permits above certain heights.
How to choose the right patio elevation for your yard
Drainage comes first
Every patio decision starts with water. The 2% slope rule (1/4 inch per foot away from the house) is the industry-standard minimum for pedestrian patios, backed by building-science guidance from sources like the Building America Solution Center. That slope needs a place to go: a lawn that grades away from the foundation, a swale, a French drain, or a connection to a storm system. If your yard is flat or bowls inward, a flush patio will collect standing water. In that case, a raised patio with a defined edge or a patio with a perimeter French drain is a better starting point. Permeable pavers (PICP systems) can help, but they require a site infiltration test before sizing the base, and the reservoir layer needs to sit at least about 2 feet above the seasonal high groundwater table.
Safety and accessibility
If someone in your household uses a wheelchair, walker, or has balance issues, a step-free transition from the door to the patio to the lawn is worth designing for from the start. The ICC A117.1 accessibility standard (widely adopted by local codes) sets a maximum threshold height of 1/2 inch, with an allowance up to 3/4 inch if the edge is beveled at no steeper than 1:2. That is not a legal requirement for a private home, but it is the accepted best practice. For any raised patio with a drop greater than 30 inches on an open side, the 2021 IRC requires a guardrail of at least 36 inches. Stairs, if needed, must have risers no taller than 7-3/4 inches and treads no shallower than 10 inches, with no more than 3/8 inch variation between risers in a single flight.
Aesthetics, cost, and resale
Flush patios look seamless and work well with modern or minimalist landscaping. Raised patios define outdoor rooms and make a stronger architectural statement. Sunken patios feel intimate and are popular in Mediterranean and California-style yards. From a resale perspective, all three can add value when built well. Buyers tend to respond negatively to drainage problems (wet spots, cracked slabs, eroded edges) regardless of elevation, so the quality of the drainage execution matters more than the style choice. Cost-wise, a basic flush concrete patio runs roughly $8 to $15 per square foot installed; a raised patio with retaining edges and steps can run $15 to $30 or more depending on materials; a sunken patio with proper drainage typically starts around $20 per square foot and climbs quickly with excavation depth and drain complexity.
HOA and permit checkpoints
Many HOAs require approval for any hardscape over a certain size or height, and some municipalities require a permit for patios above a set square footage or for any drainage connection to a public storm system. Cities like Seattle and others explicitly require permits before tying a French drain or surface drain to a public storm sewer, and illicit connections to sanitary sewers are prohibited everywhere. Seattle's municipal code requires permits for connections to the public storm sewer (see blank" rel="noopener noreferrer">Title 21 - UTILITIES | Municipal Code | Seattle, WA (Municode)). Check with your local building and public works departments before finalizing an elevation that requires retaining walls, steps, or drain connections.
Pros and cons of a flush (ground-level) patio
A flush patio sits at or within about an inch of the surrounding lawn surface. It is the most common choice for backyard patios, and it works extremely well when the site is properly graded and drains freely. The trade-off is that it requires more precise installation and ongoing attention to keep the lawn from creeping over the edges.
| Pros | Cons |
|---|---|
| Clean, seamless look from indoors and out | Grass and weeds encroach easily if edge restraints are not maintained |
| Easiest step-free accessibility from door to patio to lawn | Water can pool on or around the slab if grading is imprecise |
| Lowest installation cost; minimal retaining-edge work | Lawn mowers can clip or chip edges if the patio is not slightly above grade |
| No guardrails or stairs required | Requires careful base preparation to prevent settling below lawn level over time |
| Works with concrete, pavers, and permeable systems equally | Splashback from rain can stain pavers or slab edges if no transition strip is used |
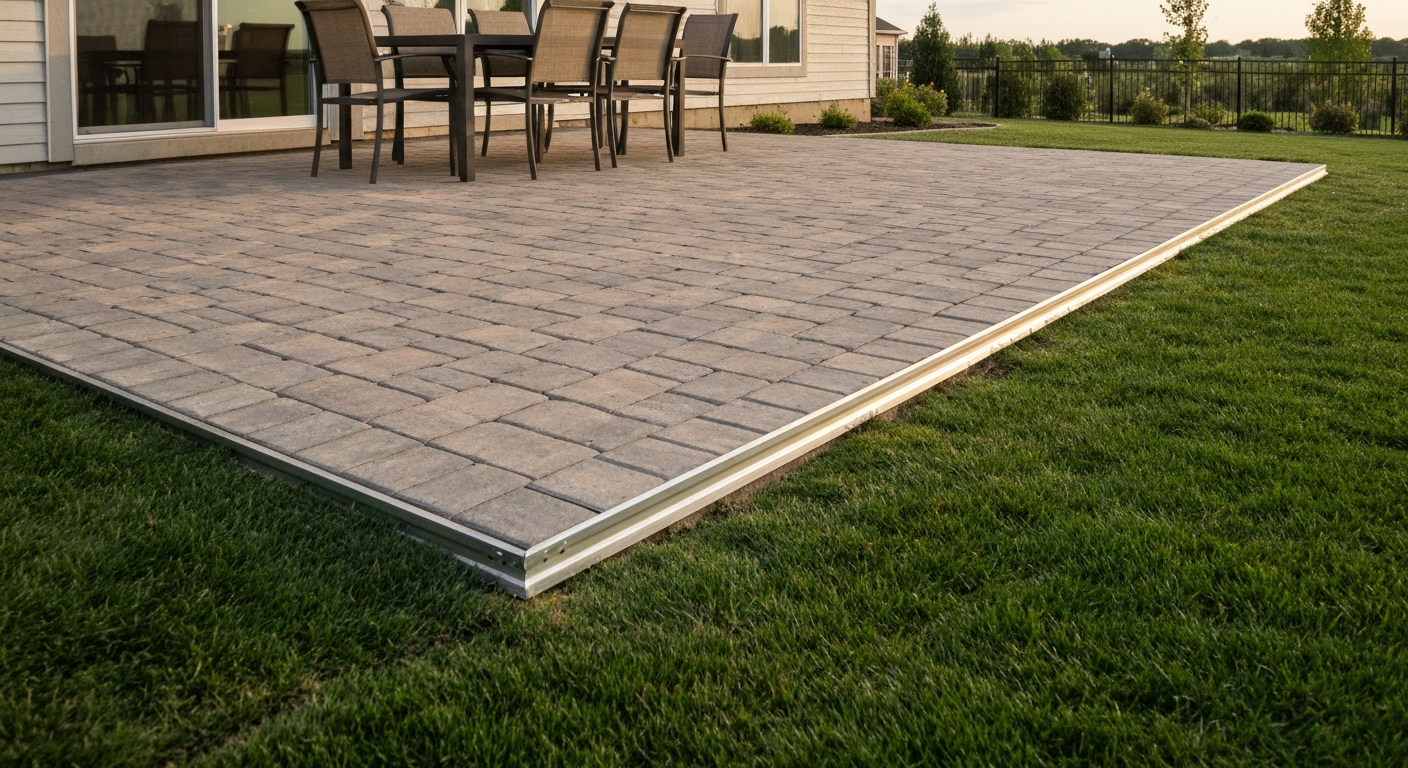
For concrete, a 4-inch nominal slab is standard for pedestrian patios, with control joints spaced roughly 8 to 12 feet apart and sawed to about 1/4 of the slab thickness. For pavers, ICPI installation guidelines call for a compacted structural base (compacted to at least 95% standard Proctor for pedestrian applications), a bedding sand layer of no more than 2 inches before compaction, and continuous edge restraints to stop lateral creep. Without that edge restraint, a flush paver patio slowly migrates into the lawn.
Pros and cons of a raised patio
A raised patio sits noticeably above the lawn, typically 6 inches or more, and is defined by a retaining edge, retaining wall, or step-down to grade. It is the right choice when drainage is a persistent problem, when the yard slopes toward the house, or when you want to create a defined platform that reads as an outdoor room.
| Pros | Cons |
|---|---|
| Excellent drainage; water sheds away from the surface naturally | Requires retaining walls or edging, adding material and labor cost |
| Stays dry in heavy rain; no pooling on the surface | Steps or ramps are needed for lawn access, adding complexity |
| Defined, architectural look that can improve curb appeal | Guardrails required by IRC if the drop exceeds 30 inches on an open side |
| Grass does not encroach over the edge easily | Segmental retaining walls above certain heights require engineered design |
| Works well on sloped or low-drainage lots | Higher cost than flush; retaining walls, steps, and drainage add $10–$20+ per sq ft |
Retaining edges for raised patios can be simple metal or plastic edging for low-rise situations (1 to 3 inches), or full segmental retaining walls (SRWs) for anything taller. For SRWs, the NCMA and manufacturer guides like Allan Block specify geogrid reinforcement when wall heights and surcharge conditions exceed the range of gravity-only designs. As a general rule, any wall over 4 feet (measured from the bottom of the footing) typically needs an engineered design in most jurisdictions. Always provide drainage behind the wall: trapped water is the leading cause of SRW failures.
Pros and cons of a lowered (sunken) patio
A sunken patio sits below the surrounding lawn grade, creating a sheltered, pit-like seating area. It is a bold design choice that works beautifully in the right yard, but it is the most technically demanding option from a drainage standpoint. Water naturally flows into low points, so a sunken patio without a robust drainage system will become a pond.
| Pros | Cons |
|---|---|
| Intimate, sheltered feel; wind protection | Drainage is the hardest to get right; requires French drain or catch basin |
| Visually striking; works well in contemporary and Mediterranean designs | Most expensive to install due to excavation and drainage engineering |
| Naturally screened from neighbors without tall fencing | Requires reliable outlet for collected water (drywell, storm connection, or daylight) |
| Retaining walls stay low relative to the patio user (good for views) | Not accessible for mobility-limited users without a ramp design |
| Keeps patio furniture from looking exposed in a large flat yard | Any drain connection to public storm system typically requires a permit |
If you pursue a sunken patio, plan the drainage system before you pour a single inch of concrete. A French drain running along the perimeter, with a perforated pipe in a 12 to 18 inch trench, clean aggregate, and a positive slope of at least 0.5% (many practitioners recommend 1% or more) to an approved outlet is the minimum. The outlet must be permitted if it connects to a public storm system, and it needs erosion protection where it daylights into open ground.
Patio vs ground-level deck: which one makes more sense?
A ground-level deck and a flush patio solve many of the same problems, and homeowners often get stuck choosing between them. Compare ground-level deck vs patio for a concise side-by-side guide to costs, maintenance, and when each option makes the most sense. The honest answer is that each has a clear home court advantage. A patio (concrete or pavers) is harder, lower maintenance over 20-plus years, and usually cheaper to install in the $8 to $20 per square foot range. A ground-level deck made from pressure-treated lumber or composite runs $15 to $35 per square foot installed but gives you a warm, natural feel underfoot and is easier to build on uneven or sloped ground without major excavation.
| Factor | Flush Patio (concrete/pavers) | Ground-Level Deck (wood/composite) |
|---|---|---|
| Typical installed cost | $8–$20/sq ft | $15–$35/sq ft |
| Lifespan (well maintained) | 25–50+ years | 15–30 years (wood); 25–40 years (composite) |
| Drainage on sloped ground | Requires grading or fill; can be complex | Framed above ground; drains naturally underneath |
| Maintenance | Sealing/resurfacing every 5–10 years | Annual cleaning; periodic staining/sealing (wood) or washing (composite) |
| Feel underfoot in heat | Gets hot in direct sun (concrete especially) | Stays cooler; composite still warm but less than concrete |
| Permits typically required | Often no permit for small patios; check locally | Usually yes; ledger connections to house always need a permit |
| Accessibility | Easy step-free transition to lawn | Requires step-down to grade unless built to grade |
| HOA acceptance | Generally unrestricted | May face restrictions on structure height or appearance |
Choose a patio when you want the lowest long-term maintenance, when your soil is stable and drains well, or when budget is the primary constraint. Choose a ground-level deck when your yard slopes significantly (grading for a flat patio gets expensive fast), when you want that wood aesthetic, or when you want to build in stages over a weekend or two. The two are often compared alongside porches and covered structures, but for simple outdoor seating purposes, it comes down to ground conditions and aesthetic preference.
When your lawn is higher than the patio: step-by-step solutions
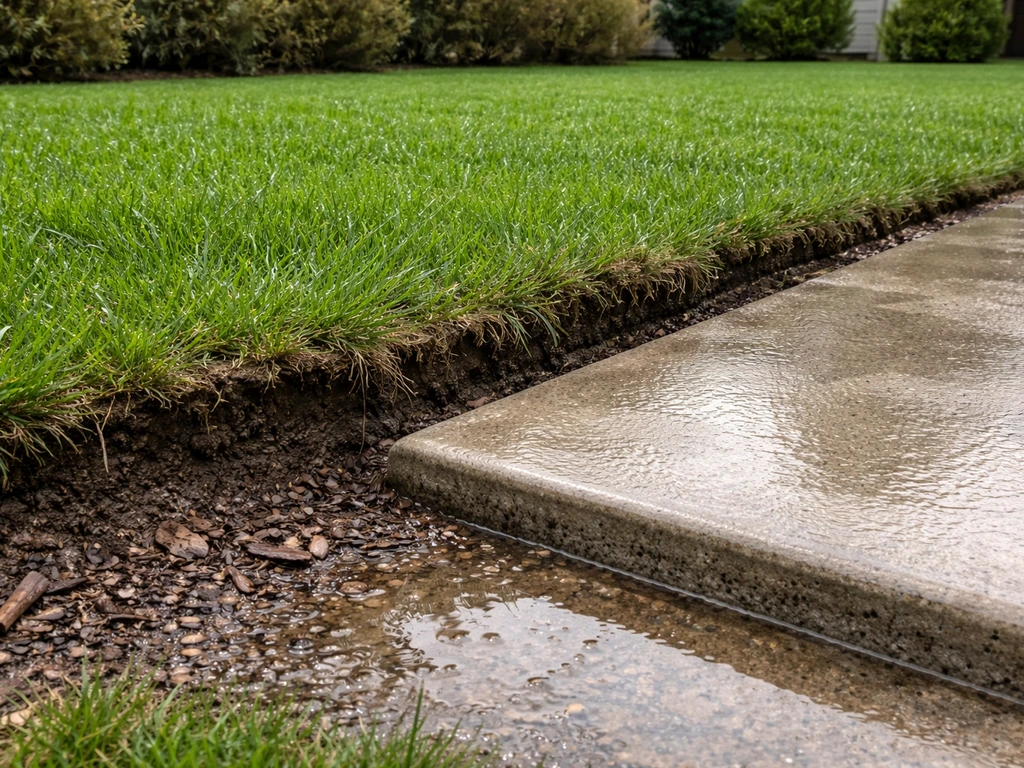
This is one of the most common patio complaints, especially on older properties where the lawn has been topdressed and built up over the years or where a patio settled slightly after installation. Water runs off the lawn onto the patio, grass creeps over the edge, and the whole transition looks unkempt. Here is how to work through it systematically. If your lawn is higher than my patio, read the step‑by‑step fixes for grading, edging, and drainage to correct the transition my lawn is higher than my patio.
- Measure the height difference first. Use a string line or a long level to find out how much higher the lawn sits above the patio edge. A 1 to 3 inch difference is a different fix than a 6 to 12 inch difference.
- For small differences (1 to 3 inches): install a low retaining edge directly at the patio perimeter. Metal landscape edging, aluminum paver restraints, or a single course of natural stone or brick laid in mortar can hold the lawn back and create a clean visual line. Cut the lawn back 3 to 4 inches from the patio edge and re-seed or re-sod after the edging is in place.
- For medium differences (3 to 6 inches): build a low segmental retaining wall or a stacked-stone border along the patio edge. Backfill with compacted soil and ensure the top of the wall directs water away from the patio surface, not onto it. Provide a small crushed-stone drainage channel or gravel strip at the base of the wall on the patio side if water tends to run toward the patio.
- For larger differences (6 inches or more): this may call for re-grading the lawn around the patio. Hire a landscaper with a small skid-steer or hand-grade with a rake and fill if the area is manageable. The goal is a positive slope of at least 2% away from the patio on all sides, with the lawn transitioning smoothly down to the patio level rather than dropping abruptly.
- Add a French drain if regrading alone is not enough. Run a perforated pipe in a gravel trench along the uphill edge of the patio, slope it at least 0.5% (1% is more reliable) toward an approved outlet. Use clean washed stone (3/4-inch crushed), wrap the pipe in filter fabric, and verify that your discharge point is permitted if it connects to a public system.
- Add steps if the finished grade difference is intentional. IRC stairs require risers no taller than 7-3/4 inches and treads no less than 10 inches deep, with no more than 3/8 inch variation between any risers in the same flight. Even a single step at 4 to 5 inches makes the transition safe and clean.
- Check for accessibility needs. If a step-free path is required, a ramp at no steeper than 1:12 (about 5 degrees) is the accepted standard. For private residential use, a 1:8 slope is sometimes used for short distances, but 1:12 is safer and more universally comfortable.
If this situation describes your yard, the related topic covering what to do when the grass is higher than the patio goes deeper into the diagnostic side of this problem, including how to tell whether the patio settled or the lawn built up, which changes the fix.
When the patio is higher than the lawn: step-by-step solutions
A patio sitting above the lawn edge is more structurally stable than the reverse, but it creates its own set of issues: erosion at the drop-off, an abrupt and sometimes dangerous edge, and water that rushes off the patio onto the lawn and erodes the soil below. The fix sequence depends on how high the drop is and what material the patio is made of.
- Assess the drop height and the material. A 2 to 4 inch drop from a concrete or paver patio is a cosmetic issue solved with edging or a low border. A 6 to 18 inch drop is an erosion and trip-hazard problem. Over 18 inches, you are looking at a true retaining wall situation.
- For small drops (2 to 4 inches): install a beveled or rounded edge cap on the patio perimeter (available as concrete or bluestone bullnose pieces), then build up the soil along the edge with clean topsoil compacted in layers. Seed or sod the transition area and add a steel or aluminum landscape edge to hold the turf in place. The goal is to bring the lawn grade up close to the patio edge without covering the patio surface.
- For medium drops (4 to 12 inches): build a segmental retaining wall (SRW) using concrete block, natural stone, or timber along the patio edge. Backfill behind the wall with compacted granular fill in 6-inch lifts. Include a 4 to 6 inch perforated drain pipe in gravel at the base of the wall, daylighting to the side or running to an outlet. This keeps hydrostatic pressure from building behind the wall and causing it to tip.
- For larger drops (12 inches and above): consult an SRW design guide or a licensed landscape contractor. Walls above approximately 4 feet (bottom of footing to top of wall) usually require engineered drawings and a permit. Geogrid reinforcement layers are typically needed when walls exceed the gravity-only range for the block type you are using; Allan Block's guidance specifies geogrid embedment lengths of at least 60% of the retained height. Do not guess on tall walls.
- Control erosion at the patio edge during construction. Before the permanent wall or edging is in place, install erosion-control fabric or temporary silt fencing to keep soil from washing away in rain. Once the retaining edge is installed, apply erosion-control seed mix or sod to any disturbed lawn area immediately.
- Regrade the lawn away from the wall base once the retaining structure is in place. The lawn on the lower side should slope away from the wall base at a gentle 2% grade to move water away from the footing and reduce saturation behind the wall.
- Add steps if needed for daily use. Apply the same IRC stair dimensions: maximum 7-3/4 inch risers, minimum 10-inch treads. For two or three steps down from patio to lawn, precast concrete steps or natural stone steppers are both practical and good-looking options that require minimal maintenance.
- If the patio is higher because it was installed without adequate site grading, consider whether partial regrading of the surrounding lawn is more practical than building retaining edges around the entire perimeter. Sometimes bringing the lawn up on all sides is the cleaner long-term solution.
The related topic on whether a patio should be higher than the lawn covers the aesthetic and functional trade-offs of this configuration in more detail, including how much height difference looks intentional versus looks like a mistake.
Material and construction checkpoints for any patio elevation
Whatever elevation you choose, the underlying construction quality determines how long the patio performs. Here are the non-negotiable checkpoints for the three most common patio materials.
Concrete slabs
Pour at a minimum of 4 inches nominal thickness for pedestrian use. Reinforce with wire mesh, rebar, or fiber depending on your contractor's spec. Install control joints at roughly 8 to 12 foot spacing (for a 4-inch slab), sawed to about 1 inch deep within a few hours of finishing. Slope the entire slab at least 2% away from the house. Make sure the subgrade is compacted and that water cannot pool under the slab, which causes frost heave in cold climates.
Concrete or clay pavers
Follow ICPI guidelines: a compacted aggregate base (at least 95% standard Proctor density for pedestrian areas), a bedding sand layer no thicker than 2 inches before compaction, and continuous edge restraint on all perimeter edges. Without edge restraint, pavers migrate laterally over time, especially at the lawn interface. The surface slope should match the 2% minimum. For permeable paver systems (PICP), you need a site infiltration test before sizing the open-graded base; the reservoir void ratio is typically 0.35 to 0.40, and the base must sit at least 2 feet above the seasonal high groundwater table for a full-infiltration design.
Natural stone and flagstone
Set on a compacted base with either a mortar bed (for a rigid system) or a compacted sand/grit bed (for a dry-set system). Dry-set flagstone is more forgiving of minor frost heave but requires more joint maintenance. Mortar-set stone on a concrete base is longer-lasting but will crack if the slab beneath cracks. Either way, maintain the same slope and drainage principles.
DIY or hire a pro: a practical guide
Many flush paver patios under about 200 square feet are realistic DIY projects for a handy homeowner with a rented plate compactor and a weekend. Larger concrete pours, raised patios with retaining walls, sunken patios with drainage systems, and anything requiring permits are better handed to a licensed contractor. The cost difference between DIY and professional paver installation can be $5 to $10 per square foot (mostly saved on labor), but a poorly compacted base or missing edge restraint costs more to fix later than the savings.
| Task | DIY-friendly? | Notes |
|---|---|---|
| Small dry-set paver patio (under 200 sq ft) | Yes | Rent a plate compactor; follow ICPI base specs carefully |
| Concrete slab pour | Difficult for most | Concrete finishing is a skilled trade; mistakes are permanent |
| Retaining wall under 3 feet | Yes for some block types | Follow manufacturer design charts; don't skip drainage behind wall |
| Retaining wall 3–4 feet+ | No | Likely requires permit and engineered design |
| French drain installation | Yes for straightforward runs | Confirm outlet is permitted; maintain minimum 0.5% slope |
| Step installation (2–3 steps) | Yes with precast units | Verify tread/riser dimensions match IRC minimums |
| Regrading for drainage | Yes for small areas | Larger regrading benefits from a mini excavator and experienced operator |
Your decision checklist before you start
Before committing to an elevation, run through these questions. If you can answer yes to all of them, you have a solid plan.
- Do I know where my patio surface water will go, and does it discharge to an approved location?
- Is my planned patio slope at least 2% (1/4 inch per foot) away from the foundation?
- Have I checked with my local building department about permit requirements for my elevation and size?
- Have I reviewed my HOA rules for hardscape height restrictions?
- If I need stairs, do they meet the IRC 7-3/4 inch maximum riser and 10 inch minimum tread requirements?
- If anyone using the patio needs step-free access, have I designed accordingly (threshold under 1/2 inch, ramp at 1:12 or gentler)?
- If I am building a retaining wall over 4 feet, do I have an engineered design and a permit?
- Does my base preparation (compaction, drainage) match the material I am installing?
FAQ
Quick answer: should a patio be flush with the lawn?
It depends. A flush (ground‑level) transition can be attractive and accessible, but it must still provide positive drainage away from the house, meet accessibility thresholds (generally ≤1/2 inch without beveling), and avoid trapping water. Use decision criteria below (drainage, slope, soil, accessibility, HOA/code, use) to choose flush, raised, or lowered.
What decision criteria should homeowners use to choose flush, raised, or lowered patio levels?
Key criteria: 1) Drainage — can you provide a 2% slope away from the structure and a legal discharge point? 2) Lawn/patio grade difference — how big is the vertical gap and will it create a tripping hazard? 3) Soil & groundwater — high water table or poor infiltration favors raised or permeable systems with an outlet. 4) Accessibility — thresholds >1/2" need beveling; stairs must meet code. 5) Safety — guardrail rules apply if walking surface is >30" above grade. 6) Aesthetics/resale — flush is often desired for universal access; raised can feel like a deck. 7) Cost & constructability — retaining walls, steps, or regrading add cost. 8) Local code/HOA — check permits, storm sewer rules, and design standards.
What are the pros and cons of a flush (ground‑level) patio?
Pros: accessible (easy for wheelchairs/strollers when thresholds comply), seamless lawn connection, lower material/edge costs, often better curb appeal. Cons: must ensure positive drainage away from house (recommended ≈2% slope), can be vulnerable to lawn runoff and mud if grading is poor, may require edging or subtle grade breaks to prevent lawn encroachment, and may need drainage features if adjacent lawn is higher.
What are the pros and cons of a raised or lowered patio?
Answer: Raised patio pros — clear visual/functional separation, easier to shed runoff if designed correctly, can provide storage/under‑deck space, and may avoid frequent lawn maintenance at the edge. Cons — steps/guardrails may be required (see IRC), higher cost for retaining structures and edge restraints, possible accessibility barriers, and potential to trap water behind the patio if not drained. Lowered patio pros — creates privacy/shelter and can manage some surface water; cons — may collect water, require subdrains or retaining walls, and need careful outlet design to prevent foundation issues.
How does a flush patio compare with a ground‑level deck?
Plain‑language comparison: A flush patio (concrete, pavers) sits on compacted base/soil and drains into the landscape; it’s durable and low maintenance but needs correct grading and edge details. A ground‑level deck (timber or composite close to grade) sits on footings or a low framing system and can be easier to install in uneven terrain but may require more maintenance and provide spaces for pests/rot. Patios generally last longer and carry fewer building‑code thresholds for guards, while decks can be built to allow flooding access and better ventilation.
What are the construction and drainage best practices? (slope, edge, retaining options)
Best practices: 1) Slope: provide ~2% (≈1/4" per foot) away from the house across the patio; avoid slopes that send water toward foundations. 2) Edge restraints: use continuous edge restraints for pavers; for concrete use formed edges with appropriate drainage. 3) Retaining: low landscaping edges or segmental retaining walls for small drops; use geogrid and follow NCMA/producer guidance for higher walls and engineered design where needed. 4) Drainage outlets: daylight to approved discharge, tie into lawful storm system with permits, or use a French drain/subdrain to a permitted outlet. 5) Avoid creating a bathtub effect — ensure patio edges have a positive outlet.
My Lawn Is Higher Than My Patio: Fix Drainage and Grades
Fix yard grading where lawn sits higher than patio to stop pooling, runoff, and trip hazards with DIY or pro options.