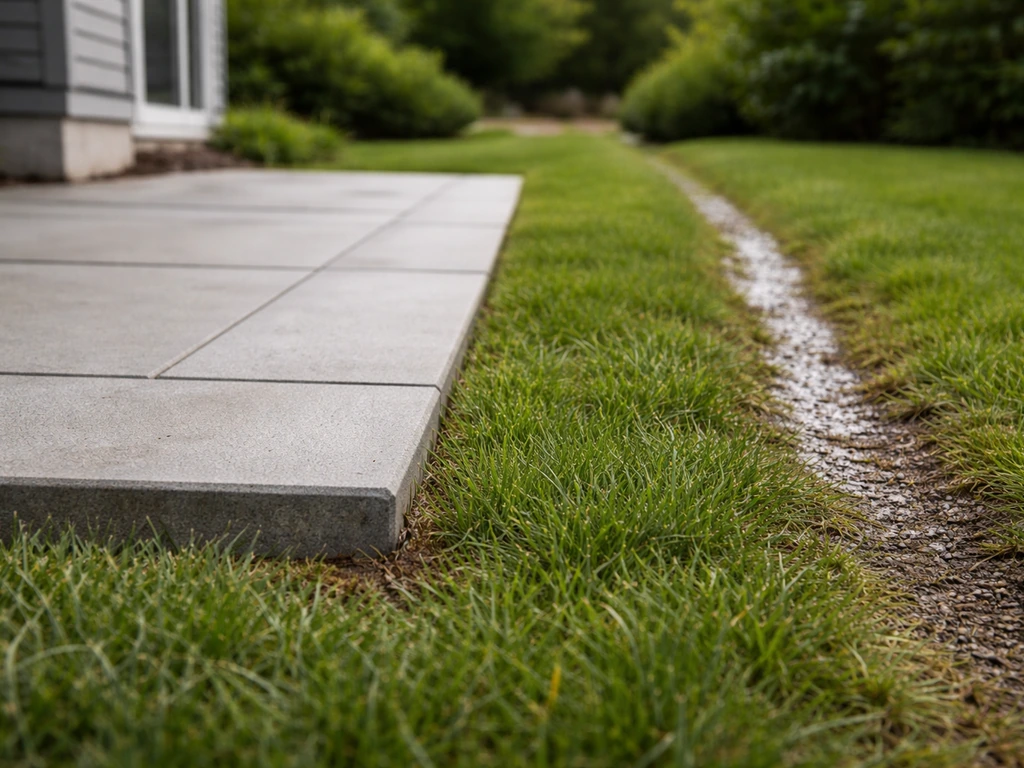
Your patio should sit slightly higher than the surrounding lawn, not flush with it and definitely not lower. The sweet spot is about 1 to 2 inches above the adjacent grass grade. That small elevation difference is enough to shed water away from the slab and your house foundation, prevent sod from creeping onto the surface, and keep the edge clean without creating a trip hazard. The exact number depends on your slope, your materials, and how close the patio sits to the house, but the direction is almost always the same: patio surface up, water running away.
Should Patio Be Higher Than Lawn? A Practical Guide

Miles Hart
24 Jun 2026
Why elevation matters more than most people think
Water is the single biggest reason to care about patio elevation. If your patio sits at the same level as the lawn or below it, rain and irrigation water has nowhere to go except toward your house or into puddles on the surface. Both outcomes are bad. Water pooling against a foundation causes long-term moisture damage, efflorescence on masonry, and in freeze-thaw climates, cracking and heaving. Water sitting on a patio surface is a slip hazard and accelerates deterioration of the patio material itself.
There is also the lawn encroachment problem. When the lawn edge sits at or above the patio, grass roots and sod naturally grow onto the surface over time. You end up with a weedy, muddy perimeter that is miserable to maintain. A patio edge that sits just above grade acts as a natural barrier, grass simply cannot crawl uphill onto the surface. If your grass is higher than the patio, water can end up creeping toward the foundation or leaving a damp, weedy edge you constantly have to manage grass is higher than patio.
Finally, there is foundation protection. The 2024 International Residential Code (IRC section R401.3) requires that the grade fall at least 6 inches within the first 10 feet away from a building foundation, and that impervious surfaces within 10 feet slope at least 2% away from the building. Federal site-drainage regulations (24 CFR § 3285.203) echo this, requiring at least a half-inch drop per foot for the first 10 feet. If your patio is attached to the house and slopes even slightly toward it, you are working against those requirements and will eventually pay for it.
Setting the height: measurements, edges, and transitions
The goal is a finished patio surface that sits roughly 1 to 2 inches above the lawn, with a gentle slope built into the slab or base. Here is how to think through the measurements before you break ground.
Establishing your starting elevation
Start at the house. The finished patio surface where it meets the structure should sit at least 1 inch below the door threshold and at least 4 inches below any wood framing, siding, or ledger board. This protects the house from splash-back and gives the patio room to heave slightly in cold weather without damaging the structure. From there, the surface should slope away from the house continuously, you are working downhill toward the lawn, not up.
The Madison Metropolitan Sewerage District recommends that the ground drop 1 inch for every 1 foot of distance from the house for the first 5 to 10 feet, and that at least 4 inches of foundation be visible above the soil level. You do not need to match that steep a grade on the patio surface itself, but your base grading underneath the patio should achieve something close to it before you lay your material.
Edge transitions and mowing clearance
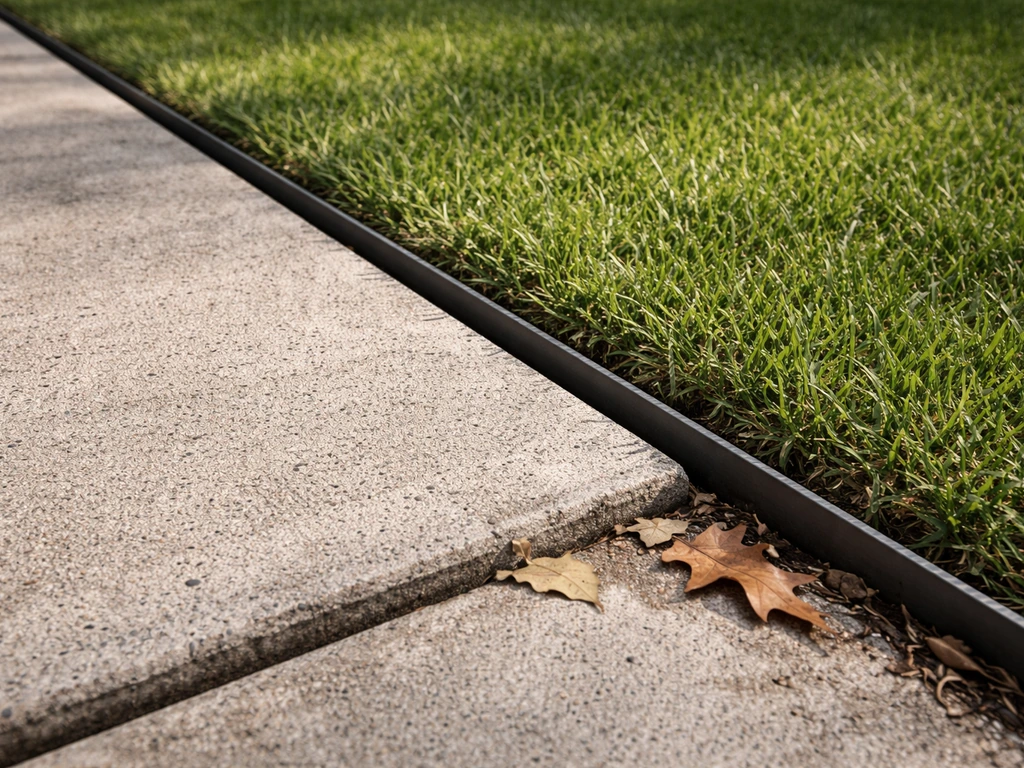
The edge where patio meets lawn needs to be functional, not just aesthetic. If the patio sits more than 2 inches above grade, you need a defined edge restraint, either a steel or plastic paver restraint, a concrete mow strip, or a small step if the height difference is large enough to be a trip hazard (generally anything above 3 inches). A 1 to 2 inch elevation difference without an edge restraint is manageable for most people but should still be clearly visible and consistent around the perimeter so nobody catches a foot on a hidden edge.
For mowing, a patio edge sitting 1 inch above grade means your mower deck will clip the edge cleanly without scalping the lawn. If the patio is flush or below grade, grass grows over the edge and you are trimming by hand every week. A mow strip, a 4 to 6 inch wide concrete or stone border between the patio edge and lawn, is one of the best investments you can make here. It creates a clean line, prevents grass intrusion, and protects the patio edge from mechanical damage.
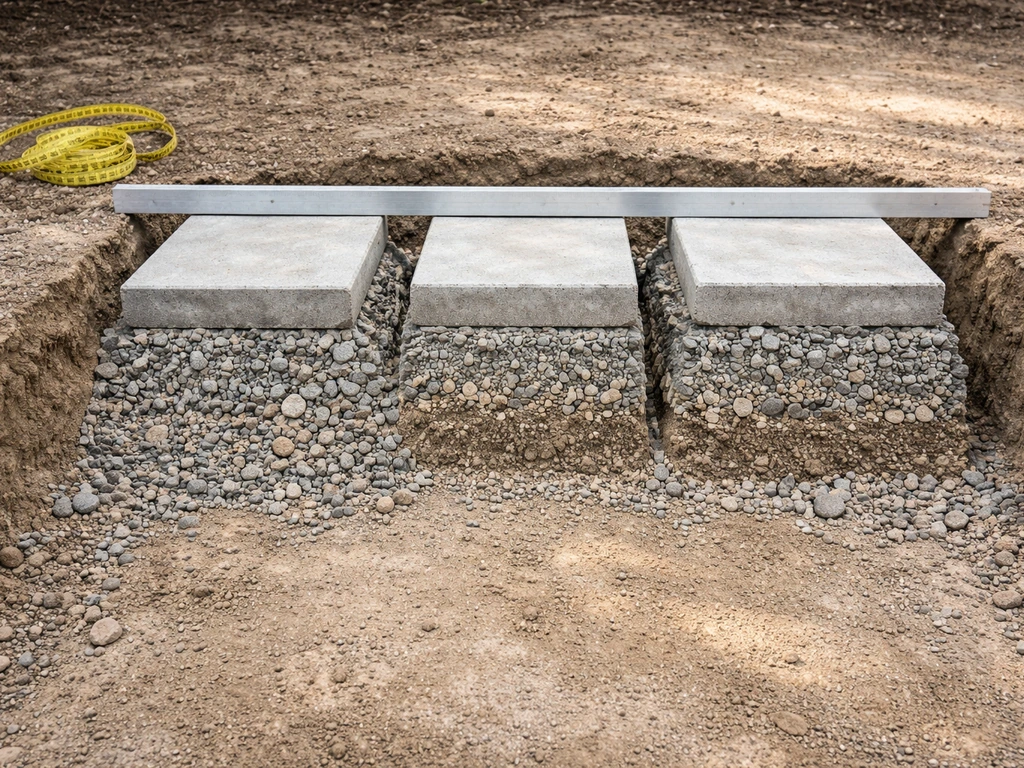
The slope numbers you actually need
QUIKRETE's installation guidance calls for a slope of about 1/8 inch per running foot away from the house. On a 12-foot-deep patio, that is 1.5 inches of total drop across the entire slab, gentle enough that you will not feel it underfoot but effective enough to shed water. That works out to roughly a 1% grade, which is below the 2% minimum the IRC requires for impervious surfaces within 10 feet of a foundation. In practice, aiming for 1/8 to 1/4 inch per foot (1% to 2% slope) is the practical target range for most residential patios.
If your site has a slope greater than 1 inch per foot, QUIKRETE's own concrete patio guide flags that as a condition where you may need to regrade the site before building. At that point you are into retaining wall or step territory, not just a patio slab adjustment.
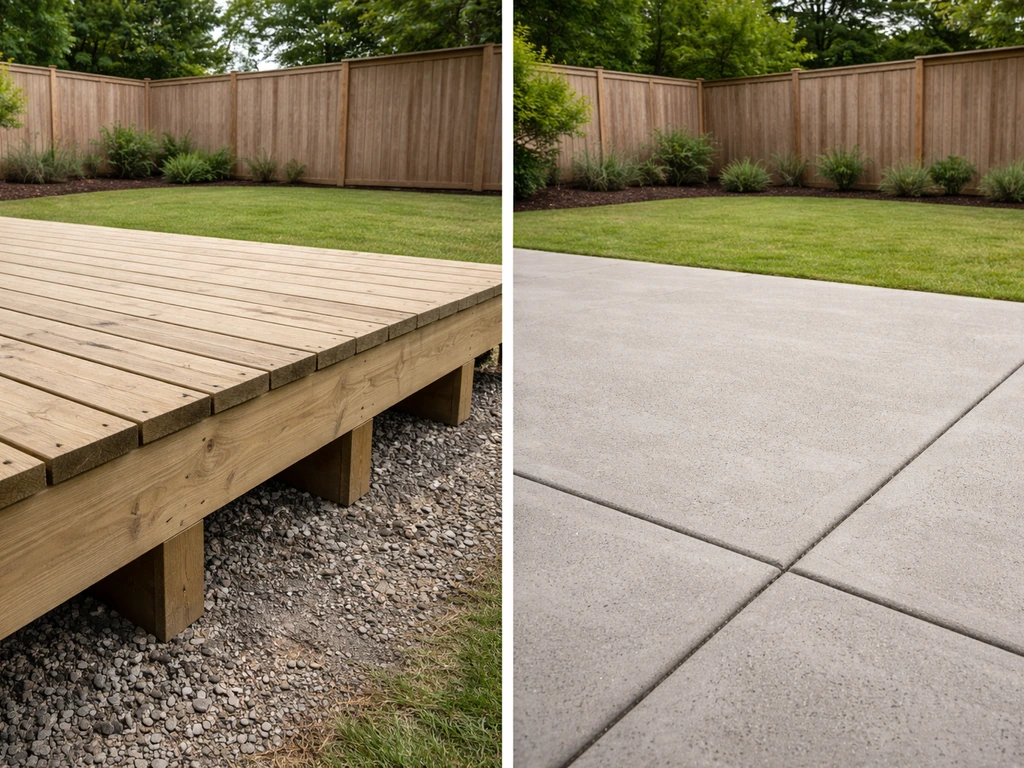
What happens if you skip the slope entirely? Water ponds on the surface, finds the path of least resistance (often toward the house), and sits. On a concrete slab, that accelerates freeze-thaw cracking. On pavers, it causes efflorescence and joint erosion. On a wood deck comparison, the same drainage rule applies, but the stakes are even higher for solid patio surfaces because there is nowhere for water to go except sideways.
| Slope | Inches of drop per foot | Effect |
|---|---|---|
| Less than 1% | Less than 1/8" | Water pools; inadequate drainage |
| 1% (IRC minimum for impervious surface) | 1/8" | Functional minimum; acceptable for most patios |
| 2% (IRC requirement near foundation) | 1/4" | Recommended target for attached patios |
| Greater than 8% | More than 1" | Regrade required before building |
How patio material and thickness affect your finished elevation
The material you choose changes how much excavation you need and where the finished surface ends up. This is worth thinking through before you dig, because getting it wrong means either a patio that sits too low or one that is unexpectedly high and creates a step-up from the lawn.
| Material | Typical total depth (base + material) | Finished surface above native grade (approx.) |
|---|---|---|
| Poured concrete (4" slab) | 8–10" total (4" gravel base + 4" slab) | 0–2" above grade after compaction |
| Concrete pavers (2–3/8" paver) | 7–9" total (4–6" base + 1" sand + paver) | 0–2" above grade |
| Flagstone (1.5–2" thick) | 7–9" total (4–6" base + 1" sand + stone) | 1–2" above grade |
| Gravel/decomposed granite | 3–5" total (edging + gravel layer) | Flush to 1" above grade — edge restraint required |
| Concrete pavers on raised base | Variable | 2–6"+ above grade — steps or ramped edge needed |
Poured concrete and standard pavers typically end up sitting close to grade naturally if you excavate correctly, usually 0 to 2 inches above the surrounding lawn, which is exactly where you want to be. Gravel and decomposed granite patios tend to settle to near-flush over time, which is why a solid perimeter edge restraint is essential for those materials. Without it, the gravel migrates into the lawn and the edge drops below grade.
Flagstone set in a dry-laid sand bed behaves similarly to pavers in terms of final elevation, but individual stones can shift over time and create uneven edges, one stone sitting flush and the adjacent one sitting an inch higher is a genuine trip hazard. Mortared flagstone is more stable but requires a concrete base, which changes your excavation depth calculation.
Handling slopes, uneven ground, and problem soils
A perfectly flat yard makes patio elevation straightforward. Most yards are not flat, and some soils actively work against you. Here is how to handle the common problem scenarios.
Sloped yards
If your yard slopes away from the house, you are in good shape, natural grade already wants to drain away from the foundation. You still need to verify the patio surface slope is adequate (at least 1/8 inch per foot), but you may not need much grading at all. If your yard slopes toward the house, you have a more serious problem that a patio alone cannot fix. You need to address the site grade before building, either by regrading, adding a swale to redirect water, or installing a french drain. Building a patio on top of a toward-house slope just creates an impervious surface that funnels water directly at your foundation.
For steep-sloped yards where you want a level patio surface, the options are cut-and-fill grading, a retaining wall on the downhill side, or stepping the patio into the slope in tiers. Each of these is a significant construction project, not a weekend DIY build.
Soft and expansive soils
Clay soils expand when wet and contract when dry, which causes slabs and pavers to heave and sink seasonally. If you are on expansive clay, a thicker gravel base (6 inches minimum, 8 inches preferred) helps buffer the movement, and a poured concrete slab with wire mesh or fiber reinforcement handles the stress better than individual pavers. Even so, some movement over time is likely. Budget for re-leveling pavers every 5 to 10 years, or plan for a slab with control joints that allow movement without cracking unpredictably.
Soft, poorly draining soils (common in low-lying yards or those with high water tables) may need a layer of compacted crushed stone deeper than standard, sometimes 8 to 12 inches, to create a stable base. Building your patio at the right elevation above lawn grade is even more important here, because a patio that sits even slightly low on soft ground will become a water collection basin every time it rains. If your lawn already has low spots where water sits for more than 24 hours after rain, fix that drainage problem before you pour or lay anything.
Quick site assessment you can do right now
Before you finalize any elevation plan, spend 20 minutes walking your site after a rain (or with a hose) and checking these things:
- Where does water run after rain? Walk the yard and watch where puddles form and where water flows. That tells you the natural drainage direction and where you must not trap water.
- Where do your downspouts discharge? If they drain onto the future patio footprint or into a low spot nearby, you need to extend them or redirect them before building.
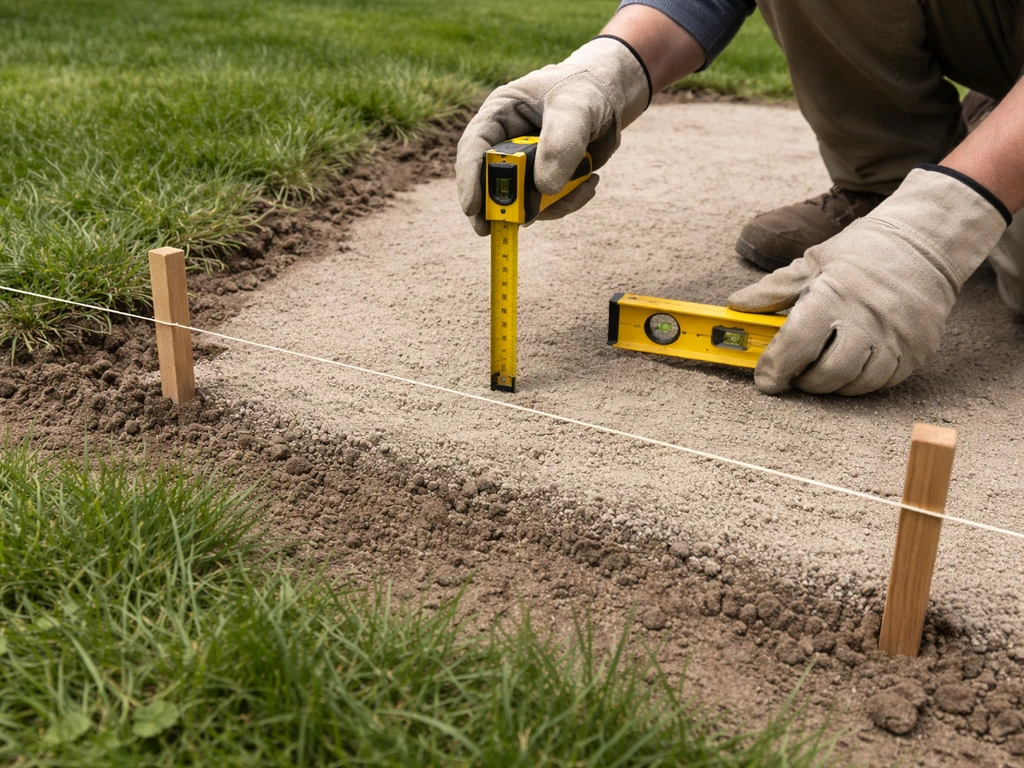
- Is your lawn higher than your planned patio area? Probe the soil with a stake and string line to measure the current grade. If the lawn around the planned patio sits higher than where the patio surface will land, you have a grading problem to solve first.
- Check for low spots in the patio footprint. Set a garden hose on the surface and watch where water pools. Any low spot will still be a low spot after you build.
- How much foundation is visible? Look at the base of your house wall. If less than 4 inches of foundation are exposed above the soil, you need to regrade away from the house regardless of what you build on top.
Once you have those answers, use this simple decision workflow: if water naturally drains away from the house, your yard is reasonably flat, and you have at least 4 inches of foundation showing, you are ready to plan a standard patio with a 1/8 to 1/4 inch per foot built-in slope. If any of those conditions are not met, fix the underlying drainage or grading issue first. No patio material will save you from bad site drainage.
DIY vs. calling a pro: where the line is
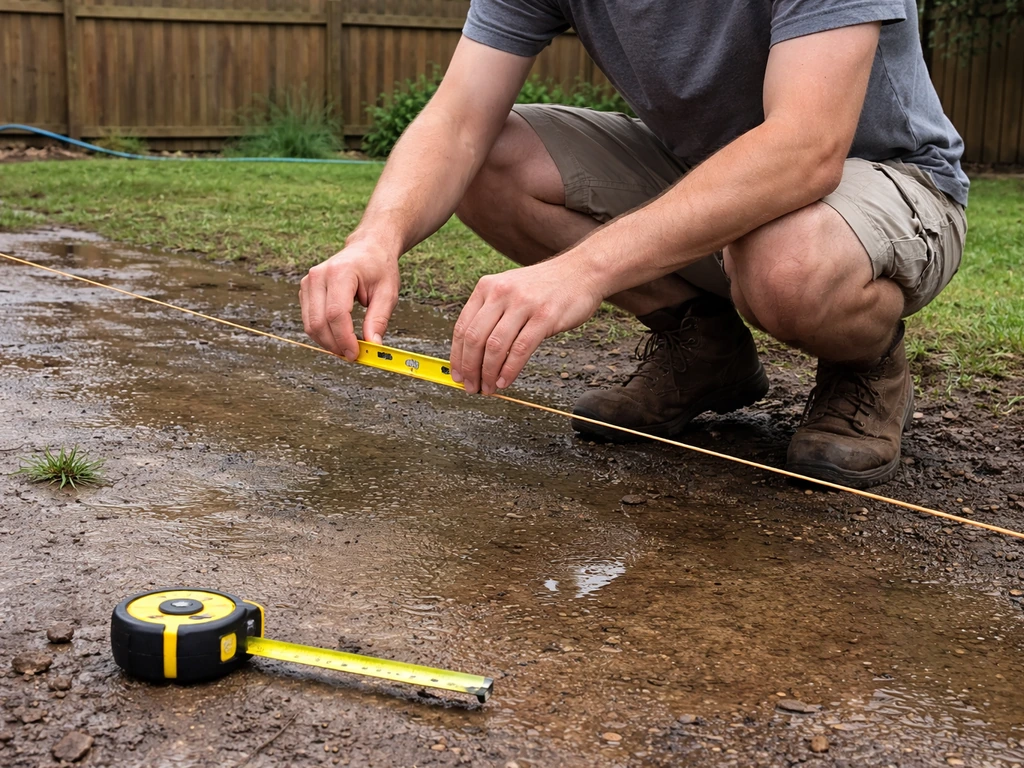
Most homeowners can handle setting patio elevation correctly on a straightforward site. Laying out batter boards, running string lines, checking slope with a line level and tape measure, and building a properly sloped gravel base are all learnable skills. If your site is flat, your lawn drains away from the house, and you are building a simple rectangular patio, this is well within DIY range, and getting the elevation right is mostly a matter of careful layout before you start digging.
There are situations where you should bring in a pro for at least the grading and drainage portion of the work, even if you do the patio build itself:
- Your yard slopes toward the house and you need to regrade or install drainage to redirect water
- You have standing water in the yard that persists more than 24 hours after rain
- The site requires a retaining wall to create a level pad
- Your soil is heavily expansive clay and you are considering a large concrete slab
- Downspouts or municipal drainage infrastructure needs to be rerouted
- The finished patio elevation will be significantly higher than the lawn (more than 4 to 6 inches), requiring steps or a ramp that must comply with local codes
A landscaper or grading contractor can typically assess drainage and set rough grade for a simple residential patio for a few hundred to a couple thousand dollars, far less than the cost of tearing out a patio that pooled water against your foundation for three years. If you are questioning whether your drainage situation is simple or complex, that assessment cost is almost always worth it.
It is also worth knowing that the elevation and drainage relationship between your patio and the surrounding lawn is closely tied to related decisions, like whether to build flush with the grass or at a slight raise, and what to do when the lawn has already crept higher than the patio over time. Those edge-case scenarios each have their own solutions, but the foundation is the same: keep water moving away from the house, keep the patio surface above the lawn grade, and make sure transitions are safe and intentional.
FAQ
How do I account for uneven lawn grade if my yard isn’t perfectly level?
Not necessarily. If the lawn is already lower than the patio area, you can still keep good drainage by setting the patio slightly above the lowest adjacent lawn point, not the average. The key is that runoff must still travel away from the house, so measure with a few spots around the perimeter and confirm the patio slope direction using a straightedge plus a level.
If the patio has to be level for steps or design reasons, can it still meet drainage needs?
A retaining wall changes the goal. If you need to build a patio on the downslope side of a slope, the patio surface can be level for comfort, but the subgrade and drainage must still move water away from the house. In many cases you will need a weep system or underdrain behind the wall, so water does not build up under the patio.
What if I want the patio much higher than 1 to 2 inches above the lawn?
Yes, but only if you protect both the house and the patio edge. Keeping the patio higher than the lawn is useful, but you must also maintain the built-in away-from-house slope and avoid pinching the drainage path near the foundation. If you raise the patio a lot, you may need an edge restraint and possibly a small step down to the lawn for safe transitions.
Should the 1 to 2 inch goal be measured from the base or from the finished patio surface?
Treat the measurement as the finished surface, not the excavation depth. For example, with pavers, the added bedding sand thickness and paver thickness shift the final elevation, so you should dry-lay a short section and measure to the target before committing to the full base. If you only measure “base level” you can easily end up flush or below grade after compaction and setting.
Can I just mow and ignore the patio edge transition issues if it’s close to flush?
Not ideal. If you rely on a mower to handle a flush or below-grade edge, grass can creep onto the patio and you will be doing frequent trimming. A separate mow strip (or edge restraint) is usually the better fix because it stops root and sod intrusion mechanically instead of just cutting it.
Do I need to consider irrigation drainage separately from rain?
Test irrigation impact, not just rain. Run a sprinkler cycle and observe where water goes, especially after the lawn becomes saturated. If water pools or runs toward the house during irrigation, the patio elevation and slope plan needs adjustment even if rain drainage looked fine during a one-time check.
What if my patio is attached to the house, and the yard slope makes drainage tricky?
If the patio is attached and you cannot maintain downward slope away from the structure, stop and address the site drainage first. An attached patio that slopes toward the house can trap water against the foundation, even if the lawn is lower. The safer approach is regrading or adding drainage (swale or underdrain) so the whole system still directs water away.
Are gravel or decomposed granite patios still okay when they end up near-flush with the lawn?
Usually you can, but the underlayment and base thickness become more critical. Gravel and DG tend to settle and migrate unless there is a firm perimeter restraint, plus you may need a deeper, compacted base to prevent future edge drop below grade. Also, higher patio elevation above lawn does not eliminate the need for away-from-house slope.
What happens to patio elevation during seasonal soil movement, and how should I plan for it?
Yes, especially on soft or clay soils. For expansive clay, seasonal movement can change the effective elevation gap over time, so plan for a stable base and include control joints in slabs, then budget for re-leveling or repair of pavers. After movement, re-check that water still sheds away from the house at the new edge height.
Any special elevation tips for patios in cold or freeze-thaw climates?
In a freeze-thaw climate, the edge details matter even more. If water can get trapped at the patio surface or near the foundation, freezing can worsen cracking, joint erosion, and efflorescence. That means you should prioritize a continuous away-from-house slope, robust edge restraint, and base drainage so water does not remain at the interface.
How can I verify slope accurately if my patio shape is irregular?
Yes, and it should be measured at the same points you will observe runoff from. If you only check the slope in the center, you can miss “low corners” where water collects. Use a straightedge across multiple orientations and confirm the lowest point is still moving away from the house toward your drainage direction.
Next Article
Ground Level Deck vs Patio: Costs, Durability, and Fit
Compare ground level deck vs patio on costs, build methods, durability, maintenance, and usability to pick the best fit.