To enclose a patio in Australia, you need to decide how 'enclosed' you actually want it to be, then pick a system (louvres, framed glazing, solid walls, or a combination), check whether your existing structure can handle the extra load, confirm what approvals your council requires, and build in the right order: roof or ceiling first, then walls and glazing, then doors, sealing, and weatherproofing. The full process from planning to a finished, weather-tight room typically takes 4 to 12 weeks depending on scope, and costs anywhere from around $8,000 for a basic screen-and-blind setup to $40,000 or more for a fully glazed, insulated, louvre-roofed room.
How to Enclose a Patio in Australia Into a Room

Miles Hart
22 Jun 2026

First, decide what you actually want: patio or room?
This sounds obvious, but the answer completely changes your budget, your approval pathway, and what you need to build. A patio in Australian council definitions is typically an open-sided structure enclosed on no more than two sides, with a water-impervious roof. The moment you start closing off more sides, many councils treat it as a different class of structure, closer to an enclosed room or habitable space. That triggers different building permit thresholds, NCC compliance requirements for glazing and energy efficiency, and sometimes a planning permit too.
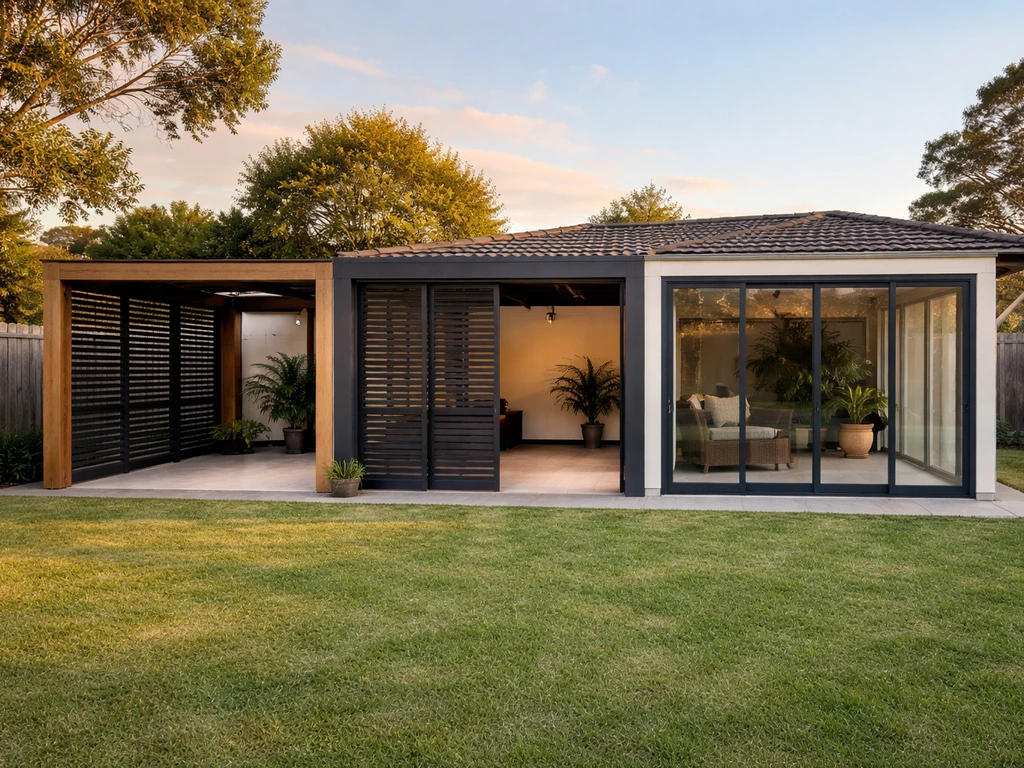
There are three realistic end states to aim for. The first is a semi-enclosed alfresco: roofed, with screens, blinds, or louvres on the sides, but not airtight and not thermally insulated. You can use it most of the year, but it is not a room in the NCC sense. The second is a weather-protected outdoor room: a louvre roof system with framed or frameless glass walls, rain-tight, wind-protected, and comfortable in most conditions, but still technically an outdoor structure.
The third is a fully enclosed room addition: solid or glazed walls on all sides, weatherproofed, possibly conditioned, and treated as an extension of the home's building envelope. Each step up increases cost, complexity, and compliance requirements significantly. If your goal is to use the space year-round as a living, dining, or home office area, you are probably aiming for option two or three.
Choosing the right enclosure system
There are four main systems Australians use to enclose patios, and they are not mutually exclusive. Most completed enclosures combine two or three of them.
| System | Best for | Weather protection | Cost range (installed) | Key trade-off |
|---|---|---|---|---|
| Outdoor blinds / screens | Semi-open alfresco, budget upgrade | Low: wind and light rain only | $1,500–$6,000 for a typical patio | Not rain-tight at joints; UV degrades fabric over time |
| Retractable / operable louvre roof | Alfresco rooms, year-round use without full enclosure | High: motorised, rain-sensor auto-close | $12,000–$35,000+ depending on size | Needs solid perimeter structure; expensive upfront |
| Framed or frameless glazing (side walls) | Full weather protection + views | Very high when sealed properly | $3,000–$10,000+ per side wall | Frameless glass has small gaps; thermal performance varies |
| Solid infill walls (timber, Colorbond, masonry) | Full room conversion, thermal insulation | Complete | $5,000–$20,000+ depending on materials and insulation | Blocks light and views; highest permit compliance requirements |
The most popular approach for a year-round alfresco room in Australia right now is a motorised aluminium louvre roof combined with framed glass or frameless glass side walls. Brands like Louvretec, Vergola, Arcadia, and Stratco all offer versions of this. The louvres let you control ventilation and light when open and block rain when closed. The glass walls cut wind without blocking the view. A 4m x 5m setup with this combination typically lands between $28,000 and $35,000 fully installed, based on current 2026 quotes. Louvretec Perth quotes a broad range of $2,400 to $3,000 per square metre for its retractable roof systems, which gives you a useful per-metre sanity check when comparing quotes.
If budget is the main constraint and you just want rain and wind protection, high-quality motorised outdoor blinds with a fixed insulated roof panel are a far cheaper starting point. If full room conversion with year-round air conditioning is the goal, you will need to move toward solid or well-sealed glazed walls with a fixed insulated ceiling and proper weatherproofing, which overlaps with what is covered in more detail in guides on converting a patio into a room or building a sunroom on an existing concrete patio.
A note on glazing standards
Any glazed walls or glazed doors you install need to meet AS 2047 (windows and external glazed doors in buildings) and AS 1288 (glass in buildings: selection and installation). These became mandatory under NCC 2022, which most states adopted by mid-2024. This matters practically because it affects which glass products you can specify and how they are framed and sealed. If you are using a reputable supplier installing a certified system, they should handle this. If you are sourcing glazing independently or doing a DIY install, confirm your product compliance before you buy.
Site checks before you design anything
Walk your patio with a critical eye before you talk to any supplier or builder. Here is what you are assessing.
- Existing roof and posts: Can the current structure carry additional glazing or louvre panels? Aluminium louvre systems and glass walls add significant weight. If your patio roof is a lightweight polycarbonate skillion on 90x90mm posts, it almost certainly cannot handle a full enclosure without structural upgrades. Get this assessed first.
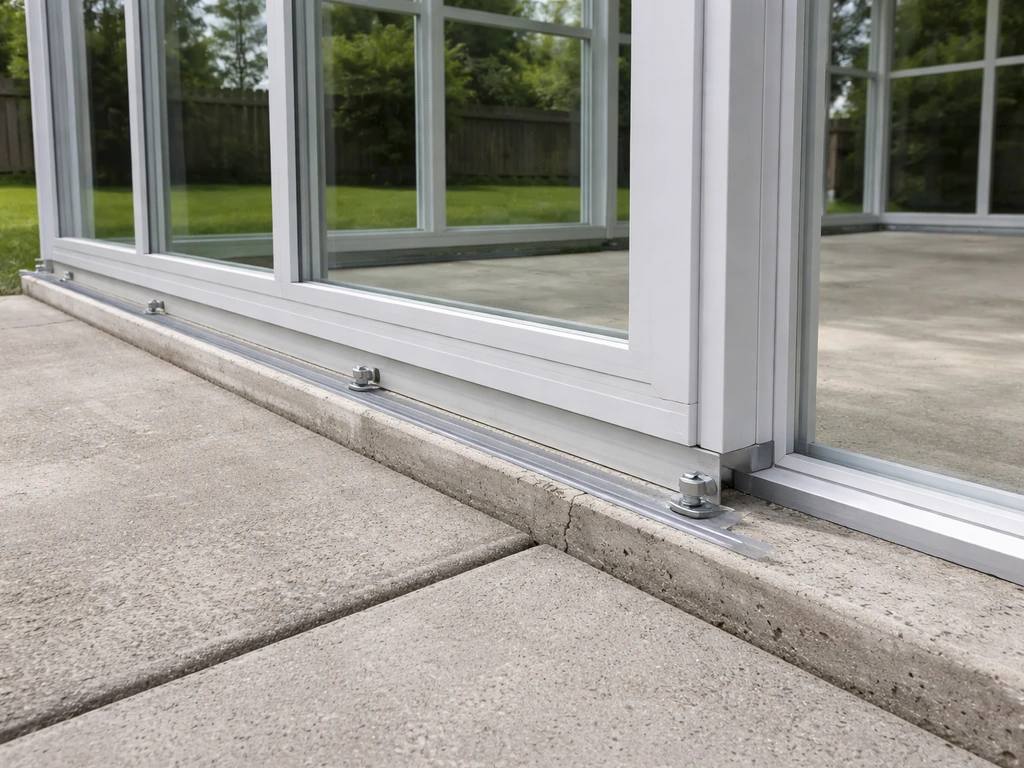
- Floor and drainage: Patios are typically built with a fall away from the house (around 1 in 100) to drain water. When you enclose the space, that fall still needs to work, and you need to confirm that water cannot pool against the house wall. Check existing drains and whether the floor level is flush with or higher than your internal floor. A flush threshold is ideal; a step down into the enclosed patio is manageable but affects accessibility.
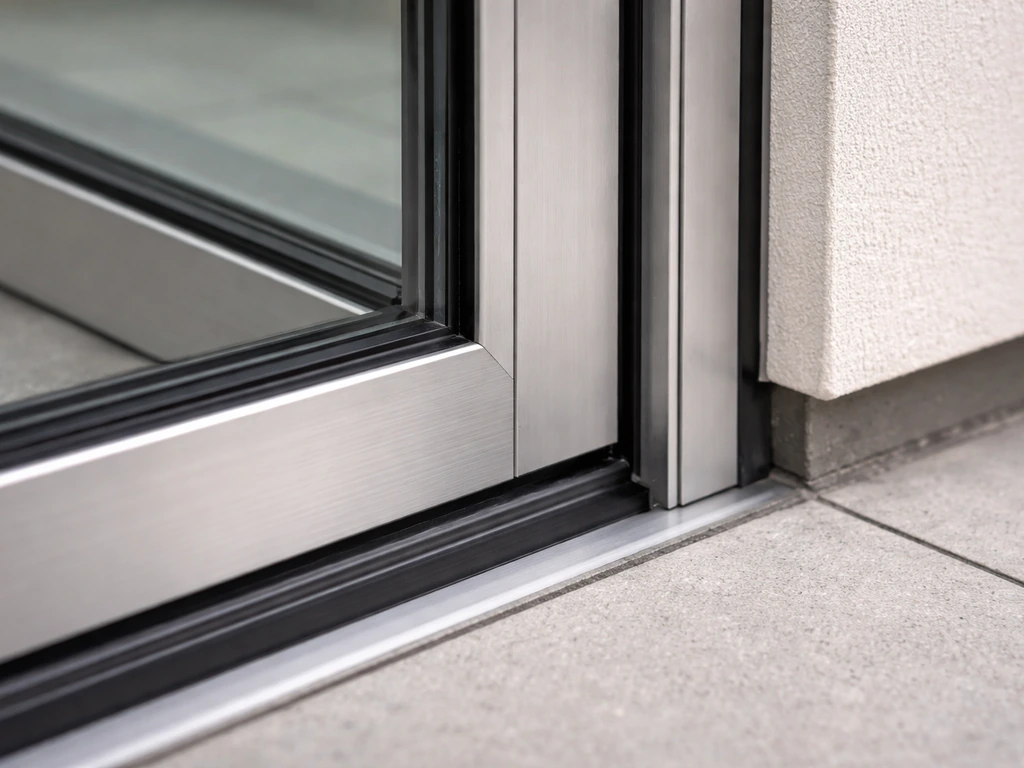
- Connection to the house wall: Where the new enclosure meets the existing house, you need a proper flashing and seal. This is one of the most common leak points. Check for existing damp, efflorescence, or cracking at the junction now.
- Wind exposure: Australia's AS 4055 wind classification system divides the country into wind classes from N1 (sheltered suburban) through to C4 (severe cyclonic coastal). Your site's wind class directly affects what structural members, glazing thickness, and frame ratings you need. A coastal Queensland or WA property might be C2 or C3, which requires significantly heavier engineering than a sheltered Melbourne suburb rated N2. Your supplier or builder should ask about this. If they do not, raise it yourself.
- Orientation and sun: North-facing patios in Australia get the most winter sun, which is a bonus for a year-round room. West-facing patios get brutal afternoon summer sun and need proper shade or solar control glazing. East-facing ones are generally pleasant. South-facing enclosed patios in cooler climates will need more heating. This affects your choice of glazing, louvre blade angle, and whether you need UV-blocking materials.
- Services: Check for any electrical conduits, irrigation lines, or gas connections running through the patio slab or posts. Relocating these adds cost and delay.
Permits, approvals, and when you need a builder or engineer
This is where many Australian homeowners get caught out, particularly if they assume an enclosure is as simple as adding screens. The approval picture varies by state and council, but here is the practical reality.
When you probably need a building permit
Once you enclose more than two sides of a patio, most Australian councils no longer treat it as a patio. You are effectively building a room addition. In WA, for example, [exemptions from building permits for patios and pergolas typically apply only to structures that remain open-sided by definition](https://www. coolgardie.
wa. gov. au/development/general/patio-pergolas-shade-sails. aspx).
NSW has an exempt development pathway for some outdoor structures, but it requires the works to be structurally adequate and comply with the NCC. In Victoria, the VBA advises confirming with your local council whether both a building permit and a planning permit are needed. In Queensland, some minor building work is self-assessable under the Building Regulation 2021, but local planning schemes may still require approvals. In the ACT, building work generally requires development approval and/or a building approval.
The safest approach: contact your local council or a private building certifier before you commit to any design. A 30-minute conversation now can save you from having to demolish non-compliant work later.
When you need a structural engineer
You will need engineer-certified drawings or specifications in a few common scenarios: when your existing patio structure cannot be confirmed as adequate for the added loads without assessment, when you are in a cyclonic or high-wind zone (AS/NZS 1170.2 applies for engineered structures, AS 4055 for housing-class wind loads), when you are adding a heavy louvre roof system to an older structure, or when a building permit is required and the certifier asks for engineering sign-off. Many louvre roof suppliers like Soltex advertise their systems as engineer-certified aluminium framing solutions, which helps with permit applications, but that certification covers their product in isolation, not the connection to your specific existing structure.
NCC compliance areas to know about
- Weatherproofing (NCC 2022 Part H2): External walls and roofs must resist water ingress. For a fully enclosed patio room, this means proper flashings, seals, and waterproofing at all junctions.
- Glazing (NCC Part 3.6, AS 1288, AS 2047): Safety glazing requirements apply to glass walls and doors. Toughened or laminated glass is required in most locations where breakage poses an injury risk.
- Energy efficiency and condensation (NCC 2022 Part 3.12): If the space is to be conditioned (heated or cooled), energy efficiency requirements apply including insulation, air sealing, and condensation management. NCC 2022 updated these provisions with stricter condensation controls effective from mid-2024 in most states.
- Waterproofing under the Australian Standard AS 4740 (louvre rain defence classification): This standard defines performance levels for louvre systems' resistance to rain penetration, useful when selecting louvre-based enclosures for all-weather use.
What it costs: a realistic breakdown
Costs swing enormously based on size, materials, and how much structural work the existing patio requires. Here are realistic 2026 ranges for Australian homeowners, broken down by component.
| Component | DIY-friendly? | Typical cost range (AUD, installed) |
|---|---|---|
| Outdoor roller blinds / zip screens (per side) | Partly (track systems, not custom) | $800–$2,500 per panel |
| Fixed insulated roof panel upgrade | No (structural connection required) | $3,000–$8,000 for a standard patio |
| Operable louvre roof system (motorised, 4x4m to 6x5m) | No | $12,000–$35,000+ |
| Framed aluminium glazed side walls (per linear metre) | No | $900–$2,000/m |
| Frameless glass walls (per linear metre) | No | $1,200–$2,500/m |
| Aluminium sliding or stacking doors | Partly (if replacing existing) | $1,500–$5,000 per opening |
| Concrete floor levelling / new screed | Partly | $50–$120/m² |
| Timber or composite decking over existing slab | Yes | $80–$200/m² |
| Structural upgrades to existing posts/beams | No | $2,000–$10,000+ (highly variable) |
| Electrical (lighting, power points, ceiling fan) | No (licensed electrician) | $1,500–$4,000 |
| Building permit and certifier fees | N/A | $800–$3,000 depending on state and project value |
A realistic mid-range project, say a 5m x 4m patio converted to a weather-tight louvre-roofed room with glass side walls, new lighting, and some floor work, is likely to run $35,000 to $50,000 all-in when done by contractors with permits. A basic semi-enclosed version using fixed roof panels and quality zip-track blinds can be done for $12,000 to $20,000. Real homeowner Reddit threads on AusRenovation show quotes ranging up to $38,000+ for a 5x3 alfresco when structural steel upgrades and electrical systems are included, so the cost of the 'hidden' structural work is a genuine budget risk.
DIY vs contractor: where the line really sits
Being honest here: most of a patio enclosure project is not DIY-appropriate unless you have construction experience. The structural connections, glazing installation, weatherproof flashing to the house wall, and any electrical work all require licensed trades or specific product certification. Where genuine DIY savings are possible: some floor prep and levelling, painting or finishing work, installing pre-made garden screening panels for purely decorative side treatments, and assembly of some kit-form pergola products rated for self-installation. The operable louvre roof systems from major suppliers are not DIY products; they require factory-trained installers to maintain warranty and meet certifier requirements.
How to actually build it: the right sequence

Getting the build order right prevents expensive rework. Here is the practical sequence for a standard patio-to-room conversion. If you are aiming for a weather-tight, NCC-compliant space, the steps in this patio-to-room conversion sequence will help you plan the build order and system choices.
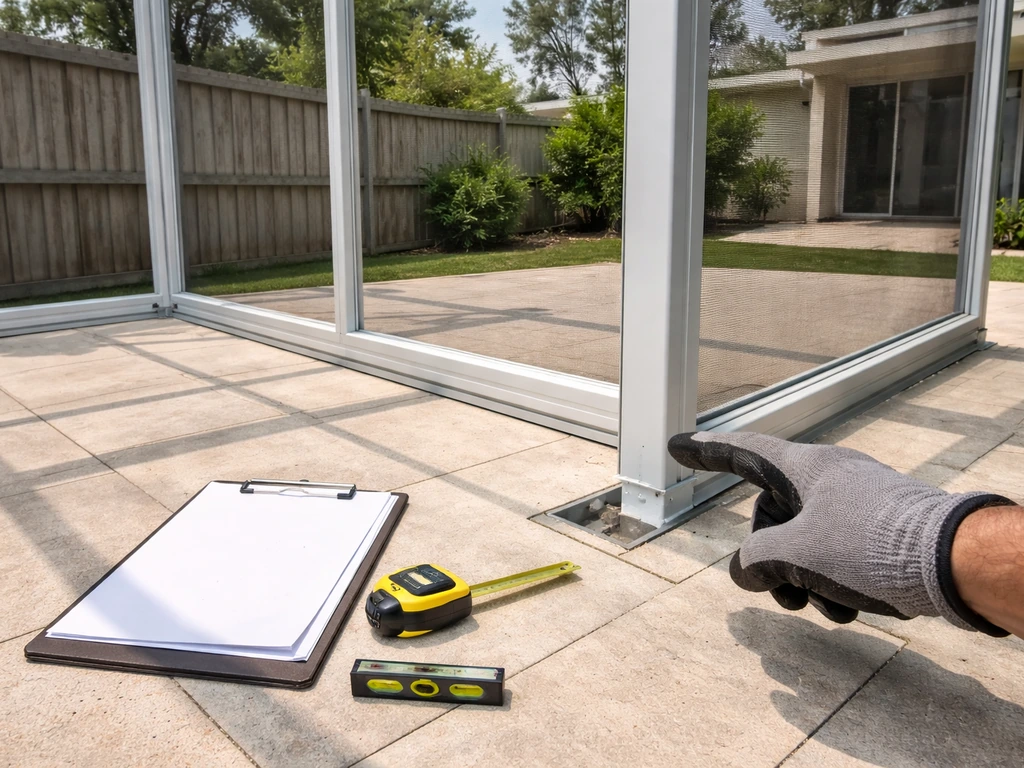
- Measure and document: Get accurate dimensions of your existing patio (length, width, ceiling height, post positions, floor-to-soffit height). Photograph the existing structure from all angles including the junction with the house wall. Note any services, drains, and existing electrical.
- Choose your enclosure system and get design drawings: Decide on your enclosure level (louvre roof, fixed roof upgrade, glazed walls, solid walls, or a combination). Get a site visit and design drawing from at least two suppliers before committing. Confirm wind zone classification for your site.
- Confirm council and permit requirements: Contact your local council or a private certifier with your design drawings. Confirm whether a building permit, development application, or planning permit is needed. Do this before you sign any contract.
- Structural assessment and upgrades: If required, have a structural engineer assess your existing patio frame. Any post replacements, additional footings, or beam upgrades should be done first, before the new roof or wall system goes on.
- Roof or ceiling installation: Install the new roof system (louvre, fixed insulated panel, or whichever you have chosen) first. This defines the envelope before the walls go in. Ensure flashings and seals at the house wall junction are installed correctly and tested with water before walls are closed up.
- Side wall framing and glazing or screens: Once the roof is confirmed watertight, install side wall framing and then glazing, screens, or blind track systems. Work from the house wall outward.
- Doors and fixed openings: Install sliding, stacking, or hinged doors. Check operation and weather seals on every door leaf.
- Sealing and weatherproofing: Caulk all junctions between the new enclosure and the existing house wall, roof, and floor. Pay particular attention to the flashing/capping at the top of any glazed or solid wall panel. Apply appropriate sealant (neutral-cure silicone for glass/aluminium junctions).
- Floor finishing: If you are upgrading the floor surface, do this after all wall and roof work is complete to avoid damage. Ensure drainage fall is maintained and no grout or adhesive blocks floor drains.
- Services: Have a licensed electrician install any lighting, power points, ceiling fans, or data cabling. A ceiling fan is strongly recommended for ventilation in any enclosed or semi-enclosed patio room in most Australian climates.
- Final inspection and compliance sign-off: If a building permit was required, arrange for the required inspection(s) with your certifier before you consider the job done.
Making it comfortable long-term: ventilation, insulation, and Aussie weather realities
Building a weather-tight patio room and making it actually comfortable are two different things. Australia's climate range is brutal: UV radiation that degrades materials faster than almost anywhere else, summer temperatures in much of the country that make an unventilated glass box unbearable, and winter condensation risks in cooler climates that can cause mould if the enclosure is poorly sealed but not properly insulated.
Ventilation
This is the biggest comfort factor for enclosed patio rooms in Australian summers. The operable louvre roof systems address this directly: you open the louvres for ventilation, close them for rain protection. For fixed-roof enclosures, you need openable panels, louvre vents, or a ceiling fan as a minimum. NCC Part 3.12 is explicit about controlling unintended air leakage in the building envelope, but a fully sealed enclosed room with no openable sections will overheat rapidly in summer without mechanical cooling. Plan for at least 10 to 15 percent of your wall area to be openable or ventilated.
Insulation
If the space is to be used in winter or conditioned with heating or cooling, insulate the ceiling. A minimum R2.5 batt in the ceiling cavity makes a significant difference in a climate zone like southern Victoria or the ACT. For the walls, insulated panel systems (the same profiles used for insulated patios) give you the best thermal performance without adding bulk. Frameless glass walls look great but perform poorly thermally unless you are using double-glazed units, which adds cost. NCC 2022's condensation management provisions mean you also need to consider vapour barriers and adequate ventilation to prevent moisture building up inside insulated wall cavities, particularly in humid coastal climates.
UV and material durability
Australian UV levels are extreme. Standard polycarbonate roof panels yellow and become brittle within 5 to 10 years without UV stabilising coatings. Powder-coated aluminium frames with a quality finish are the best choice for longevity. Fabrics used in outdoor blinds should be specifically rated for Australian UV exposure (look for AS/NZS 4174 compliance for fabrics). Glass walls with a solar control low-e coating reduce heat gain significantly and are worth the extra cost in west or north-facing applications.
Water ingress and condensation
Water gets in through four main points: the roof-to-house wall flashing, the floor perimeter if surface water can track back, the joins between glazing panels, and around door frames. Check all these points annually and reseal with neutral-cure silicone as needed. Condensation is a separate issue and happens when warm humid air meets a cold surface, typically inside glass or on the underside of a metal roof panel. In humid climates (Queensland coast, Darwin) or in well-sealed rooms in cool climates, condensation can be significant enough to cause water staining and eventually mould. The answer is adequate ventilation to prevent moisture accumulation, and insulation to keep surfaces above the dew point.
Maintenance schedule
- Every 6 months: Clean louvre blades, check and lubricate motorised system mechanisms, inspect all silicone seals for cracking or separation, clear gutters and any drainage channels in the floor.
- Annually: Re-test all drainage falls with a hose, check flashing condition at the house wall junction, inspect glass panels for chips or cracks (which can propagate under wind load), check all door and window weather seals.
- Every 3 to 5 years: Assess fabric blind or screen condition for UV degradation, inspect powder coat finish on aluminium frames for chalking or corrosion, re-seal all perimeter joints as a precaution.
Your practical next steps
If you have read this far and you are ready to move forward, here is the practical sequence to follow right now. Measure your patio accurately and photograph everything, including the house wall connection, existing roof, posts, and floor. If you are wondering can you build a conservatory on a patio, the key starting point is still getting your patio size, structure, and clearances properly assessed Measure your patio accurately.
Decide on your enclosure level: semi-enclosed alfresco, weather-protected outdoor room, or full room addition. Get at least two site-visit quotes from suppliers, specifying your wind zone if you know it or asking them to confirm it. Before signing anything, make one call or send one email to your local council planning or building department to ask whether a permit is required for your proposed scope.
Confirm any structural upgrades needed based on the supplier's assessment or an independent structural engineer visit if the quotes disagree. Once permits are in hand, schedule works in the sequence above: structure first, roof second, walls and glazing third, doors and sealing fourth, floor finishes and services last.
The enclosure type, permit pathway, and build details all shift depending on how far you take the conversion. A semi-enclosed alfresco with blinds and a louvre roof is a very different project from a fully glazed, insulated room addition that adds habitable floor area to your home. Getting that question answered first, before you spend a cent, is the most valuable thing you can do.
FAQ
Can I enclose a patio in Australia without getting a permit if it stays open on the sides?
Often yes, but it depends on your council and exactly how many sides are considered “open” (and whether the structure is still defined as a patio or becomes a room addition). Before you buy any glazing, ask the council or a building certifier how many sides can be closed, and whether screens or fixed panels count as enclosure for their definition.
Do louvre roofs count as “enclosing” the patio for council and NCC purposes?
A louvre roof by itself usually changes the weather protection level, but councils typically focus on how many sides are closed off and whether you create a wind-protected, rain-tight enclosure. If you add framed glass or largely fixed side systems, it is more likely to be treated as an enclosed structure rather than a simple patio.
Is DIY glazing or installing glass panels ever acceptable in Australia?
In many cases you should not attempt DIY glazing because the installation needs to meet external glazing standards and be properly sealed to prevent water ingress. Even if you buy compliant glass, the compliance risk often sits in the framing, setting, and flashing details, so confirm whether your product warranty requires a licensed or factory-trained installer.
What should I do if my existing patio was not engineered for a heavy louvre roof?
Get the patio structure assessed before you order the roof system. Many louvre suppliers can certify their product framing, but that does not automatically prove your existing posts, beams, footings, and connections can carry the added loads. If the certifier asks for engineering, plan for reinforcement rather than assuming the old structure is adequate.
How do I estimate costs more accurately than using a per-square-metre figure?
Ask for a line-item quote (wind ratings, glass type, insulation, ceilings, electrical allowance, drainage, and floor prep). Two projects with the same footprint can differ hugely if one requires new steel, upgraded connections to the house, or new electrical circuits, so request a scope schedule that shows what is included and what is excluded.
What venting or openable area should I plan for in a fully enclosed patio room?
If you will not rely on active cooling, plan for meaningful ventilation because a sealed glass box can overheat quickly. A practical rule is to include openable sections or vents across a substantial portion of the wall area (and ensure they are actually operable), rather than assuming a fixed louvre roof alone will manage summer heat.
Do I need to insulate if the enclosure has an operable louvre roof?
Insulation requirements depend on whether you will use the space in winter or rely on heating or cooling. Even with louvres, nights in cooler regions can drive condensation and heat loss, so consider ceiling insulation and proper ventilation strategy if the room will be conditioned for comfort year-round.
How can I reduce condensation problems in humid or coastal Australian climates?
Do not rely only on “sealing” as a solution. Use adequate ventilation and consider moisture control details such as vapour management in insulated assemblies, then ensure surfaces do not regularly drop below the dew point. If you have fully sealed systems, build in airflow paths so humidity can escape rather than accumulate.
What are the most common water ingress points that cause failures after installation?
Expect issues at roof-to-wall flashing, floor perimeter areas where water can track back, glazing panel joins, and door frame seals. Because these are detail-sensitive, plan for an annual inspection and re-seal where needed, and do not skip check points around the house connection.
How do I confirm my glazing products meet Australian standards if I am not using the supplier to install everything?
Request documentation that shows compliance for external windows and external glazed doors, and glass selection and installation requirements. Also confirm that the framing system and sealing methods match the certification, because non-compliant installation details can undermine compliant glass.
What should I specify in the quotes regarding wind zone and structural design?
Ask the supplier to state the wind zone assumptions and the design basis for the louvre roof and glazing systems, and ensure the quote references how the enclosure connects to your existing structure. If quotes disagree, push for an independent structural engineer check so the differences are resolved before you sign.
What build order mistakes most often lead to rework?
Common problems happen when walls, flashing, or glazing are installed before the roof system and water pathways are finalized. For weather-tightness, ensure roof and ceiling installation happens first, then side enclosures and sealing, then final doors, and only after that do you complete floor finishes and any internal services that could be damaged by water sealing work.
Can I build a conservatory-like enclosure on a patio, and what changes first?
Yes, but the first step is still assessing the patio size, clearances, and structural capacity. The bigger conservatory-style projects usually push you toward a more enclosed, NCC-relevant outcome, so confirm the permit pathway early, then specify whether the project behaves as an outdoor room or as an extension of the building envelope.
How many quotes do I need, and should I include an independent structural engineer?
At least two site-visit quotes is a good baseline, but add an independent structural engineer when the supplier assessment is unclear or when there is likely reinforcement (older patios, heavy louvre roofs, or cyclonic wind conditions). If one quote assumes “existing is fine” and another assumes upgrades, the fastest way to prevent budget blowouts is engineering clarity before approvals.
Next Article
Can You Build a Sunroom on an Existing Concrete Patio?
Yes, if your patio can handle loads and drainage; learn checks, anchoring, moisture barriers, permits, costs, and common