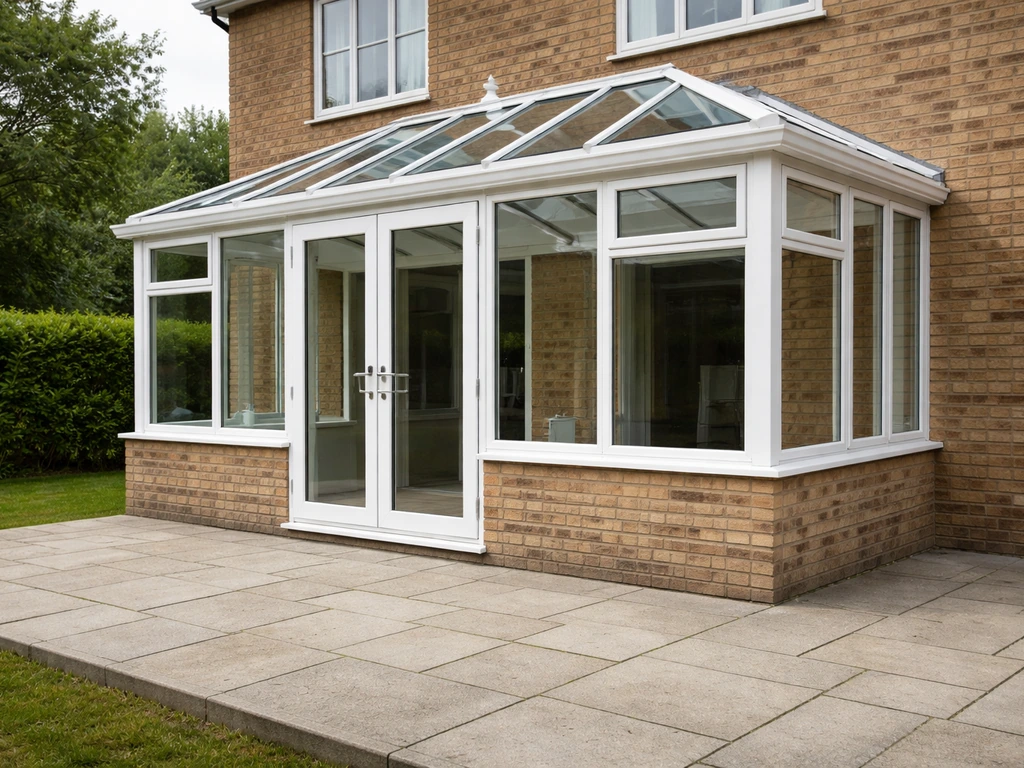
Yes, you can build a sunroom on an existing concrete patio, but whether yours is a good candidate depends on four things: the slab's thickness and condition, how well it drains, whether your local codes allow the structure you want, and how the sunroom frame will anchor to the concrete. Most standard residential patios are poured at 4 inches thick, which is enough for a lightweight 3-season enclosure. A heavier all-season room with insulated walls and a proper roof system may need engineering review first. Get those checks right and a patio-to-sunroom conversion is one of the more straightforward outdoor enclosure projects a homeowner can take on.
Can You Build a Sunroom on an Existing Concrete Patio?

Miles Hart
21 Jun 2026
Is your patio actually ready for a sunroom?
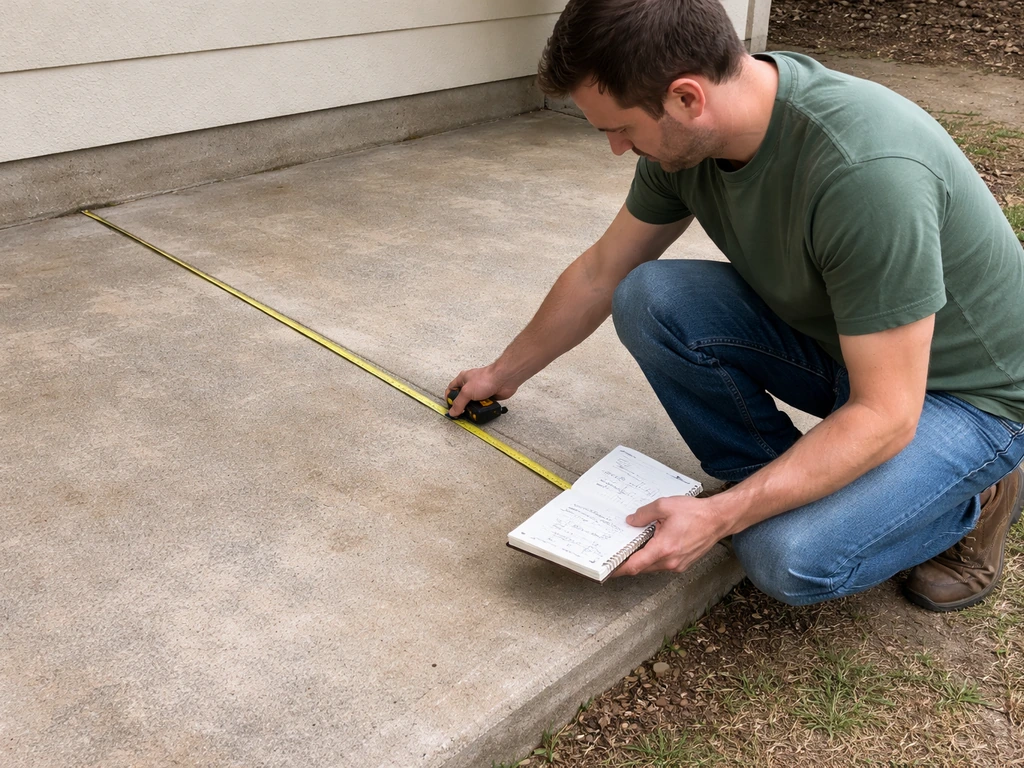
Before you price anything out, walk your patio with a tape measure and a notebook. If you want to convert your patio into a room, start by confirming your patio can support the added structure and moisture demands sunroom. You're looking at three things: size, structural capacity, and existing condition. Most kit sunrooms and prefab enclosures are designed for slabs at least 10 feet by 12 feet, and you'll want a few extra inches around the perimeter for the base frame and any required clearance from the house. Measure the actual usable square footage, not just the poured area.
Structural capacity is the part that trips people up. A standard residential patio poured for outdoor furniture and foot traffic typically handles about 40 to 50 psf of distributed load. A lightweight aluminum-frame 3-season enclosure adds relatively little dead load, usually under 10 psf for the roof system itself, which is well within range.
The IBC Appendix I and IRC Appendix H both set a minimum design live load of 10 psf for patio covers, but a heavier all-season room with a tile roof and insulated glass can push that considerably higher. IBC Appendix I patio cover requirements include designing for dead loads plus a minimum vertical live load of 10 psf (0.
48 kN/m²), and for minimum wind and seismic loads. If you're considering an all-season build, have a structural engineer or at minimum your building department review the slab before you order anything.
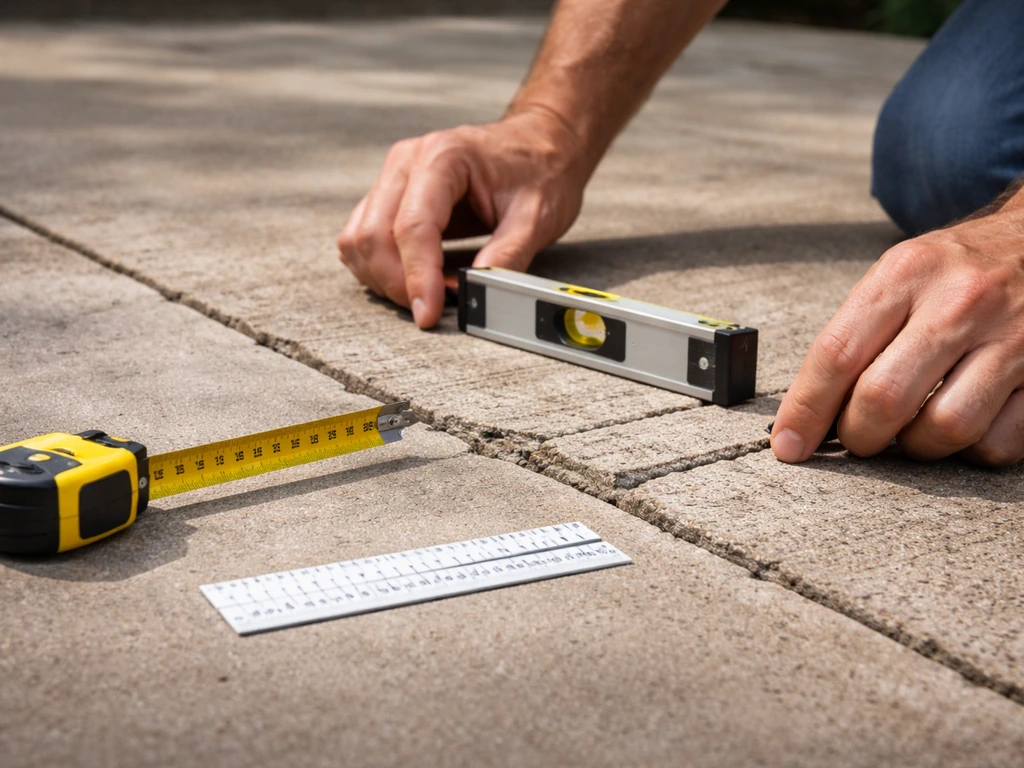
Check the slab condition carefully. Look for large cracks (anything wider than a hairline), significant heaving or settling, spalling on the surface, or areas that feel hollow when you tap them. A slab with active movement, major cracking, or frost-heave damage is not a good foundation for an enclosed structure. Minor surface cracks are usually fine; a slab that has shifted or settled unevenly is a problem you need to fix first. Also note whether the patio has control joints or expansion joints, because those will factor into where you place your base frame anchors.
Concrete prep: levelness, drainage, and moisture control
Here's something most people don't think about until water is pooling inside their new sunroom: patios are intentionally sloped. Building codes typically require a minimum slope of 1/8 inch per foot away from the house for drainage. That's fine when the patio is open to the elements, but once you enclose it, you've trapped that slope inside your sunroom floor. A slight slope you never noticed becomes obvious the moment you put furniture on it and realize nothing sits flat.
You have two real options here. One is to level the floor with a self-leveling concrete overlay or grout bed under a finished flooring material. The other is to use shimmed base plates when setting the sunroom frame, which handles the slope at the structural attachment level rather than the floor surface. Most experienced installers use a combination: shim the frame for plumb walls, then address the floor surface separately if the owner wants it truly level. If you go the overlay route, confirm the product you're using bonds to aged concrete and can handle foot traffic loads.
Moisture control at the slab level is critical and frequently ignored. Concrete is porous. Even a patio that looks dry will allow vapor transmission, especially during temperature swings. Once you enclose the space, that moisture has nowhere to go, and it will find its way into your wall framing and base plates if you don't manage it.
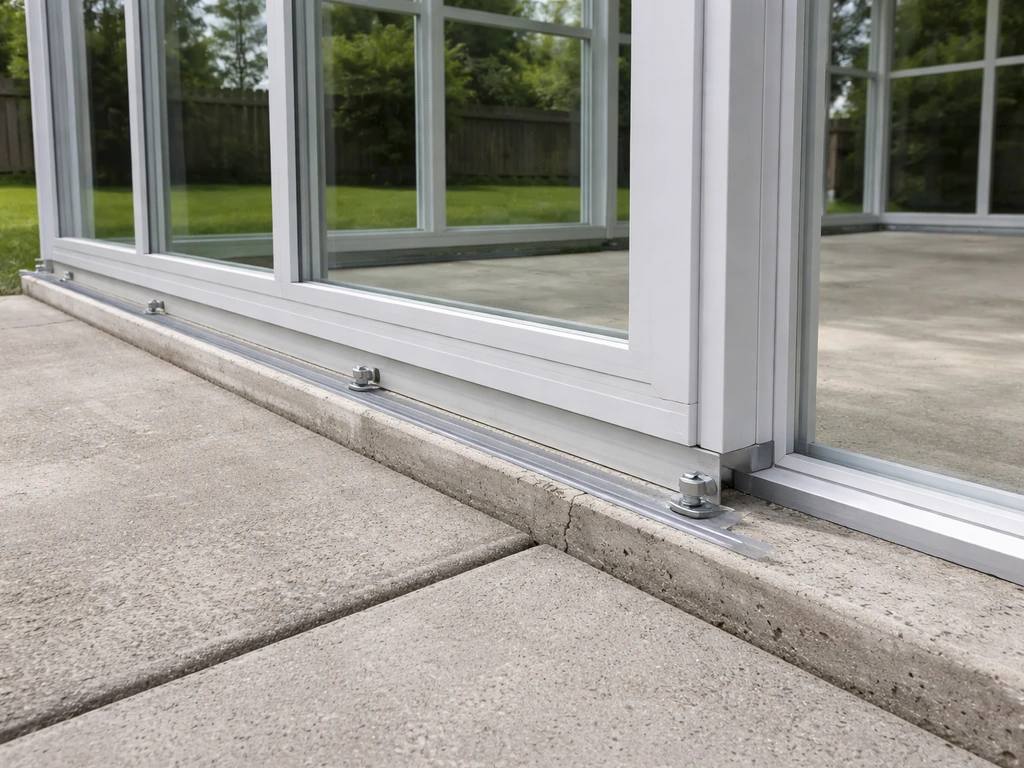
The standard approach is a foam sill gasket or closed-cell sill sealer (products like FoamSealR or similar) between the base plate and the concrete. This seals out both liquid water and vapor at the critical slab-to-frame interface.
For an all-season room where the slab will be insulated and finished, a proper vapor retarder treatment of the concrete is also worth doing before the floor goes down, following the DOE guidance that vapor management is about the whole assembly, not just a single layer.
Also think carefully about where water goes when it rains. The existing patio drainage path must still work after the sunroom is built. If your patio drains toward the yard, the sunroom perimeter needs weep holes or gaps in the base track to let any water that does get in exit freely. Blocking that drainage path is one of the most common mistakes in patio enclosure projects, and it leads to standing water under the sill, rot, and mold.
Anchoring the sunroom frame to your slab
The base frame of any sunroom needs to be mechanically fastened to the concrete, not just set on top of it. This isn't optional. Wind uplift loads on an enclosed structure are significant because, unlike an open patio cover, a fully glazed sunroom acts like a sail. The IRC requires all exterior building attachments to resist design wind pressures, and there's documented history of enclosed patio structures failing below design wind loads specifically because the base connections were inadequate.
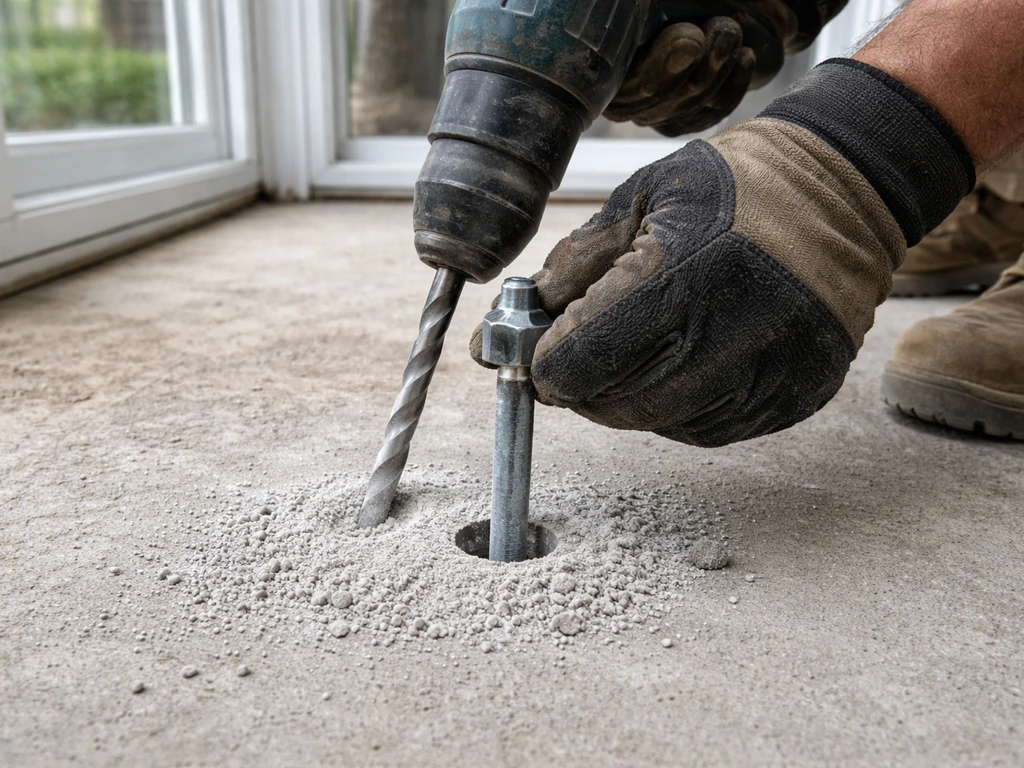
The standard fastening method for an existing slab is post-installed mechanical anchors or epoxy anchors, typically 1/2-inch diameter at spacing determined by the sunroom manufacturer's installation instructions or a structural engineer. A few practical rules: don't drill anchor holes within 6 inches of a slab edge (you risk concrete breakout failure at the edge), keep away from existing control joints, and don't drill into cracked concrete without engineering guidance. [ACI standards on post-installed anchors](https://www. concrete.
org/Portals/0/Files/PDF/Previews/355. 3R_11web. pdf) (ACI 355. 2 and related guidance) provide the technical basis for these rules, but the short version is that anchor capacity drops significantly near edges and cracks.
If your slab is on the thin side (3. 5 inches or less), flag that for whoever is doing your engineering review.
Thermal movement is something most DIY guides skip over, but it matters. Aluminum sunroom frames expand and contract with temperature changes, and so does concrete, but at different rates. Manufacturer systems account for this in their track and base plate design, which is one reason you shouldn't improvise the base connection detail on a prefab kit. Follow the manufacturer's anchor pattern and spacing exactly. At the wall-to-house connection, use flashing and a flexible sealant (not just caulk) that can accommodate that movement. Rigid sealant at a thermal joint cracks within a couple of seasons and starts letting water in.
3-season vs all-season: picking the right sunroom for your patio
This choice has a bigger impact on your project than most people realize. It affects the foundation requirements, the structural load on your slab, the permitting complexity, and the total cost, sometimes doubling it.
| Feature | 3-Season Enclosure | All-Season (4-Season) Room |
|---|---|---|
| Typical use | Spring through fall, mild winter climates | Year-round use in any climate |
| Wall system | Aluminum frame with single or double-pane glass/screen | Insulated walls, double or triple-pane low-E glass |
| Roof system | Polycarbonate, tempered glass, or insulated panel | Insulated roof panel or tied into home's roofline |
| HVAC required? | Usually no (fans/portable heaters optional) | Yes, dedicated heating and cooling needed |
| Slab load impact | Low (typically under 15 psf total) | Higher (20–35+ psf depending on system) |
| Permitting complexity | Moderate (patio cover permit in most jurisdictions) | High (treated as habitable space addition in many codes) |
| Habitable space classification | Usually non-habitable | Often triggers habitable-space requirements |
| Cost range (installed, 200 sq ft) | $8,000–$25,000 | $25,000–$75,000+ |
For most patios, a 3-season enclosure is the more practical starting point. The structure is lighter, the permitting process is usually simpler, and the installation is more forgiving of minor slab imperfections. An all-season room is essentially a room addition with glazed walls, and your local building department will often treat it exactly that way, requiring it to meet habitable space standards for insulation, egress, heating, and ceiling height. Maricopa County, for example, explicitly classifies sunrooms that open directly to habitable living space as needing to meet habitable-space requirements themselves. That's a pattern you'll see repeated in many jurisdictions.
If you're in a climate with heavy snow loads, note that the IRC requires the design live load to exceed the minimum 10 psf wherever snow loads govern. A 3-season structure in Minnesota isn't really a 3-season structure if you're planning to leave it up through winter. Roof snow load capacity needs to match your climate zone.
Permits, setbacks, and when you need an engineer
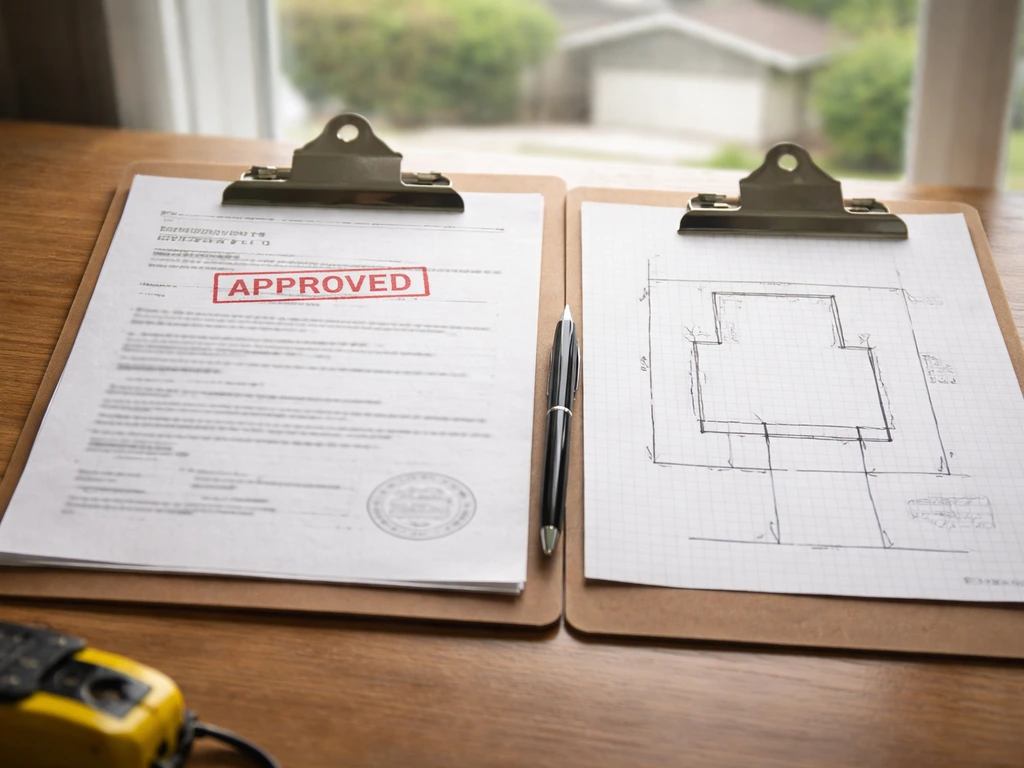
Almost every jurisdiction requires a permit for a sunroom, even when it's described as a patio enclosure. The threshold is usually the moment you add a roof and enclose more than one side. If you are looking for how to enclose a patio in Australia, the permit and zoning steps are where you should start before ordering a kit. Don't skip the permit. Beyond the legal risk, an unpermitted sunroom can complicate your homeowner's insurance, create problems at resale, and in some cases make it harder to get a claim paid if the structure is damaged.
The two code concerns that catch homeowners off guard are setbacks and egress. Setbacks are your local zoning rules about how close a structure can be to property lines. Your existing patio may be too close to a property line or easement to legally enclose. Pull your property survey and call your building department before you buy anything. Egress rules come into play if the sunroom is connected to or treated as habitable space, specifically whether windows in the enclosed space meet minimum openable area and sill height requirements for emergency escape. This matters most for all-season rooms that open directly to a bedroom or sleeping space.
Whether you need a structural engineer depends on the project scope and your jurisdiction. For a lightweight prefab kit on a standard patio with a manufacturer's ICC-ES evaluation report (these reports verify the product meets IBC/IRC provisions), many building departments will accept the kit documentation without separate engineering. For an all-season room, a custom structure, or any situation where your slab condition is uncertain, get an engineer involved. The cost is typically $500 to $1,500 for a residential sunroom review, and it can save you from a costly mistake or a permit rejection.
What this actually costs
Cost varies a lot based on sunroom type, size, and whether you're doing any of the work yourself, but here are realistic 2026 ranges for a 200-square-foot enclosure on an existing patio.
| Cost Item | Typical Range | Notes |
|---|---|---|
| 3-season prefab kit (materials) | $4,000–$12,000 | Aluminum frame, single/double-pane glazing, polycarbonate or glass roof |
| All-season room kit or custom materials | $15,000–$40,000 | Insulated panels, thermally broken frames, upgraded roof system |
| Professional installation (3-season) | $4,000–$13,000 | Varies by region and site complexity |
| Professional installation (all-season) | $10,000–$35,000 | Includes electrical rough-in, HVAC connection |
| Slab prep and leveling | $500–$3,000 | Self-leveling overlay, crack repair, drainage fixes |
| Permitting and engineering | $500–$2,500 | Higher if structural engineer review required |
| Electrical and HVAC (all-season) | $2,000–$8,000+ | Dedicated circuit, mini-split or extension of existing system |
| Total: 3-season (installed) | $8,000–$25,000 | |
| Total: all-season (installed) | $25,000–$75,000+ | Custom or luxury builds can exceed this |
The biggest cost variable after the room type is whether you need slab repair or leveling work. A patio in good shape saves you $1,000 to $3,000 compared to one that needs significant prep. Geographic location also matters: labor rates in the Northeast and West Coast run meaningfully higher than in the South and Midwest.
DIY vs hiring a pro: where the line is
A capable DIYer can realistically handle the installation of a prefab 3-season kit on a solid, well-drained slab. Most manufacturers provide detailed installation manuals, and the actual assembly is largely drilling, fastening, and sealing. Where DIY gets risky is the concrete anchor work (you need to be precise about edge distances and anchor depth), the waterproofing at the house attachment point, and anything involving the electrical system. If you're adding a circuit or wiring for lighting and fans, that work needs a licensed electrician in most jurisdictions.
All-season rooms are a different story. The thermal bridging details, insulation continuity, vapor management, and HVAC integration require real building science knowledge to get right. Most homeowners who DIY an all-season room end up with condensation problems, air leaks, or comfort issues that require costly fixes later. Hire a pro for all-season work, especially for anything that will be treated as conditioned living space.
The mistakes that actually cause problems
After looking at a lot of failed patio enclosure projects, the problems almost always trace back to one of these five issues. Knowing them in advance is the most valuable thing you can take from this guide.
- Building a heavy all-season room on a slab that wasn't designed for it. If your patio was poured as a decorative surface with no engineered footings or reinforcement, adding significant structural loads without verification is how you end up with a cracked, settled floor and a structure that moves when it shouldn't. Get the slab assessed first.
- Ignoring or blocking drainage. The most common failure mode is sealing the base of the sunroom to the concrete without providing any path for water to escape. Water finds its way into any structure eventually. If it can't drain out, it stays and rots the framing. Weep holes in the base track are not optional.
- Failing to waterproof the slab-to-frame interface. Just setting the base plate on concrete without a sill gasket or sealer invites moisture wicking up into the frame. One homeowner account describes exactly this failure: water accumulated in the sill trough, wicked through attachment screws, and rotted the framing over several seasons before anyone noticed. A $15 foam sill gasket prevents this.
- Setting the base plate at or below patio grade. If the surrounding ground, pavers, or soil are at the same level as the base plate, any rain or irrigation that hits that area has nowhere to go except into the frame. The sill should be slightly above the surrounding drainage plane, and the concrete near the base should slope away from the structure.
- Skipping the permit and discovering it at resale. Unpermitted sunrooms that fail inspection at sale time can require either demolition or retroactive permitting (which often triggers all current code requirements). The permit process forces a baseline review that catches problems before they become expensive.
If you're also weighing whether to fully convert the space into a finished room rather than keeping it as a sunroom, or exploring a conservatory-style build, those paths involve additional structural and habitability considerations that go beyond what a straightforward patio enclosure requires. The sunroom route covered here tends to be the most accessible starting point for most homeowners because it works with an existing slab rather than requiring new foundations.
Your practical next steps
Here's what to do this week if you want to move forward seriously.
- Measure your patio: length, width, and verify clearance from property lines using your survey or county GIS map.
- Inspect the slab: look for cracks wider than a hairline, any areas of heaving or uneven settling, and check whether the surface drains away from the house.
- Call your building department: ask whether a sunroom/patio enclosure requires a permit in your municipality, what setbacks apply to your lot, and whether a prefab kit with an ICC-ES evaluation report simplifies the review process.
- Decide on 3-season vs all-season: be honest about your climate and how you'll actually use the space. This single choice drives most of the cost, permitting complexity, and slab requirements.
- Get at least two contractor quotes and one manufacturer consultation: most prefab sunroom manufacturers offer free design consultations and can tell you quickly whether your slab dimensions and condition are compatible with their systems.
- If you're leaning toward all-season or your slab has visible damage: budget $500 to $1,500 for a structural engineer review before you commit to anything.
FAQ
Can I install a sunroom over a patio that has tile, pavers, or an existing finished surface?
Sometimes, but only if you can still meet the manufacturer’s anchor requirements and keep the drainage slope from getting blocked. If you plan to cover the patio with a floating floor, you may lose the ability to properly seal the base plate and sill gasket to the concrete, which increases the chance of trapped moisture at the frame.
What if my patio has minor cracks or uneven spots, can I still build on it?
Yes, but it must be addressed before the frame goes up. You want to avoid locking in any uneven settling, so fix spalling or heaving spots and confirm the slab does not move under load. If you see active cracking or a noticeable lip, treat it as a structural repair project, not just a leveling job.
Is it okay to attach the sunroom base with sealant only, or is concrete drilling always required?
Often you do not want to rely on sealant alone. Sealants can crack from thermal movement and do not provide a mechanical bond, so you typically need post-installed anchors into competent concrete, plus flashing and a flexible sealant at any house connection. For all-season builds, the sill and wall interfaces usually need a more complete vapor and water management system, not just caulk.
Can I use shims to level the sunroom even if the concrete is not perfectly flat?
Usually, but it depends on the kit and the attachment plan. Many sunroom systems require a specific anchor spacing and base rail design, and they assume the slab is within a certain flatness tolerance. If the patio is out of plane beyond that tolerance, you may need a patch or grout leveling plan before installation.
How do I handle drainage and a ‘not perfectly level’ floor once the patio is enclosed?
If the slope is trapped inside the enclosure, you generally need to choose a strategy up front. Shimmed framing can keep the structure plumb, but it does not automatically make the floor flat for aesthetics or usability. If you plan to place tile or a low-pile finished floor, confirm whether you need an overlay or a leveling method to prevent rocking and water pooling.
When would I need a structural engineer even for a prefab sunroom?
Not always. Many kits are designed to use the slab as the primary base for exterior wind loads, but if you are in a high-wind or heavy snow area, or the slab is thin or cracked, the building department may require engineered anchorage or supplemental structural members. A professional review is especially important before you order if your slab thickness is at or under about 3.5 inches.
Do I need to avoid expansion joints and control joints when drilling anchors?
It can, especially if you ignore concrete joints and thermal movement. Control joints and expansion joints are intentional movement paths, so you usually must avoid anchoring right through them and may need a specific detailing approach so the sunroom can handle movement without concentrating stress.
My patio drains toward the house or toward landscaping, what changes if I build the sunroom?
Sometimes, but not by turning the patio into a sealed ‘sink.’ You still need a drainage exit path and proper weep detailing at the perimeter base track, so water does not collect under the sill. If your downspouts or yard grading point toward the patio, consider adjusting gutters or adding discreet surface drains before enclosing.
Can I prevent moisture problems by adding a basement-style vapor barrier under the floor?
Yes, especially in all-season designs where you are effectively creating a conditioned envelope. A common mistake is using a floor finish that blocks vapor movement without verifying that the slab coating or vapor retarder plan matches the whole assembly. Ask your installer whether the chosen floor and underlayment are compatible with aged concrete vapor transmission.
If I build a sunroom that is not heated, will it still be treated like habitable space under code?
Check how the sunroom is classified. If it can be considered habitable space, you may need insulation and egress details that go beyond a 3-season enclosure, including requirements for emergency escape sizing and placement. Even if you are not adding heat, the way the space connects to sleeping areas can trigger additional code expectations.
Do I always need a permit, and what specific project details should I give the building department?
Not necessarily. Some jurisdictions treat enclosed patio structures as roofed additions that require permits, but the trigger often includes how many sides are enclosed and whether it connects to living space. Contact your building department with the exact kit model and site dimensions, and confirm zoning setbacks and any easements before paying deposits.
Next Article
Can you build a conservatory on a patio? UK guide
Step-by-step UK guide on whether you can build a conservatory on a patio, including regs, costs, and next steps.