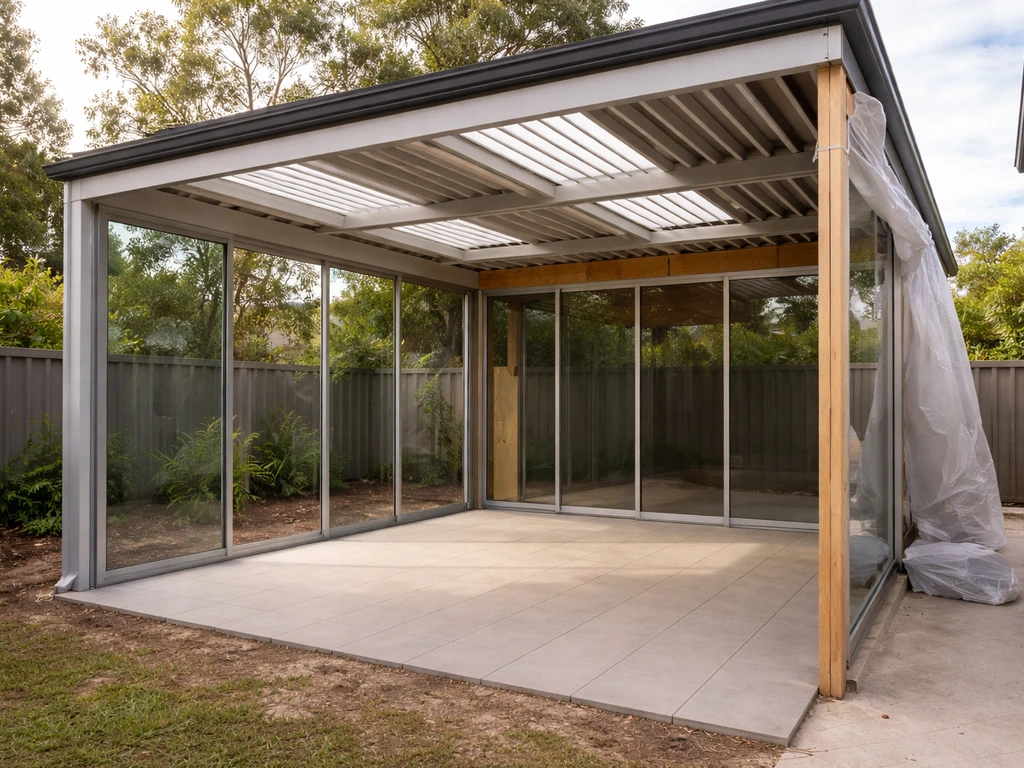
You can convert most existing patios into a usable room, but whether you should depends on three things: what the slab can structurally support, which enclosure type fits your climate and budget, and whether your local permit office will approve the project. A poured concrete slab that is at least 4 inches thick, reasonably level, and free of significant cracking or settlement is a workable starting point. From there, your options range from a simple screened porch (the most affordable and DIY-friendly route) all the way up to a fully insulated four-season room or conservatory that functions like conditioned living space year-round.
How to Convert Patio into a Room: Guide, Costs & Permits

Miles Hart
6 Aug 2026
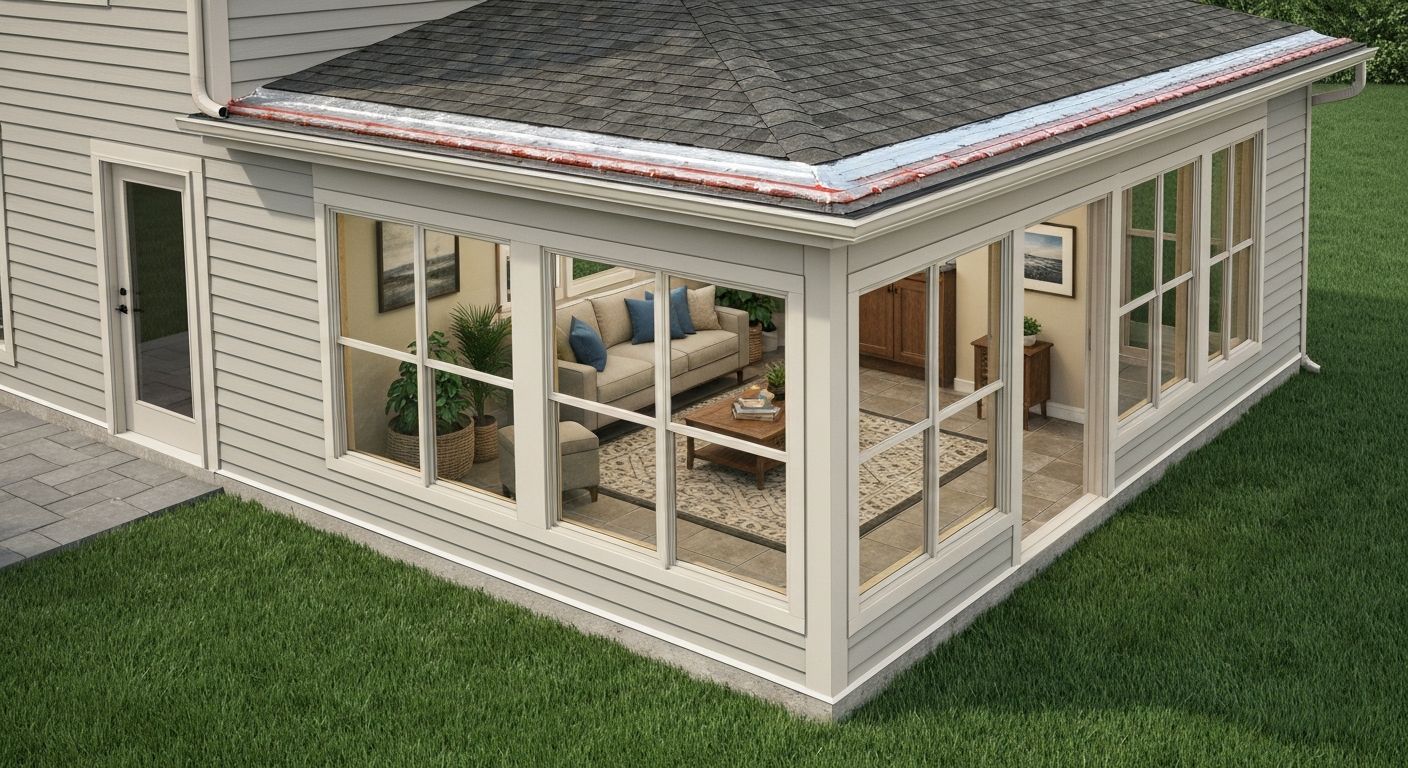
Who this guide is for and what you'll learn
This guide is written for homeowners who already have a concrete or paver patio and are wondering what it would take to put walls and a roof on it. You might be looking at a screened room to keep bugs out, a three-season sunroom for spring-through-fall use, or a fully conditioned four-season addition you can use in January. I've worked through all three approaches on real projects and I'll walk you through the feasibility checkpoints, structural realities, enclosure options with honest pros and cons, roofing and weatherproofing details, glazing and insulation decisions, and the permit process including notes for Australian homeowners. By the end you should have a clear picture of whether your patio qualifies, what the project will cost, and what you can realistically handle yourself versus what needs a licensed contractor.
Convert your patio or build new: a quick decision checkpoint
Before you spend time planning an enclosure, run through these yes/no checkpoints. They are not definitive engineering judgments, but they will tell you quickly whether converting the existing patio is practical or whether you would be better off starting fresh with a purpose-built addition.
- Slab thickness: Is your slab at least 4 inches (100 mm) thick? Thinner slabs may crack or settle under wall loads and are unlikely to meet ACI 302.1R minimums for supported structures.
- Slab condition: Are cracks limited to hairline surface cracks rather than through-cracks, step cracks, or heaving? Significant cracking is a red flag for soil or drainage problems underneath.
- Slope: Is the slab slope no more than about 1/8 inch per foot? Steeper slopes complicate wall framing, door seals, and finished flooring.
- Drainage: Does water drain away from the house rather than pooling on or against the slab? Drainage problems must be resolved before enclosing or you will trap moisture.
- Location and setbacks: Is the patio within your property's buildable area after applying local setback requirements? Many patios sit close to property lines that would block an enclosed room.
- Attachment point: Does your house have a ledger-friendly rim joist or masonry wall that can receive the new roof structure? Freestanding options exist but cost more.
- HOA or covenant restrictions: Are enclosed structures permitted on your lot by any CC&Rs or HOA rules?
- If you answered NO to any of the first four points, building a fresh foundation alongside or replacing the slab may actually be cheaper than remediation. If you answered NO to setbacks or HOA, no amount of construction skill will help — resolve those first.
Feasibility checklist for your existing slab
A patio slab designed for foot traffic and patio furniture was not engineered to carry wall and roof loads. That does not mean it cannot do the job, but you need to assess it honestly before committing.
Thickness and reinforcement
ACI 302.1R sets the accepted industry minimum for residential slab-on-grade construction at 4 inches (100 mm) over a prepared subbase. Many builder-grade patios hit this, but older slabs and DIY pours are sometimes thinner. You can check thickness by drilling a small core or measuring at an exposed edge. Reinforcement matters almost as much: an unreinforced 4-inch slab behaves very differently from a 4-inch slab with wire mesh or rebar. If you plan to attach wall framing directly to the slab with anchor bolts and that slab carries roof loads, an engineer may specify adding perimeter thickening or new footings.
Cracking, settlement, and soil issues
Hairline shrinkage cracks are cosmetic. Cracks wider than about 1/8 inch, step cracks at corners, or any section of the slab that has moved vertically relative to an adjacent section indicate settlement or soil movement. Expansive clay soils and frost heave are common culprits. If you are in a cold climate and the slab was not placed over frost-depth gravel or rigid insulation, repeated freeze-thaw cycles may be causing ongoing movement. Enclosing a slab that is actively settling will transfer those movements to your new walls and roof, causing cracked finishes and misaligned doors. A geotechnical report is the right call when settlement is evident; a structural engineer can then determine whether underpinning or a new perimeter footing is needed.
Flatness, slope, and levelness
Patios are intentionally sloped for drainage, typically 1/8 to 1/4 inch per foot away from the house. That slope is fine for an open patio but creates problems under finished flooring in an enclosed room. ASTM E1155 (the F-Number system) and ACI 117 define flatness and levelness tolerances for floor slabs that will receive finished materials. If you want tile, hardwood, or LVP on the floor, you will likely need to pour a self-leveling underlayment or build a sleeper floor system over the slab to bring it to acceptable flatness. Budget $2–5 per square foot for self-leveling compound, depending on pour depth.
Moisture and vapor emission
An outdoor slab dries from both surfaces. Once you enclose it, it loses one drying face and moisture vapor drives upward. This matters for every finish flooring product and for any wood framing anchored to the slab. Two industry-standard tests tell you the slab's moisture condition: the ASTM F1869 calcium chloride test measures moisture vapor emission rate (MVER) at the surface in pounds per 1,000 sq ft per 24 hours. ASTM F1869 Standard Test Method for Measuring Moisture Vapor Emission Rate of Concrete Subfloor Using Anhydrous Calcium Chloride (ASTM) specifies the anhydrous calcium‑chloride (CaCl2) procedure to report MVER in lb/1,000 ft²/24 hr and is widely referenced by flooring manufacturers. Most flooring manufacturers accept up to roughly 3–5 lb/1,000 ft²/24 hr, though limits vary by product. The ASTM F2170 in-situ relative humidity probe test is now considered the more reliable method for modern slabs; probes are placed at 40% of slab thickness and read after 24-hour equilibration. If your slab fails either test at the manufacturer's threshold, a vapor barrier membrane or moisture-mitigation coating is required before any moisture-sensitive flooring or wall framing goes down.
Structural and foundation realities
This is where most homeowners underestimate the project. Adding walls and a roof to a slab creates load paths that did not exist when the patio was just a slab. You need to think through how those loads travel from the roof down through the walls into the ground.
Ledger-attached vs freestanding
Most patio enclosures are ledger-attached, meaning one side of the roof structure fastens to the existing house. The ledger transfers lateral loads and one end of roof spans to the house rim joist or wall framing. This works well but requires the ledger connection to be engineered correctly: lag screws or through-bolts into solid framing, flashing above the ledger to prevent water intrusion, and confirmation that the house framing can accept the added loads. A freestanding enclosure avoids touching the house structure entirely (useful when the house has stucco, EIFS, or masonry that is hard to penetrate cleanly) but requires its own complete foundation system.
When you need new footings
IRC Section R403 is clear: exterior walls and bearing partitions must be supported on continuous footings sized to the soil bearing capacity and story count. A standard residential footing for single-story construction might be 12 inches wide and 12 inches deep in good soil, but IRC Table R403.1.1 provides prescriptive minimums. If your patio slab was not designed to carry wall loads, the correct approach is to install new perimeter footings below the slab edge or around the perimeter of the new room, extending to frost depth in cold climates. This often requires breaking the edge of the slab or installing helical piers alongside it. In climates with expansive soils or high frost depth, skipping footings to save money is the single most common cause of early enclosure failure.
Posts, beams, and connection hardware
For screened porches and three-season rooms, 4x4 or 6x6 posts set on post bases anchored to the slab or new footings carry the roof beam loads. For heavier four-season rooms and conservatories, beam spans and post sizing must be calculated against snow and wind loads per ASCE/SEI 7 in the U. For structural loads and snow/wind design in the U.S., ASCE/SEI 7 (Minimum Design Loads for Buildings and Other Structures) is the authoritative referenced standard for determining snow, wind and load combinations used in engineering roof and addition designs ASCE/SEI 7 — Minimum Design Loads and Associated Criteria (ASCE). S. (or AS/NZS 1170 in Australia). All metal connectors should be rated for the exposure and meet code requirements for the connection type. Do not use interior-grade connectors in what is effectively an exterior environment.
Comparing enclosure types: which one fits your situation
There is no single best enclosure type. The right choice depends on your climate, how you plan to use the space, your budget, and whether you want year-round conditioned comfort or just a seasonal room. Here is a practical comparison across the main options.
| Enclosure Type | Typical Cost (US, per sq ft) | Seasons of Use | Climate Suitability | HVAC Needed | Permit Complexity | DIY Feasibility |
|---|---|---|---|---|---|---|
| Screened porch | $20–$60 | 3 (spring–fall) | Mild to moderate; not suited for freezing winters | No | Low–Moderate | High |
| Three-season sunroom | $80–$180 | 3 (spring–fall) | Mild to warm climates; marginal in cold winters | Optional | Moderate | Moderate |
| Four-season sunroom | $150–$350+ | 4 (year-round) | All climates with proper insulation and HVAC | Yes | High | Low |
| Conservatory | $200–$500+ | 4 (year-round) | Moderate climates; high-efficiency glazing needed in extremes | Yes | High | Very Low |
| Modular/glass room kit | $100–$300 | 3–4 depending on spec | Moderate climates; upgrade glazing for cold climates | Optional | Moderate–High | Moderate |
| Framed insulated addition | $150–$400+ | 4 (year-round) | All climates | Yes | High | Low–Moderate |
Screened porch
A screened porch is the most accessible entry point. You frame a roof structure over the patio, wrap the perimeter with screen panels or screen-and-frame systems, and you have a bug-free outdoor living space. Total project costs for a 200 sq ft screened porch typically range from $4,000 to $12,000 depending on roof framing complexity and whether you use basic wood framing or aluminum screen systems. The limitation is obvious: screens offer zero insulation or weather protection. In climates with harsh winters, a screened porch sits unused for five months. But in warm or mild regions it delivers excellent ROI and is a strong candidate for skilled DIYers.
Three-season sunroom
A three-season room adds glazed wall panels (typically single or basic double-pane) and a proper roof to make the space usable from roughly March through November in most of the U.S. and Australia. It is not insulated to conditioned-space standards, so it gets cold in winter and hot in summer without supplemental heating or cooling. Many homeowners add a small electric heater or portable AC to extend the season. Modular sunroom kits (brands like TEMO, Four Seasons Sunrooms, and various Australian aluminium system suppliers) fit well in this category and simplify installation with pre-engineered panel systems.
Four-season sunroom
This is the most popular upgrade for homeowners in climates with real winters. A four-season room is built to conditioned-space standards: insulated walls, low-E double or triple-pane glazing, an insulated roof system, and a connection to the home's HVAC or a dedicated mini-split unit. Done correctly, a 200–300 sq ft four-season room adds functionally livable square footage and can meaningfully increase home value. It also triggers the highest permit and code requirements of any non-conservatory option, including meeting local energy codes (IECC climate zone requirements in the U.S., NCC energy provisions in Australia).
Conservatory
A conservatory is essentially a glazed room with a glass or polycarbonate roof, historically associated with Victorian-era plant rooms and now popular in the UK and Australia as living extensions. The all-glass roof creates dramatic light but is the most thermally challenging element: glass roofs gain heat rapidly in summer and lose it quickly in winter. High-performance conservatories address this with thermally broken aluminum frames, laminated safety glass with low-E coatings, and automated blinds or shading systems. If you are in Australia and considering this option, the related topic of building a conservatory on a patio covers local planning and glazing requirements in detail.
Modular glass room kits
Pre-engineered glass room and aluminum patio enclosure kits have improved significantly. Systems from European manufacturers like Weinor, Palram, and similar brands offer powder-coated aluminum frames, polycarbonate or glass panel infills, and engineered connection hardware that can be assembled by a motivated DIYer in a long weekend. The trade-off is that most kit systems are designed for three-season or mild-climate use unless you specifically select systems rated for higher wind and snow loads. Always verify the kit's structural rating against your local design loads before ordering.
Framed insulated addition
The most robust option is essentially building a room addition using conventional residential framing: 2x6 stud walls, batt or rigid insulation, house wrap, siding, and a conventional shingle or metal roof with windows and a door. This is indistinguishable from the rest of the house once complete and can be legally classified as conditioned living area if it meets code. It is also the most expensive and complex, typically requiring a structural engineer for the foundation and roof connection, full permits, inspections, and licensed trades for electrical and HVAC work. For homeowners in cold climates who want the space to function as a true room addition year-round, this is often the right answer even though the cost is highest.
Roofing, drainage, flashing, and tying into the house
The roof is where most patio conversion problems originate. Water management at the junction between the new enclosure and the existing house is the most critical detail in the entire project.
Roof types and pitch
A shed roof (single slope) is the most common and most economical choice for patio enclosures. It pitches away from the house, which keeps its height at the wall below the existing eave and simplifies the ledger connection. Minimum pitch for asphalt shingles is typically 2:12; metal roofing can go down to 1:12 with standing seam profiles. Polycarbonate panel roofs common in conservatory and kit-room applications can run nearly flat but should have at least 1/8 inch per foot of slope for drainage. A gable roof looks better architecturally but complicates the tie-in at the existing wall and usually raises the ridge into the plane of the house wall, requiring more careful flashing and potentially dormer-style framing.
Flashing and water management
The ledger flashing is non-negotiable. A continuous piece of step or kick-out flashing runs behind the house siding and over the ledger, directing water away from the wall. Without it, water infiltrates the wall assembly over time, causes rot in wood-framed houses, and generates the kind of hidden damage that costs far more to fix than the original enclosure. Best practice: use a self-adhering membrane (like Grace Ice and Water Shield or equivalent) over the ledger before installing the flashing metal. On stucco or brick houses, the flashing must be embedded into a saw-cut reglet or sealed with a compatible caulk rated for the substrate. Building Science Corporation guidance emphasizes continuous air barriers and thermal breaks at these junctions to prevent both water infiltration and condensation within the wall assembly.
Gutters and downspouts
The new roof needs its own gutter and downspout system. This is frequently overlooked in kit installations. Without gutters, roof runoff concentrates at the drip edge and erodes soil next to your slab foundation, which is exactly the drainage problem you were trying to avoid. Size gutters to match the roof area and local rainfall intensity: a 5-inch K-style gutter handles most residential applications but a 6-inch gutter is justified on larger roof areas or in high-rainfall regions. Downspouts must discharge at least 6 feet from the foundation or connect to an underground drainage system.
Glazing, insulation, HVAC, and energy efficiency
If you are building a screened porch, you can skip this section. If you are building anything glazed that you want to be comfortable year-round, these details determine whether the room actually works or becomes an oven in July and a freezer in January.
Window and glazing performance ratings
In the U.S., window and door performance is certified by the National Fenestration Rating Council (NFRC). Every NFRC-labeled product shows U-factor (lower is better for insulation), Solar Heat Gain Coefficient (SHGC, lower limits unwanted summer heat gain), Visible Transmittance (VT), and Condensation Resistance. The IECC (Table R402.1.2 in the 2021 edition) sets maximum U-factor and SHGC by climate zone. For example, Climate Zone 5 (northern U.S.) requires fenestration U-factor of 0.30 or better. In hot-sunny Climate Zone 2, SHGC of 0.25 or lower is prescribed. Check your specific climate zone's requirements because they vary significantly and most jurisdictions have adopted a recent IECC edition or an equivalent state energy code.
| IECC Climate Zone | Max U-Factor (Fenestration) | Max SHGC | Notes |
|---|---|---|---|
| Zone 1–2 (hot/very hot) | 0.40 | 0.25 | Solar control is the priority; prioritize low-SHGC glazing |
| Zone 3 (warm) | 0.35 | 0.25 | Balanced U-factor and SHGC requirements |
| Zone 4 (mixed) | 0.35 | 0.40 | SHGC less restrictive; insulation more important |
| Zone 5–6 (cold) | 0.30 | No limit (NR) | Insulation dominates; solar gain can help in winter |
| Zone 7–8 (very cold/subarctic) | 0.28 | No limit (NR) | Triple-pane strongly recommended; thermal bridging critical |
For high-glazed rooms like conservatories and sunrooms, warm-edge spacers in the insulated glass unit (IGU) and thermally broken aluminum or fiberglass frames are essential in any climate above Zone 3. Warm-edge spacers reduce edge-of-glass temperature drop, which is the zone most prone to condensation. Pairing warm-edge spacers with low-E coatings and argon or krypton gas fill between panes gives the best combination of condensation resistance and thermal performance. Steel or standard aluminum spacers (the old 'cold-edge' design) should be avoided in any climate where winter temperatures drop below about 20°F (-7°C).
Insulation targets for walls and ceiling
For a four-season room or framed addition to qualify as conditioned space, walls and ceiling must meet the IECC requirements for your climate zone. Typical targets for a well-built addition in Zone 5 are R-20 minimum for walls (2x6 framing with R-19 batts or 2x4 framing with continuous exterior rigid foam) and R-49 for ceiling/roof assemblies. Slab edge insulation is also required in colder zones: IECC Table R402.1.2 specifies R-10 slab edge insulation to a minimum 2-foot depth for Zone 6 and colder. This is often the detail that gets omitted when a patio slab is enclosed, and it is a meaningful source of heat loss and moisture-related problems in cold climates. ASHRAE 90.1 provides an alternative compliance path for additions that connect to conditioned commercial-adjacent spaces.
Condensation control
A fully glazed room creates conditions where condensation can form on the coldest surfaces: glass edges, metal frames, and cold-bridging points in the structure. Building Science Corporation guidance focuses on three controls: keeping surface temperatures above the dew point through adequate insulation and thermal breaks, maintaining continuous air barriers to prevent warm humid interior air from reaching cold structural elements, and providing adequate ventilation or dehumidification to limit indoor relative humidity. For a sunroom or conservatory in a cold climate, plan for a dedicated dehumidification strategy and consider operable windows or a heat recovery ventilator (HRV) sized for the room's volume.
Heating and cooling options
For three-season rooms, a plug-in radiant panel or small electric heater is typically sufficient for shoulder-season comfort. For four-season rooms, a ductless mini-split heat pump is the cleanest solution: it provides both heating and cooling, installs without ductwork, and allows independent zone control. A single 9,000–12,000 BTU mini-split handles most patio room conversions in the 150–300 sq ft range. Extending the existing home's forced-air system is technically possible but requires duct sizing calculation and often a new air handler or variable-speed blower to handle the added load without degrading comfort in the rest of the house.
Permits, building codes, and the inspection timeline
Every enclosed room addition requires a permit in virtually every U.S. jurisdiction and under the Australian NCC framework. The permit process exists to verify structural safety, energy compliance, and life safety (egress, smoke detectors, electrical). Skipping permits creates problems at resale and can require demolition of unpermitted work if discovered. Here is what the process typically looks like.
U.S. permit process: general steps
- Pre-application meeting: Most building departments offer a brief meeting where you describe the project and learn the specific requirements. This saves significant time and is worth doing even for straightforward projects.
- Submit drawings: You will need a site plan (showing the existing patio and proposed enclosure with setback dimensions), floor plan, elevations, and at minimum a roof framing plan. Engineered drawings are required when the project includes new footings, structural modifications, or when your jurisdiction requires engineer-stamped plans for additions.
- Structural review: The plan reviewer checks footing design against IRC Table R403.1.1 (or site-specific engineer calculations), roof framing against span tables, and ledger connections. Structural loads must be substantiated against ASCE/SEI 7 design values for your location.
- Energy compliance review: If the space will be conditioned, the reviewer checks that wall, ceiling, and fenestration values meet the locally adopted IECC edition for your climate zone.
- Electrical, plumbing, and mechanical permits: Any new lighting, receptacles, HVAC, or plumbing (rare in patio rooms but possible if adding a sink or outdoor shower) require separate sub-permits and licensed contractor work in most jurisdictions.
- Foundation/footing inspection: Inspector visits after forms are set but before concrete is poured.
- Framing inspection: Inspector visits after rough framing, rough electrical, and rough mechanical are complete but before insulation or drywall.
- Insulation inspection: Required in most jurisdictions for conditioned-space additions.
- Final inspection: All work complete, fixtures installed, HVAC operational. Inspector issues certificate of occupancy or signed permit card.
Regional considerations: U.S. climate zones and state codes
California operates under its own Title 24 energy code, which is more stringent than federal IECC in many respects, particularly for fenestration SHGC. Florida uses the Florida Building Code with specific hurricane wind-load requirements that affect all enclosure structural design. In northern states (Minnesota, Wisconsin, Michigan, New England), frost depth requirements dictate footing depths of 42–60 inches, which significantly affects cost. Always verify which IECC edition your state has adopted: as of 2026, many states are on the 2021 IECC, but some remain on 2018 or 2015 editions with different requirements.
Australian NCC and council requirements
In Australia, the National Construction Code (NCC), administered by the Australian Building Codes Board (ABCB), governs the construction of enclosed additions. The NCC references AS/NZS 1170 (Parts 0, 1, 2, and 3) for structural load design actions including wind, snow, and imposed loads. Part B1 of the NCC covers structural provisions and provides Deemed-to-Satisfy (DTS) pathways for common addition types. In practice, Australian homeowners must also obtain Development Approval (DA) or Complying Development Certificate (CDC) approval from their local council, and requirements vary significantly by state. New South Wales, Victoria, Queensland, Western Australia, and South Australia each have state-level planning instruments that override or supplement the NCC in some areas. A patio enclosure in Queensland that functions as a habitable room requires compliance with Queensland Development Code Part 1.1 and relevant livability standards. For a deeper look at the Australian-specific process, the guide on enclosing a patio in Australia covers state-by-state planning requirements in detail.
Australian homeowners should also be aware that any glazed addition (conservatory, sunroom, or glass room) must comply with NCC energy efficiency provisions, which reference the Nationwide House Energy Rating Scheme (NatHERS) or the Deemed-to-Satisfy elemental provisions for glazing performance. High SHGC glazing without shading is a common compliance issue in Queensland and Western Australia.
Step-by-step plans for three common approaches
Approach 1: Simple screened porch with shed roof
- Assess and prepare the slab: check thickness, drainage direction, and moisture. Clean and patch surface cracks. Install post bases at planned post locations, anchoring to the slab with 1/2-inch anchor bolts and epoxy in pre-drilled holes if footings are not required by your jurisdiction.
- Install the ledger: attach a pressure-treated 2x8 or 2x10 ledger to the house rim joist with structural lag screws (or through-bolts on masonry). Install flashing membrane and metal flashing above the ledger before any framing proceeds.
- Set posts and beam: set 4x4 or 6x6 posts on post bases at the outer edge of the slab. Install a doubled 2x8 or 2x10 beam across the post tops with post caps.
- Frame rafters: install rafters from the ledger to the beam at 16-inch or 24-inch on-center spacing. Install hurricane ties at each rafter-to-plate connection.
- Install roofing: nail OSB sheathing, install self-adhering ice-and-water membrane at eaves and over the full roof if low-slope, then install roofing material. Attach gutters and downspout at the outer edge.
- Install screen framing: attach pressure-treated 2x4 horizontal rails between posts at mid-height and along the top of the knee wall if used. Install screen panels in aluminum or wood frames. Add a screen door at the entry point.
- Permit inspections: footing inspection (if required), framing inspection, final inspection.
Approach 2: Three-season sunroom using a modular kit
- Select your kit: choose a pre-engineered sunroom kit sized to your patio footprint. Confirm the kit's structural ratings meet your jurisdiction's wind and snow load requirements. Order the kit with the manufacturer's installation manual and engineering documentation for permit submission.
- Prepare the slab: self-level if slope exceeds 1/4 inch per foot; install slab-edge insulation board if required by your energy code; verify moisture content is within acceptable ranges using ASTM F1869 or F2170 testing if installing finished flooring.
- Install perimeter framing: follow the kit manufacturer's instructions for anchoring the aluminum or wood base track to the slab. This typically uses concrete screws at 12-inch centers.
- Erect wall panels: set prefabricated wall panel assemblies into the base track and secure at the head. Install corner connectors per the kit instructions.
- Install roof system: most kit roof systems use polycarbonate multiwall panels or insulated glass panels in an aluminum rafter-and-purlin frame. Follow the kit sequence carefully — the installation order matters for weathertightness.
- Flash the wall-to-house junction: install the manufacturer's supplied flashing kit at the connection to the house wall. Supplement with self-adhering membrane if the manufacturer allows.
- Add utilities: install electrical outlets on a new circuit (licensed electrician required in most jurisdictions). Add a small ductless mini-split or electric heater as desired.
- Inspections: structural framing, electrical rough-in, final inspection.
Approach 3: Fully insulated four-season room (framed addition)
This approach is closest to building a room addition and is not a strong DIY candidate unless you have construction experience. The sequence is: engineer the foundation (new perimeter footings at frost depth, or a structural engineer verifies the existing slab with perimeter thickening), frame 2x6 exterior walls, install house wrap and sheathing, frame the roof (shed or gable), install roofing with full flashing, install insulation to meet IECC requirements for your climate zone, install energy-code-compliant windows (check your NFRC U-factor and SHGC requirements), install vapor barrier as required by your climate zone, hang drywall, finish floor over a sleeper or self-leveled slab, and connect to HVAC. For step-by-step instructions specifically focused on how to enclose a patio into a room, see the dedicated guide covering planning, slab checks, and foundation details. Budget $150–$400 per square foot for this scope depending on material quality and regional labor costs, and plan 6–12 weeks for a professional crew to complete a 200–300 sq ft space including permit timeline. The topic of building a sunroom on an existing concrete patio covers the slab assessment and foundation detailing for this approach in greater depth.
DIY vs. contractor: where to draw the line
A screened porch with a straightforward shed roof is genuinely within reach for a competent DIYer with basic carpentry skills and a helper. The framing is repetitive and the materials are forgiving. Modular kit sunrooms land in the middle ground: assembly is designed for non-professionals but the permit process, flashing details, and electrical work benefit from at least some professional involvement. Four-season rooms and conservatories almost always require a general contractor plus licensed subcontractors for structural work, electrical, and HVAC. The permit inspection sequence alone, which requires specific work stages to be visible before they are covered up, makes it impractical to do everything yourself and still pass inspections on schedule.
| Task | DIY-Friendly? | Why or Why Not |
|---|---|---|
| Site plan and permit drawings (screened porch) | Yes | Simple drawings are acceptable for minor structures in most jurisdictions |
| Site plan and permit drawings (conditioned room) | Maybe | Engineering stamps required in many jurisdictions — hire a designer or engineer |
| Footing excavation and pour | Maybe | Achievable if small, but footing inspection is mandatory — errors are costly to fix |
| Slab moisture testing | Yes | Test kits are commercially available; F2170 probes can be rented |
| Basic wood framing (posts, rafters, ledger) | Yes | Standard carpentry skills apply; follow span tables carefully |
| Roofing and flashing | Yes with caution | Flashing details are critical; mistakes cause hidden damage — watch manufacturer installation videos |
| Modular kit assembly | Yes | Kits are designed for DIY but follow the sequence exactly |
| Electrical rough-in and panel work | No in most areas | Licensed electrician required by code in nearly all U.S. and Australian jurisdictions |
| HVAC installation (mini-split) | Partial | Mini-split mounting and line-set routing is DIY-possible; refrigerant work requires EPA certification in the U.S. |
| Structural engineering calculations | No | Must be done by a licensed structural engineer when required by code |
Realistic costs, timelines, and impact on home value
Cost ranges for patio conversions vary widely by region, enclosure type, and finish level. The numbers below are ballpark ranges based on U.S. national averages as of 2025–2026 and should be adjusted for your local labor market (coastal markets and major metros typically run 20–40% higher; rural markets may be 10–20% lower).
| Enclosure Type | Estimated Total Cost (200 sq ft) | Project Timeline | Typical ROI at Resale |
|---|---|---|---|
| Screened porch | $4,000–$12,000 | 1–3 weeks | 50–75% cost recovery |
| Three-season sunroom (kit) | $16,000–$36,000 | 2–6 weeks | 50–65% cost recovery |
| Four-season sunroom | $30,000–$70,000+ | 6–16 weeks | 50–70% cost recovery |
| Conservatory | $40,000–$100,000+ | 8–20 weeks | Variable; high in warm climates, lower in cold |
| Framed insulated addition | $30,000–$80,000+ | 8–20 weeks | 60–80% cost recovery if permitted and finished to code |
Return on investment at resale is notoriously variable for sunrooms and patio enclosures. Remodeling Magazine's annual Cost vs. Value report consistently shows sunroom additions recovering roughly 50–65% of cost at resale nationwide, though this varies by local market desirability and how well the addition is integrated with the house. The highest value returns come when the addition is permitted, insulated to conditioned-space standards, and architecturally consistent with the existing house. An unpermitted or poorly insulated screened room may actually reduce buyer confidence and require disclosure.
Recommended materials and enclosure systems
For screened porches, pressure-treated lumber (ground contact rated for the bottom plate and posts) combined with aluminum screen frames is the most durable long-term combination. Pet-resistant screen mesh (brands like Phifer BetterVue) is worth the modest upside cost. For modular sunroom kits, look for systems with thermally broken aluminum extrusions, double or triple-wall polycarbonate or glass panel options, and structural test documentation. TEMO Sunrooms, Four Seasons Sunrooms, and Betterliving Sunrooms are established U.S. brands with dealer networks and permit documentation packages. For glazing in four-season rooms, fiberglass frames (Marvin, Integrity, Pella Impervia) or vinyl frames with warm-edge spacer IGUs offer the best balance of thermal performance and durability. Avoid standard aluminum frames without thermal breaks for any climate below Zone 3.
Maintenance considerations
Regardless of enclosure type, plan for annual maintenance. Screen panels should be inspected each spring for tears or loose frames and replaced as needed. Caulk joints at the house-to-enclosure junction should be inspected after each winter and recaulked where cracking or separation is visible. Gutter and downspout systems need cleaning twice a year in deciduous-tree environments. For conservatories and glass room kits, clean the glazing channels of debris that traps moisture and causes frame corrosion. Mini-split filters need cleaning every 4–6 weeks during heavy use. Slab moisture can be a recurring issue if the site drainage was not fully addressed: if you see efflorescence (white salt deposits) on the slab surface after conversion, that is a sign of ongoing moisture migration and should be investigated before it damages flooring or wall framing.
Final decision checklist before you start
- Slab confirmed as 4 inches or thicker with no active settlement or through-cracking.
- Drainage confirmed to run away from the house on all sides; drainage corrections completed before enclosure work begins.
- Setback requirements verified at the local building department; enclosure footprint falls within buildable area.
- HOA or deed restrictions reviewed and confirmed to allow the enclosure type you are planning.
- Enclosure type selected based on climate zone, intended year-round vs seasonal use, and budget.
- Structural approach determined: ledger-attached or freestanding; new footings required or existing slab adequate (confirmed with a structural engineer if any doubt).
- Glazing specifications meet locally adopted IECC U-factor and SHGC requirements for your climate zone.
- Insulation levels meet or exceed IECC requirements if the space will be conditioned.
- Permit application prepared with site plan, floor plan, roof framing plan, and energy compliance documentation.
- DIY vs. contractor scope defined: at minimum, electrical work allocated to a licensed electrician.
- Moisture testing completed (ASTM F1869 or F2170) if installing finished flooring directly over the slab.
- Maintenance plan in place for gutters, caulk joints, glazing channels, and HVAC filters.
FAQ
What primary research questions should I ask to determine if an existing patio slab is feasible to convert into an enclosed room?
Can the slab support added wall and roof loads or will new footings/beams be required? What is the slab thickness, reinforcement, and edge condition? Is the slab flat/level within flooring tolerances? What is in‑slab moisture (RH) and surface MVER? Are there settlement, cracking, or drainage problems? Authoritative sources to consult: ACI 302.1R Guide to Concrete Floor and Slab Construction (slab thickness/reinforcement), ASTM E1155 and ACI/FF/FL guidance for flatness, ASTM F2170 (in‑situ RH) and ASTM F1869 (CaCl MVER) for moisture testing, and local building code (IRC Chapter 4) for bearing/support requirements.
Which standardized tests and acceptance thresholds should I use for slab moisture and why?
Use ASTM F2170 in‑situ RH probes (preferred modern method) placed per the standard (40% slab depth) to assess internal slab moisture. Use ASTM F1869 calcium‑chloride MVER for surface emission where required by manufacturers. Reference manufacturer limits (commonly ~3–5 lb/1000 ft2/24 hr for MVER) and RH acceptance criteria per flooring/system manufacturer. Useful guidance: ASTM F2170, ASTM F1869, and NRMCA/CIP 28 moisture guidance for typical MVER acceptance ranges.
How do I evaluate slab flatness and levelness before installing finished floors for an enclosed room?
Measure F‑Numbers (FF/FL) per ASTM E1155 or use straightedge/tolerance criteria in ACI 302.1R and manufacturer installation guidelines. Compare measured tolerances to the finished flooring manufacturers’ acceptable limits and to ACI/ASTM guidance for flat floors. If out of tolerance, plan for grinding/leveling or a new slab/overpour designed to accept wall/roof loads.
When will I need new footings or to reinforce the existing slab to support framed walls and a roof?
If the existing slab was not designed to carry vertical wall or concentrated roof loads, the IRC typically requires continuous footings sized per soil bearing capacity and story count (IRC R403). Situations requiring new footings: slab < required thickness/reinforcement, poor soils, slab edge not continuous, or if the addition will be insulated/conditioned with a framed load‑bearing wall. Consult IRC Chapter 4 for prescriptive footing sizes; for unusual soils or loads obtain a geotechnical report and engineer—reference ASCE/SEI 7 for load combinations (snow, wind) in the U.S. and AS/NZS 1170 and NCC for Australia.
What structural standards determine roof and snow/wind load sizing for an attached room or conservatory?
Use ASCE/SEI 7 (Minimum Design Loads for Buildings and Other Structures) in the U.S. to determine snow, wind and load combinations for roof and attachment details. In Australia refer to the AS/NZS 1170 series (wind, snow, permanent/imposed actions) as referenced by the National Construction Code (NCC). These must be used by your structural engineer/designer to size framing and attachments.
How should I research code/permit requirements and what checklist items should I gather before applying?
Identify the adopted local building code edition (IRC/IECC in U.S.; NCC in Australia) and local amendments. Checklist items: site plan, foundation/structural plans, roof tie‑in details, glazing specs (NFRC labels), energy compliance (IECC/ASHRAE/State), HVAC sizing, egress and smoke‑alarm impacts, drainage/grade changes, and contractor licensing/inspections schedule. For footing details consult IRC Chapter 4/Tables R403.1.1; for glazing/energy consult IECC fenestration tables and NFRC ratings; for Australia consult NCC and referenced AS/NZS standards.
Next Article
How to Enclose a Patio in Australia Into a Room
Step-by-step guide to enclose an Australian patio into a weatherproof room, with options, approvals, costs, and next ste