A cat patio (also called a catio) is an outdoor enclosure that gives your cat fresh air, sunshine, and outdoor stimulation without the risks of free roaming. You can build one as a standalone structure in your yard, attach it directly to your house, or enclose an existing patio or porch you already have. Most homeowners can complete a basic cat patio in a weekend for $200 to $800 in materials, while larger or more finished versions run $1,500 to $5,000 or more depending on size, framing material, and weather protection features.
How to Build a Cat Patio: Step-by-Step DIY Guide

Miles Hart
24 May 2026
What exactly is a cat patio, and which type fits your situation?
A cat patio is essentially a screened or meshed enclosure where cats can experience the outdoors safely, protected from traffic, predators, toxins, and disease. The term overlaps with 'catio,' and both mean the same thing. Where it gets interesting is in the setup options, because the right choice shapes every decision that follows.
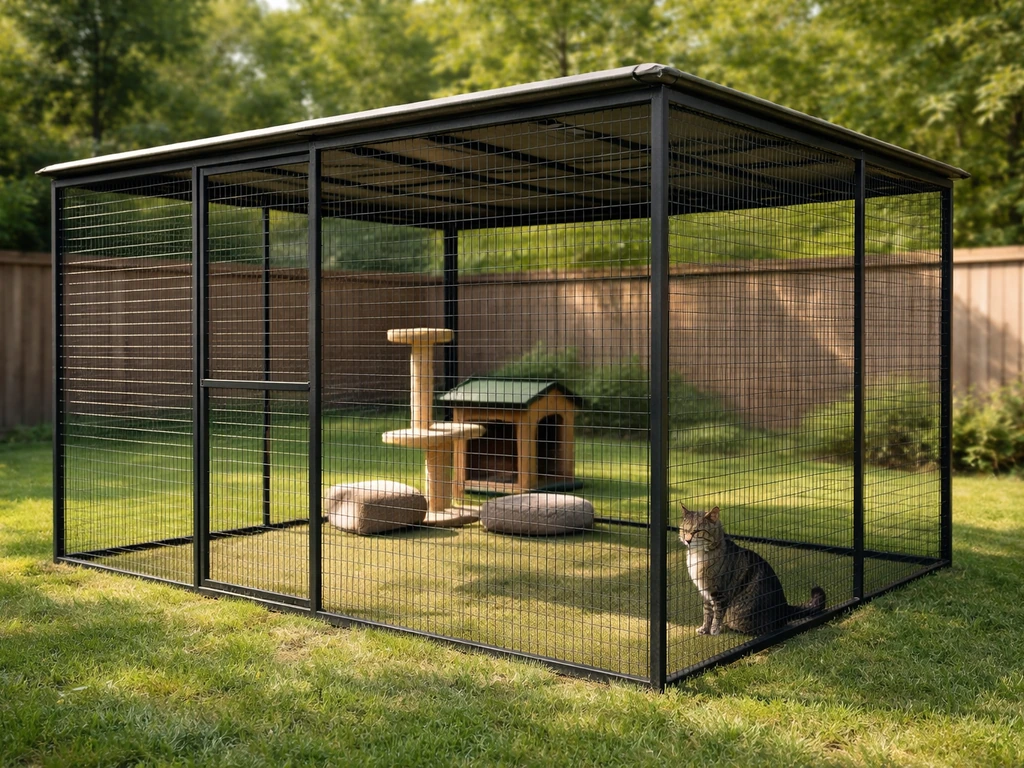
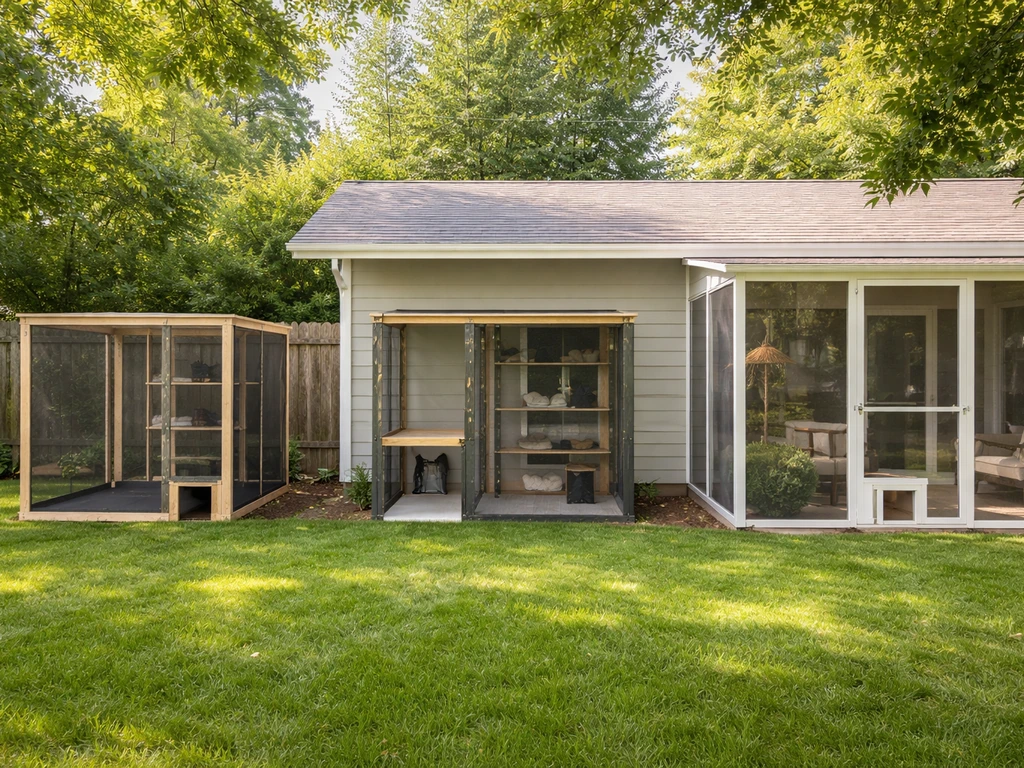
There are three practical configurations to choose from. First, a freestanding or standalone enclosure sits independently in your yard, connected to your home only by a cat door or a covered tunnel. Second, an attached enclosure is built directly against the house wall, typically three-sided, using the house as its fourth wall. Third, an enclosed patio conversion takes an existing covered patio, porch, or balcony and screens or meshes it in to contain cats. If you already have a patio slab or covered porch, that third option is almost always the fastest and most cost-effective starting point. If you are planning to use your existing patio slab, see the next steps for the fastest, most cost-effective way to build a catio on a patio.
| Type | Best For | Approx. Cost Range | Main Trade-off |
|---|---|---|---|
| Freestanding / standalone | Yards with no existing patio; larger enclosures | $400–$3,000+ | Requires cat door or tunnel connection; more materials |
| Attached to house wall | Direct indoor-outdoor access; smaller footprints | $200–$1,500 | Permanent attachment; wall penetration for cat door |
| Enclosed existing patio/porch | Homeowners with an existing slab or covered structure | $150–$2,000 | Limited to existing footprint unless you extend it |
If you're converting an existing covered porch or patio into a cat-safe space, that's a related but slightly different project (more like screening in an existing structure). Building from scratch on a bare yard patch or attaching a new enclosure to your home are the true 'build from zero' scenarios this guide focuses on, though the principles apply to all three.
Planning: picking the spot, measuring, and laying out the space
Site selection
Choose a location that gets partial shade for most of the day. Full sun is hard on cats, and a south-facing wall in summer can turn even a well-ventilated enclosure into an oven. East-facing spots work well in most climates: morning sun, afternoon shade. Avoid low-lying areas that collect rainwater, and stay away from spots near compost bins, treated landscaping, or areas where neighborhood cats frequently mark territory (which can stress your cats through the mesh).
For attached enclosures, note where your home's wall studs are located, whether there's an existing door or window you can use for cat access, and how close you are to utility lines or HVAC equipment. For freestanding builds, keep the enclosure within a reasonable tunnel distance from a cat door, typically no more than 20 to 30 feet, or your cats may not bother using it.
Measuring and sizing
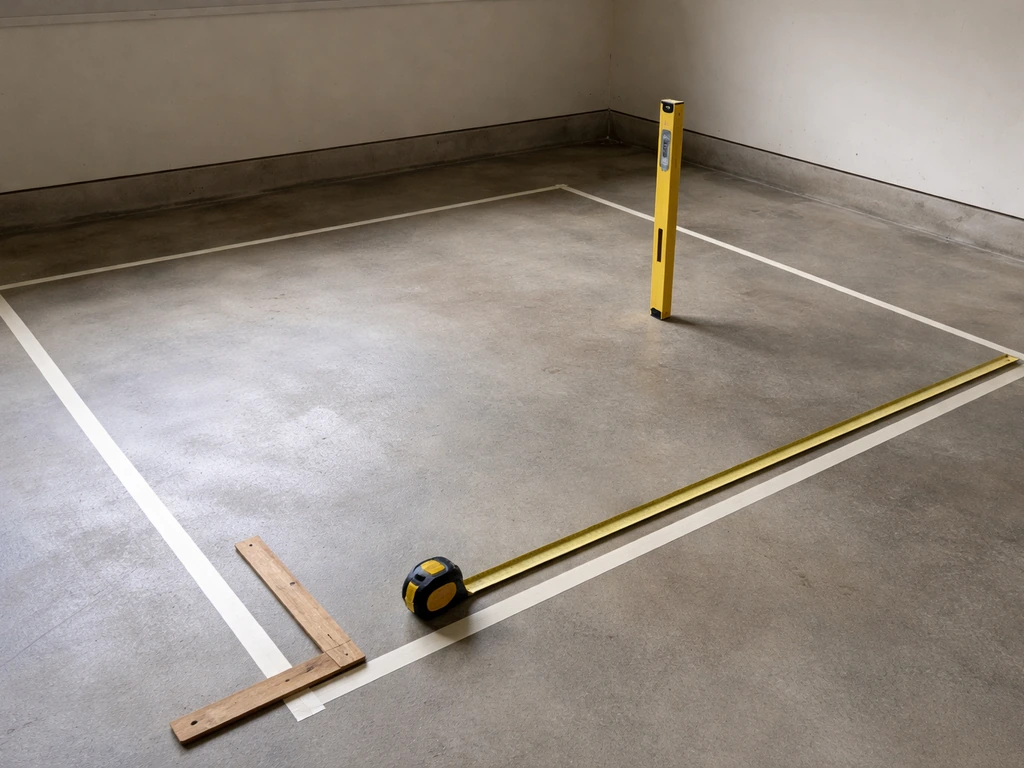
A workable minimum for one or two cats is about 6 feet by 8 feet with a ceiling height of at least 6 feet. That's enough for a shelf or two, a litter box, and room to move. For three or more cats, aim for at least 8 by 12 feet, and go taller if possible since cats love vertical space. Map out your footprint with stakes and string before you buy anything. Measure twice: the width of your gate opening, the distance from house wall to property line (you need setbacks for permits), and any grade change across your chosen footprint.
Orientation and layout
Orient your longest walls along the east-west axis to maximize shade from the roof structure during peak afternoon hours. Put the entry gate on the side least visible from the street, which also tends to be the side with the fewest distractions for your cats. If you're attaching the enclosure to your home, center it on an existing door or window opening, because cutting a new wall penetration is extra work and expense.
Materials and enclosure options
Framing

Pressure-treated 2x4 lumber is the most common framing choice for ground contact and floor frames. For wall and roof framing above ground, standard 2x4 or 2x3 construction lumber works fine. Cedar is a good premium option because it's naturally rot-resistant without chemical treatment and looks better, but it costs about 30 to 50 percent more than pressure-treated pine. Metal conduit or steel tubing is an alternative for a very light modern look, but it requires different tools (a pipe cutter and connector hardware) and offers fewer options for attaching shelving and enrichment features.
Mesh and fencing
Welded wire mesh with 1-inch by 1-inch openings is the standard choice. It keeps cats in and keeps most predators (raccoons, opossums, dogs) out. If you are also wondering are dogs allowed on patios, plan on using the same sturdy mesh and secure fencing concepts so pets stay contained safely around your enclosure. Avoid chicken wire: it's flimsy, the openings are large enough for a determined cat to claw through over time, and it rusts quickly. Hardware cloth (which is just the common name for welded wire mesh) in 16-gauge or heavier is what you want. For the roof, you can use the same mesh or switch to polycarbonate panels if you want rain protection, which also reduces ventilation, so balance the two. Galvanized mesh holds up better than vinyl-coated in wet climates.
Weather protection
At minimum, cover at least one-third of the roof with a solid material: corrugated polycarbonate panels, metal roofing, or even exterior-grade plywood with a waterproof coating. This gives cats a dry spot during rain and shade in summer. In cold climates, consider enclosing one section of the wall with clear polycarbonate or acrylic panels to create a windbreak without blocking light. For hot climates, prioritize ventilation and add a shade cloth over part of the mesh roof during peak months.
How to build it: step by step
Step 1: Site prep
Clear and level your footprint. Remove sod and at least 2 to 3 inches of topsoil from the interior area if you're building on bare ground. You'll fill this with gravel, pavers, or leave it as dirt (more on anti-dig measures below). Mark your corner post locations with stakes. Call 811 (in the US) before you dig anything deeper than 6 inches to confirm there are no buried utility lines.
Step 2: Foundation and floor
For a small enclosure, post anchors set in concrete footings are the cleanest approach. Dig holes about 12 inches deep (below your frost line in cold climates) at each corner and mid-span if spans exceed 6 feet. Set metal post-base anchors in quick-set concrete, let them cure 24 hours, then bolt your posts in. For a ground-level floor, fill the interior with 2 to 3 inches of compacted gravel topped with pavers or artificial turf, both of which are easy to clean. A concrete slab works too and is the most durable, but it requires forming and a truck delivery for anything larger than a small patch.
Step 3: Framing the walls and roof
Cut your corner posts to your target ceiling height (6 to 8 feet is typical). Install horizontal top plates connecting the posts at the top, and add mid-rail framing at roughly 36 to 48 inches off the ground to give your mesh panels a solid middle attachment point. For the roof, a simple shed-style (single-slope) roof is the easiest to frame: run rafters from a higher back wall to a lower front wall at a 10 to 15 degree slope for drainage. If you're attaching to your home, lag-bolt a ledger board directly into wall studs first, then frame out from there.
Step 4: Installing mesh walls and roof
Roll out your hardware cloth and cut panels to size with wire snips or aviation shears. Staple to wood framing using a heavy-duty staple gun with 1/2-inch staples, then add a furring strip or lath board over the stapled edge and screw it down. This sandwich method is far more secure than staples alone: a cat throwing its weight against the mesh won't pop it off over time. At wall corners, overlap mesh panels by 2 to 3 inches before stapling. For the roof, install solid panels first, then mesh over the remaining open sections. Seal the junction between solid panels and mesh with foam weatherstripping or flashing tape to close gaps.
Step 5: The gate and entry
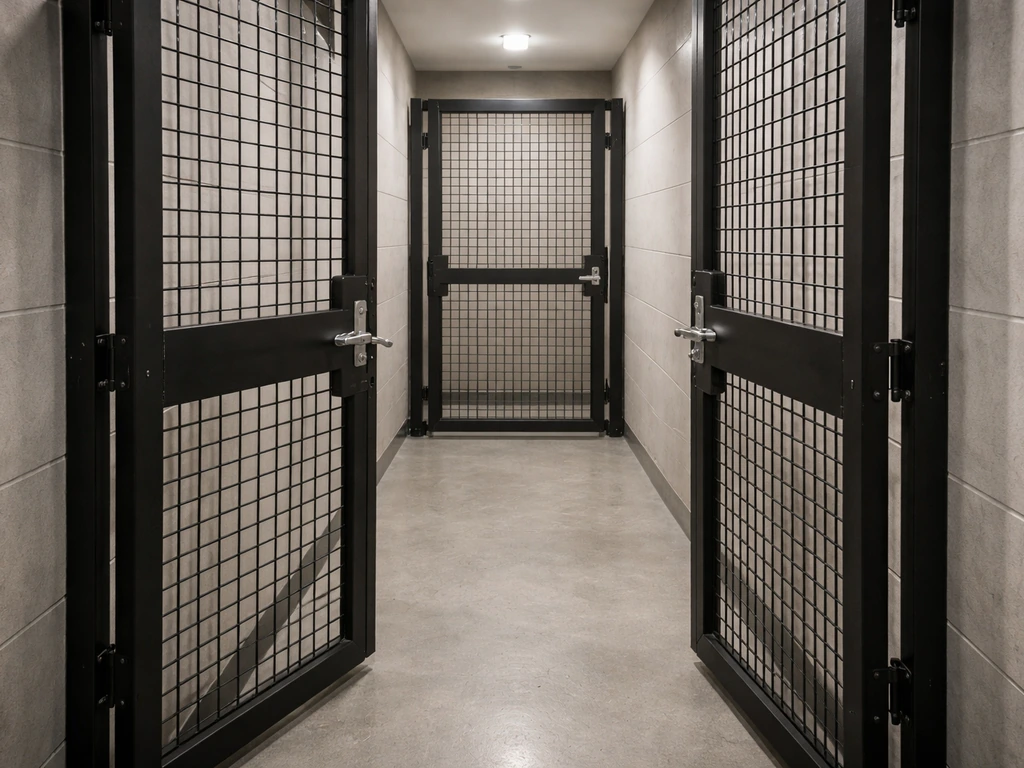
Build a double-door airlock entry if you can: a small outer gate plus an inner gate, with a few square feet of space between them. This is the single best escape-prevention feature you can add, because it gives you a buffer if a cat darts for the opening. Use a self-closing hinge and a positive-latch mechanism (a carabiner clip over the latch handle works well) on both gates. Make sure both gates open inward into the airlock space, not outward, so the motion of opening doesn't push a cat back through.
Cat-safety design details
Dig-proofing
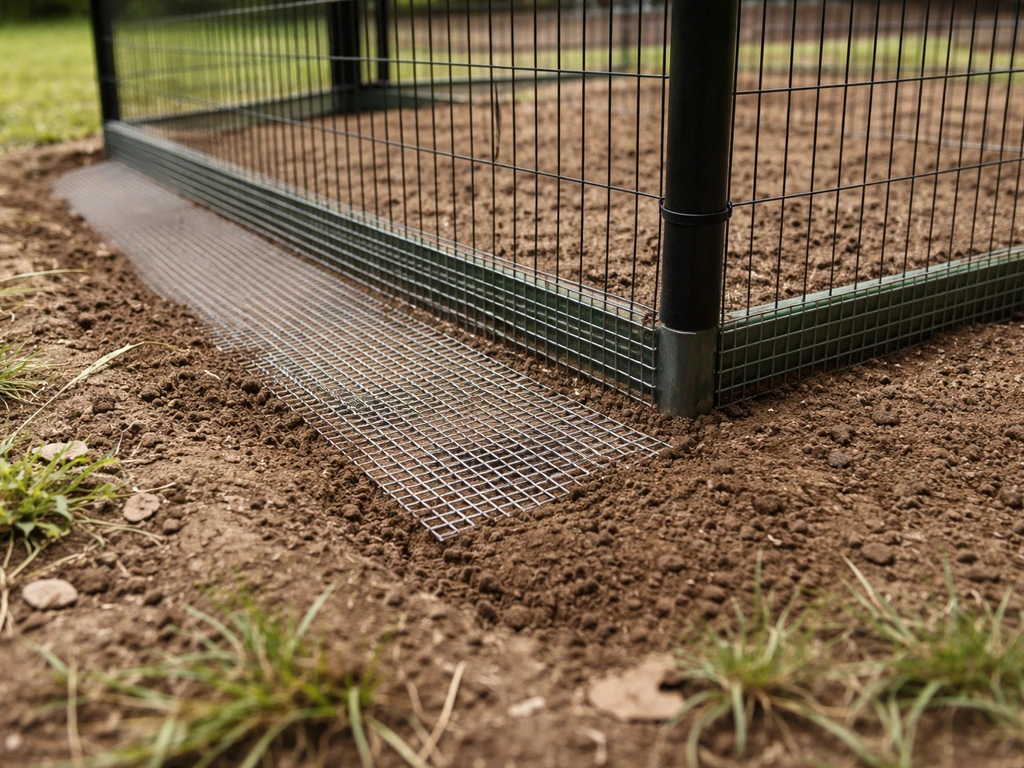
Cats are less likely than dogs to dig out, but it happens, and predators like raccoons will absolutely dig under mesh if they smell food or a cat. Bury a 12-inch apron of hardware cloth horizontally around the perimeter, extending outward from the base of your wall. Lay it flat underground and cover it with gravel or soil. This 'L-footer' method works better than burying mesh vertically because animals follow the wall down and then out, hitting the buried apron instead of soft soil.
Climb-proofing
Your roof mesh is your primary climb-proofing, but double-check that the junction between your wall mesh and roof mesh has no gaps larger than an inch. At the top interior corners, add a 45-degree overhang of mesh (called a coyote roller in dog fencing, but the same concept applies) angled inward at about 45 degrees. This prevents a cat that's good at climbing from pulling itself over the top edge from inside. Keep interior shelves and furniture at least 12 inches away from walls so cats can't use them as launch pads to test the upper mesh.
Ventilation, shade, and water
Mesh walls provide natural cross-ventilation, but you still need to monitor temperature on hot days. A shaded area covering at least one-quarter of the floor space is the minimum. In climates where summer temperatures regularly exceed 90 degrees Fahrenheit, add a battery-powered fan clipped to the framing and consider a misting line (a simple garden hose misting kit works fine) along the shaded section. Fresh water is non-negotiable: a stainless bowl refilled daily is fine, or a pet fountain that runs on a covered exterior outlet. Secure the water source so it can't tip over and create standing water.
Enrichment and comfort
Add at least two elevated surfaces at different heights: simple shelves made from 1x8 or 1x10 boards attached to the wall framing work perfectly. A scratch post, a sheltered sleeping box (a plastic storage bin with a hole cut in the side is cheap and weatherproof), and a patch of real or artificial grass give cats things to do. These aren't extras: environmental enrichment directly affects whether your cats will actually use the enclosure or ignore it.
DIY feasibility, realistic costs, and common mistakes
Can you build this yourself?
Yes, with basic tools and a free weekend. You don't need contractor experience for a simple attached or freestanding enclosure. If you can drive a screw, use a circular saw, and follow a level, you can build a solid cat patio. The most technically demanding parts are the concrete footings and any wall penetration for a cat door; both are manageable with YouTube guidance and patience. A freestanding cat tunnel connecting to an existing cat door is even simpler and avoids any wall work entirely.
Time estimates
- Planning, measuring, and permit research: 2 to 4 hours
- Material shopping and delivery: 1 to 2 hours
- Site prep and footing installation: 3 to 5 hours (plus 24-hour concrete cure time)
- Framing: 4 to 8 hours depending on size
- Mesh installation and gates: 3 to 6 hours
- Finishing details (shelves, shade, water): 2 to 4 hours
- Total active build time: roughly 1.5 to 2.5 full days for a 6x8 to 8x12 enclosure
Budget ranges
| Build Scale | Size | DIY Material Cost | What's Included |
|---|---|---|---|
| Basic | 4x6 ft | $150–$400 | 2x4 framing, hardware cloth, simple shed roof, basic gate |
| Mid-range | 6x10 ft | $500–$1,200 | Pressure-treated lumber, 16-gauge mesh, polycarbonate roof panels, airlock gate, shelves |
| Large / finished | 10x16 ft+ | $1,500–$4,000+ | Cedar framing, heavy-gauge mesh, full weather protection, concrete floor, enrichment features |
| Contractor-built (any size) | Varies | $2,000–$8,000+ | Labor included; full design and build |
Common mistakes to avoid
- Using chicken wire instead of hardware cloth: it degrades fast and isn't secure
- Skipping the L-footer anti-dig apron and assuming your cats won't try to escape
- Building the ceiling too low: cats need at least 6 feet of vertical space to feel comfortable
- Forgetting shade: a sunny enclosure on a hot day can be dangerous within an hour
- Single-gate entry with no airlock: one dart during entry and your cat is out
- Not securing mesh at mid-rail: unsupported spans of hardware cloth flex and fail over time
- Ignoring drainage: a poorly graded floor becomes a muddy mess after the first heavy rain
Permits, HOA rules, and your build checklist
Do you need a permit?
Permit requirements vary by municipality and project size. In most jurisdictions, accessory structures under 120 square feet (roughly 10x12 feet) don't require a building permit, but there are almost always setback requirements: you typically need to keep structures 3 to 5 feet from property lines and sometimes further from rear property lines. An attached structure may trigger different rules than a freestanding one. Call your local building department or check their website before you buy materials. It's a 10-minute call that can save you a serious headache.
HOA rules
If your property is governed by an HOA, check your CC&Rs (the governing documents) before starting anything. Many HOAs have rules about accessory structures, visible fencing, and exterior materials. Some require pre-approval for any structure, regardless of size. If you're in a townhome or condo situation with a shared or private patio, the rules get even more specific, and the process for getting approval matters as much as the design. Bring a simple sketch and material list to the HOA review board rather than asking for verbal permission, because a paper trail protects you.
Your start-today checklist
- Decide on your setup: standalone, attached, or enclosed existing patio
- Choose your location and check for partial shade, level ground, and utility lines (call 811)
- Measure your footprint and set a target size (minimum 6x8 ft for one to two cats)
- Check local permit requirements and setback rules with your building department
- Review HOA rules if applicable and submit any required approval requests
- Sketch a simple layout showing post locations, gate placement, and roof slope direction
- Make your materials list: lumber, hardware cloth (16-gauge, 1-inch mesh), post anchors, concrete, screws, roof panels, hinges, and latches
- Order or pick up materials; buy 10 to 15 percent extra mesh to account for waste
- Mark your corners with stakes, dig your footings, and set post anchors in concrete
- Build the frame, install mesh using the furring-strip sandwich method, and hang your gates
- Add dig-proof L-footer apron, shade cover, water source, and enrichment features
- Do a walk-through inspection: check every seam, gate latch, and overhead junction for gaps before introducing your cats
Building a cat patio is one of the more satisfying weekend projects for a cat owner because the payoff is immediate and obvious: your cats get real outdoor time without the risks that come with free roaming. Start with a clear setup decision, get the permit question answered early, and don't skip the airlock gate or the anti-dig apron. If you want a real-world walkthrough, use the step-by-step guidance in this article to plan an enclosure tailored to an apartment patio. After that, follow the rest of the design tips in this guide so you know how to make your patio cat friendly. Everything else is adjustable as you go.
FAQ
How do I get my cat used to using the cat patio without stressing them?
If your cat is not already using the enclosure, start with shorter “practice sessions” and reward calm behavior near the entry. Keep the outer and inner gates closed until your cat is fully inside, then open only one gate at a time so they do not learn to dart back out. Within a week, gradually increase time outdoors, and avoid introducing changes during hot afternoons when stress is higher.
What are the most common places cats escape from, and how can I prevent it?
Do not rely on mesh as the only barrier around a door, window, or gap. Make sure any cat entry path has the same 1-inch by 1-inch mesh standard, and check that the tunnel or cat door opening does not create a larger “escape gap” underneath or beside framing. Use weather stripping or flashing tape at every junction so you do not end up with openings bigger than your cat’s head.
Can I build a cat patio with only part of the roof covered?
Yes, you can use a partially roofed design, but plan for a fully dry retreat. Cover at least one-quarter to one-third of the floor area with solid or semi-solid material so cats can choose shade and dryness. If you live in a rainy climate, consider directing drainage away from the enclosure roof so water does not pool and create slippery surfaces.
How should I handle temperature extremes, like hot summers or cold winters?
For most climates, aim for at least one shaded zone on the enclosure floor and keep the overall structure well ventilated. In very hot regions, a fan alone may be insufficient, because it cools only the air it moves. Add a misting line only on the shaded side, and never run water where it can freeze or turn the ground into a slip hazard.
What floor option is best if I want low cleanup and fewer digging issues?
If you have a dirt floor, the two biggest problems are digging and odor. Add the 12-inch hardware-cloth apron to stop under-digging, then use a practical base like compacted gravel topped with pavers or turf for easier cleaning. Scoop waste regularly and rinse the area with clean water, because urine smell tends to build up fast outdoors.
Does feeding my cat inside the enclosure change the security risks?
Yes, but choose placements carefully. Keep food and litter in areas that do not attract predators, meaning avoid corners with easy access and avoid putting them right up against the mesh perimeter. Also be consistent with feeding times so you do not create a scent trail that encourages raccoons or other animals to investigate.
What makes a good enclosure gate latch, and how do I test it?
A gate that does not latch positively is one of the fastest ways to cause accidental escapes. Use self-closing hinges plus a latch you can visually confirm from a standing position, and test it by gently pulling and pushing with the gate fully open. If you use a carabiner or hook style latch, make sure it cannot slip off from vibration when a cat jumps.
Do I still need an anti-dig apron if my enclosure sits on concrete or pavers?
If you already have a patio slab, you still need anti-dig coverage where the mesh meets the ground. Even on concrete, check for any boundary edge where soil remains along the base, and run the apron concept along the perimeter. For freestanding builds, inspect the tunnel connection too, because that transition area is where cats often find unexpected gaps.
How do I adapt the plan for a small apartment patio or balcony?
In apartments or smaller yards, choose a configuration that matches how your cat enters. If you cannot build an enclosure that fits a typical 6 by 8 or 8 by 12 footprint, prioritize vertical space with stable shelves and use a design that is easy to access for cleaning. If you must screen an existing balcony, double-check that the roof and wall junction has no widening seams and that the structure is anchored securely to approved building surfaces.
How do I make sure the roof and corners are escape-proof once cats start climbing?
Yes, but mesh alone can fail if there are climb helpers. Remove or reposition any objects inside that create “stairs,” and keep shelves and furniture at least 12 inches away from walls so cats cannot use them to reach higher edges. Also inspect the top corners and roof junction after your first week of use, because cats will test the weakest attachment points quickly.
How do I know whether my specific cat patio project needs a permit?
It depends on the municipality, and it also depends on whether the enclosure changes the footprint, height, or number of walls. If you are enclosing an existing patio or adding a structure attached to the home, rules often differ from a freestanding box. When in doubt, ask your building department whether it is treated as an accessory structure, a screened structure, or an attachment, and confirm setback and height limits before buying lumber.
Next Article
Grass Is Higher Than Patio: Causes, Fixes & Deck vs Patio
Grass higher than patio? Causes, slope checks, repair options, lower lawn, raise patio, or build a deck, with costs & DIY