To enclose a patio for cats, you need to frame the open sides of the space with a rigid structure, cover it with escape-proof wire mesh or screen, add a secure entry door, and make sure there are no gaps larger than 1 inch anywhere in the build. You can do this by wrapping an existing covered patio with hardware cloth and framing lumber, buying a modular catio kit designed to attach to a patio, or building a freestanding cat enclosure that connects to the patio. Each path has different costs, permit requirements, and complexity levels, so the right choice depends on what your patio already looks like and how much you want to spend.
How to Enclose a Patio for Cats: Design and Build Guide

Miles Hart
11 Jun 2026
Enclosing an existing patio vs. building something new
This is the first decision that shapes everything else. If your patio already has a roof, posts, and a slab, you are mostly filling in the open sides, which is simpler and cheaper. If your patio is just a concrete pad with no cover, you are effectively building a new structure from scratch, which costs more and almost always requires a permit. The City of Tampa, for example, formally defines a residential screened enclosure as a space created by enclosing a covered patio or porch under an existing roof. That framing matters because working within an existing roof line typically involves less structural work and sometimes a lighter permit load than adding a roof yourself.
There is a third path worth knowing about: freestanding modular catio kits. These are pre-designed wood or metal enclosure panels you assemble next to your house, then cut a cat door through the wall or window to connect them. They do not technically enclose your patio, but they give cats outdoor access from the same general area. If you want a DIY option that is still close to the idea of build a cat patio, freestanding modular catio kits can provide outdoor access without fully enclosing the patio itself. If your patio is complicated to enclose, or you rent and cannot modify the structure, a modular freestanding kit is sometimes the practical answer.
| Approach | Best For | Typical DIY Level | Rough Cost Range | Permit Likely? |
|---|---|---|---|---|
| Wrap existing covered patio with mesh/screen | Patios with existing roof and posts | Moderate | $500–$3,000 | Sometimes |
| Build new framed enclosure over open slab | Uncovered patios or large open areas | Advanced | $2,000–$8,000+ | Almost always |
| Modular catio kit attached to patio/house | Renters, small patios, minimal construction | Easy–Moderate | $300–$2,500 | Rarely |
| Hire a contractor for custom screened enclosure | Large patios, complex layouts, full enclosures | None (contractor) | $5,000–$20,000+ | Yes |
If you are comparing this project to building a dedicated catio structure from the ground up, the key difference is that enclosing an existing patio gives you a much larger usable space for the cats and for you. A purpose-built catio is often a smaller, purely functional cat zone, while an enclosed patio can serve as an outdoor living room that also happens to be cat-safe.
Measure, map escape routes, and plan the layout

Before you touch any materials, walk your patio and look at it the way your cat will. If you want to know how to make your patio cat friendly, start by planning the layout around your cat’s favorite paths, hiding spots, and climbing options. Cats do not just walk through gaps, they test every corner, push on weak spots, and jump at the tallest points. Your job is to find every potential escape route before you build.
Start by measuring the full perimeter of the space you want to enclose, including height. Note where existing posts or walls already provide a solid boundary and where you have open air. Sketch the layout on paper or a free app like Sketchup. Then identify the specific problem spots: gaps between a roof edge and a wall, open sides taller than 8 feet, the gap under a gate, where the enclosure meets a fence or neighboring structure.
For sizing, a useful rule of thumb is to plan for roughly 1 to 2 meters of floor space per cat as a minimum. For context, a containment reference used in professional cat care suggests at least 10 cubic meters per cat for larger enclosures, with example dimensions of 2 x 2 x 2.5 meters. Most residential patios exceed that easily, so size is rarely the issue. What matters more is that the enclosure has enough vertical height for cats to jump and climb (at least 6 feet tall, ideally 8), and that you plan where the entry door goes for your own access.
Map out where the cat will enter and exit the enclosure from inside your home. This is usually a cat door cut into a screen door, a window with a cat flap, or a tunnel connecting a wall opening to the enclosure. Plan this before you build the enclosure walls, because the tunnel or cat-door placement affects which wall panel you build first and where you set the framing.
Pick the right materials and cat-proofing features
Wire mesh vs. screen: which one to use
[Do not use standard fiberglass window screen or chicken wire. ](https://catiospaces. com/wp-content/uploads/2018/06/Tips-for-Considering-a-Catio. 6.
6. 18. pdf) Fiberglass screen tears easily under claw pressure and will not stop a determined cat or keep out predators. Chicken wire has gaps that are too large, and it rusts quickly.
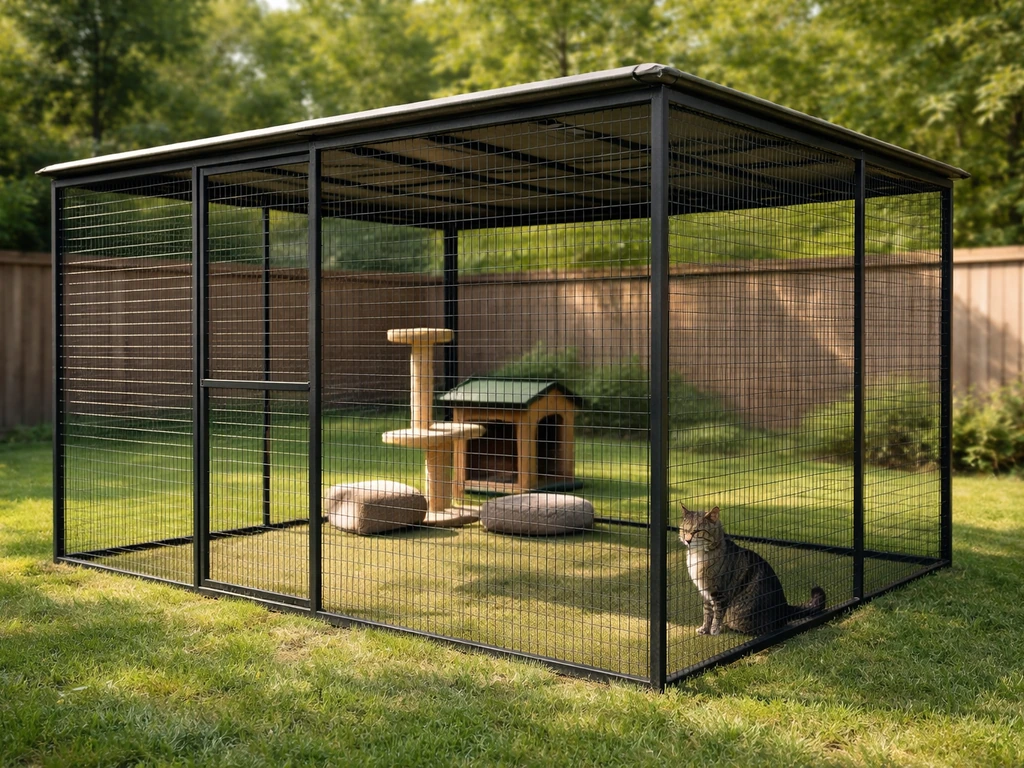
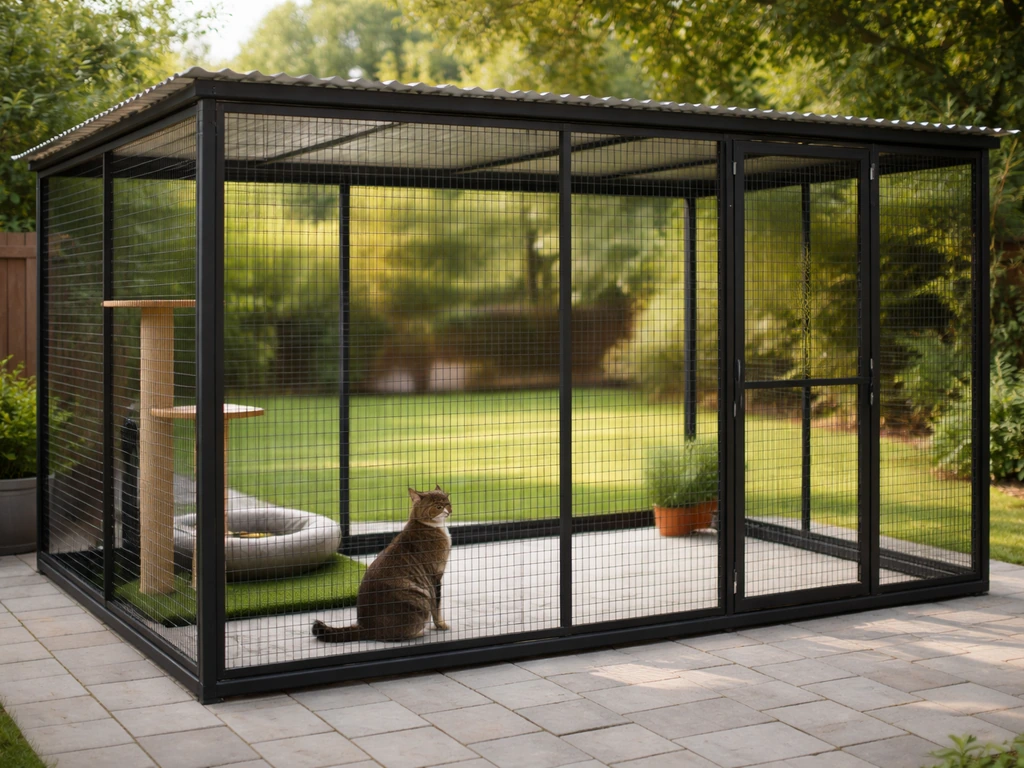
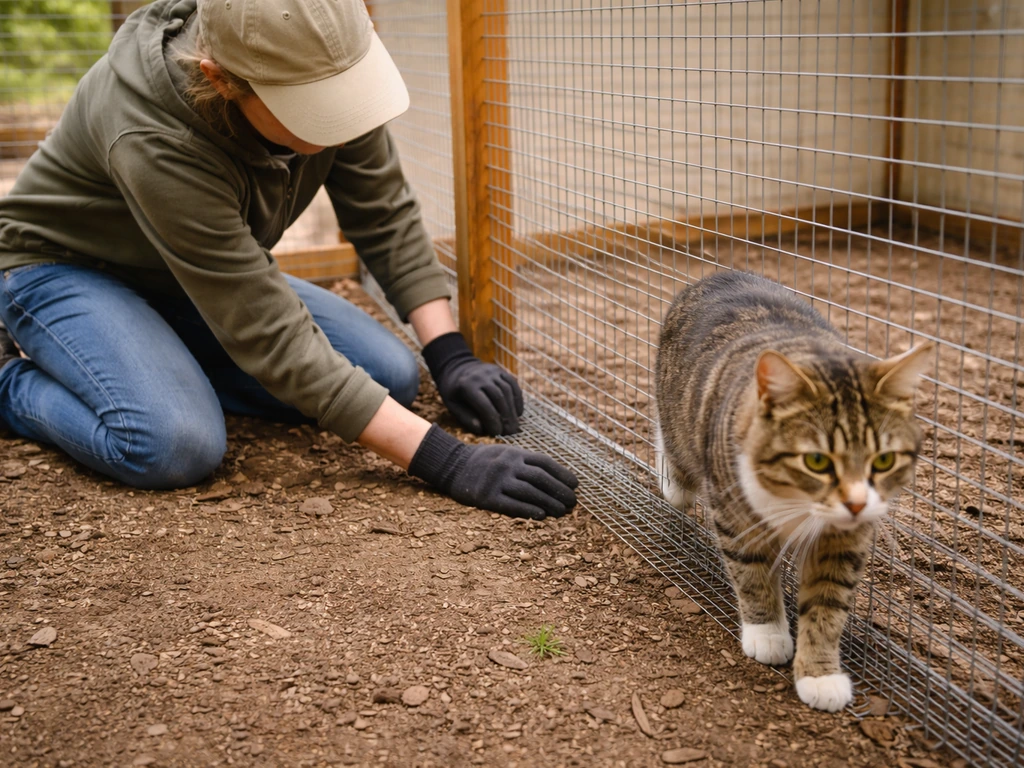
The material you want is galvanized welded wire hardware cloth, specifically with a mesh size of 1/2 inch by 1/2 inch and a wire gauge of 16. This combination is stiff enough to resist clawing and biting, the gaps are small enough that a cat cannot squeeze through or get a paw stuck, and the galvanized coating resists rust outdoors.
Vinyl-coated versions of 16-gauge hardware cloth are also available and give you an extra layer of corrosion protection plus a cleaner look.
Hardware cloth comes in 1/8-inch, 1/4-inch, and 1/2-inch mesh sizes. For cat enclosures, 1/2-inch is the sweet spot. Smaller mesh is harder to work with and more expensive without adding meaningful safety. The key safety rule: no gap anywhere in the finished enclosure should exceed 1 inch. That includes corners, where panels meet, where mesh attaches to framing, and especially where the enclosure meets the ground or the house wall.
Framing, roof, and claw-proofing
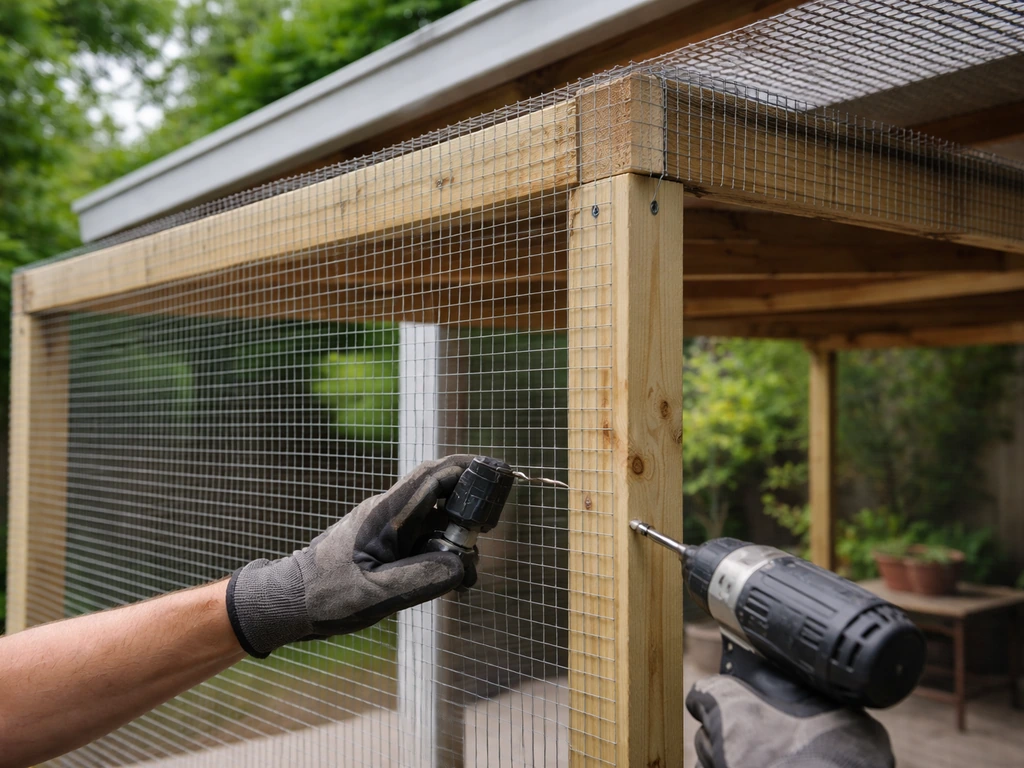
For framing, pressure-treated 2x4 lumber is the standard DIY choice. It handles outdoor moisture, accepts screws easily, and is available at any home improvement store. If you want a longer-lasting frame with less maintenance, powder-coated steel tube framing is an option, though it costs more and requires welding or special connectors. Frame your panels in sections you can handle alone, typically 4-foot widths, and attach the hardware cloth to the frame using galvanized staples or U-clips, not just staple gun staples, which can pop loose.
For the roof of the enclosure, you have a few options. If your patio already has a solid roof, you just need to make sure the mesh attaches flush to the underside of that roof with no gaps.
If you need to add a roof, a simple sloped frame covered with hardware cloth works fine for mild climates, but in areas with heavy rain or snow you will want a solid roof panel, corrugated polycarbonate panels, or the same material as your existing patio cover. To understand the full process of building one, including planning, measuring, and weather-proofing, follow a complete guide on how to build a cat enclosure on an apartment patio solid roof.
Polycarbonate is popular because it lets in light while blocking rain and keeps the enclosure from feeling like a cage.
For claw-proofing, the 16-gauge welded wire handles most of it. Where cats are likely to rub or scratch at the frame itself, wrapping the lower 2 feet of wooden framing with metal corner guards or metal L-brackets reduces damage. Place cat-safe shelves, climbing posts, and perches inside the enclosure so cats have better things to scratch than the enclosure walls.
Step-by-step DIY build sequence
Here is the order that makes the build go smoothly and reduces mistakes. Skipping steps or doing them out of order is one of the most common reasons DIY enclosures end up with gaps or structural problems.
- Finalize your measurements and draw a panel-by-panel plan showing frame dimensions, door location, and where the cat entrance connects to the house.
- Check permits and HOA rules (covered in the next section) before buying any materials.
- Install the cat door or cat flap into the house wall, window, or screen door that will connect to the enclosure. Do this first so you know the exact opening size and position before framing around it.
- Set any new posts or anchor points needed. If you are wrapping an existing covered patio with posts already in place, mark where you will attach framing to those posts. If you are building new posts, set them in concrete footings and let the concrete cure for at least 48 hours before loading them.
- Build the wall panels flat on the ground, then raise and attach them. Frame each panel with 2x4 lumber, cut hardware cloth to size with wire cutters or aviation snips, and staple it to the frame with 3/8-inch galvanized fence staples every 4 to 6 inches. Overlap mesh edges by at least 2 inches at seams and secure with tie wire.
- Attach wall panels to existing posts or new posts using structural screws or carriage bolts. Check every corner and seam for gaps larger than 1 inch and fill with additional mesh secured with U-clips.
- Install the roof panel or verify that existing roof edges are sealed flush to the wall mesh. Use L-brackets to close any gap where the roof meets the mesh walls.
- Hang the human access door, which needs a self-closing hinge and a positive-latch mechanism. A door that swings closed on its own is essential because cats will bolt for any door left open.
- Install the cat tunnel or connect the cat-door opening to the inside of the enclosure. Make sure the tunnel itself is also enclosed with hardware cloth if it runs through open space.
- Do a full gap inspection from inside the enclosure at ground level. Press on the mesh in multiple spots to test tension. Then do a second pass from outside.
Permits, HOA rules, and safety checks before you start
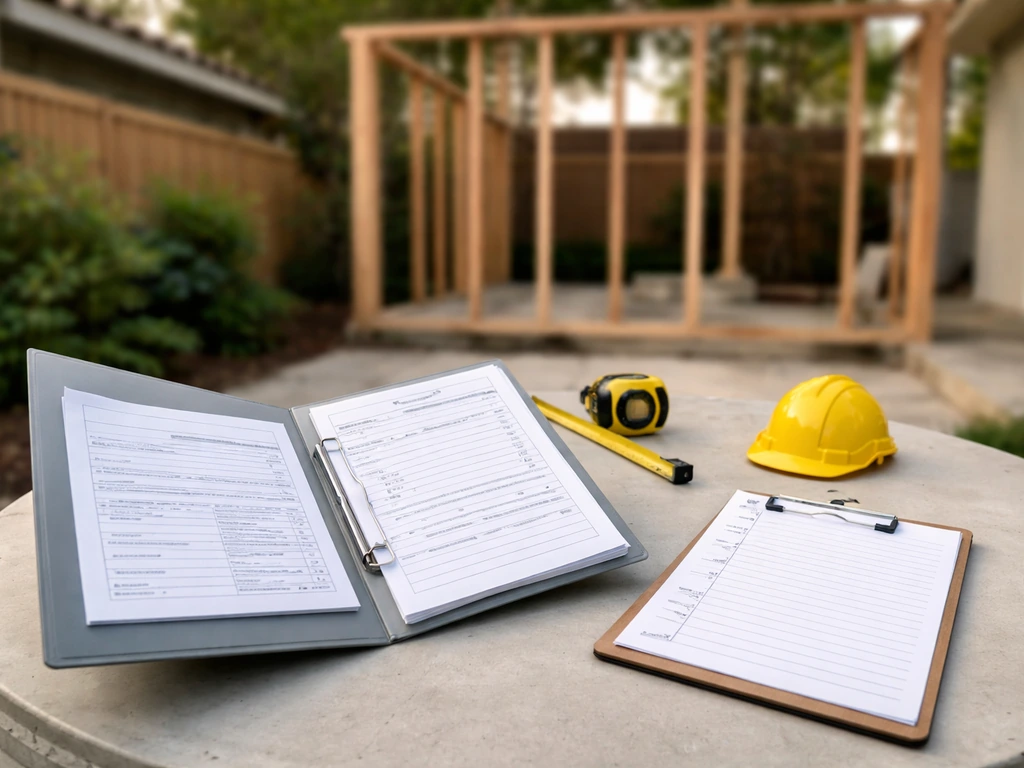
This is the step people skip and then regret. Permits and HOA approval are not optional, and finding out after the build that your enclosure violates a rule can mean tearing it down. Before building a cat enclosure, confirm local rules on whether dogs are allowed on patios and in outdoor enclosures in your area are dogs allowed on patios.
On the permit side: Solano County, California, for example, states that a patio cover regardless of size requires a building permit. Most jurisdictions treat any new framed structure attached to a house as requiring at least a zoning review, and screened enclosures that fall under the roof line often require a residential permit application. The City of Tampa has a specific permit category for residential screen enclosures. Check with your local building department before you build. In many cases a simple screen or mesh wrap of an existing covered patio is a minor permit, but if you are adding a new roof structure, expect a full building permit.
On the HOA side: HOA rules vary enormously, but most have architectural review requirements for any structure visible from outside the property. Common restrictions include height limits (one example HOA caps the lowest point of a patio cover at 9 feet), setback requirements (typically rear yard only), and roof pitch minimums (one HOA specifies at least a 4/12 pitch away from the house). Some HOAs also restrict structures visible from the street, including retractable awnings, so a cat enclosure attached to a rear patio will usually have a better chance of approval than anything on a front or side yard. Submit an ARC (Architectural Review Committee) application with your plans before you start.
Safety considerations beyond permits: make sure there are no toxic plants inside or adjacent to the enclosure where cats can reach them. Check that no electrical lines run through or near the enclosure area. If you live in an area with hawks, coyotes, or other predators, a solid roof (not just mesh) adds meaningful protection. And if your cats are declawed, their ability to climb out is reduced, but they also cannot defend themselves, so predator-proofing the roof matters even more.
Realistic costs, time, and home value impact
Cost depends heavily on patio size, whether you already have a covered structure, your local labor rates, and material choices. For a DIY mesh wrap of a modest covered patio (say 10 x 12 feet with existing posts and roof), materials alone typically run $500 to $1,500, mostly hardware cloth, framing lumber, fasteners, and a self-closing door. If you need to add a roof structure or work with a larger footprint, materials alone can reach $2,000 to $5,000. Hiring a contractor for a custom screened enclosure on a larger patio in the Southeast US, where these are common, often runs $5,000 to $15,000 or more depending on square footage and finish level.
Time for a DIY build: a straightforward mesh wrap of a covered patio with two people working over a weekend is realistic for an experienced DIYer. A first-time builder should plan for two to three full weekends. A build that requires new posts, a new roof structure, or a permit process will take longer because of cure times, inspection scheduling, and additional framing complexity.
Home value impact is nuanced. A well-built, permitted screened enclosure adds functional outdoor living space and is generally viewed positively by buyers, particularly in warm climates where outdoor living is a selling point. An unpermitted or poorly built enclosure, on the other hand, can become a liability during a home sale if it does not pass inspection. If you are spending more than $2,000, pulling the permit and keeping the documentation is worth doing. A freestanding catio kit that does not attach permanently to the house has essentially no impact on home value either way, but it is also fully removable.
After the build: testing, maintenance, and getting your cats comfortable
Inspect the enclosure before the cats go in
Before your cats use the space for the first time, do a systematic inspection. Get down to cat level and look for any gap larger than 1 inch. Push and pull on mesh panels to check that staples and fasteners are holding. Check that the door latch engages every time the door swings closed. Look at the roofline from inside and verify there is no gap between the mesh walls and the roof edge. If you have an older patio with a roof overhang, the gap where the roof extends past the enclosure wall is a common escape point.
Ongoing maintenance
Inspect the enclosure every few months for wear and weak points, particularly at the bottom of the mesh where it meets the ground or slab (this area sees the most moisture and physical pressure from cats). Check fasteners for rust, and replace any staples or clips that have pulled loose. Wooden frames should be inspected annually for rot, especially at ground contact points. Treat or seal wood as needed. If you used vinyl-coated hardware cloth, check the coating for chips or peeling, which can expose bare wire to rust.
Training cats to use the space
Most cats will not immediately walk through a new cat door or tunnel into an unfamiliar space. Start by propping the cat door open and sitting in the enclosure yourself with some treats. Let the cat explore at their own pace over several sessions rather than picking them up and placing them inside. Once they are comfortable going in and out on their own, you can let the cat door operate normally.
If a cat is very hesitant, try placing their food bowl just inside the enclosure entrance for a few days. Cats that have never been outdoors may take longer to adapt than cats that previously had yard access, so plan for at least one to two weeks of gradual introduction.
FAQ
Can I enclose a patio for cats using my existing fence or wall as part of the barrier?
Yes, but you still need to finish the boundary so cats cannot escape through the “top” edge of the fence line. In practice, attach the mesh to the solid fence or wall, then wrap inward so the mesh meets the fence face with no more than 1 inch of exposed gap. If the fence is wood, add a continuous rail (2x4) along the inside edge so the mesh fastening points are not just at the boards.
What’s the best way to prevent cats from escaping under the enclosure if it’s on a concrete slab?
Plan for under-bed-like clearance issues. If the enclosure sits on a slab, use mesh skirt panels or a continuous bottom rail so there is no route underneath. If the slab has cracks or expansion gaps, seal them (for example with exterior-grade, non-toxic sealant) before fastening the bottom edge.
How do I choose and install a secure door so it doesn’t accidentally stay open?
For access, use a self-closing door rated for outdoor use, and add a latch that fully seats when the door swings shut. Also place a magnetic or spring hook latch as a secondary catch, especially if your cats can paw at the latch. Test it by repeatedly opening and closing for several minutes to confirm it does not bounce open.
Where do DIY patio cat enclosures most often develop escape gaps, and how can I reinforce those areas?
Use hardware cloth with correct fastening and finishing, don’t rely on mesh tension alone. A common failure point is corners and where mesh meets framing, because cats hook claws and pull at seams. Reinforce corners with overlapping mesh seams on framing rails (or additional corner guards) so there is no single seam line that takes all the stress.
If my patio already has a solid roof, do I still need a roof for the cat enclosure, and how do I seal the roof edge properly?
If you already have a covered patio roof, you may not need to add structural roof framing, but you still need weather-proof attachment at the mesh edges. Attach the mesh to the underside with a continuous furring strip or blocking so the mesh stays flush under wind and rain, and avoid leaving “shadow gaps” near the roof edge where cats can press through.
How can I confirm whether my project is “minor screening” or a full permit job before I start?
In many areas, screening over an existing covered porch can be treated differently than adding a new roof or attaching new structural elements. Your permit answer can also depend on whether you are changing the roof size, height, or structural load. Before you buy materials, call your local permit office with a simple description like “mesh wrap to enclose existing covered patio under existing roof” and ask which exact permit category applies.
What should I do if my cat tries to climb the enclosure right away, especially near the door?
If your cat is an active climber, prioritize vertical and scratch resistance at the places they will reach immediately: the entry area, any ledges, and the first 24 inches above ground. Add a covered or reinforced scratch zone on the inside of the frame (for example metal corner guards on posts or a dedicated scratch post mounted high enough that it intercepts their climbing path).
Should I use a solid roof or mesh roof if predators like hawks or coyotes are a concern?
Yes, but the safest approach is to make the enclosure plan predator-aware from the start. Use a solid roof covering in areas with hawks or other birds, and ensure all mesh junctions are sealed so a bird cannot reach a paw or claw into a seam. If you must use a mesh top for budget reasons, still block access along the top perimeter with a solid overhang panel.
How often should I inspect and re-secure the mesh and door hardware after the enclosure is built?
Don’t treat hardware cloth as a one-time install. After storms and seasonal changes, re-check the fasteners at the bottom rail and at door hinges, because movement can loosen clips or staples. If you live in freeze-thaw climates, inspect after the first hard freeze, then again after spring rains.
Are there common material mistakes that reduce how long an enclosed patio for cats lasts outdoors?
If you want maximum durability, use pressure-treated framing or corrosion-resistant fasteners rated for outdoor exposure, then consider sealing ground-contact wood at the bottom rails. For hardware cloth, vinyl-coated can help, but you still need to verify the coating is not scratched where you attach staples or clips.
Next Article
How to Build a Cat Patio: Step-by-Step DIY Guide
Step-by-step DIY guide to build an escape-proof cat patio, choosing materials, safety features, shelter, and realistic c