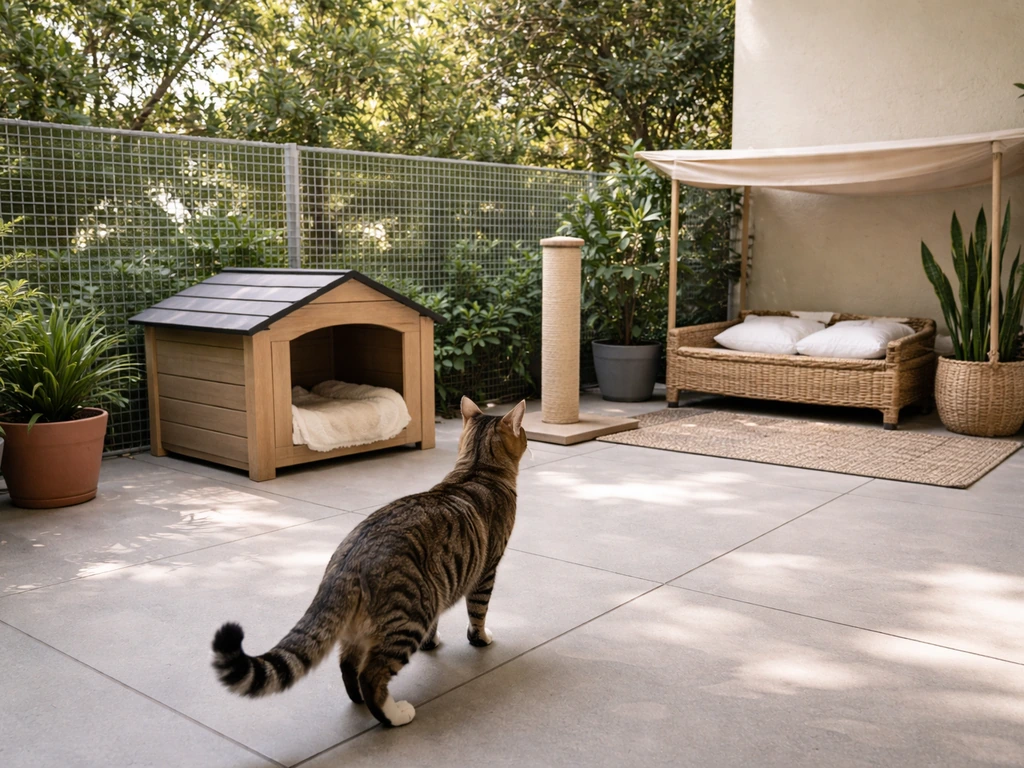
You can absolutely build a cat enclosure on an apartment patio, but the process starts before you buy a single board or panel. If you want a full, step-by-step path, keep reading for practical guidance on how to build a catio on a patio. The key steps are: check your lease and get written landlord permission, pick a freestanding or minimally-attached design that won't damage the surface, build or assemble an escape-proof mesh enclosure using a kit or DIY framing, anchor it safely without drilling into walls or floors, and then introduce your cat gradually. Most apartment-friendly builds run $150 to $600 for a kit or $200 to $500 in DIY materials, and they can be taken down completely when you move.
How to Build a Cat Enclosure on an Apartment Patio

Miles Hart
7 Jul 2026
Check the rules before you buy anything

This step feels boring but it will save you from tearing down a finished enclosure. Pull out your lease and read the alterations or improvements clause. Almost every apartment lease includes language that prohibits making improvements or alterations without the landlord's written consent. In many states, if you make an alteration without that consent, it can legally become the landlord's property when you leave, or you can be required to remove it and restore the surface. Neither outcome is great.
The good news is that many landlords will say yes if you frame the request correctly. Don't ask to build a structure. Ask if you can set up a freestanding, no-damage cat enclosure on the patio that you will fully remove when you leave. Put it in writing (email is fine) and keep the reply. If you're also dealing with an HOA, the framing matters there too. Some catio owners have had success describing their enclosure as a screened patio cover for bug and weather protection rather than a pet structure. HOAs often have approved aesthetics for patio screening, and if your enclosure looks clean and neutral, approval is much more likely.
Building permits are a real consideration if your enclosure is large, attached to the building, or roofed. In Chula Vista’s permitting guidance, a blank" rel="noopener noreferrer">patio cover is defined as a one-story roofed structure not more than 12 feet in height above grade and intended for recreational outdoor living uses. Many jurisdictions require a permit for any attached patio cover structure, and some require one for detached structures over 120 square feet. For a small freestanding catio on a typical apartment patio, you're very unlikely to cross any permit threshold, but it's worth a quick call to your city's permit center if you're building something large or covering the entire patio. For example, City of San Diego guidance notes that patio covers under 300 square feet of projected roof area may be exempt from a building permit for single-family and duplex homes, but a permit can still be required if certain conditions apply blank" rel="noopener noreferrer">patio covers under 300 square feet may be exempt. Most renters building a 6-by-8 or 8-by-10 freestanding enclosure won't need a permit.
Choose the right enclosure style for your patio
Apartment patios come in a few common forms: ground-level concrete slabs, elevated balconies with railing edges, and covered patios with an existing roof or pergola. The right enclosure style depends on which type you have, how much space you're working with, and how permanent you're allowed to go.
Freestanding vs. attached enclosures
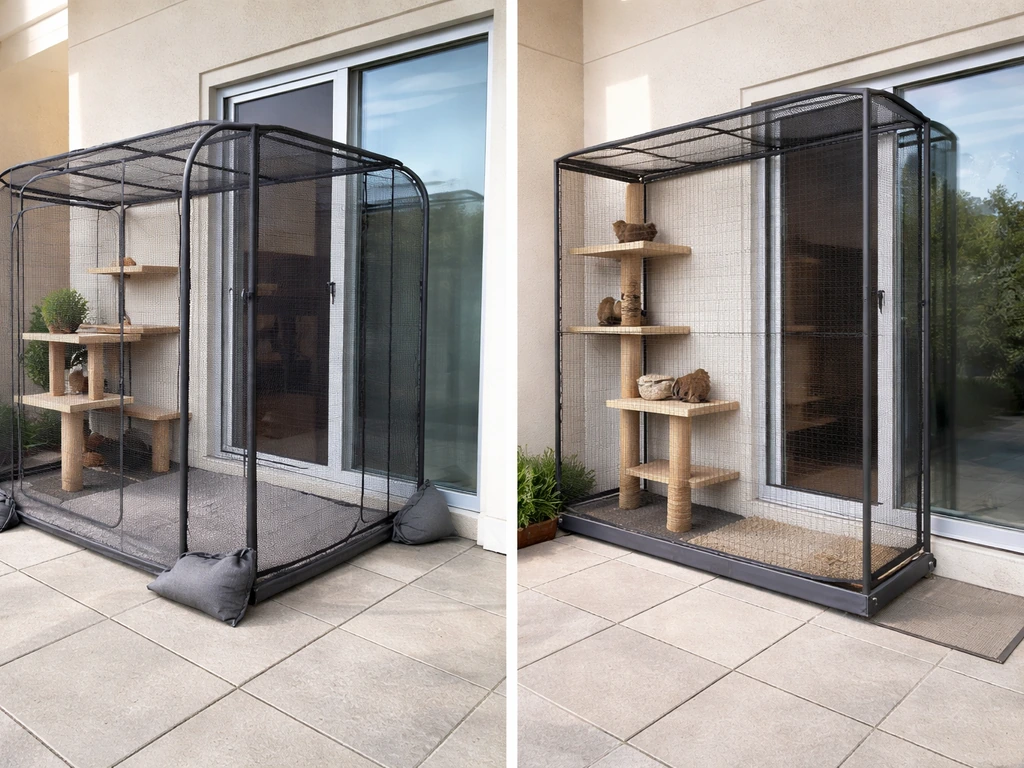
For renters, freestanding is almost always the right call. A freestanding enclosure sits on the patio surface and is stabilized with weights, sandbags, or furniture clamps rather than bolts into concrete or walls. It can be disassembled and moved. An attached enclosure is secured directly to the building wall or floor and is more stable in wind, but it almost always violates a lease's no-alterations clause and can cause surface damage. If you own your unit or have explicit written permission to attach things, an attached structure is more secure and can enclose a much larger space, but that's the exception for apartment dwellers.
Screened vs. partially roofed designs
A fully screened or mesh-sided enclosure with no solid roof is the simplest apartment-friendly design. It keeps cats in, provides ventilation, and stays lightweight. The tradeoff is sun exposure and rain. If your patio gets direct afternoon sun or is in a rainy climate, consider adding a partial roof using a shade cloth panel, a polycarbonate panel, or a pre-made mesh panel with a solid top section. Full solid roofs add weight and wind resistance that can make a freestanding structure unstable and may trigger permit requirements.
Size and layout
For a single cat, a minimum comfortable enclosure is about 6 feet wide by 4 feet deep by 6 feet tall. For two cats or a longer stay, aim for at least 8 by 8 feet. Most apartment patios are 6 by 10 feet to 10 by 12 feet, so you'll usually have room for a meaningful enclosure without filling the whole patio. Leave yourself a few feet of clear patio space outside the enclosure if you want to use the patio yourself.
Materials and kits vs. DIY framing
You have two main paths: buy a pre-made catio kit and assemble it, or build a custom frame from lumber or metal conduit and attach mesh yourself. Both work well. If you want a clear overview of the whole project, follow this step-by-step guide on how to build a cat patio from start to finish. The right choice depends on your budget, your comfort with tools, and how custom your patio shape is.
| Factor | Pre-Made Kit | DIY Framing |
|---|---|---|
| Typical cost | $150 to $600 for a mid-size kit | $200 to $500 in materials for a similar size |
| Tools needed | Minimal (screwdriver, zip ties) | Saw, drill, staple gun, measuring tools |
| Customization | Limited to kit dimensions | Fully custom to your patio shape |
| Assembly time | 2 to 4 hours | 4 to 10 hours depending on size |
| Portability | Very easy to move or store | Moderate (can be built in sections) |
| Structural strength | Moderate (designed for cats, not weather extremes) | Higher if built with 2x2 or metal conduit |
| Appearance | Consistent and finished-looking | Depends on build quality |
| Best for | Renters, smaller patios, first-time builders | Odd-shaped patios, larger enclosures, budget-focused builders |
Mesh and screen material options
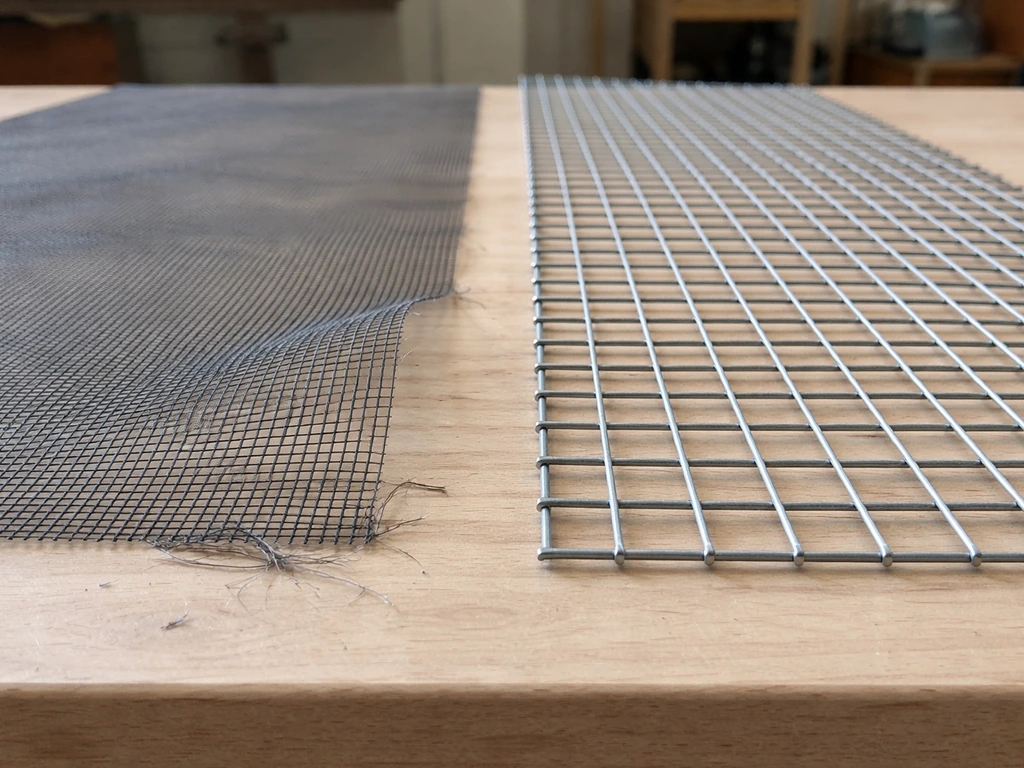
The mesh is what actually contains your cat, so it matters. Standard fiberglass window screen is not strong enough for most cats. Welded wire mesh (also called hardware cloth) in a 1-by-1 inch or 1-by-2 inch opening with 16-gauge wire is the most escape-proof and predator-resistant option for a permanent or semi-permanent build. It's also the heaviest. PVC-coated welded wire is a good upgrade because it resists rust and won't scratch cats that press against it. For a lighter build or kit system, heavy-duty polyester mesh or powder-coated steel panels are common and hold up well for indoor/outdoor cat use. Avoid chicken wire entirely: it has too-large openings and will rust quickly.
Measuring, layout, and escape-proof design
Measure your patio carefully before ordering anything. Note the width, depth, and ceiling or overhead clearance. Check for obstacles like spigots, electrical outlets, or drain locations that will affect where you can place the enclosure. Sketch a simple top-down floor plan with measurements and mark any walls or railings you could potentially use as one side of the enclosure.
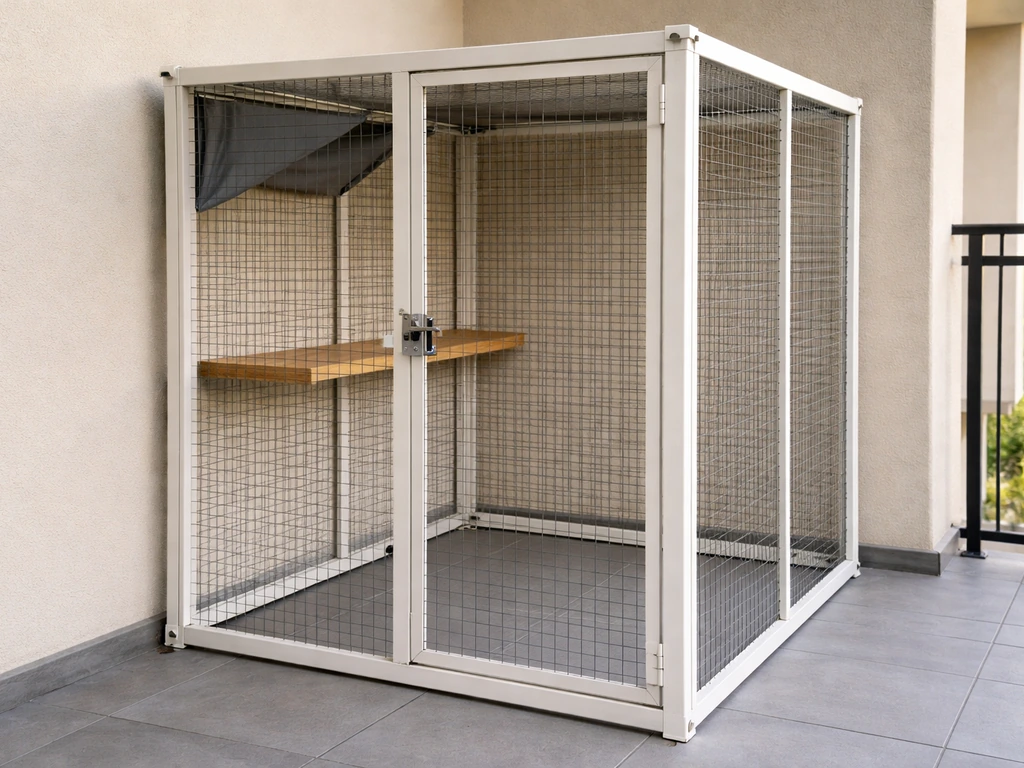
Escape-proofing is about eliminating every gap, weak point, and climbing-out opportunity. Cats are remarkably good at finding the one spot you didn't seal. The critical design rules are: all mesh openings must be 1 inch or smaller (some breeds need even smaller), there must be a full roof or ceiling on the enclosure (cats will absolutely climb out of an open top), all door and panel joints must overlap by at least 2 inches and be secured with hardware rather than just zip ties, and the base must sit flush with the ground with no gaps larger than an inch. If you’re wondering how to enclose a patio for cats, start by planning your layout to remove every gap and escape route before you assemble the frame. If you're building on a patio with gaps or a grated surface, line the bottom perimeter with a ground-level wire skirt that extends 6 inches outward and is weighted or secured.
The door is the most common escape point. Use an airlock-style double door if possible: a small vestibule with an outer and inner door so you always close one before opening the other. For a simpler build, a single door with a spring-loaded latch and a secondary clip or carabiner backup is the minimum. Make sure the door swings inward so a cat can't push it open from inside.
Anchoring on apartment patio surfaces
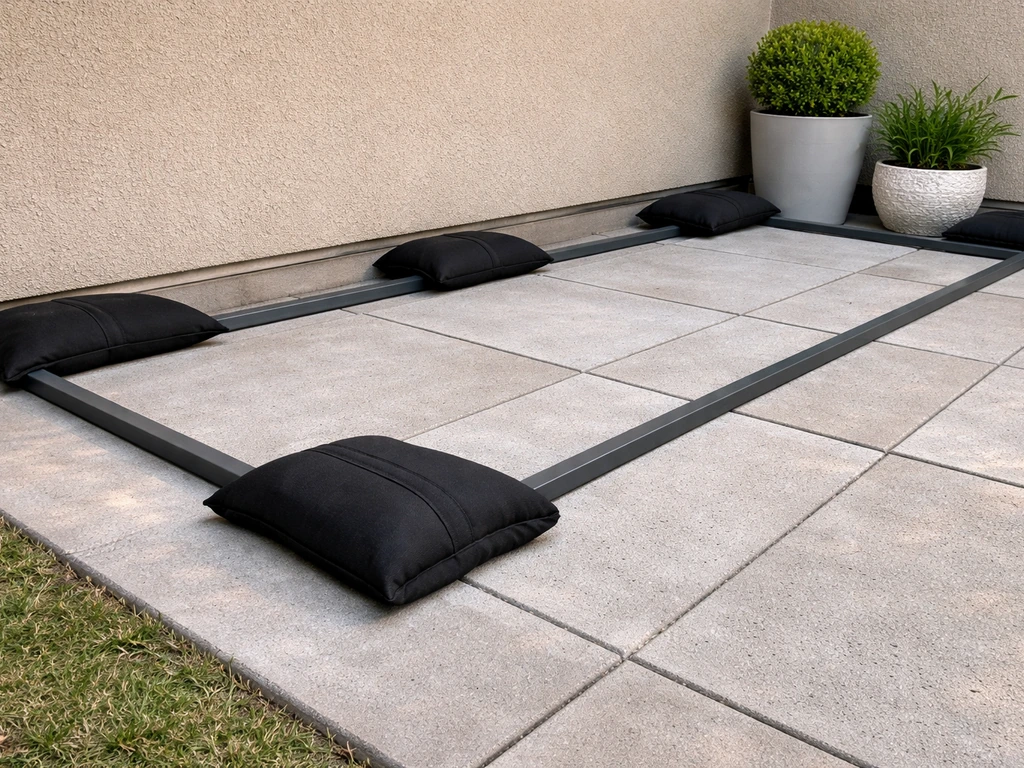
This is where apartment builds get tricky. You can't drill into most landlord-owned surfaces without permission, and even with permission, you need to patch those holes when you leave. are dogs allowed on patios landlord-owned surfaces. The good news is that a properly weighted or clamped freestanding enclosure is stable enough for most conditions.
Concrete slab and tile patios
For concrete or tile surfaces, the cleanest no-damage anchoring method is to place the enclosure's base frame and then weight it with sandbags, concrete blocks, or planters along the perimeter. A 6-by-8 enclosure with a wooden base frame weighing 40 to 60 pounds itself, plus 4 sandbags at the corners, will be stable in normal wind conditions. If you have landlord permission to drill, use concrete anchors and expansion bolts, but be prepared to fill and seal those holes when you leave.
Pavers
Loose pavers are actually helpful. You can lift individual pavers at the base perimeter and set the enclosure's bottom frame into the ground-level gap, then replace the pavers around it. This creates a no-drill anchor that's also reversible. Make sure the frame doesn't crack or shift the pavers themselves.
Balconies and railings
If you have an elevated balcony, anchoring to the railing is the most practical option. Use railing-mount clamps or cable ties rated for the weight of the panel you're attaching. Many balcony catio setups treat the existing railing as one or two sides of the enclosure, attaching mesh panels directly to the railing with stainless steel cable ties or hose clamps. The floor of a balcony catio should still have a full mesh bottom or a solid base to prevent falls through railings. Never rely on the railing gap width alone to contain a cat: most building codes allow railing gaps up to 4 inches, which is wide enough for a cat to squeeze through or get stuck.
Walls and building surfaces (when you have permission)
If your landlord allows attachment, adhesive anchor mounts rated for 50-plus pounds can hold light panels against stucco or painted concrete block without drilling. These use industrial construction adhesive and a mechanical plate. They're removable with a heat gun and solvent but can damage some surface finishes, so get explicit written approval before using them.
How to actually build it: a step-by-step workflow
- Confirm landlord permission in writing and review HOA rules if applicable.
- Measure the patio, sketch a layout, and decide on dimensions. Account for door placement and any patio obstacles.
- Choose your build approach (pre-made kit or DIY framing) and order or buy materials.
- If building DIY: cut frame pieces (2x2 lumber or 1-inch metal conduit works well for a freestanding structure), then assemble the floor frame first as a rectangle. Screw or bolt corners with metal L-brackets for rigidity.
- Build or assemble the four wall frames as separate rectangles. Attach welded wire mesh or panels to each frame using a staple gun and J-clips (for wire mesh) or panel clips (for kit panels) before assembling the walls together.
- Stand the four walls and attach them to the floor frame. Use corner brackets on the inside of each joint. Check for square by measuring diagonally: both diagonal measurements should match.
- Build or attach the roof frame, then cover it with mesh or a solid panel. If adding a partial solid roof for shade or rain, use a polycarbonate corrugated panel cut to size, overlapping the mesh edge by at least 3 inches.
- Install the door: hang it with two hinges, add a spring-loaded latch, and attach a secondary clip or carabiner to the latch. Test that the door swings fully inward.
- Set the finished enclosure in position. Weight or clamp the base as described for your surface type.
- Seal all mesh-to-frame gaps with J-clips, staples, or cable ties spaced no more than 3 inches apart. Walk around the outside and try to find any gap larger than 1 inch. Fix everything you find.
- Apply a pet-safe exterior sealant or outdoor paint to any bare wood framing. Allow full cure time (usually 24 to 48 hours) before letting your cat use the enclosure.
- Add enrichment: at least one elevated shelf or perch, a scratch surface, a hiding box or covered area, and a water bowl.
Weatherproofing details
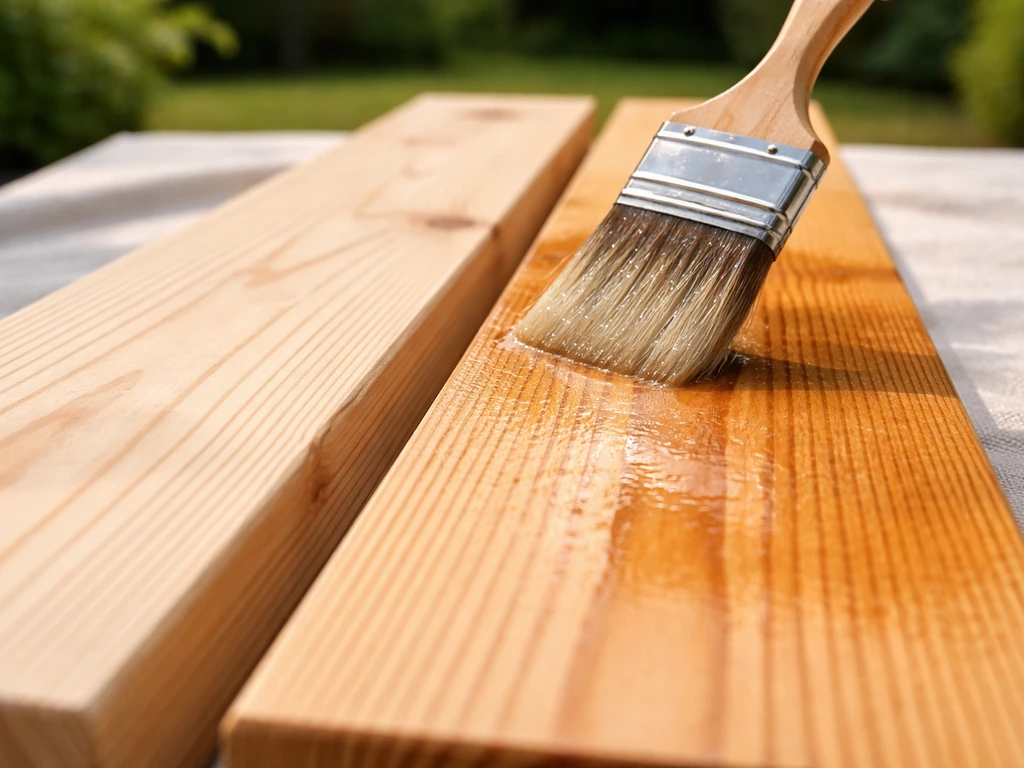
Bare wood in an outdoor enclosure will rot and splinter within a season if left unsealed. Use an exterior-rated, water-based, pet-safe stain or sealant on all lumber before assembly if possible, and touch up cut ends after assembly. For metal framing, check for rust after the first wet season and apply a rust-inhibiting spray as needed. If you live somewhere with extreme sun, UV-stabilized polyester mesh lasts significantly longer than standard mesh and is worth the small price difference.
Safety, cat acclimation, and maintenance
Safety details worth double-checking
- No electrical cords inside or accessible through the mesh: cats chew wires and can be electrocuted.
- No toxic plants near or inside the enclosure. Common patio plants like oleander, sago palm, and many succulents are toxic to cats.
- Shade must be available at all times, not just in the morning. Cats can overheat quickly in direct afternoon sun, especially in summer.
- Ventilation must be sufficient: a fully enclosed solid-sided box is dangerous in heat. Mesh on at least three sides is the minimum for safe airflow.
- Check that no predator (dogs, raccoons, birds of prey) can reach through the mesh or tip the enclosure. If you're on a ground-level patio in a neighborhood with dogs or wildlife, use a welded wire mesh with smaller openings and consider a heavier-gauge wire.
- Make sure no cat can get a paw, claw, or head stuck in a joint, hinge gap, or mesh opening.
Introducing your cat to the enclosure
Don't just put your cat in and close the door. Some cats take to outdoor enclosures immediately; others are anxious and need days or weeks of gradual exposure. Start by propping the door open and letting the cat explore at its own pace while you're present. Following the steps for how to make your patio cat friendly also means setting up enrichment so your cat feels safe outdoors introduce your cat gradually. Bring familiar items inside: a toy, a blanket that smells like home, or the cat's bed. Feed the cat a meal or offer treats inside the enclosure over several sessions before closing the door. Stay nearby and calm for the first few closed-door sessions. Once your cat is relaxed enough to groom, nap, or eat inside, it's comfortable.
Enrichment basics
An empty mesh box is boring and cats won't want to spend time in it. At minimum, add a raised shelf or perch at two heights (cats feel safer elevated), a horizontal or angled scratch surface, and something to hide inside like a small box or covered bed. A bird feeder placed just outside the mesh, or a window bird feeder attached to the outside of the mesh wall, gives cats something to watch and dramatically increases time spent in the enclosure.
Maintenance checklist
- After any storm or high wind: inspect all joints, latches, and weighted anchors. Re-secure anything that shifted.
- Monthly: check all mesh for tears, rust spots, or loose staples/clips. Check wood framing for soft spots or visible rot.
- Seasonally: reapply sealant to any bare wood showing weathering. Check that shade coverage is adequate for the coming season.
- After each use: remove food bowls to avoid attracting pests overnight.
- Annually: inspect the door hinges and latch mechanism for wear and replace if the spring tension has weakened.
- Before storms: if your area gets high winds, temporarily disassemble or fully anchor the enclosure. A freestanding structure can become a projectile in a severe storm.
What this will actually cost you
A basic freestanding DIY enclosure using 2x2 lumber, welded wire mesh, and basic hardware typically runs $200 to $400 in materials for an 8-by-8 enclosure. A mid-range pre-made kit for a similar size runs $300 to $600. Premium modular panel systems with powder-coated steel frames and PVC-coated mesh can run $600 to $1,200 or more for a large enclosure, but they're very portable and look polished. If your patio is oddly shaped and you can't make a kit work, DIY is usually the more cost-effective path. Labor cost if you hire someone to build a custom enclosure varies widely but budget at least $400 to $800 on top of materials for a professional carpenter.
Building on a balcony or working with a covered patio that could become a fully enclosed catio space is a related but somewhat different project. Those builds share most of the same principles here but may involve screening in an existing overhead structure rather than building a standalone frame, which changes the anchoring and framing approach meaningfully.
FAQ
What counts as “no-damage” when the enclosure still has to be stable and escape-proof?
In an apartment, it usually means avoiding any permanent changes, so keep the enclosure freestanding, weight-clamped, or attached only with landlord-approved, removable mounts. If you cannot remove all attachments cleanly at move-out, ask for written permission that explicitly covers installation and removal (including patching responsibility and timelines).
How can I test stability and water coverage before my cat spends time inside?
Use a temporary water-and-splash test before introducing the cat. Set up the enclosure, hose the patio area lightly (or wait for a rain), and verify the mesh bottom seals against water and grit, that any partial roof doesn’t funnel rain inside, and that nothing shifts as the patio surface gets wet.
What are common layout mistakes that make the enclosure impossible to assemble or use on a small patio?
Measure the exact access path too. Many patio enclosures end up too large to slide through a balcony door, up a stair, or around patio furniture. Dry-fit panels and the door swing path in advance, then plan for turning space so you can assemble and disassemble without removing half your patio.
How do I choose a patio location that reduces stress during the first week?
If your cat is new to outdoor sounds, place the enclosure where it has a “safe observer” spot, like facing a quiet yard or a wall for partial cover. Avoid putting it right next to HVAC units, loud dumpsters, or heavy foot-traffic, since constant stress can make cats refuse the enclosure even with gradual introduction.
Can I build a fully screened cat enclosure on an apartment patio if the area gets intense sun?
Yes, but prevent overheating. Use a partial roof or shade cloth and provide a cool resting spot (for example, a raised perch plus a shallow water dish outside the mesh). In very hot climates, place the enclosure so the cat gets sun early and shade later, rather than full afternoon sun.
Do I always need a full solid roof, or can I do a partial top to stay apartment-friendly?
A solid top is the most secure for escape prevention, but you can manage heat and rain without making it heavy. Use lightweight panels only where needed (a partial roof over the hottest side, plus open sides for airflow), and keep the mesh opening rules and roof-to-mesh overlaps the same.
What should I do if my patio has a drain, cracks, or a grated area under the intended enclosure?
If your patio surface has gaps, grates, or uneven tiles, plan for a continuous base barrier. A ground-level wire skirt that extends outward helps, but also add a way to keep the skirt from shifting (weights or perimeter ties where permitted) so a cat cannot exploit a moving edge.
What’s the best way to prevent escapes when I need to open the door often?
The safest choice is a double-door (airlock) so you never have an open exit while handling the cat. If you must use a single door, use a latch you can operate quickly with one hand and add a secondary security method (clip or carabiner) plus routine checks before every entry/exit.
Is it okay to rely on zip ties and tension for mesh panels in outdoor conditions?
No, don’t assume zip ties alone are enough at panel joints. Use overlaps plus metal hardware or properly secured fasteners, because plastic ties loosen over time from weather, UV exposure, and vibration from wind.
How can I design for easy take-down when my lease ends?
Yes, you can plan for disassembly, but build it from reversible parts. Avoid permanent adhesives unless you have explicit written approval, and choose components that can be un-clamped without damaging mesh, lumber, or finishes.
What enrichment setup is most effective for cats that seem fearful at first?
Start with enrichment that matches outdoor behavior. Add at least one high perch and a sheltered hide so your cat can choose distance from the mesh side, then use inside-the-enclosure meals during the acclimation period so the cat associates the space with positive routines.
Where do cats most often find escape routes, and how do I inspect those weak spots?
Cats can use the roof frame like a ladder. Even if the roof is present, ensure the roof edge is fully enclosed and any horizontal elements do not create a continuous climbing route to a gap. Inspect corners after assembly because most escape attempts start there.
How do I handle maintenance for outdoor weather exposure (rust, loosening, and corrosion)?
Yes. If the enclosure will be near sprinklers or receive frequent splashes, elevate electrical-safe accessories (like feeders or water bowls) so they don’t sit against wet mesh. Also check rust and fastener corrosion after the first wet season and re-tighten clamps if your system uses them.
If I choose welded wire mesh, what mistakes should I avoid during cutting and fastening?
Welded wire mesh can be heavy and harder to work with, so use the right tools and protect your hands. Use gloves, plan how you’ll cut and deburr edges, and confirm your fastening method creates a secure barrier at every seam, because sharp edges can also stop a cat from pressing through but can injure the cat if not covered.
Next Article
How to Make Your Patio Cat Friendly and Safe
Step-by-step patio upgrades to make your cat safe, comfortable, and trusting outside.