The correct fall for a patio surface is 1/4 inch per foot (roughly 2%, or about 1.2 degrees). That slope moves water away from the house and toward a drain or lawn edge without making the surface feel tilted underfoot. For a quick, plain-language answer to what fall should a patio have, 1/4 inch per foot (about 2%) is the standard recommendation. Some materials can get away with as little as 1/8 inch per foot (1%), but 1/4 inch per foot is the standard most contractors and municipal specs land on because it gives you a safety margin for construction tolerances. If your finished patio ends up slightly flatter than planned, 1/4 inch per foot keeps you above the threshold where water starts pooling.
What Is the Correct Fall for a Patio: Slope, Pitch & Height

Miles Hart
10 Aug 2026
Quick answers for homeowners
Here are the one-line answers to the questions that most people are searching for, with more detail in each section below.
- What fall should a patio have? At least 1/4 inch per foot (2%) sloping away from the house. Minimum acceptable is 1/8 inch per foot (1%) for well-jointed pavers.
- How much pitch should a patio cover have? A minimum of 1/4 inch per foot (2%) for membrane and metal roofing; 2:12 (about 17%) for asphalt shingles as a practical low-slope minimum.
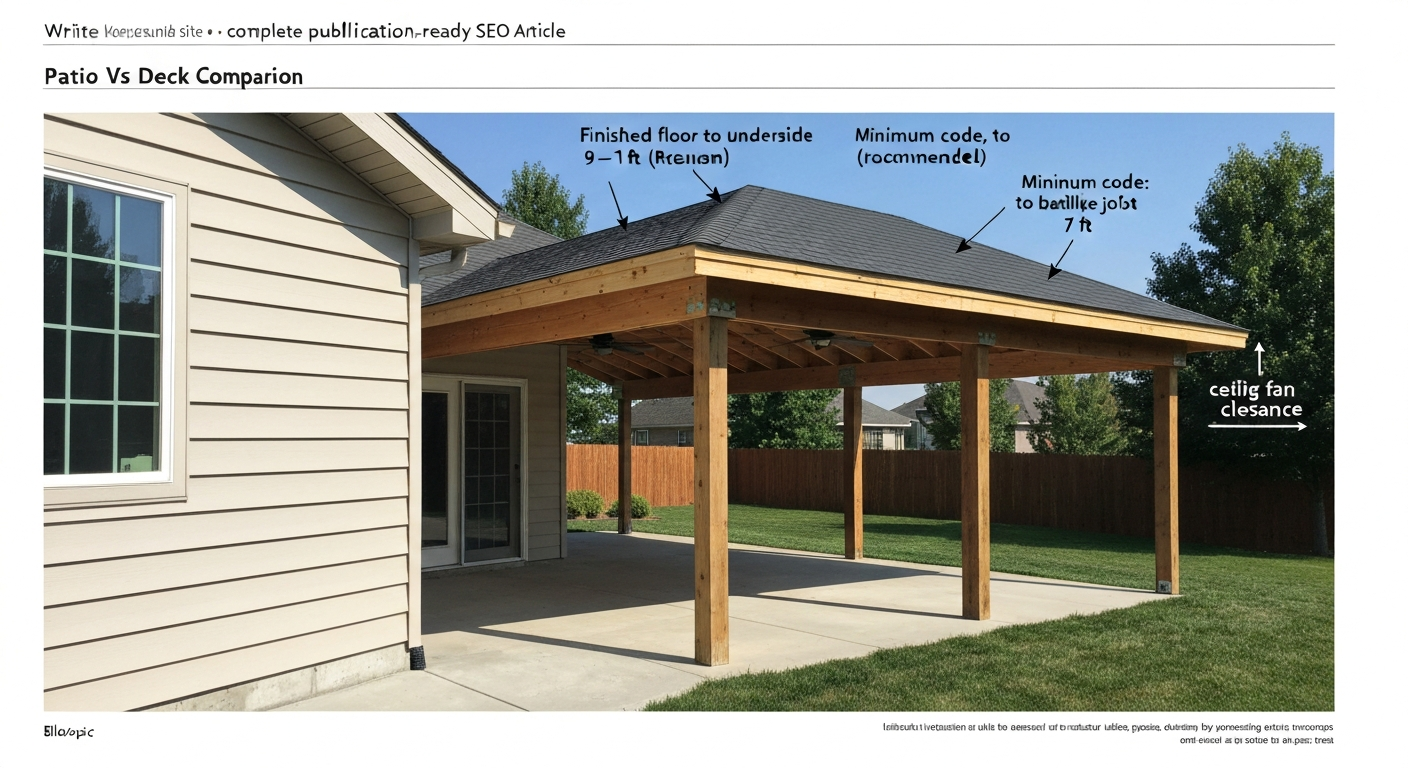
- How high should a patio cover be? At least 7 feet of clear headroom from finish floor to the lowest structural element; 8 feet is the common preferred height.
- What is the minimum slope for a patio cover? 1/4 inch per foot (roughly 2%) for flat/low-slope roofing systems per the IRC; more for shingles.
Recommended slopes at a glance
The table below pulls together the key slope values for the most common patio surfaces and cover types, expressed in the three ways contractors and codes typically state them: inches per foot, percentage, and degrees. Use this as a quick reference when ordering materials, filling out permit applications, or checking contractor quotes.
| Surface or Cover Type | Minimum Slope | Preferred/Standard Slope | As a % (approx.) | As Degrees (approx.) |
|---|---|---|---|---|
| Concrete patio slab | 1/8" per foot | 1/4" per foot | 1% min / 2% preferred | 0.6° min / 1.2° preferred |
| Interlocking concrete pavers | 1/8" per foot (0.5–1%) | 1/4" per foot | 1% min / 2% preferred | 0.6° min / 1.2° preferred |
| Exterior ceramic/porcelain tile | 1/8" per foot | 1/4" per foot | 1% min / 2% preferred | 0.6° min / 1.2° preferred |
| Natural stone (flagstone, slate) | 1/8" per foot | 1/4" per foot | 1% min / 2% preferred | 0.6° min / 1.2° preferred |
| Patio cover — membrane/single-ply (TPO, EPDM) | 1/4" per foot | 1/4"–3/8" per foot | 2% min | 1.2° min |
| Patio cover — standing-seam metal roof | 1/4" per foot | 1/2" per foot (1:24) | 2% min / 4% preferred | 1.2° min / 2.4° preferred |
| Patio cover — corrugated/exposed-fastener metal | 1/2" per foot (1:24) | 1" per foot (1:12) | 4% min / 8% preferred | 2.4° min / 4.8° preferred |
| Patio cover — asphalt shingles (low slope) | 2:12 (2" per 12") | 4:12 and above preferred | ~17% min | ~9.5° min |
Slopes for common patio surfaces
Concrete
Concrete is the least forgiving patio material when it comes to slope because once it cures, you can't easily adjust it. ACI 302.1R (the American Concrete Institute's guide for slab construction) and most municipal specs call for exterior concrete flatwork to slope a minimum of 1/8 inch per foot away from structures, with 1/4 inch per foot as the practical standard. The reason contractors use 1/4 inch per foot rather than the bare minimum is simple: concrete placement is imprecise enough that if you target 1/8 inch per foot and your screed operator runs 1/16 inch low in a spot, that area may pond. Target 1/4 inch per foot and you have enough cushion. For a 12-foot-deep patio, that means the far edge should be 3 inches lower than the edge at the house.
Interlocking pavers
The Interlocking Concrete Pavement Institute (ICPI) recommends a design slope of 1% to 2% for pedestrian paver surfaces, with 2% (1/4 inch per foot) as the common target. Project spec referencing ICPI guidance (paver section: recommends ~1% slope; 2% typical) documents the industry recommendation to design pedestrian paver surfaces at about 1%–2%, with 2% (1/4" per ft) commonly targeted for reliable drainage. Pavers have a slight advantage over concrete in that small adjustments are possible after installation by lifting and re-bedding individual units. However, the compacted aggregate base underneath must be graded correctly from the start, or pavers will settle unevenly and create low spots over time. The minimum practical slope for pavers is about 0.5% to 1%, but anything below 1% is risky in climates with freeze-thaw cycles because water that lingers in joints causes heaving. If your site is nearly flat and drainage is constrained, a linear channel drain (discussed below) is a better solution than trying to squeeze water off a nearly level surface.
Exterior tile
Tile installation on exterior slabs follows the same 1/8 to 1/4 inch per foot rule, but manufacturers and the Tile Council of North America (TCNA) lean toward 1/4 inch per foot for wet/exterior applications. The concern with tile isn't just ponding: water trapped under tiles works its way into grout joints, and in freezing climates that moisture expands and pops tiles off the substrate. A mortar-bed or thick-set installation set at 1/4 inch per foot, with properly sloped substrate underneath, is the reliable approach. If your existing slab is too flat, a polymer-modified mortar bed can build in the slope during tile setting.
Natural stone (flagstone, slate, travertine)
Natural stone patios are often dry-laid (set in sand or decomposed granite) or wet-set in mortar. Either way, the same 1/4 inch per foot target applies for the finished surface. Dry-laid stone has similar adjustability to pavers, and skilled installers can shim or rebed individual stones if drainage problems appear. Wet-set stone behaves more like tile once cured. Travertine and other porous stones are especially vulnerable to freeze-thaw damage when water collects in their voids, so reaching 1/4 inch per foot and sealing the surface is worth the extra effort.
Minimum slope and pitch for patio covers
A patio cover roof operates by very different rules than the patio surface below it. The slopes here are about roof membrane or panel performance, not walking safety, so the values and the consequences of getting them wrong are different. The 2024 International Residential Code (IRC), Chapter 9, sets minimum design slopes for most roofing assemblies, and those rules apply whether you're covering a deck or a patio. If you need a quick answer to what is the minimum slope for a patio cover, see our guidance: generally at least 1/4 inch per foot for most membrane and standing-seam metal systems, while exposed-fastener metal panels and asphalt shingles require steeper minimums. For specifics on how much pitch a patio cover should have, see the dedicated guide how much pitch should a patio cover have.
Membrane and single-ply roofing (TPO, EPDM, PVC)
The IRC requires a minimum slope of 1/4 inch per foot (approximately 2%) for membrane and single-ply roofing systems. TPO and EPDM manufacturers echo this in their warranty documentation: install below 1/4 inch per foot and most manufacturers will deny ponding-related claims. Where the structure physically can't achieve 1/4 inch per foot (for example, a low-profile pergola cover attached flush to a wall plate), the code allows an exception if you can demonstrate 'positive roof drainage,' meaning the roof drains completely within 48 hours of rain. In practice, this is accomplished by adding tapered insulation, additional roof drains, or scuppers, not by simply declaring that the slope is close enough.
Metal roofing
Standing-seam metal roofing can go as low as 1/4 inch per foot under the IRC, which is why it's popular for patio cover applications where a steep pitch would look wrong or block light. In practice, most installers prefer at least 1/2 inch per foot (about 1:24) on standing-seam panels to reduce the risk of capillary water being driven backward under the seams during heavy rain. Corrugated or exposed-fastener metal panels are a different story: the fastener penetrations make them more vulnerable to leaks at low slopes, so most manufacturers require a minimum of 1/2 inch per foot (1:24) and prefer 1 inch per foot (1:12) for reliable weathertightness. If you're deciding between standing-seam and corrugated metal for a patio cover, the standing-seam panel's ability to work at lower pitches is a meaningful practical advantage.
Asphalt shingles
Asphalt shingles technically have a low-slope installation method down to 2:12 (2 inches rise per 12 inches run, or about 17%) with double underlayment, but most contractors and manufacturers treat 4:12 as the real practical minimum for a shingle roof. Below 2:12, shingles shouldn't be used at all. On a patio cover, the visual bulk of a steep shingle roof often looks out of proportion with the structure, which is why membrane or metal systems are more common for low-slope patio cover applications.
Tapered insulation and drainage alternatives when slope is insufficient
If your patio cover structure is already built and the slope is too flat, the two remediation paths are tapered insulation (polyiso foam boards cut at a gradient, added on top of the existing deck) and additional drainage points (roof drains, scuppers, or extended downspout locations). The WoodWorks guidance on low-slope wood-frame roofs is clear: ponding on flat roofs is a structural concern as well as a membrane concern because standing water adds load and promotes rot in framing. Don't wait for a leak to address a too-flat patio cover roof.
Height and clearance for patio covers
Getting the slope and pitch right is half the job. The other half is making sure the cover is tall enough to be livable and that it won't trap moisture against your house wall. These are separate concerns that involve different parts of the building code. If you're wondering how high should a patio cover be, the code minimum is 7 feet from the finished patio surface to the lowest structural element, though 8 feet is the comfortable standard most homeowners prefer.
Minimum headroom
The IRC sets a minimum ceiling height of 7 feet for habitable and usable spaces. For a patio cover specifically, the 7-foot minimum is measured from the finish floor (or patio surface) to the lowest structural element, meaning the bottom of a beam, not the roof sheathing. In practice, 7 feet feels cramped, especially when a ceiling fan is added. Eight feet is the comfortable standard, and most homeowners who've built a 7-foot cover wish they'd gone to 8. If the cover attaches to the house at an existing ledger or rim joist, your wall height may dictate the maximum height, but 8 feet is worth designing toward if the structure allows it.
Door threshold and wall clearance
The IRC requires that exterior wall finishes (siding, stucco, etc.) sit at least 6 inches above exposed ground and at least 2 inches above concrete slabs or porches. This 2-inch clearance above the patio surface is important when you're attaching a cover: the ledger and any flashing must account for this gap so that water running off the roof doesn't bridge behind the siding. When the patio slab is at door-threshold height, the finished patio surface must slope away from the threshold to prevent water from flowing back under the door. The standard is to keep the patio surface at least 1 inch below the door threshold and sloped away at the required 1/4 inch per foot.
Flashing and kick-out details at the wall attachment
Where a patio cover roof meets the house wall, step flashing, counterflashing, and kick-out flashing are required, not optional. Kick-out flashing is the small angled piece at the bottom of a roof-to-wall intersection that directs runoff away from the wall face and into the gutter. Without it, water runs down the wall face, saturates the siding, and eventually rots the framing behind it. The water-resistive barrier (housewrap) behind the siding must be integrated with the flashing layers so that any water that does get behind the cladding exits at the base of the wall rather than being trapped. This detail is one of the most commonly missed items on DIY patio cover projects.
Drip edge and overhang
The roof of a patio cover should have a drip edge on all exposed eaves and rakes, and a minimum overhang of 1 to 2 inches beyond the outermost beam or post to direct runoff into a gutter rather than onto the structural member. A gutter on the low-side edge of the cover is almost always worth adding: it catches roof runoff and routes it to a downspout rather than letting it splash onto the patio surface or erode the base under pavers.
How to measure fall on an existing or planned patio
There are four practical methods for measuring or setting slope, and the right one depends on how precise you need to be and what tools you have on hand. All of them express slope as rise over run: vertical change divided by horizontal distance.
Method 1: String line and line level
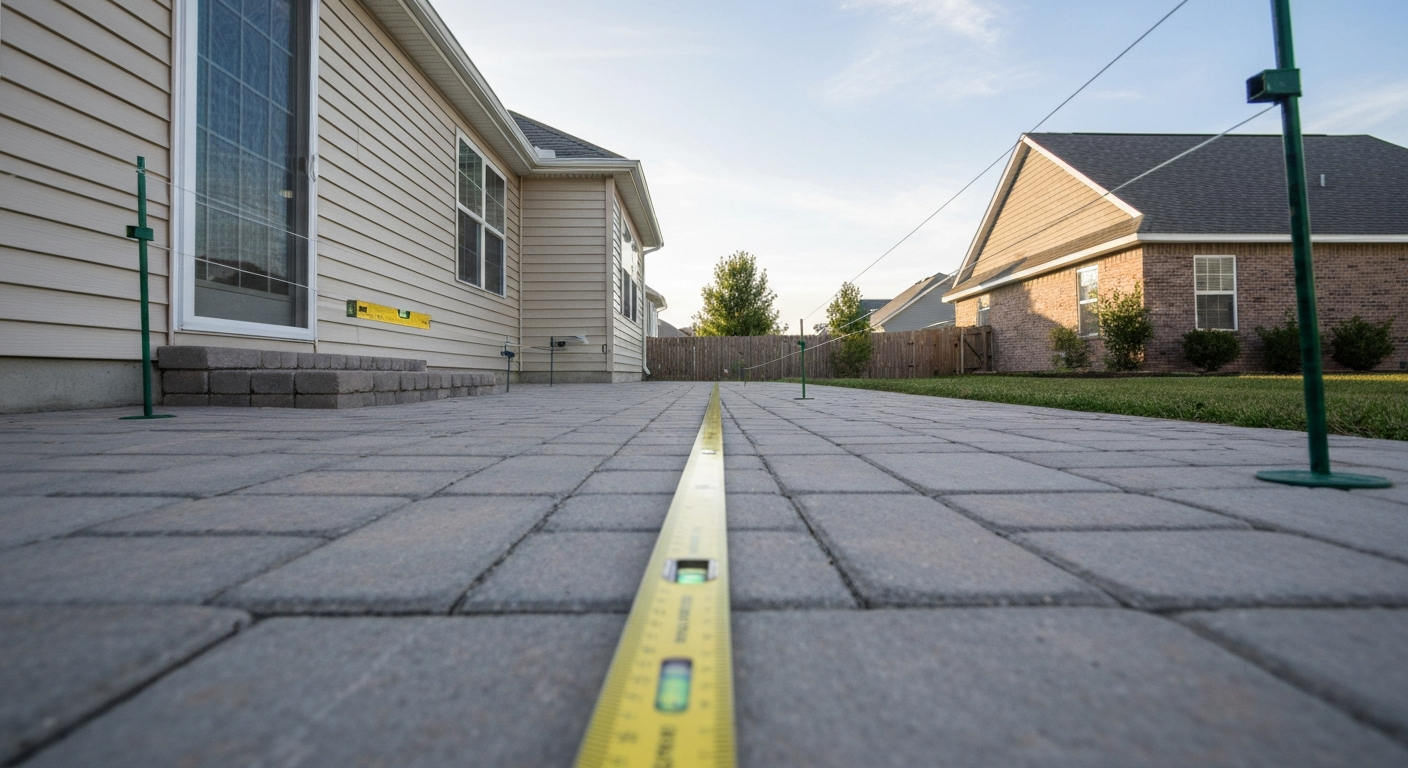
This is the standard DIY method described in most concrete and paver installation guides, including Quikrete's patio-building instructions. Drive a stake at the house wall and another at the planned outer edge of the patio. Stretch a string between them at the height of the finished surface at the house. Clip a line level to the center of the string and adjust until the string is level. Measure the height of the string above the planned finished surface at the outer stake. That height difference divided by the horizontal distance is your current or planned slope. For a 12-foot patio, you want that string to be 3 inches above the outer stake surface level (3 inches / 144 inches = 2%, or 1/4 inch per foot).
Method 2: Spirit level and tape measure
Place a long spirit level (4-foot level is ideal) on the patio surface. Read the bubble, then lift the low end until it reads level. Measure how much you lifted it. That rise, divided by the length of the level, gives you slope in inches per foot. Example: you lift the 4-foot level 1 inch on the low end before the bubble centers. 1 inch / 48 inches = 0.021, or about 2% (roughly 1/4 inch per foot). This method works well for checking existing surfaces but is less practical for setting slope during construction.
Method 3: Slope laser or rotary laser level
A rotary or line laser (Bosch, Leica, DeWalt, and similar brands all make affordable models) lets you project a level plane across the entire patio area and read actual surface heights at multiple points using a grade rod or tape measure. This is the fastest and most accurate method for large slabs. You set the laser at a known elevation near the house, then walk the grade rod to any point on the patio and read the difference. For 1/4-inch-per-foot slope on a 16-foot patio, the far edge should read 4 inches lower on the grade rod than the house edge. This method is especially useful for diagnosing ponding: you can quickly identify the exact low spots on a finished slab.
Method 4: Rise-over-run calculation
This is the math behind all three methods above. Slope (as a decimal) = vertical rise / horizontal run. To convert to inches per foot, multiply by 12. To convert to percent, multiply by 100. For example, if your patio drops 4.5 inches over 18 feet: 4.5 / 216 (18 feet × 12 inches) = 0.0208, or about 2.1%, which is roughly 1/4 inch per foot. To find the required drop for a given distance: multiply the run in feet by the desired slope in inches per foot. A 14-foot patio at 1/4 inch per foot needs 14 × 0.25 = 3.5 inches of total drop from house to outer edge.
| Patio Depth (feet) | Drop at 1/8" per foot (1%) | Drop at 1/4" per foot (2%) | Drop at 3/8" per foot (3%) |
|---|---|---|---|
| 8 ft | 1 inch | 2 inches | 3 inches |
| 10 ft | 1.25 inches | 2.5 inches | 3.75 inches |
| 12 ft | 1.5 inches | 3 inches | 4.5 inches |
| 14 ft | 1.75 inches | 3.5 inches | 5.25 inches |
| 16 ft | 2 inches | 4 inches | 6 inches |
| 20 ft | 2.5 inches | 5 inches | 7.5 inches |
Building in the slope: construction methods
Concrete: forming and screeding
Set your forms so the house-side form is higher than the outer form by the required fall amount. For a 12-foot patio at 1/4 inch per foot, the outer form sits exactly 3 inches lower than the inner form. Use screed guides (pipe or 2x4 rails) set at the correct height at several points across the width of the pour. Screed the concrete from the high end toward the low end so excess material is pushed away from the house. Bull-float immediately after screeding to close the surface, then check your slope with a long level or string line before the concrete takes its initial set, usually within 30 to 45 minutes in warm weather. ACI 302.1R recommends checking slope during finishing, not after curing.
Pavers: grading the base
For pavers, the slope is built into the compacted aggregate base. Set your edge restraints first, then grade the base material using a screed board or a long straight-edge referenced off a taut string at the correct height. Compact the base in 3-inch lifts and re-check slope after each lift because compaction will shift the grade slightly. The bedding sand layer (typically 1 inch of concrete sand) is screeded to the final slope. Paver units sit on top and can be individually adjusted during the setting process. Check slope frequently with a 4-foot level as you work across the surface.
Patio cover rafters: adjusting joist height
For a patio cover roof, slope is set by the difference in height between the ledger at the house and the beam at the outer posts. If you want 1/4 inch per foot of slope on a 12-foot-deep cover, the outer beam needs to be 3 inches lower than the ledger. During layout, calculate the required height difference and set your post heights accordingly. If the posts are already set and the slope is wrong, you can shim beam-to-post connections slightly (within about 1/2 inch) but significant corrections require cutting posts to the correct height. Get this right before setting posts in concrete.
Drainage solutions: where the water goes after it leaves the patio
Getting the slope right only solves half the drainage problem. Water has to go somewhere, and that somewhere needs to be designed, not accidental.
- Gutters and downspouts on patio cover roofs: the single highest-impact drainage upgrade for any covered patio. Size gutters at a minimum of 5 inches (K-style) for patio covers and route downspouts at least 6 feet from the house foundation.
- Channel/linear drains: set into the patio surface at the low edge or midpoint, with concrete or pavers sloped toward the channel at a minimum 1% grade. The channel outlet connects to a storm drain, dry well, or daylight outlet per local plumbing rules. ACO and NDS are common brands in residential applications.
- Scuppers: openings in the parapet or fascia of a patio cover that allow roof water to escape when gutters can't handle the volume or aren't appropriate for the design. Scuppers should be at least 4 inches wide and positioned at or near the lowest point of the roof.
- Pop-up emitters and French drains: underground pipe (minimum 1% slope, slotted or perforated, wrapped in geotextile fabric) carries water from channel drains or area drains to a daylight outlet or dry well. Best for patios where surface drainage is constrained by fencing or grade.
- Crickets and saddles: small angled structures behind chimneys or obstructions on a patio cover roof to direct water around the obstruction rather than letting it pond behind it. Required by the IRC for chimneys wider than 30 inches on a sloped roof.
Troubleshooting ponding and drainage failures
If water is pooling on your patio after a normal rain, you have one of three problems: the surface is too flat or has settled unevenly, the drainage outlet is blocked, or there isn't a drainage outlet at all. The fastest diagnostic is the rotary laser method above, which will show you exactly where the low spots are. For a concrete slab that's developed low spots from settling or heaving, options include grinding high spots (if the surrounding grade is actually correct), applying a polymer-modified overlay with the slope corrected in the mix, or full replacement in severe cases. For pavers, lifting and re-bedding the affected area on a re-graded base is usually straightforward for an experienced installer.
On patio cover roofs, ponding is most visible as dark staining or algae growth in flat areas. Check that all drains and scuppers are clear of debris, particularly in fall after leaf drop. Standing water on a membrane roof adds approximately 5 pounds per square foot per inch of depth to the structural load, which matters on light patio cover framing. If ponding persists after clearing drains, investigate whether the framing has deflected (rafters or joists sagging under load) and consult a contractor before the next heavy rain.
Cracks and drainage blockages: maintenance checklist
- Inspect patio surface slope twice a year (spring and fall) using a 4-foot level; address any new low spots before they become chronic ponding areas.
- Clear channel drain grates and pop-up emitter caps after every major storm and at least quarterly.
- Check patio cover roof drains and gutters before the rainy season; remove all debris from sumps and gutter runs.
- Inspect caulk and sealant at wall-to-cover junctions, ledger flashings, and around any roof penetrations annually; re-apply where cracked or separated.
- Examine kick-out flashing at the base of any wall-to-roof intersection; replace or reinstall if displaced, as this single detail is responsible for a disproportionate share of wall rot on attached patio covers.
- For concrete patios with surface cracks: seal cracks up to 1/4 inch wide with a flexible polyurethane or epoxy crack filler rated for exterior use. Cracks wider than 1/4 inch or cracks that run through the full depth of the slab need professional assessment before sealing.
Permits, codes, and where local rules override these guidelines
The slope values in this article are based on the 2024 IRC and widely adopted industry standards (ACI, ICPI, TCNA, NRCA). However, local jurisdictions can and do adopt modified versions of the IRC or overlay their own residential construction codes. A few places where local variation commonly changes the requirements:
- Minimum patio surface slope: some municipalities specify 1/8 inch per foot as the minimum in their public works or residential construction standards; others have adopted 2% as a hard minimum in flood-prone zones.
- Patio cover permits: most jurisdictions require a building permit for any attached patio cover and for freestanding covers over a certain size (commonly 200 square feet or any structure with a roof). Some HOAs impose additional height and setback restrictions beyond the building code.
- Roof-to-wall attachment: ledger attachment requirements (lag bolt patterns, through-bolts, and flashing methods) vary by jurisdiction and sometimes by wind/seismic zone. The IRC prescribes minimum standards but local amendments may be stricter.
- Stormwater and drainage: some municipalities prohibit connecting patio drain outlets to sanitary sewer; others restrict the volume of impervious surface and require infiltration systems. Check with your local planning or public works department before routing patio drainage.
- Accessibility: if the patio serves as a primary accessible route (ADA or local equivalent), slope must not exceed 1:48 (2%) in any direction, which aligns with the drainage minimum but means you have zero tolerance for over-sloping.
When pulling a permit, your local building department will review plans for slope, drainage, ledger attachment, and clearances. Having a dimensioned plan that calls out the finished slope and drainage outlet location speeds up the review considerably and signals that you've thought through the water management before breaking ground.
DIY or hire a pro?
Setting the correct slope is achievable as a DIY project for most patio types, but the margin for error is smaller than many homeowners expect. Here's how to think about it honestly.
| Task | DIY Difficulty | Key Risk If Done Wrong | Recommendation |
|---|---|---|---|
| Grading and setting paver base | Moderate | Uneven settling, ponding | DIY with rented plate compactor and careful laser or string layout |
| Forming and pouring concrete slab | High | Slope error locked in permanently | Hire a pro unless you have concrete experience; rent a laser level at minimum |
| Tile on existing slab (slope OK) | Moderate | Grout/bond failure at low spots | DIY if substrate slope is already correct; pro if slope needs correcting in mortar bed |
| Patio cover framing (attached) | High | Structural failure, water intrusion at ledger | Hire a structural contractor; DIY only if you are confident in ledger attachment and flashing details |
| Installing channel drains | Low–Moderate | Incorrect outlet slope, standing water in drain | DIY with careful attention to 1% minimum pipe slope to outlet |
| Diagnosing and correcting existing ponding | Low–Moderate | Misdiagnosis, wasted repair cost | DIY diagnosis with a laser level; pro for concrete overlay or structural correction |
The tipping point for most homeowners is concrete: once a slab is poured at the wrong slope, correcting it means grinding, overlaying, or replacing it, each of which costs more than getting it right the first time with professional help. Pavers and tile are more forgiving because they can be re-set. Patio cover roof framing attached to the house is another pro-recommended task primarily because the ledger-to-wall connection is a structural and water-management detail that has specific code requirements and real consequences if done poorly. The drainage work between those two bookmarks, channel drains, French drains, gutters, is well within DIY capability for most homeowners.
A note on patio covers vs. decks and other covered structures
The slope and drainage principles in this article apply specifically to patio surfaces (ground-level concrete, pavers, tile, stone) and their attached or freestanding covers. If you're working with an elevated wood or composite deck, the framing-to-drainage relationship is different: deck boards typically have gaps that allow drainage, and the relevant slope is applied to the joist framing rather than a finished membrane surface. The pitch requirements for covers (1/4 inch per foot minimum for membrane and metal roofing) apply whether the cover sits above a patio or a deck, but the height and clearance considerations differ between an elevated deck cover and a ground-level patio cover because deck surfaces sit above grade with air circulation underneath. Considering whether a deck or patio better fits your drainage situation, budget, and site conditions is a genuine planning question, and the slope characteristics of each structure play into that comparison.
FAQ
Title and meta description for this article (≤160 characters)
Title: What Is the Correct Fall (Slope) for a Patio — Patio Cover Pitch, Height, Drainage & Code Guidance Meta description: Clear, practical guidance on patio slopes (percent, in/ft, degrees), patio cover pitch/height, drainage, measurement, construction, codes, and DIY vs pro.
What is the difference between 'fall', 'slope', and 'pitch' for a patio or patio cover?
Fall, slope, and pitch all describe incline but are used differently: fall/slope (used for flatwork and terraces) usually expressed as percent (e.g., 2%), inches per foot (e.g., 1/4" per ft) or ratio (1:48). Pitch (used for framed/roof surfaces) is often given as rise over run (e.g., 2:12) or inches per foot. For homeowners, treat them interchangeably and convert: 1/4" per ft ≈ 2% ≈ 0.25 in/ft ≈ 1:48 ≈ 0.24°. Note: roof-pitch conventions (e.g., 2:12) use inches per foot of run; convert when comparing to slab slopes.
Recommended slopes for common patio surfaces (quick comparison table)
Use minimums to avoid ponding; use preferred values to allow tolerances and long-term performance. Surface — Minimum (typical) — Preferred (practical) Concrete slab — 1/8" per ft (≈1%) — 1/4" per ft (≈2%) Pavers/interlocking — 0.5%–1% — 1%–2% (1/4" per ft commonly targeted) Exterior tile/natural stone — 1/8"–1/4" per ft (≈1%–2%) — 1/4" per ft (≈2%) Patio cover roof (membrane/low-slope) — 1/4" per ft (≈2%) per IRC/industry — 1/4" per ft or use tapered insulation/additional drains if flatter Framed pitched cover (shingles/metal) — follow manufacturer's min pitch (often 2:12 or per product) — 3:12+ for ease of shed and warranty Note: local code, manufacturer instructions or site conditions can change these minimums; for roof attachments the 2024 IRC commonly uses 1/4"/ft as the baseline for positive drainage.
How to express slopes in percent, inches per foot, and degrees (conversion help)
Quick conversions to use on plans and when measuring: - Inches per foot to percent: (inches per ft ÷ 12) × 100. Example: 1/4" per ft = 0.25/12 = 0.02083 → ≈2.08%. - Percent to inches per foot: (percent ÷ 100) × 12. Example: 2% → 0.02×12 = 0.24 in/ft (~1/4"/ft). - Degrees (small angles): degrees ≈ arctan(slope). For small patios, 2% ≈ 1.15° (rarely used in field measurements). Use in/ft or percent for concrete/pavers; roofer plans often use inches per foot or pitch (rise:12).
Minimum slope/pitch requirements for patio covers and roof attachments
General guidance: - Low-slope roof coverings and attached patio covers: 1/4" per ft (≈2%) is the widely referenced minimum (IRC/industry) for positive drainage unless the manufacturer or code provides an approved exception with documented drainage strategy. - Single-ply membranes/TPO/PVC: manufacturers often require ≥1/4"/ft or specify tapered insulation and additional drains when flatter. - Shingles and typical steep-slope roofing: many asphalt shingles require minimum pitch (commonly 2:12) — check product instructions. - If you cannot achieve 1/4"/ft, provide positive drainage with tapered insulation, crickets, scuppers, or additional drains and document for inspectors and warranties. Always confirm with local code authorities, the roofing manufacturer, and your permit reviewer before construction.
How high should a patio cover be (headroom and clearances)?
Common homeowner and code-oriented guidance: - Minimum headroom/ceiling height: many enclosed spaces use 7 ft as a baseline; open patio covers commonly keep clearances higher for comfort — 8 ft is comfortable. - Door thresholds and adjacent wall clearances: exterior wall finish (siding) should be at least 6" above adjacent exposed ground and typically 2" above concrete slab grade to avoid splash-back and moisture issues (check local code variations). - Attachment clearance: leave room for flashing and water diversion (kick-out flashing) at the house-wall intersection; ensure the cover’s fascia and roof edge do not trap water against siding. - Check local ordinances for minimum eave/overhang setbacks and inspection rules for attached structures.
Next Article
How High Should a Patio Cover Be: Height, Pitch & Drainage
How high should a patio cover be? Clear height, clearance, pitch and drainage tips for safe, comfortable outdoor covers.