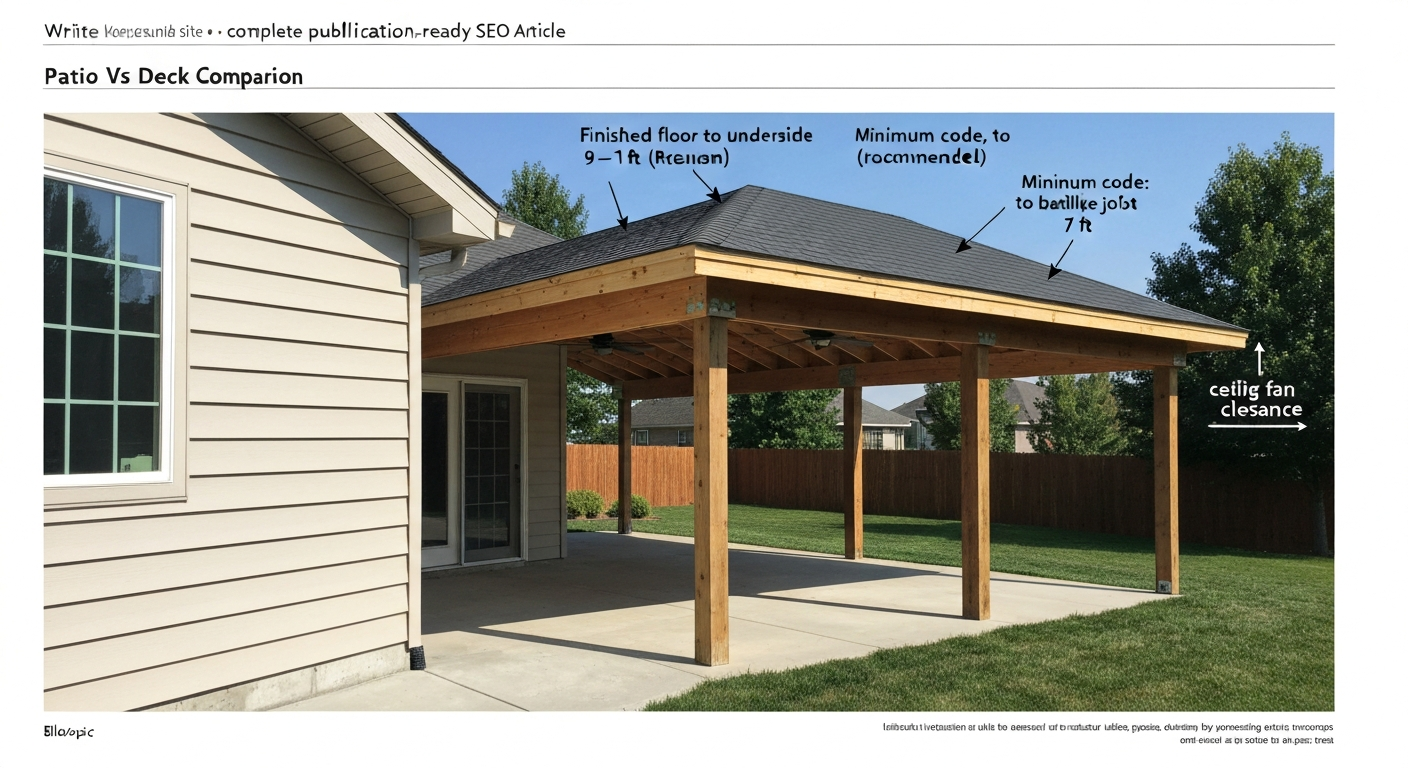
For most attached residential patio covers, a finished ceiling or underside height of 8 to 10 feet works well for the majority of homeowners. The absolute code floor is 7 feet under IRC Appendix H for screen enclosures, but in practice anything below 8 feet feels cramped, limits your fan and lighting options, and can create clearance problems at doors. If you're attaching to a single-story house with standard 8- or 9-foot interior ceilings, aiming for 9 feet at the beam underside gives you comfortable headroom, room for a ceiling fan, and a clean visual relationship with the house. That said, the right number for your project depends on your door heights, your roofline, local code amendments, and how you plan to use the space.
How High Should a Patio Cover Be: Height, Pitch & Drainage

Miles Hart
5 Aug 2026
Who this guide is for and what height decisions actually affect
This guide is for homeowners planning a new patio cover or pergola, whether you're DIYing it or hiring a contractor. It covers attached covers, freestanding covers, screen enclosures, and open-beam pergolas. Height decisions matter more than most people expect: they affect your permit approval, your door and window clearances, fan and lighting placement, how well the cover ties into your roofline, how much shade versus natural light you get, and even how water drains off the roof. Get the height wrong and you end up with a cover that fights your house aesthetically, fails inspection, or pools water into your wall framing. This guide walks through each of those factors with real numbers you can use as a starting point before you pull a permit.
Quick answer: typical and minimum heights to know
These are typical industry recommendations and commonly adopted code minimums. Always verify with your local building department and any manufacturer installation specs before finalizing your design, since local amendments can differ from the numbers below.
| Scenario | Typical Recommended Height | Code/Reference Minimum | Notes |
|---|---|---|---|
| Open patio cover (attached or freestanding) | 9–10 ft at beam underside | 7 ft (IRC Appendix H) | Below 8 ft feels cramped; check local amendments |
| Screen enclosure / enclosed patio | 8–9 ft finished ceiling | 7 ft (IRC Appendix H AH106.1.2) | Screen panels reduce perceived openness; lean toward 8 ft minimum |
| Egress/circulation path under cover | 8 ft minimum recommended | 7 ft-6 in (IBC Chapter 10 egress headroom) | Apply where cover forms part of an egress route |
| Ceiling fan installation | 9 ft floor-to-ceiling minimum recommended | 7 ft blade-to-floor (manufacturer manuals) | Most fan bodies hang 12–18 in below ceiling; 8 ft ceiling is workable but tight |
| Attached cover at exterior door | Match or exceed door rough opening + 6 in minimum clearance above frame | 80 in (6 ft-8 in) clear opening height at egress doors | Non-egress doors sometimes permitted at 76 in; confirm with code official |
| Maximum height (common local limits) | 10–12 ft typical residential design | 12 ft common max in IRC Appendix H jurisdictions | Some ordinances cap unenclosed covers at 15 ft; check local zoning |
If your jurisdiction has not adopted IRC Appendix H, it may use a local patio cover ordinance or apply the main IRC residential chapters directly. Either way, 7 feet is generally the lowest permissible finished height for any occupied space or screen enclosure, and in practice that is an uncomfortable ceiling for anything but a narrow walkway. Build to at least 8 feet and you'll have significantly more flexibility.
How to measure and set your finished cover height
The key measurement is the vertical clearance from finished floor to the underside of the lowest structural member, whether that's a beam, a rafter, or a finished ceiling panel. Here's how to work out the number for your specific project.
- Start at the slab or deck surface: measure from the finished patio surface (after any planned pavers, concrete pour, or deck boards are in place) rather than from bare ground or substructure.
- Identify your controlling constraint: this is usually the door header height on the house wall you're attaching to. Measure from finished floor to the top of the door frame, then add at least 6 inches for flashing and ledger clearance above the door. That gives you a practical minimum beam attachment height.
- Account for roof pitch: the beam on the house wall will be lower than the outer beam or ridge if you're building a sloped cover. Decide your pitch first (see the drainage section below), then work backward from the outer eave height to confirm the house-side attachment height clears doors and windows.
- Subtract for finish materials: if you're adding insulated panels, a plywood-and-drywall ceiling, or tongue-and-groove boards, subtract their thickness from the structural rough height to get your finished clearance.
- Check fan and light fixture depths: if you're planning a ceiling fan, look up the specific model's downrod plus motor housing depth. A fan that adds 18 inches below the ceiling on an 8-foot structure puts the blades at 6 ft-6 in — below the 7-foot manufacturer minimum.
- Confirm with your permit office: take your scaled drawing with the finished floor-to-underside dimension clearly labeled and ask whether local amendments require anything above the numbers you've calculated.
Door, window, and circulation clearances
The door situation is where attached patio cover heights get real in a hurry. A standard exterior entry door in the US is 3-0 x 6-8 (36 inches wide, 80 inches tall), which gives an 80-inch clear opening. That's the minimum egress door height under the IBC, and it's the most common constraint that dictates how high your ledger can sit on the house wall. You need at least the door frame height, plus room for flashing above it, plus the ledger itself. In practice, a 7-foot finished cover height barely clears a standard door frame with no room for flashing or trim, which is why most builders land at 8 to 10 feet.
Sliding glass doors and French doors present the same constraint. A typical 6-0 x 6-8 sliding door has an 80-inch frame, so the math is identical. Where people run into trouble is with non-standard or older doors: a 76-inch non-egress interior door, for example, sits lower than an egress door, but if the cover forms part of a circulation path that connects to an exit, the IBC Chapter 10 egress headroom requirement of 7 ft-6 in (90 inches) kicks in over the path, not just at the door itself. That means even if your door clears, the beam spanning over the walkway leading to it needs to be at 7 ft-6 in or higher.
Windows are a secondary constraint for attached covers. If a window sits above a door on the house wall, the beam attachment point has to clear the window head or the cover will block light to that window. It's worth marking up a wall elevation drawing with every door and window head height before you commit to a ledger location. A few inches of adjustment at the design stage saves real headaches during framing.
Ceiling fans and lighting: the clearances that often get overlooked
Ceiling fans are one of the most practical additions to a covered patio, especially in warm climates, but they impose a firm minimum height requirement. Every major residential fan manufacturer, including Hunter and Casablanca, requires the lowest point of the rotating blades to be at least 7 feet above the finished floor. The Casablanca ceiling fan installation/owner manual (minimum blade‑to‑floor clearance requirement) specifies a 7 ft (2134 mm) minimum distance from finished floor to the lowest point of the rotating blades. That's a manufacturer requirement, and because national building codes require compliance with manufacturer installation instructions, it effectively becomes a code-level constraint.
Here's the practical issue: a typical ceiling fan has a motor housing plus a downrod that can add 12 to 18 inches below the ceiling. On an 8-foot ceiling, a flush-mount or low-profile fan (which drops about 10 to 12 inches) puts blades at roughly 7 ft-0 in to 7 ft-2 in, just barely clearing the minimum. A standard fan on an 8-foot ceiling often fails the 7-foot blade clearance requirement. The common fix is to use a low-profile (hugger) fan rated for low ceilings, or to design to a 9-foot minimum ceiling height, which gives you much more flexibility in fan selection and airflow performance.
For airflow effectiveness, higher is actually better. Fan airflow efficiency improves when blades are roughly 8 to 9 feet above the floor, where the air column can expand before it reaches occupants. On a 10-foot cover, a fan on a 12-inch downrod puts blades at about 8 ft-9 in, which is close to ideal. The other consideration is wind: under an open patio cover, even light breezes compete with fan airflow, so oversizing the fan diameter by one step compared to what you'd use indoors is a reasonable approach.
For pendant lights and recessed fixtures, the 7-foot clearance minimum from the floor applies to the lowest hanging element. Recessed lights flush with the structural members don't create a clearance problem, which is why they're popular in low-profile covers. For any fixture rated for damp or wet locations (required outdoors), confirm the listed mounting height and orientation in the manufacturer's installation manual, since some fixtures are not rated for upward-facing installation.
How cover height interacts with your roofline
This is where height planning gets genuinely structural. When you attach a cover to the house, the ledger or beam has to connect to something solid: the band joist, the rim joist, or the wall framing. Under IRC R507 (deck ledger attachment rules, which builders commonly apply to attached patio covers), the ledger needs to be fastened with 1/2-inch diameter lag screws or through-bolts at engineered spacing, and the connection must be flashed to prevent water from tracking behind the siding and into the wall. Connectors from manufacturers like Simpson Strong-Tie are the standard way to make these connections in modern residential construction.
The height you attach at determines what part of the house wall you're going into. Attaching into the band joist of the floor framing is structurally solid and a standard detail. Attaching higher, into the wall studs above a window, may require engineering review because you're no longer tying into a primary diaphragm element. Attaching so high that you're near the eave or soffit of the house creates a different problem: the cover's roof system has to transition cleanly into the existing roof without directing water into the wall or blocking ventilation.
Step flashing and counter-flashing are required wherever the cover roof meets the house wall, and the pitch of the cover roof dictates how that flashing detail is executed. A steeper cover pitch sheds water faster but requires a taller attachment point to maintain headroom at the outer edge. A shallower pitch sits lower on the wall but may need more careful flashing at the transition. If your house has an overhanging eave, the cover can often tuck under it, which simplifies flashing and gives a cleaner look, but limits how high you can place the attachment beam. Getting the height and pitch relationship right at the design stage prevents leaks later.
One scenario worth calling out: if your house has a hip roof or a roof that slopes toward the patio wall, the eave height may be lower than you expect, and attaching a cover there forces a low ledger position. In that case, you may need to lower the outer posts to maintain a workable pitch, or consider a freestanding cover that doesn't attach to the house at all. A freestanding cover avoids ledger attachment complexity entirely but requires footings for all posts and a different approach to lateral bracing.
Permits, zoning, and setbacks
In most jurisdictions, a patio cover that attaches to the house or has a solid roof requires a building permit. Height is one of the variables reviewers check. Many municipalities that adopt IRC Appendix H limit patio cover structures to one story and a maximum roof height of 12 feet above finished floor. Some city ordinances go further: certain Texas municipalities, for example, cap unenclosed patio covers at 15 feet, and some local codes limit height based on proximity to property lines or other structures. HOA rules can add another layer of restriction.
Footing depth is a related permit issue. IRC Section R403.1.4 requires exterior footings to bear below the local frost line, with an absolute minimum of 12 inches below undisturbed ground. In cold climates, frost lines can be 36 to 48 inches deep, which means your post footings need to be excavated significantly deeper than you might expect. The required footing depth doesn't change the above-ground height, but it does affect your total post length and your budget for concrete.
Higher vs lower: making the right call for your space
Height is not just a code issue, it's a comfort and design decision, and the right call depends on how you're using the space and what your house looks like.
When a higher cover (10 ft or more) makes sense
- You want ceiling fans with maximum airflow and flexibility in fan model selection.
- The house has 9- or 10-foot interior ceilings and a lower cover would look truncated or mismatched.
- You're in a hot climate and want to trap rising heat above head level rather than at face level.
- The space will be used for entertaining and you want a generous, open feel.
- You have tall doors (8-foot doors are increasingly common in newer construction) that require more headroom above the frame.
- You want to incorporate skylights, clerestory windows, or operable vents at the top of the cover for passive ventilation.
When a lower cover (8–9 ft) works better
- The house has standard 8-foot ceilings and a taller cover would look out of scale.
- You're prioritizing shade and privacy over openness — a lower roofline blocks more of the sky and surrounding sightlines.
- The attachment point on the house wall is constrained by a window or overhang that limits how high you can go.
- You're building a screen enclosure where a lower ceiling is more comfortable and easier to climate-condition.
- Budget is a factor: taller posts, taller beams, and more linear feet of structure cost more, and a lower cover is simpler and cheaper to build.
Ventilation is worth a specific note. A higher cover allows warm air to stratify above head height and escape at the eaves rather than sitting at occupant level. In humid climates, this can make a meaningful difference in how comfortable the space feels. A cover that's too low effectively acts as a lid, trapping heat and reducing air movement. If you're in a climate where heat is the primary concern, erring toward 9 to 10 feet is the practical choice even if 8 feet would technically pass code.
Roof pitch and patio surface drainage: getting water to go where you want it
Cover height and roof pitch are directly linked: the pitch of your cover roof determines how much height you lose (or gain) between the house attachment and the outer edge. Choosing pitch before finalizing height avoids unpleasant surprises when you realize a required slope drops your outer eave below a comfortable clearance.
Typical pitch ranges by roofing material
These are typical recommended minimums. Always confirm with the specific product manufacturer's installation instructions, since product-level requirements can differ from general industry guidance and violating them can void warranties. For guidance on required roof slope, see what is the minimum slope for a patio cover.
| Roofing / Cover Material | Recommended Minimum Slope | Common Practical Range | Notes |
|---|---|---|---|
| Asphalt shingles | 2:12 (≈17%) | 3:12 to 6:12 for patio covers | Slopes 2:12–4:12 require double underlayment or self-sealing membrane; below 2:12 voids most manufacturer warranties |
| Standing-seam metal (factory-seamed) | 0.5:12 to 1:12 (varies by system) | 1:12 to 3:12 | System-specific: confirm with panel manufacturer; mechanically seamed systems handle low slopes better than lapped panels |
| Exposed-fastener / lapped metal panels | 3:12 minimum (typical) | 3:12 to 6:12 | Lower slopes increase leak risk at laps; follow manufacturer minimum |
| Corrugated / multiwall polycarbonate panels | 1:12 to 1.5:12 minimum (product-specific) | 1.5:12 to 3:12 typical | End caps and proper flashing required; confirm per Palram/Suntuf or equivalent product guide |
| Single-ply membrane (TPO/EPDM) | 0.25:12 minimum with tapered insulation | 0.5:12 to 2:12 | Requires proper detailing; not common on open residential patio covers but used on insulated flat-top covers |
How pitch affects runoff and your patio surface needs
The direction your cover sheds rain determines where water lands, and that affects how you need to slope your patio surface. A cover that drains toward the outer edge dumps rain at the perimeter, typically into a planting bed or lawn, which is the most common and lowest-maintenance outcome. A cover that drains back toward the house (rare but seen in some butterfly or reverse-pitch designs) requires a gutter at the house wall and careful flashing to prevent water from running behind the ledger.
For the patio slab or pavers below the cover, the standard recommendation for concrete flatwork is a slope of 1/8 inch to 1/4 inch per foot away from the building face, which translates to roughly 1% to 2% grade. For related guidance on setting slab slope and pitch, see our article on what fall should a patio have. A 1/8-inch per foot slope (about 1%) is the minimum to ensure positive drainage and avoid ponding; 1/4 inch per foot (about 2%) is the more comfortable target and aligns with common ACI flatwork practice. For more detail on how to calculate surface slope and the right drainage pitch, see what is the correct fall for a patio. On a 12-foot-deep patio, a 2% slope means the outer edge is about 3 inches lower than the house wall, which is barely visible but highly effective.
For decking boards (composite or wood) under a cover, gaps between boards handle most drainage without a significant structural slope, but the framing below should still slope at least 1% away from the house to drain any water that gets through. The relationship between these two topics, how much pitch should your cover roof have, and what fall should your patio surface have, is closely connected. If your cover roof sheds a large volume of rain at the outer edge, confirm that the patio surface slope is directing that water away from the foundation rather than pooling it near the house.
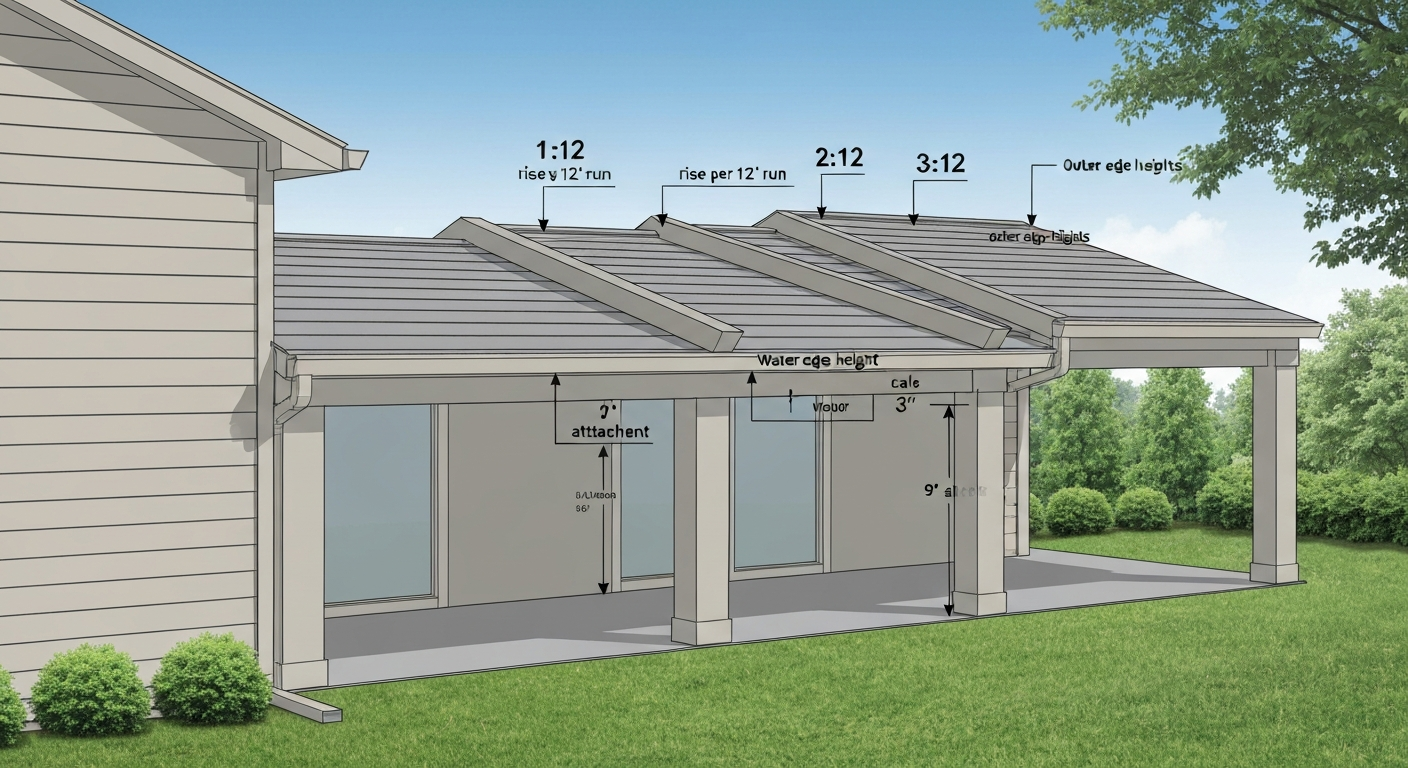
Calculating how pitch affects your cover's height
A simple way to think about it: a 3:12 pitch drops 3 inches for every 12 inches of horizontal run. On a 12-foot-deep cover, that's a 3-foot drop from the house attachment to the outer edge. If you attach at 10 feet at the house, the outer eave is at 7 feet, right at the code minimum and probably too low for a comfortable open cover. Attaching at 11 feet gives you an 8-foot outer eave, which is workable. Dropping to a 2:12 pitch on the same 12-foot depth gives you a 2-foot drop, so a 10-foot attachment puts the outer eave at 8 feet. This is the practical reason why patio cover pitches tend to be gentle: steeper pitches consume headroom quickly.
DIY vs professional: where the real risks are
An open pergola with no solid roof, no electrical, and no attachment to the house is a reasonable DIY project for someone comfortable with basic framing. Adding a solid roof, electrical for fans and lights, and a ledger attachment to the house raises the stakes considerably. Ledger attachment requires correct flashing to prevent water intrusion, this is one of the most common sources of structural damage in attached patio covers, and it's a detail that's easy to get wrong if you haven't done it before. Electrical work under a cover is subject to wet-location requirements and typically requires a licensed electrician in most jurisdictions.
Post sizing and beam spans are another area where a quick check is worth the time. IRC and AF&PA span tables (and any engineered span tables from kit manufacturers) tell you what size posts and beams you need for your tributary area, wind exposure, and snow load. For a light, open cover in a mild climate, 4x4 posts and 4x8 beams spanning 10 to 12 feet are commonly used. In areas with significant snow loads or high wind, 6x6 posts and deeper beams may be required, or an engineered design. Getting this wrong isn't just a code issue, undersized framing under snow load is a safety problem.
Cost-wise, a basic DIY open-beam cover (materials only, no electrical) can run $2,000 to $5,000 depending on size and materials. A professionally installed solid-roof patio cover with electrical and permit fees commonly ranges from $8,000 to $25,000 or more for a mid-size project, with significant regional variation. Height affects cost at the margins: taller posts and the extra material for a higher cover add modestly to material costs, but the bigger variable is roof complexity, material choice, and whether engineering is required.
Putting it all together before you build
The most practical way to approach cover height is to start with your door and window constraints, confirm the egress clearances, layer in your pitch requirements to check the outer eave height, and then test your fan and lighting plan against the resulting ceiling height. Most residential attached covers land between 8 and 10 feet because that range satisfies all of those constraints simultaneously without requiring special engineering or deviating from standard framing. Going above 10 feet is absolutely possible and sometimes the right design decision, but confirm with your local building department whether the 12-foot ceiling common to IRC Appendix H jurisdictions applies in your area. Going below 8 feet should be a deliberate choice with specific reasoning, not a default, the comfort, fan clearance, and egress headroom trade-offs are real.
FAQ
How high should a patio cover be — quick answer?
Typical recommendation: a minimum clear ceiling height of about 7 feet (84 in / 2134 mm) for pedestrian clearance, with 8 feet (96 in / 2438 mm) commonly used for comfort and to permit ceiling fans/lighting. Many designers set attached covers between 8–12 feet depending on style and roofline. These ranges are typical recommendations — always verify local codes, manufacturer installation instructions, and door/egress requirements.
What are the minimum code and safety height considerations?
Follow local code: IRC/IBC conventions require clear headroom for egress (commonly 80 in/6 ft‑8 in or 7 ft‑6 in depending on context). Appendix H and local amendments often treat patio covers as unenclosed structures; a 7‑ft minimum ceiling/clearance is widely used for exterior covered areas. Also meet manufacturer instructions for lights/fans (many fans require minimum 7 ft blade‑to‑floor clearance; some recommend 8 ft). Always check local building and zoning offices and the product manuals for final minimums.
How does door clearance affect patio cover height?
Where a patio cover attaches over an exterior door, provide at least the same clear headroom as the door’s required egress height—most exterior doors are 80 in (6 ft‑8 in) clear opening. For comfortable operation and to allow for transoms or sidelight windows, designers typically place the underside of the cover or soffit at 8 ft or higher. Verify local egress and attachment rules.
What height do I need for ceiling fans and lighting?
Manufacturer instructions typically require the lowest rotating part of a ceiling fan to be at least 7 ft above the finished floor; many recommend 8 ft for optimal airflow. Damp‑ or wet‑rated fixtures must also be installed per their instructions. To accommodate both standard fixtures and comfortable clearance, plan for an underside height of 8 ft or more under the fan location.
How should patio cover height relate to the house roofline and attachment?
Match or step the cover so that it integrates with the existing roof without creating drainage or flashing conflicts. Common approaches: roof attached at a wall plate under existing eaves (cover ceiling generally below existing eave), or attach to the band joist/ledger and slope away. Keep the cover low enough to preserve sightlines and house proportion but high enough (often 8–12 ft) to avoid interference with windows, gutters, and roof features. Any attachment requires continuous flashing and correct rain‑management detailing to avoid water intrusion.
When should I choose a higher cover vs a lower one?
Choose higher (10–12 ft or more) when you want an airy feel, taller sightlines, better ventilation, reduced heat pooling, or to match high adjacent windows/roof forms. Choose lower (7–8 ft) for intimate spaces, to maintain shade, reduce construction cost, or keep the cover visually subordinate to the house. Higher covers increase material and structural requirements; lower covers can constrain lighting/fans and door clearances—weigh comfort, sunlight, and aesthetics.
Next Article
How Much Pitch Should a Patio Cover Have: Recommended Ranges
How much pitch should a patio cover have, clear pitch ranges, material minimums, calculations, drainage and code tips.