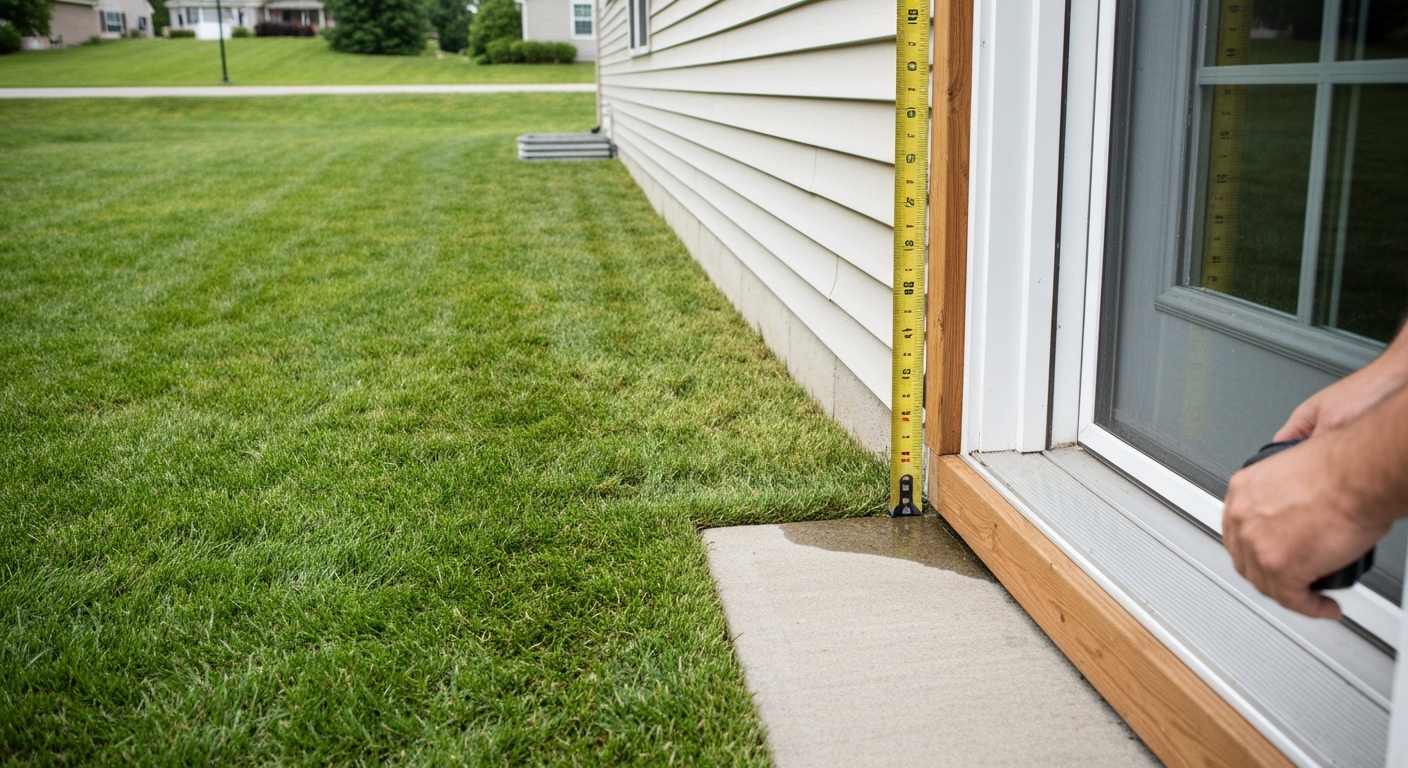
Most patio covers need a minimum pitch of 1:12 (about 1 inch of rise for every 12 inches of run, or roughly 5 degrees) and work best in the 1:12 to 3:12 range for low-profile roofing materials like metal panels and polycarbonate. If you are using asphalt shingles, that minimum jumps to 2:12. For a standard backyard patio cover attached to the house, a pitch somewhere between 1:12 and 2:12 is the most common practical choice, and anything steeper than that is usually driven by climate, material, or aesthetics rather than necessity.
How Much Pitch Should a Patio Cover Have: Recommended Ranges

Miles Hart
22 Jul 2026
At a glance: pitch ranges by material and climate
The table below gives you a fast reference for the most common patio-cover materials. Use it as a starting point, then check the material-specific section further down for the details behind each number. Keep in mind that local code and your manufacturer's installation guide can push these minimums higher.
| Material | Minimum slope | Recommended working range | When to go steeper |
|---|---|---|---|
| Asphalt shingles | 2:12 (17%) | 4:12 and above | Standard in most climates; low-slope installs need special underlayment |
| Standing-seam metal (hydrostatic seam) | 1/4:12 to 1/2:12 | 1:12 to 2:12 | Heavy snow or very high rainfall areas |
| Exposed-fastener corrugated/ribbed metal | 3:12 (25%) | 3:12 to 4:12 | Required unless laps are fully sealed |
| Polycarbonate corrugated panels | ~1:20 (5%) | 1:10 to 1:12 (~10%) | Whenever drainage may be marginal |
| Multiwall polycarbonate (Lexan/Thermoclear) | ~5° (1:12) | ~10° (about 1:6) | Longer spans, heavy rainfall |
| Solid membrane (TPO/EPDM) | 1/4:12 minimum | 1/4:12 to 1/2:12 | Flat or near-flat designs only; needs good drainage detail |
| Pergola / louvered systems | No structural minimum | 3–5 degrees for louvres to shed water | Adjust louvre angle for rain; check maker's guidance |
As a general rule of thumb: raise the pitch if you are in a high-rainfall region, a snow climate, or if your span is longer than about 12 feet. Drop toward the minimum only when you need to preserve headroom at the house-wall attachment point, and always confirm that choice with the material manufacturer.
Pitch vs fall: they are not the same thing
This is one of the most common mix-ups I see on patio projects. 'Pitch' and 'fall' are both ways of describing slope, but they refer to completely different surfaces. Roof pitch is the slope of your patio-cover roof. Patio floor fall (sometimes called drainage slope or grade) is the slope of the concrete slab or paver surface underneath you. They serve different purposes and use different numeric targets.
Roof pitch has to move rainwater off the roofing material fast enough that it never sits long enough to work through seams or fastener holes. Patio floor fall moves surface water away from the house foundation and toward a drainage edge so you are not standing in a puddle. A patio cover can have a 1:12 roof pitch draining toward the yard edge while the concrete below it falls at 1/4 inch per foot away from the house wall. Both slopes are doing different jobs at the same time.
You will sometimes hear 'fall' used informally to describe roof pitch too, particularly in the UK and Australia. In those contexts, a '1 in 40 fall' on a roof means a very shallow 2.5% slope, which is well below safe minimums for most roofing materials used in the US. If you are reading international installation guides or comparing notes with a contractor from overseas, clarify which surface they are describing.
Converting between inches-per-foot, percent, and degrees
Three different units get thrown around on patio-cover projects, sometimes in the same conversation. Here is how they relate and how to convert quickly.
The units explained
- Inches per foot (X: 12): the most common US framing convention. A 2:12 pitch means 2 inches of vertical rise for every 12 inches of horizontal run. This is what US codes and most manufacturer specs use.
- Percent slope: rise divided by run, multiplied by 100. A 2:12 pitch = (2 ÷ 12) × 100 = 16.7%, usually rounded to 17%.
- Degrees: the angle of the roof surface from horizontal. Degrees = arctan(rise ÷ run). A 2:12 pitch = arctan(2/12) ≈ 9.5 degrees.
Quick conversion table
| Pitch (X:12) | Percent slope (%) | Degrees (approx.) |
|---|---|---|
| 1/4:12 | 2.1% | 1.2° |
| 1/2:12 | 4.2% | 2.4° |
| 1:12 | 8.3% | 4.8° |
| 2:12 | 16.7% | 9.5° |
| 3:12 | 25% | 14.0° |
| 4:12 | 33.3% | 18.4° |
| 5:12 | 41.7% | 22.6° |
A worked example
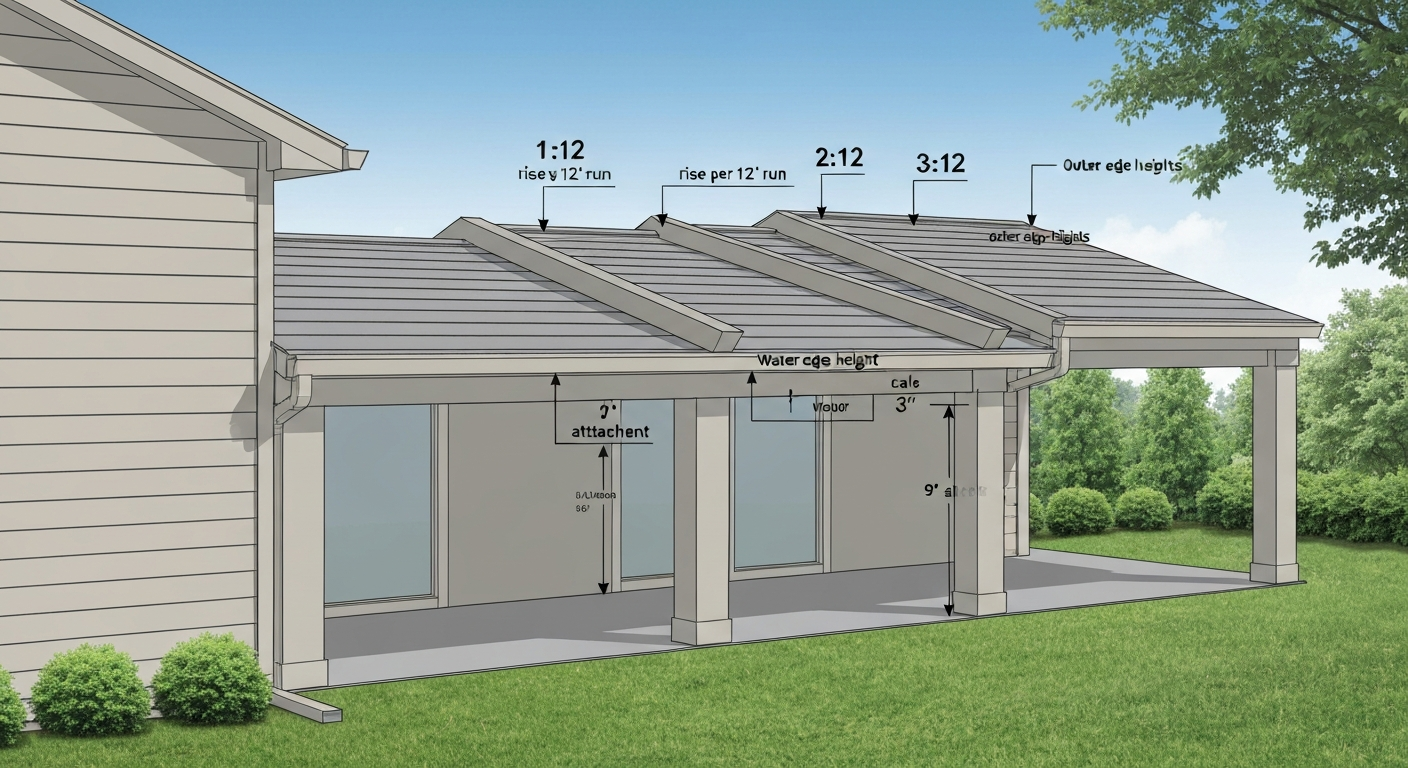
Say you are covering a 12-foot-deep patio at a 2:12 pitch. Your roof rises 2 inches for every 12 inches of run, so over 12 feet (144 inches) of run, total rise = (2 ÷ 12) × 144 = 24 inches, or exactly 2 feet. If the roof attaches to the house at 9 feet above the patio slab, the outer edge of the cover will sit at 9 feet minus 2 feet = 7 feet above grade. That is close to the practical minimum for comfortable clearance under a patio cover. This kind of calculation is worth doing before you commit to a pitch, especially when attachment height is limited.
Recommended pitch by patio-cover material
Asphalt shingles
Both the 2024 International Residential Code (IRC) and major manufacturers like GAF and Owens Corning set the hard floor at 2:12 for asphalt shingles. Between 2:12 and just under 4:12, those manufacturers require special low-slope installation: double deck protection or a specified underlayment with particular lap dimensions, and in some cases a full-field ice-and-water barrier. NRCA guidance states that low‑slope (near‑flat) roofs require enhanced underlayment and detailing, documenting minimum underlayment and flashing best practices for slopes that cannot rely solely on conventional shingles and advising designers to follow manufacturer and code requirements for slopes, underlayment, and edge attachment National Roofing Contractors Association — Resources & Guidance (low‑slope and flashing best practices). Skipping those steps does not just void the warranty; it genuinely increases leak risk. For a patio cover where you want the simplest, most reliable shingle install with a standard single underlayment, 4:12 or steeper is the practical recommendation. If your attachment height allows it, that is where I would start.
Standing-seam and corrugated metal
Standing-seam metal is where you get the most flexibility on pitch. Products with a hydrostatic (fully locked and sealed) standing seam can go as low as 1/4:12 in some manufacturer specs, making them a go-to choice when you absolutely need to preserve headroom. Other standing-seam systems specify 1/2:12, 1:12, or even 2:12 as their minimum, depending on panel profile and seam type. The variance here is significant enough that you should look up the exact installation guide for the specific panel you are buying, not just the product category.
Exposed-fastener corrugated and ribbed metal panels are a different story. Many manufacturers specify a minimum of 3:12 for these, and for good reason: the fastener penetrations in the panel field need water to move off quickly so it does not work around the washers. Some products allow lower slopes if the panel laps are fully sealed with tape or sealant, but again, check the spec sheet. A 3:12 corrugated-metal patio cover is one of the most common DIY-friendly options and holds up well with minimal maintenance.
Polycarbonate panels
Polycarbonate is popular because it lets in diffused natural light while still blocking rain. Palram's Suntuf and SunSky corrugated polycarbonate panels recommend a minimum slope around 5% (just under 1:20), but list 10% (about 1:10) as a preferred minimum for reliable drainage. SABIC's Lexan Thermoclear multiwall polycarbonate panels suggest a minimum slope of about 5 degrees (close to 1:12) for sloped glazing, with roughly 10 degrees being the more comfortable working range. These are not steep pitches, but they matter: multiwall polycarbonate channels fill with debris and moisture if the slope is too flat, leading to algae growth inside the cells and eventual discoloration.
Solid membrane panels (TPO / EPDM)
Fully adhered membrane roofing like TPO or EPDM is the material choice for truly flat or near-flat patio covers. These systems can work at slopes as low as 1/4:12, but that low slope demands very careful drainage design. You need properly sized scuppers or internal drains, and ponding water (defined in most codes as water remaining on a roof 48 hours after rain) is not acceptable long-term even for membrane roofing. Use 1/4:12 only when you have a clear drain path and the structure has been sized to handle the added dead load of any standing water.
Pergola and louvered systems
Open pergolas and louvered patio covers do not have a structural roof pitch in the traditional sense, but they still shed water through the design of their louvre blades. Most adjustable-louvre systems are engineered to drain when blades are set to a specific closed angle (often 3 to 5 degrees), and the manufacturer's installation guide will specify exactly how the frame should be set up for drainage. The frame itself is typically level or nearly so. If you are building a DIY timber pergola with a fixed sloped top, a gentle 1:12 to 2:12 pitch on any solid ridge or purlins helps move rain off and away from the posts.
What manufacturers and local codes actually require
Code and manufacturer requirements work in layers, and you need to satisfy both. The IRC sets minimums, but it also defers to manufacturer instructions for products installed below those minimums using alternative methods. What that means in practice: if your polycarbonate panel manufacturer says 5% is the minimum, installing at 4% does not just risk leaks, it potentially voids your product warranty and could fail a building inspection if an inspector asks for the installation datasheet.
When you read manufacturer specs, look for two things: the absolute minimum slope listed (below which the product should not be installed at all), and any conditional minimum that applies only with added detailing like extra lap sealing, specific underlayment, or sealed fasteners. Conditional minimums carry more installation burden and more risk if any step is missed. If you are doing this yourself, building to the unconditional minimum or above it is the lower-risk path.
Local building departments adopt specific editions of the IRC and sometimes add amendments. Before you design your patio cover, call your local building department or check their website for the adopted code edition and any local amendments related to roof slope. In some snow-country jurisdictions, local amendments require minimum roof slopes above what the IRC base text requires. Getting a permit also means an inspector will check that your installed slope actually matches the approved drawings, so design to what you will build.
Patio floor fall: concrete and pavers
The concrete slab or paver surface under your patio cover needs its own drainage slope, completely separate from whatever the roof above it is doing. ACI 302.1R guidance and standard industry practice recommend a minimum of 1/8 inch per foot (about 1%) for exterior concrete, with 1/4 inch per foot (about 2%) as the more reliable standard specification. For more on recommended slab slopes and whether 1/8" or 1/4" per foot is right for your project, see what fall should a patio have. Most contractors I have seen work with target the 1/4-inch-per-foot figure because a slab that meets only the 1/8-inch minimum can look level to the eye and pool water if there is any slight concrete settlement over time.
Pavers behave similarly but offer one practical advantage: if the base settles and low spots develop, individual pavers can be reset to correct the drainage slope. Poured concrete cannot be corrected without grinding or overlayment. Either way, slope the surface away from the house. A 12-foot-wide covered patio at 1/4 inch per foot has a total drop of 3 inches from house wall to outer edge. That is barely noticeable underfoot but very effective at keeping the slab dry.
One important note: the floor fall of your patio slab and the roof pitch of the patio cover above it are independent design decisions. Your roof might pitch toward the yard at 1:12 while the slab below pitches at only 1/4 inch per foot. Or your roof might drain to a gutter at the outer edge, while your slab drains the other way. Neither one determines the other. Design each for its own drainage purpose.
How pitch affects cover height and edge clearances
This is where pitch stops being just a drainage number and starts affecting how comfortable your covered patio actually feels. Most patio covers attach to the house at a ledger board or fascia. The typical attachment height puts the top of the ledger somewhere between 8 and 10 feet above the finished patio slab. Once you add the roof slope over the patio span, the outer edge drops below that attachment height. The deeper your patio and the steeper the pitch, the more that outer edge drops.
Edge height calculation examples
| Patio depth | Pitch | Total drop | Edge height (from 9 ft attachment) |
|---|---|---|---|
| 10 ft | 1:12 | 10 in | 8 ft 2 in |
| 10 ft | 2:12 | 20 in | 7 ft 4 in |
| 10 ft | 3:12 | 30 in | 6 ft 6 in |
| 14 ft | 1:12 | 14 in | 7 ft 10 in |
| 14 ft | 2:12 | 28 in | 6 ft 8 in |
| 14 ft | 3:12 | 42 in | 5 ft 6 in |
A 14-foot-deep patio cover at 3:12 with a 9-foot attachment height gives you an outer edge of only 5 feet 6 inches, uncomfortably low and potentially a code violation depending on your jurisdiction's required egress height for covered structures. This is why many homeowners on deeper patios choose lower pitches like 1:12 or 2:12, or raise the attachment height at the house wall before committing to pitch. If your ledger attaches at 10 feet instead of 9, you gain a full foot of clearance everywhere.
The minimum comfortable walking clearance under a patio cover is generally considered 7 feet, and many homeowners prefer 8 feet for a spacious feel. For a quick summary of attachment heights and comfortable clearances, see how high should a patio cover be for guidance on minimums and typical 7–8 foot targets. Work backward from those targets using the formula: attachment height minus (pitch rise per foot × patio depth in feet) = edge height. If the result is under 7 feet, either lower the pitch, raise the attachment point, or reduce the patio depth.
Climate and load: when to raise pitch (and when to call an engineer)
Rain intensity
In areas with high rainfall intensity, a steeper pitch moves water off the roof faster, reducing the load on your drainage system and lowering the risk of water backing up under panel laps or seams. NOAA Atlas 14 is the standard reference for design rainfall intensity by location in the US, and it is free to access online. If your area experiences 3 or more inches per hour in a 10-year storm event, that is a signal to be conservative with pitch: go toward the higher end of your material's recommended range and size your gutters or scuppers for that design intensity using IPC gutter and downspout tables.
Snow loads
Snow is a structural issue as much as a drainage issue. ASCE 7 provides the methodology for converting ground snow loads to roof design loads, including a slope factor (Cs) that gives credit for steeper roofs shedding snow. In theory, a steeper roof sheds snow faster and carries a lower design load. In practice, some jurisdictions set minimum roof snow loads or prohibit applying the slope reduction factor in configurations where drifting or trapped snow is likely. More importantly, ASCE 7's slope factor does not reduce the need to design the structure for the appropriate snow load: a 1:12 patio cover in a 50 psf ground-snow-load zone still needs to be engineered for the actual loading. If you are in a meaningful snow climate, get an engineer involved.
Wind uplift
Wind uplift is most critical at the perimeter and corners of a patio cover, and it is a function of your site's design wind speed (from ASCE 7 wind maps) and the exposure category of your location. Low-slope patio covers are particularly vulnerable to uplift because the pressure differential above and below the roof is more favorable to lift than on a steeply pitched surface. NRCA guidance calls for enhanced fastening patterns and edge-metal detailing (ANSI/SPRI ES-1 protocols) for low-slope installations in higher wind zones. If you are in a hurricane-prone region or a high-wind exposure (open terrain, coastal), your fastener pattern and edge attachment need to be engineered, not just estimated.
When to bring in an engineer vs doing it yourself
A straightforward patio cover in a mild climate using a standard material at a well-documented slope is a reasonable DIY project in many jurisdictions, particularly if a permit is obtained and an inspector reviews the work. You should bring in a structural engineer or experienced contractor when any of the following apply: you are in a snow-load zone above about 25 psf ground snow load; your site is in a high-wind exposure; the patio cover exceeds about 200 square feet; you are attaching to an older home where the existing framing is unknown; or you are using a near-minimum slope with a material that has conditional manufacturer requirements.
Drainage design, gutters, and flashing
Slope creates the drainage potential; gutters and scuppers actually capture and redirect the water. For most house-attached patio covers, a gutter at the outer low edge is the cleanest solution. To size it correctly, calculate your roof catchment area in square feet, find your design rainfall intensity from NOAA Atlas 14 for your location, convert to gallons per minute using the IPC's conversion approach, and then consult the IPC gutter-sizing tables (Table 1106. FHWA summarizes NOAA Atlas 14 as the authoritative source for intensity–duration–frequency (IDF) precipitation data and recommends using NOAA Atlas 14 values for design rainfall intensities FHWA summary referencing NOAA Atlas 14 (IDF data) — use NOAA Atlas 14 for rainfall intensities. 6 in the 2021 edition) to select the right gutter profile and downspout count. Undersizing gutters on a lower-pitched roof is a real problem because the water volume hits the gutter all at once rather than being spread out over time by a steep slope.
Flashing at the house-wall attachment is the other critical detail. Where a patio-cover ledger or roof panel meets the house wall, water must not be able to travel behind the siding or into the rim joist. Step flashing, kick-out flashing at the ends, and proper integration with the existing wall weather-resistant barrier are all necessary. A patio cover with a well-designed pitch but poor flashing at the house wall will still cause rot and leaks within a few years.
Permit and manufacturer checklist before you build
Before finalizing your pitch and starting any work, run through these steps in order.
- Pull the permit: contact your local building department to confirm whether a patio cover requires a permit (most jurisdictions require one for attached structures), what drawings are needed, and which code edition applies.
- Get the manufacturer installation guide for your exact roofing product, not just the product category. Confirm the minimum slope, any conditional slope requirements, underlayment specifications, and fastener details.
- Check warranty conditions: verify that your intended installation meets the slope and underlayment requirements for the product warranty to be valid.
- Calculate your edge height using the formula above and confirm you will maintain at least 7 feet of clearance (8 feet preferred) at the outer edge.
- Check your local adopted wind speed and snow load maps if applicable; determine if engineering is required.
- Size gutters and downspouts using your catchment area and NOAA Atlas 14 rainfall intensity before ordering materials.
- Confirm flashing details at the house-wall attachment before framing begins.
Putting it all together: a realistic design scenario
Here is how these decisions play out on a typical project. Suppose you have a 12-foot by 16-foot covered patio attached to the back of the house. You want to use corrugated metal panels for a clean, low-maintenance look. The attachment ledger will sit at 9 feet 6 inches above the finished slab. Your local climate is moderate rain with no significant snow load.
Choosing 2:12 pitch: total drop over 12 feet = 24 inches. Outer edge height = 9 feet 6 inches minus 24 inches = 7 feet 6 inches. That is comfortable clearance. Corrugated exposed-fastener metal at 2:12 is below the typical 3:12 minimum for that panel type unless laps are sealed, so either bump up to 3:12 or use a sealed-lap installation method per the panel spec. At 3:12 the outer edge drops to 9 feet 6 inches minus 36 inches = 6 feet 6 inches. That is getting low for a 12-foot span. In that case, raising the attachment point to 10 feet 6 inches solves the problem, giving you 7 feet 6 inches clearance at the outer edge even at 3:12.
Alternatively, switching to a standing-seam metal panel that accepts 1:12 minimum keeps the outer edge at 8 feet 6 inches with the original 9-foot-6-inch attachment height. That is a genuinely comfortable covered patio, and it illustrates why material choice and pitch are design decisions you need to make together rather than separately.
FAQ
How much pitch should a patio cover have?
Recommended pitch depends on cover material and climate. Typical ranges: solid roof panels or shingles: 2:12–6:12 (minimum 2:12 for asphalt shingles, see manufacturer/IRC special low‑slope rules between 2:12 and <4:12); standing‑seam metal: often 1/4:12–2:12 depending on panel (check panel spec); exposed‑fastener corrugated metal: commonly ≥3:12 unless sealed laps; polycarbonate corrugated/multiwall: generally 5% (≈1:20) preferred, commonly 1:12–1:10 (≈8.3%–10%) for good drainage; pergola/louvered systems: near flat to 1:12 for louver drainage, louvers may require built‑in channels. Always follow the product manufacturer’s minimum slope and local building code; increase slope in heavy‑rain or snowy climates.
What’s the difference between roof pitch and fall (floor slope)?
Roof pitch refers to vertical rise per horizontal run (inches per foot, percent or degrees) for the cover that sheds water. Fall (floor slope) is the surface slope of the patio floor (concrete, pavers) for drainage. Typical floor fall: 1/8 in/ft (≈1%) minimum, 1/4 in/ft (≈2%) standard to avoid ponding. Roof pitch values are larger because they must shed water quickly and meet roofing product minima.
How do you read and convert pitch units? (inches per foot, percent, degrees)
Conversions: inches per foot (rise/run) to percent = (rise/run in inches ÷ 12) × 100. Example: 2:12 = (2/12)×100 = 16.67%. Inches per foot to degrees: degrees = arctan(rise/run) where run = 12. Example: 2:12 → arctan(2/12) ≈ 9.46°. Percent to ratio: 10% ≈ 0.10×12 = 1.2:12. Quick reference: 1:12≈4.76%, 2:12≈9.5% (16.7%), 3:12≈14.0% (≈14.0% is rounded), 4:12≈18.4%.
What are clear minimum slope guidelines by material?
Common minimums (verify manufacturer & local code): - Asphalt shingles: 2:12 minimum; 2:12–<4:12 require special underlayment/installation per manufacturer/IRC. - Standing‑seam metal: manufacturer dependent—some panels accept 1/4:12 to 1:12, others require 2:12+. - Exposed‑fastener metal corrugate: commonly ≥3:12 unless seams sealed. - Polycarbonate multiwall/corrugated: typically recommend ≥5% (≈1:20) and many profiles prefer ~1:12–1:10 for reliable drainage. - Pergola/louvered: manufacturer guidance varies; louvers often built to shed at small angles but require channels/gutters. These are starting points; follow manufacturer specs and local code.
How does climate (rain, wind, snow) change slope requirements?
Rain: Higher intensity rainfall requires reliable rapid drainage—steeper slope helps move water to gutters/scuppers and reduces leakage risk for glazing. Use local IDF (NOAA Atlas 14) when sizing gutters. Wind: Higher wind speeds increase uplift risk—attachment details and edge reinforcement matter more than slope, but low slopes increase exposure to ponding and wind‑driven rain intrusion; follow wind/attachment guidance. Snow: Snow load rules (ASCE 7) may limit slope reductions; in heavy snow areas design for ground snow loads and consider slopes that reduce accumulation (steeper roofs shed snow better), but structural sizing must follow ASCE/AHJ rules regardless of slope.
How do I size the edge height change when I set a given pitch over my patio span?
Calculate rise = pitch × run. Example: cover span from house to outer beam = 12 ft. For a 2:12 pitch, rise = (2 in/ft)×12 ft = 24 in. If house attachment point is fixed at 9 ft, outer beam height = 9 ft − 24 in = 7 ft. For 1:12 over 12 ft, rise = 12 in → outer beam = 8 ft. Always leave required clearance (commonly 7 ft min at lowest point unless code/AHJ requires higher). Account for drainage gutters/overhangs when determining final beam height.
Next Article
Grass Is Higher Than Patio: Causes, Fixes & Deck vs Patio
Grass higher than patio? Causes, slope checks, repair options, lower lawn, raise patio, or build a deck, with costs & DIY