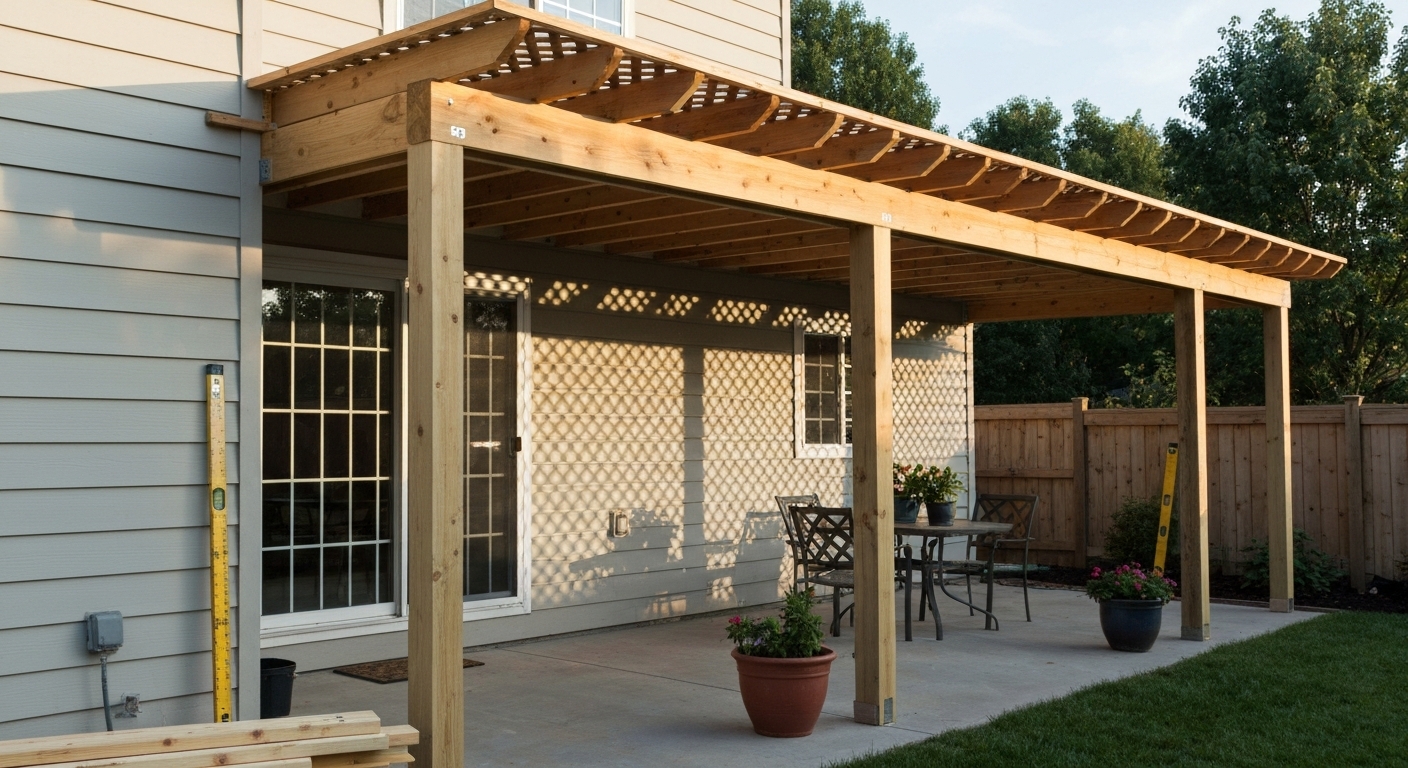
Yes, a typical homeowner can build a lattice patio cover themselves, and thousands do it every year without a contractor. The realistic caveat is this: if your cover attaches to the house, exceeds roughly 200 square feet, sits in a high-wind or heavy-snow region, or requires a building permit with plan submittal, you'll need to either understand basic structural principles or hire a professional engineer to review your design. A freestanding lattice cover under 120 to 300 square feet (the permit-exempt threshold in many jurisdictions) over a simple concrete patio is genuinely weekend-project territory for a handy homeowner with basic carpentry skills. Attached covers that bolt to the house ledger board are a step up in complexity and carry real safety consequences if the connection fails.
Lattice Patio Covers Do Yourself: Plan, Build, Costs & Pros

Lattice covers vs. other patio cover types: honest pros and cons
A lattice patio cover is an open-grid overhead structure, most commonly built from wood, vinyl, or aluminum. It filters sun rather than blocking it, which means dappled shade instead of deep shade, and zero rain protection. That's the honest starting point for any comparison. If you primarily want relief from direct afternoon sun and you enjoy an airy, garden feel overhead, lattice is hard to beat for cost and DIY ease. If you want to use the space in the rain or need full shade in a scorching climate, you're looking at a solid or translucent roof instead. For homeowners weighing sunlight control against rain protection, see our comparison of retractable awning vs patio cover to help choose between a removable shade option and a fixed roof.
Lattice covers carry lighter structural loads than solid roofs because they don't accumulate significant dead load or trap wind the same way. San Diego's patio cover prescriptive tables, for example, assume 10 psf live load and 7 psf dead load for solid-roof calculations. An open lattice cover with no roofing material sits well below those numbers, which means smaller footings, lighter beams, and an easier build overall. That load advantage is a real practical benefit when you're sizing posts and beams by hand.
- Lattice pros: lower cost, lighter structure, excellent airflow, suits gardens and pergola aesthetics, easiest DIY build
- Lattice cons: no rain protection, partial shade only, wood versions require regular maintenance, not ideal for extreme heat climates
- Solid cover pros: full rain and sun protection, extends usable season, can add insulated panels for year-round use
- Solid cover cons: heavier loads requiring larger footings and beams, more complex permits, higher cost
- Translucent cover pros (acrylic or polycarbonate): lets in diffused natural light while blocking rain, modern appearance
- Translucent cover cons: higher material cost, thermal expansion must be accounted for, can discolor or yellow over time depending on panel grade
- Retractable awning pros: on-demand shade, folds away when not needed, no footings or posts required in many configurations
- Retractable awning cons: highest per-square-foot cost, mechanical parts require maintenance, limited wind resistance
Attached vs. detached: which configuration is right for your site
This choice affects your permit requirements, your structural complexity, and your long-term maintenance. An attached lattice cover connects directly to the house via a ledger board bolted to the band or rim joist. A detached cover (sometimes called a freestanding pergola) stands on its own posts with no connection to the house. Both are viable, but they have meaningfully different requirements. See our guide on attached vs detached patio cover for a detailed comparison of implications for permits, structural complexity, and maintenance.
Attached covers
Attaching a cover to the house gives you a clean, integrated look and typically saves one row of posts. The trade-off is that the ledger connection becomes a critical structural element. After several ledger-related failures in the field, the IRC added prescriptive fastener spacing requirements starting with the 2009 edition, and connector manufacturers like Simpson Strong-Tie publish tested fastener schedules for lag bolts, SDS structural screws, and other approved fasteners. Getting this connection wrong can result in the cover pulling away from the house, especially under wind uplift. The City of Carlsbad, for example, requires a building permit for all attached patio covers without exception. Many other jurisdictions treat attached structures the same way. If you're going attached, pull the permit and follow the fastener schedule from your local handout or an IRC-compliant table.
You also need to think about flashing at the ledger. Water infiltration at the house-to-cover junction is one of the most common and expensive problems homeowners face years after an attached cover is built. Use continuous metal flashing that directs water away from the wall assembly before it reaches the ledger.
Detached covers
Freestanding covers are structurally independent, which keeps the house envelope out of the equation and often keeps you below permit thresholds. San Diego allows detached patio covers up to 300 square feet to be permit-exempt under Information Bulletin 206 (March 2026), provided the structure doesn't encroach on setbacks or fall in a coastal, historic, or other sensitive zone. Carlsbad's threshold is more conservative at 120 square feet for detached structures. Always confirm the exact number with your local building department because a 300 sq ft cover in one city is a permit-required project a few miles away. Setback requirements are particularly important: a detached structure placed too close to a property line will require a variance or permit regardless of size.
The detached format does require more posts and footings, which adds material cost and labor. For a 12 x 16 foot freestanding lattice cover, you're typically looking at six posts minimum, each needing its own footing or post base anchored to an existing slab.
Material options: wood, vinyl, metal, and more
The material you choose for your lattice cover affects cost, maintenance, lifespan, and how the finished structure looks alongside your house. Here's how the main options compare in practice.
Wood lattice
Pressure-treated lumber (PT) is the default for structural members: posts, beams, and rafters. For the lattice infill panels themselves, cedar and redwood are common choices because they're naturally rot-resistant and take stain or paint well. Douglas-fir-Larch No. 2 is the species-grade combination used in most prescriptive span tables, including San Diego's IB 206, which specifies design values of Fb = 900 psi, Fv = 180 psi, and E = 1,600,000 psi. PT pine is cheaper and structurally sound but needs sealing if you want it to look finished. Expect to repaint or restain wood lattice every 3 to 5 years in most climates.
Vinyl lattice
Vinyl lattice panels and post wraps are widely available at home centers and require almost no maintenance beyond occasional washing. The downside is that vinyl is less rigid than wood, so large panels need a wood subframe to prevent flex and sagging. In very hot climates, vinyl can warp or expand noticeably, which makes precise fit and gap allowances important. Vinyl is also harder to cut cleanly with standard carpentry tools without splintering; a fine-tooth blade helps. Lifespan with minimal maintenance is typically 20 to 25 years before UV degradation becomes visible.
Aluminum and metal
Aluminum lattice and pergola kits are sold as complete systems with post brackets, beam channels, and lattice infill. They're rot-proof, lightweight, and low-maintenance, but the upfront cost is higher than wood and the modular sizes may not fit your exact patio dimensions without awkward filler pieces. Powder-coated aluminum holds up well in coastal environments where salt air would accelerate decay in untreated wood.
Solid and translucent roofing: when lattice isn't enough
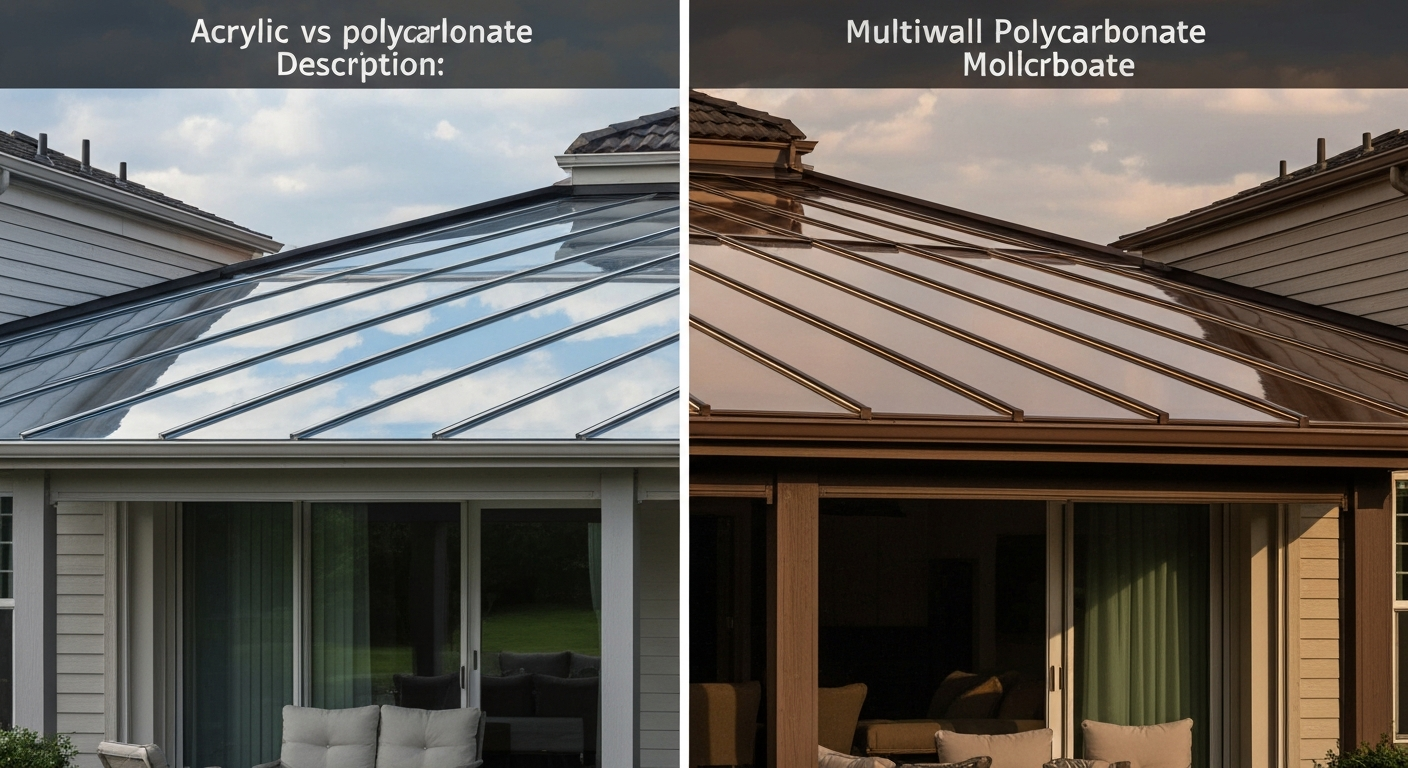
If you've been comparing lattice vs. solid covers, the core difference comes down to what you need the space to do. For a side-by-side comparison of patio cover lattice vs solid options, see a short guide on patio cover lattice vs solid for pros, cons, and when to choose each. Solid covers (corrugated metal, shingle, or wood sheathing with roofing felt) completely block sun and rain but add significant dead load and usually trigger permits regardless of size. Translucent panels, particularly polycarbonate, split the difference: they shed rain, let in diffused light, and weigh very little. Twin-wall polycarbonate is more impact-resistant than acrylic and handles thermal expansion better in most climates, which is why it's the more common choice for DIY patio roof panels. Acrylic is clearer and more optically attractive but cracks more easily under impact and cold temperatures. For a detailed comparison of acrylic vs polycarbonate patio covers, see our guide on acrylic vs polycarbonate patio covers. Both materials require specific fastener and gasketing systems to avoid cracking at the attachment points.
Cover type comparison at a glance
| Cover type | Shade level | Rain protection | Natural light | Typical DIY cost (materials, 12x16 ft) | Structural load | Installation difficulty | Lifespan |
|---|---|---|---|---|---|---|---|
| Wood lattice | Partial (dappled) | None | High (filtered) | $800–$1,800 | Very light | Easy | 10–20 yrs (with maintenance) |
| Vinyl lattice | Partial (dappled) | None | High (filtered) | $1,000–$2,200 | Very light | Easy–Moderate | 20–25 yrs |
| Aluminum lattice kit | Partial (dappled) | None | High (filtered) | $1,500–$3,500 | Very light | Moderate | 25–30+ yrs |
| Solid wood/shingle | Full | Yes | None | $2,500–$5,000+ | Heavy (10–17+ psf) | Difficult | 20–30 yrs |
| Corrugated metal (solid) | Full | Yes | None | $1,800–$3,500 | Moderate–Heavy | Moderate | 25–40 yrs |
| Polycarbonate translucent | Partial–full (diffused) | Yes | Moderate–High (diffused) | $1,500–$3,000 | Light | Moderate | 15–25 yrs |
| Acrylic translucent | Partial–full (diffused) | Yes | High (clear) | $1,800–$3,500 | Light | Moderate | 10–15 yrs |
| Retractable awning | Full (when extended) | Limited | Full (when retracted) | $2,000–$6,000+ | None (wall-mounted) | Moderate | 7–15 yrs |
Cost ranges above reflect typical DIY material costs for a 12 x 16 foot (192 sq ft) cover in 2025-2026, excluding permits, concrete, and tool rental. Regional lumber prices vary significantly; the Pacific Northwest and Southeast tend to run lower than the Southwest and Northeast on dimensional lumber.
Planning checklist before you buy a single board
Skipping the planning stage is the single biggest mistake DIYers make on patio cover projects. Spending a weekend on the items below before you buy materials will save you from costly redesigns or failed inspections.
- Confirm permit requirements: call or visit your local building department before anything else. Ask specifically about attached vs. detached thresholds, setback requirements, and whether your property is in a coastal, flood, or historic overlay zone that changes the rules.
- Measure your site accurately: record the patio dimensions, note any grade changes, and identify underground utilities (call 811 before any digging).
- Choose attached or detached: think about house wall material (stucco, wood siding, brick), existing eave height, and whether you want the cover to be removable in the future.
- Determine orientation: a cover on the south or west face of the house provides afternoon shade relief; a north-facing cover adds relatively little sun protection and may feel dark. Lattice is particularly effective on south/west exposures because it filters without fully blocking.
- Check your roof pitch at the house: an attached cover typically slopes away from the house at 1:12 to 2:12 to shed water. Make sure that slope clears any windows or doors below it.
- Plan drainage: where will water run off the cover? Avoid directing runoff toward the foundation or a neighbor's property.
- Look up your site's design loads: use the ASCE Hazard Tool to find your basic wind speed and ground snow load. In most of the southern US, ground snow load is negligible. In areas above roughly 2,000 feet elevation or in the Mountain West and Northeast, snow loads can be substantial and will affect beam and post sizing.
- Select your material and style: nail down lumber species, lattice type, and finish before sizing members, since load assumptions differ by material.
- Sketch a dimensioned plan: include post locations, beam spans, rafter spans, and footing locations. This becomes your permit drawing if you need one.
- Get at least two material quotes: lumber and hardware prices vary by supplier. Get quotes from a local lumber yard and at least one big-box store.
Structural basics: footings, posts, beams, and spans
You don't need to be an engineer to build a code-compliant lattice cover, but you do need to understand how loads travel through the structure. The lattice panels and rafters put weight on the beams; the beams transfer load to the posts; the posts transfer load to the footings; the footings spread that load to the soil. Every member in that chain needs to be sized for the load it carries.
Footings
Footing requirements depend on your jurisdiction, soil bearing capacity, and frost depth. The IRC's Chapter R403 sets minimum requirements, but local jurisdictions modify them. 2018 International Residential Code, Chapter 4 (Foundations) / R403 (Footings) explains minimum footing requirements and allows jurisdictions to set local frost‑depths 2018 International Residential Code — Chapter 4 (Foundations) / R403 (Footings) explains minimum footing requirements and allows jurisdictions to set local frost‑depths.. Carlsbad's handout B-8, for example, specifies a minimum 12-inch depth into natural grade for solid-roof covers and provides a prescriptive table of minimum square footing sizes keyed to post spacing and rafter span, assuming 1,000 psf soil bearing capacity. For open lattice covers with lighter loads, footings can often be smaller, but confirm with your local handout or building department. Concrete for footings should meet a minimum compressive strength of 2,500 psi (f'c), which is standard bagged or ready-mix concrete. In freeze-thaw climates, footings must extend below the local frost line, not just 12 inches. A footing at 8 inches in Chicago or Minneapolis will heave in winter and destroy your posts. Check your county's frost line depth before you dig.
Posts
For most residential lattice covers, 4x4 posts work for spans up to about 8 feet between posts, and 6x6 posts are appropriate for longer spans or when loads are higher. Posts should be pressure-treated where they're within 6 inches of the ground. Post height matters too: taller posts are more susceptible to lateral (horizontal) racking under wind load, which is why diagonal knee braces or beam-to-post connector hardware is important on taller structures.
Beams and rafters
Beam and rafter sizing is where most homeowners get uncertain. The easiest approach is to look up your jurisdiction's prescriptive span tables. Most city building departments publish these for free. San Diego's Information Bulletin 206 and Carlsbad's B-8 handout both include rafter and beam span tables based on Douglas-fir-Larch No. 2, which is the common framing lumber at most West Coast lumber yards. For other regions, the American Wood Council provides span table tutorials and an online span calculator where you input species, grade, member size, spacing, and load conditions. For a lightweight lattice cover (very low dead load), you can generally use the minimum values in these tables. Don't size down further just to save money: an undersized beam that sags or splits is a safety issue and an inspection failure.
Wind and snow loads
Open lattice structures actually reduce wind load compared to solid roofs because wind passes through the gaps. That said, wind uplift on rafters and beam connections is still a real force, especially in coastal or mountain regions. Jurisdictions referencing ASCE 7 (or adopting it via California's adaptation, for example) require that basic wind speed and ground snow load be considered in structural design. California/Los Angeles County, Chapter 16 (Structural Design) referencing ASCE 7 and snow-load rules requires design snow loads to be determined per ASCE 7 and calls for additional snow-load calculations (exposure, thermal factor, drift) when ground snow loads exceed about 10 psf California/Los Angeles County — Chapter 16 (Structural Design) referencing ASCE 7 and snow-load rules. Use the ASCE Hazard Tool online to look up the specific values for your address, then compare them to the assumptions in any prescriptive table you're using. If your site's wind speed or snow load exceeds the table's assumptions, you can't use the prescriptive table without a professional review. In most of the southern and coastal US, the prescriptive tables work fine for lattice covers. In areas with ground snow loads above 10 psf or wind speeds above 110 mph (3-second gust), get an engineer to review your design.
Anchoring, ledger connections, and safety
This section is where a lot of DIY projects go wrong. Structural connections, electrical proximity, and tool safety are the three areas where mistakes have serious consequences. Take each one seriously.
Ledger board connection to the house
If your cover attaches to the house, the ledger board is the most critical element in the entire structure. Several real-world ledger failures prompted the IRC to add prescriptive fastener spacing tables starting with the 2009 edition. Simpson Strong-Tie publishes tested fastener schedules (including engineering letter L-F-100DCKLIV26 and related technical bulletins) for SDS structural screws, lag bolts, and through-bolts. The core rules: fasteners must be spaced according to the applicable table based on tributary load; never use nails alone as the primary ledger fastener; and avoid cross-grain tension by not placing hanger nails in locations that create tension perpendicular to the wood grain. The ledger must be attached to the house's structural framing (the band or rim joist), not just the sheathing or siding. Remove siding before installing the ledger and flash over it correctly to prevent water infiltration.
Post base anchoring
Posts can be anchored to a new concrete footing or to an existing concrete slab using manufactured post bases. Carlsbad's guidance (and many similar jurisdictions) allows post base anchoring to slabs when the post load does not exceed 750 lbs. For loads above 750 lbs, a separate pad footing or pier is required. This 750 lb threshold matters in practice: a heavily loaded beam or a long span can easily push a single post load above that number, especially once you factor in wind uplift. When in doubt, install a separate footing. Post bases must be installed with the correct fastener pattern per the manufacturer's load tables, not just whatever screws are nearby.
Tool and general site safety
Working at height on ladders while handling long lumber members is genuinely hazardous. Use a helper for any member longer than 8 feet. Set ladders on firm, level ground and secure them. When cutting pressure-treated lumber, wear a dust mask (N95 minimum) because modern PT lumber uses copper azole compounds that produce irritating and potentially harmful sawdust. Avoid burning PT scraps. Before digging any footing holes, call 811 (US) at least two business days in advance to have underground utilities marked. Electrical lines, gas lines, and irrigation pipes all run through typical suburban backyards.
Electrical safety near the cover
Many homeowners want to add lighting or a ceiling fan to their patio cover. Any new electrical work, including a new outdoor circuit or adding outlets and fixtures, typically requires its own electrical permit regardless of whether the cover itself is permit-exempt. Running electrical inside a lattice cover structure means planning conduit routing during the build, not after. If you're not comfortable with residential electrical work, sub out that portion to a licensed electrician while you handle the carpentry.
What the build actually looks like: steps, time, and cost
A basic freestanding wood lattice cover (12 x 16 feet, six posts, two main beams, rafters at 24 inches on center, lattice panels on top) is a realistic two-weekend project for two people with basic carpentry skills. Here's how the work breaks down.
- Weekend 1, Day 1 (4–6 hours): Mark post locations using batter boards and string lines. Confirm square using the 3-4-5 triangle method. Call 811 and dig footing holes to required depth (typically 12 inches minimum into native soil in mild climates, deeper in frost zones). Pour concrete footings or set post base hardware into wet concrete. Let concrete cure 24–48 hours minimum.
- Weekend 1, Day 2 (4–5 hours): Set posts in post bases or embed them in footings. Plumb each post and brace temporarily. Mark and cut posts to uniform height. Install beam hardware at post tops.
- Weekend 2, Day 1 (5–7 hours): Lift and set main beams onto post hardware. Check level. Install rafter hardware (joist hangers or rafter ties) on both beams. Cut and install rafters at 24 inches on center. Install diagonal knee braces at each post-beam connection if required.
- Weekend 2, Day 2 (4–6 hours): Install lattice panels in a 2x2 or 2x4 frame grid across the rafters. Secure with galvanized or stainless fasteners. Install any fascia boards. Apply stain, sealer, or paint as desired.
- After build (1–2 hours): Schedule inspection if permit was pulled. Clean up site, dispose of PT lumber scraps properly.
Itemized materials list (12 x 16 ft freestanding wood lattice cover)
| Material | Quantity (approx.) | Estimated cost (2026) |
|---|---|---|
| 4x4 PT posts, 10 ft | 6 | $90–$140 |
| 2x8 PT beams, 16 ft | 2 | $80–$130 |
| 2x6 PT rafters, 12 ft | 8 | $100–$160 |
| 4x8 cedar lattice panels | 8–10 | $200–$400 |
| 2x4 PT ledger/fascia boards | 4 | $40–$70 |
| Post base hardware (e.g., ABA44 or similar) | 6 sets | $60–$100 |
| Rafter ties / joist hangers | 16–20 | $30–$60 |
| Structural screws / lag bolts (box) | 2–3 boxes | $40–$80 |
| Concrete (60 lb bags or ready-mix) | 6–8 bags or ~0.3 cu yd | $30–$90 |
| Stain, sealer, or paint | 1–2 gallons | $40–$80 |
| Miscellaneous hardware, bits, sandpaper | — | $30–$60 |
| TOTAL (materials only) | — | $740–$1,370 |
Tool rental for a post-hole digger (power auger) adds $60 to $120 for a day. Permits, where required, typically run $100 to $400 for a residential patio cover in most US jurisdictions. Contractor labor to build the same structure would add $1,500 to $3,500 depending on region, putting the total installed cost at roughly $3,000 to $5,500 hired out vs. $800 to $1,800 done yourself.
Maintenance and how long a lattice cover actually lasts
A well-built pressure-treated wood lattice cover with cedar or redwood infill panels, properly sealed and maintained, will realistically last 15 to 25 years before major structural work is needed. The lattice panels themselves are usually the first thing to show wear: wood lattice degrades at the intersections where water sits after rain. Replacing panels is a straightforward repair that costs $100 to $300 per panel in materials. Vinyl lattice lasts longer without intervention but becomes brittle in cold climates and may need panel replacement after 20 years even without visible damage. The structural framing (posts and beams) in PT lumber can last 30 to 40 years if it's properly finished and kept off direct soil contact.
The maintenance schedule for a wood lattice cover looks like this: inspect fasteners and connections every year (especially the post bases and any ledger connections), re-seal or re-stain every 3 to 5 years, check that drainage isn't pooling near post bases, and replace individual lattice panels as needed. Aluminum and vinyl systems cut that annual maintenance to essentially just cleaning.
Common mistakes that cause real problems
- Skipping the permit and then discovering the cover needs to be removed or rebuilt during a home sale inspection
- Setting posts in direct soil contact without pressure treatment or concrete encasement, leading to rot within 5 years
- Installing a ledger into stucco or siding without removing the cladding first, trapping water between the ledger and wall
- Using deck screws (designed for shear) instead of structural lag bolts or SDS screws for the ledger connection
- Undersizing footings based on what 'looks about right' rather than checking the prescriptive table for your span and spacing
- Ignoring frost depth requirements in cold climates, resulting in heaving posts that push the entire structure out of alignment
- Not accounting for water drainage off the cover, sending runoff toward the house foundation
- Buying lattice panels before confirming finished opening dimensions, ending up with awkward seams and gaps
- Installing electrical fixtures without a separate electrical permit
- Forgetting to call 811 before digging footing holes
DIY vs. hire a pro: the honest decision guide
DIY is the right call if your project is a freestanding structure within your jurisdiction's permit-exempt size limit, your site is flat with no unusual soil conditions, you're in a mild-climate zone with low wind and no meaningful snow load, and you have basic carpentry experience (can use a circular saw, drill, and level accurately). Add in moderate complexity and you can still DIY, but budget more time and pull the permit so an inspector catches any structural issues before they become permanent.
Hire a professional (or at minimum get a structural engineer to review your drawings) if your cover attaches to the house in a region with strict ledger requirements, your site has significant grade changes, you're in a high-wind or high-snow-load zone, your cover exceeds 300 square feet, or you're adding electrical, gas, or mechanical work. The cost of a structural engineer's review, typically $200 to $600 for a residential patio cover, is cheap insurance against a failed inspection or, worse, a structural failure.
Final decision checklist
- Decided: attached or detached? (Attached requires more structural rigor and usually a permit; detached may be exempt if small enough)
- Confirmed: local permit threshold and setback requirements with your building department
- Confirmed: frost line depth for your county (critical for footing depth in freeze-thaw climates)
- Looked up: site-specific wind speed and ground snow load using the ASCE Hazard Tool
- Selected: material type (wood, vinyl, aluminum) based on budget, maintenance tolerance, and climate
- Determined: whether lattice (partial shade, no rain protection) is sufficient or whether a solid or translucent panel roof better fits your needs
- Sized: footings, posts, beams, and rafters using your local prescriptive table or the AWC span calculator
- Planned: ledger connection fastener schedule if attaching to the house (use IRC-compliant or manufacturer-tested schedule)
- Checked: post load vs. 750 lb threshold for post base vs. separate footing decision
- Planned: water drainage path off the cover
- Called 811: before any digging
- Considered: whether a retractable awning or solid/translucent cover might serve your actual usage pattern better than lattice
FAQ
Can a typical homeowner safely and legally build a lattice patio cover themselves?
Yes—many homeowners can safely build a lattice patio cover themselves if they have moderate carpentry skills, the right tools, and follow local code/prescriptive guidance. Key limits: comply with local building-department rules (some jurisdictions exempt small detached covers but require permits for attached covers or larger areas), follow footing and anchorage requirements in the adopted code/handouts, and design for local loads (wind, snow, seismic). When in doubt about structural connections, soil bearing, or site-specific loads, consult the local building department or a licensed engineer.
How do I know whether my project needs a permit?
Permit rules are local. Many jurisdictions publish patio-cover handouts with clear thresholds (examples: San Diego: attached/detached under ~300 sq ft may be exempt; Carlsbad: detached <=120 sq ft may not require a permit). Exemptions rarely apply if the cover encroaches setbacks, is in a coastal/historic/sensitive zone, includes electrical work, or exceeds prescriptive sizes. Always call or check your local building department and provide project dimensions, attachment type (attached/detached), and materials to confirm.
What are the major design choices I should evaluate (lattice vs solid, attached vs detached, translucent options)?
Major choices: - Lattice (open slats): lighter, lower material and structural demands, more shade but still airflow—usually treated lumber, cedar, or aluminum lattice. - Solid roof (built roof): full weather protection, heavier framing, requires stronger footings/ledger and possibly permits. - Translucent panels (acrylic vs polycarbonate): provide weather protection with light transmission; polycarbonate is more impact-resistant and UV-treated; acrylic is clearer but more brittle. - Attached covers transfer loads to the house (ledger details critical); detached covers require independent footings/posts. Choose based on desired weather protection, aesthetics, and local climate.
How do lattice and solid/translucent covers compare (pros/cons at a glance)?
Lattice: pros—lighter framing, cheaper, easier DIY, good airflow and filtered light; cons—limited rain protection, shorter perceived lifespan in some woods. Solid roof: pros—full protection, integrates with house roof; cons—heavier, more expensive, may trigger full plan review and stronger foundations. Translucent panels (polycarbonate): pros—light transmission, weatherproof, lighter than full roofing, impact-resistant; cons—requires careful flashing, can yellow over time, higher material cost than simple lattice.
Who should DIY vs hire a pro?
DIY if: you have moderate carpentry experience, can follow prescriptive local tables, are building a relatively small detached or simple attached lattice cover, and can excavate/prepare shallow footings. Hire a pro if: the cover is large, attached to the house with a ledger (risk of improper ledger attachment), local codes require engineered plans, site has poor soils/frost-depth issues, you need electrical work, or you lack tools/experience to install proper anchorages and flashing. When structural calculations or unusual loads are present, hire a licensed engineer or contractor.
What planning checklist should I follow before starting?
Planning checklist: 1) Site: measure area, note setbacks, utilities, slope, drainage. 2) Sizing: projected roof area, post spacing, and clearances. 3) Permits: call local building dept; check prescriptive handouts (e.g., city patio-cover bulletins). 4) Structural/load considerations: check local wind/snow/seismic via ASCE Hazard Tool or code; verify span tables for selected species/grade. 5) Footings: determine frost depth and footing sizes per local table or IRC R403. 6) Ledger/attachment: follow tested fastener spacing (Simpson Strong‑Tie guidance) or avoid ledger by building detached. 7) Utilities/clearances: maintain access to gutters, HVAC, and clearances to doors/windows. 8) Timeline/budget: estimate materials, tools, and permit time. 9) Safety: fall protection, PPE, proper anchorage methods.
Acrylic vs Polycarbonate Patio Covers: Choose by Climate
Acrylic vs polycarbonate patio covers: compare clarity, durability, cost, installation, and best-use recommendations.