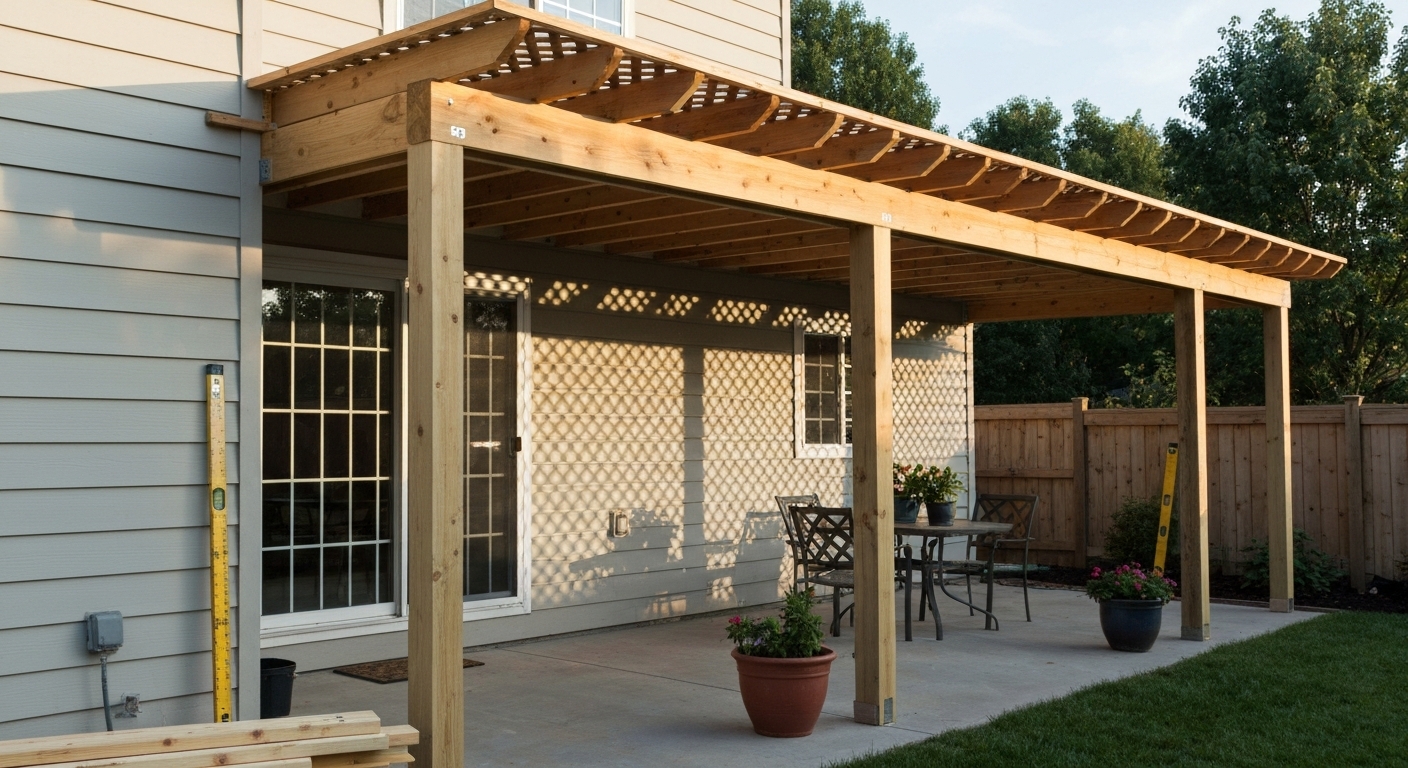
An attached patio cover connects directly to your house and shares a wall, giving you seamless indoor-outdoor flow but requiring careful flashing work to prevent water intrusion. A detached cover stands on its own footings away from the house, trades some convenience for design flexibility, and avoids the ledger-attachment code requirements that can drive up permit complexity. For most homeowners who want a covered extension of their living room or kitchen, attached wins on practicality. If you have a standalone yard feature, a pool area, or want something that won't involve cutting into your roofline, detached makes more sense.
Attached vs Detached Patio Cover: Choosing the Right Option

Miles Hart
23 Jul 2026
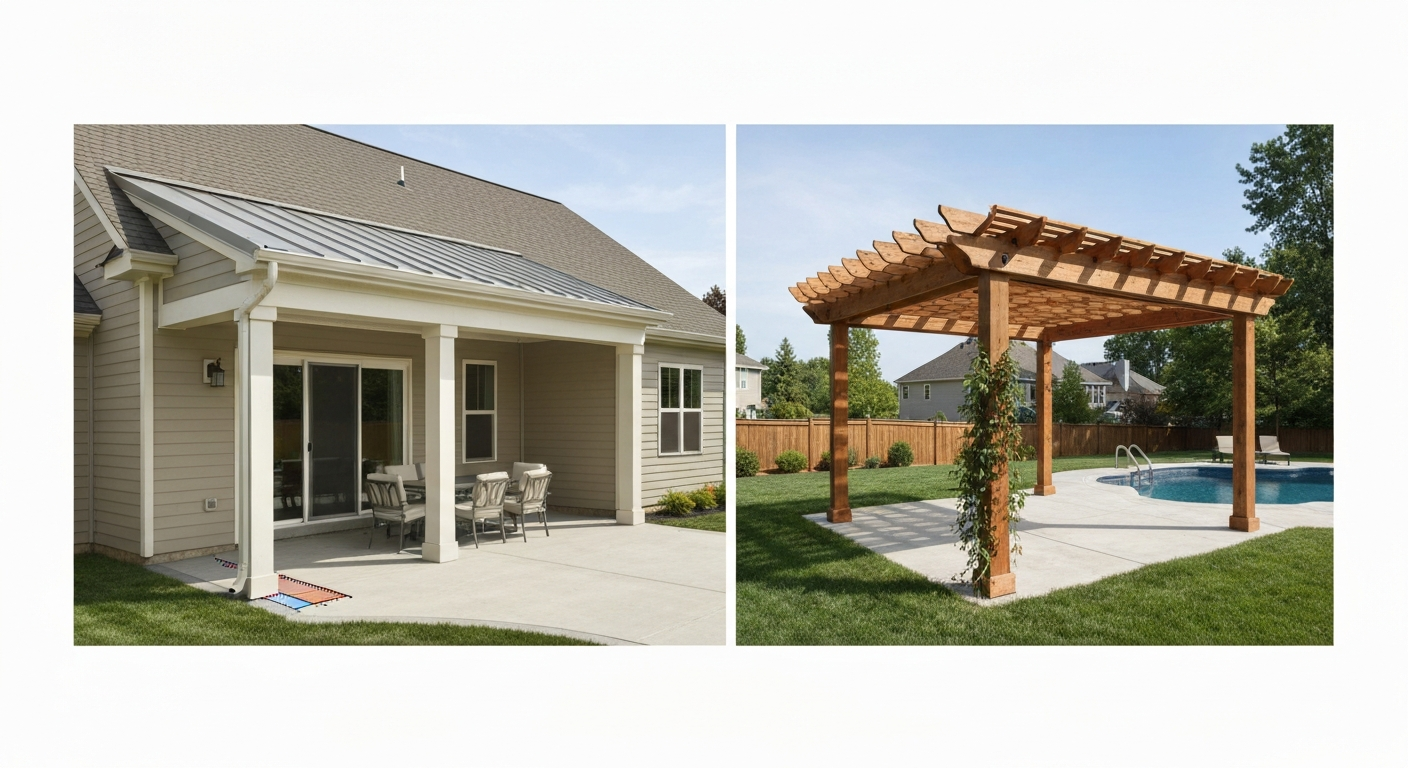
Which setup fits common homeowner goals
Before diving into the structural differences, it helps to match cover type to the most common situations homeowners actually face. Neither option is universally better, they solve different problems.
| Goal | Better Choice | Why |
|---|---|---|
| Extend living space directly off back door or sliding glass door | Attached | Covered transition from interior to exterior without crossing open yard |
| Cover a pool, hot tub, or garden seating area away from the house | Detached | Freestanding placement anywhere on the lot |
| Minimize structural impact on house exterior | Detached | No ledger, no flashing, no wall penetration |
| Keep project cost lower on a tighter budget | Detached (pergola-style) | Fewer code triggers, simpler footings, no ledger work |
| Match roofline aesthetics and look built-in | Attached | Can be designed to match existing eave and roof pitch |
| Maximize shade directly outside the kitchen for outdoor cooking | Attached | Immediate overhead coverage right off the house |
| Add a structure that can be relocated or removed later | Detached | No permanent house tie-in; easier to modify or sell separately |
| Maximize natural light while still having overhead coverage | Either (polycarbonate or lattice roof) | Material choice matters more than attachment type here |
How attached and detached covers actually differ structurally
The core structural difference comes down to how the cover is supported. An attached patio cover uses a ledger board bolted to the house framing as one of its primary bearing points. The ledger carries half the roof load, and the posts on the outer edge carry the other half. That ledger connection is where most of the code complexity lives: the IRC Chapter 7 requires proper flashing and drainage-plane continuity at any wall penetration, and the 2024 IBC Appendix I governs patio cover construction specifically. Done wrong, a ledger connection is one of the most common sources of long-term water damage behind siding.
A detached cover is entirely self-supporting. It has four or more posts set into concrete footings, beams spanning between the posts, and rafters or panels across the top. No part of it touches the house. That means no flashing requirements, no wall penetration, and no load transfer to the house structure. It does mean you need adequately sized footings for the full dead load and any wind or snow loads in your area, since the structure can't lean on the house for lateral stability. ASCE 7-22 is the standard used to determine design wind and snow loads by location, and in high-wind or high-snow zones those footing and post sizes can get substantial.
One practical implication: attached covers in most jurisdictions almost always require a building permit because they connect to the primary structure. Detached covers sometimes fall under a size threshold where permits aren't required, the City of Little Elm, TX, for example, requires permits only for patio structures larger than 200 sq ft, while Phoenix requires permits and plan review for all residential patio covers regardless of size. Your local authority having jurisdiction (AHJ) sets the rules, so check before you build either type.
Attached patio covers: the real pros and cons
What works well
- Seamless access from indoors to outdoors — no uncovered gap to cross in the rain
- Can be designed to match existing roofline pitch, fascia, and soffit details for a built-in look
- Electrical runs to the house panel are shorter, making outlets, fans, and lighting easier and cheaper to add
- Provides direct shade on the house wall, which can reduce cooling loads on nearby interior spaces
- Often increases perceived square footage and usable living area for resale purposes
- Structurally efficient — the house wall acts as one side of the frame, reducing post and footing count
The limitations you need to know
- Ledger flashing is the single biggest risk: any improper installation allows water to track behind the ledger, into the wall cavity, and cause rot or mold over years — Building Science Corporation guidance on drainage-plane continuity is detailed on exactly this failure mode
- Almost always requires a permit and engineering review in most jurisdictions
- Height is constrained by the existing eave height; if your back wall is low, your cover can end up uncomfortably close to head height
- Modifying or removing it later is more disruptive — you'll have fastener holes and flashing to deal with in the house wall
- Adds load to the house structure, which matters in older homes with aging framing
- Fire separation requirements may apply in high-risk zones (check IRC R302 for your jurisdiction)
Common use cases
Attached covers make the most sense when you're extending a back patio directly off the house, covering a sliding glass door or French door exit, or trying to create a room-like outdoor space that reads as part of the home's architecture. A 12x16 attached aluminum patio cover over a concrete slab is a very typical project in the Southwest. An attached insulated roof panel cover in Phoenix, for example, shows up in permit records with installed valuations ranging from roughly $5,400 to $18,000 depending on size and materials.
Detached patio covers: the real pros and cons
What works well
- Total placement flexibility — can go anywhere in the yard regardless of house wall location
- No ledger flashing required, eliminating a major water-intrusion risk
- Often fewer code triggers for smaller structures (under 200 sq ft in many jurisdictions)
- Easier to design for aesthetics independent of the house style — a modern pergola can sit in a yard with a traditional ranch house without looking odd
- Less structural disruption to the house if you modify or remove it later
- Well-suited for poolside cabanas, outdoor kitchens, garden sitting areas, and hot tub enclosures
The limitations
- You need to cross open yard to reach it from the house — relevant in rain-prone climates
- Requires four fully independent post footings sized for the full structural load, which adds concrete cost
- Electrical runs from the house are longer and typically require a conduit trench
- Freestanding structures must handle all lateral loads (wind, seismic) on their own — may need diagonal bracing or larger posts in high-wind zones
- Can look disconnected from the house if not carefully integrated into yard landscaping
- Some HOAs treat detached structures differently than attached ones for approval purposes
Common use cases
Detached covers are the natural choice for poolside shade structures, outdoor kitchen pavilions, garden pergolas, and any situation where the area to be covered is more than about 20 feet from the house. They're also popular when the homeowner specifically wants a pergola or lattice-style structure that feels like a garden feature rather than a room extension. A freestanding 12x12 cedar pergola is among the most common DIY-friendly projects in this category.
Materials: wood, aluminum, vinyl, and roofing panel options
Both attached and detached covers use the same core material families for the structural frame and roof. The main choices are wood, aluminum, and vinyl for the frame, and then solid roofing (shingles, metal panels, insulated panels), polycarbonate or acrylic panels, or open lattice for the roof itself. Each combination has different cost, maintenance, appearance, and performance trade-offs.
Frame materials
| Material | Typical Lifespan | Maintenance | Relative Cost | Best For |
|---|---|---|---|---|
| Pressure-treated pine | 15–25 years with maintenance | Stain or paint every 2–3 years; check for rot at post bases | Low | Budget-conscious builds, DIY projects |
| Cedar or redwood | 20–30+ years | Oil or stain every 2–3 years; naturally rot-resistant | Medium | Natural look, moderate climates |
| Aluminum (powder-coated) | 30–50+ years | Near-zero; wipe down occasionally | Medium-high | Low-maintenance, desert/coastal climates, Alumawood-style covers |
| Vinyl (PVC) | 20–30 years | Wash occasionally; can yellow in UV exposure over time | Medium | Humid climates, paint-free preference |
| Steel (galvanized or powder-coated) | 30–50 years | Check for rust at cut edges; repaint if coating fails | High | Large spans, heavy snow loads, commercial-grade builds |
Roofing panel options: polycarbonate vs acrylic
Polycarbonate and acrylic translucent panels are both popular for patio covers because they let in natural light while providing weather protection. They behave quite differently in practice. Polycarbonate, typified by products like Palram's SUNTUF corrugated sheets or multiwall panels, is highly impact-resistant (tested to ASTM F736 standards) and virtually unbreakable in residential applications. Multiwall polycarbonate panels (6mm twin-wall up to 25mm multiwall) carry R-values from about R-1.6 for 6mm twin-wall up to R-3.7 for thicker 25mm multiwall panels, per Amerilux and Palram manufacturer data. A key installation detail: polycarbonate panels must be fastened through pre-drilled, oversized holes to allow thermal expansion and contraction, Palram's installation guidance is specific about this, and skipping it causes panels to crack or buckle at fasteners.
Acrylic panels are stiffer and optically clearer than polycarbonate but are brittle by comparison. Impact from hail or a falling branch can crack acrylic; polycarbonate in the same scenario just flexes. Acrylic holds its clarity longer without yellowing in some formulations, but quality UV-stabilized polycarbonate grades (like SABIC Lexan UV-coated sheets) now have excellent UV durability. The comparison between acrylic and polycarbonate panels is worth reading in detail if you're planning a translucent roof, the performance differences are significant enough to affect your material choice.
Solid roofs, lattice, and everything in between
The roof style you choose affects shade, ventilation, rain protection, and how the structure feels underfoot. A solid roof, whether insulated aluminum panels (common in the Sunbelt), shingles matching the house, or standing-seam metal, gives full weather protection and the most finished look. Insulated aluminum panel systems like Alumawood or similar products are extremely popular in Arizona, California, and Texas because they're lightweight, durable, and permit-ready as manufactured systems.
Lattice or open-beam pergola styles are at the other end of the spectrum. They filter light and create dappled shade rather than blocking it completely, allow airflow, and are significantly cheaper to build. For a focused comparison of the pros and cons of lattice versus solid patio roofs, see our patio cover lattice vs solid discussion. A basic pressure-treated lattice cover is one of the most accessible DIY projects a homeowner can take on, and the aesthetic suits cottage, craftsman, and traditional styles well. For step-by-step guidance on building one yourself, see lattice patio covers do yourself. The trade-off is obvious: they don't keep you dry. If rain protection matters, a lattice cover needs a solid panel or retractable shade layered underneath.
Between the two extremes are louvered roofs (adjustable aluminum louvers that open and close), polycarbonate or acrylic translucent panels (light with weather protection), and shade sail or retractable awning hybrids. Retractable awnings occupy a related but distinct category from fixed patio covers, they offer flexibility but have lower structural durability and don't handle heavy snow or sustained wind the way a framed cover does. For a focused comparison of flexibility, durability, and cost between the two options, see our guide on retractable awning vs patio cover. If you're weighing a retractable awning against a fixed cover, the functional differences are worth comparing carefully before committing.
What things actually cost: realistic ranges for 2026
Patio cover costs vary enormously by size, material, roof type, and whether you hire a contractor or DIY the build. Angi's July 2026 data puts the national average installed patio cover cost at $8,500, with most homeowners paying between $4,500 and $12,000 for professional installation. Fixr's covered-patio data shows a similar band of $4,000 to $12,000 for standard projects, with outliers running up to $25,000 for large, high-end systems. For freestanding pergolas specifically, HomeAdvisor data puts the average installed cost around $4,251 with a typical range of $2,118 to $6,435, that's for modest 10x10 to 12x12 sized structures.
DIY builds can cut costs significantly if you're comfortable with framing and basic concrete work. A 10x12 pressure-treated wood pergola kit, for example, can be purchased for $1,000 to $3,000 in materials and installed in a weekend by two people with basic tools. At the other end, a professional solid-roof attached cover with insulated aluminum panels, electrical rough-in for ceiling fans and lighting, and a concrete slab can easily run $15,000 to $32,000 for a 20x20 or larger project, consistent with permit valuations seen in contractor records.
Main cost drivers
- Size: cost scales roughly with square footage, though per-square-foot cost often drops on larger projects
- Material: aluminum and engineered systems cost more than pressure-treated wood; vinyl sits in the middle
- Roof type: solid insulated panel roofs cost significantly more than open lattice or polycarbonate panels
- Attachment type: attached covers add ledger flashing labor and sometimes structural engineering fees; detached adds full footing costs
- Electrical: adding outlets, ceiling fan boxes, and lighting adds $500 to $2,500+ depending on panel distance and conduit runs
- Permit and plan review fees: typically $150 to $600 for residential patio covers, more in complex jurisdictions
- Concrete work: post footings for a detached structure at RSMeans-referenced rates of $8 to $12 per sq ft for basic slabs; individual post footings range $100 to $400 each depending on depth and diameter
- Demolition and site prep: removing an old structure, grading, or adding drainage adds cost before the new cover even starts
Sample cost table: installed price ranges by scenario
| Scenario | Type | Size | Material / Roof | DIY Estimate | Pro Install Estimate |
|---|---|---|---|---|---|
| Basic backyard pergola | Detached | 10x10 | Pressure-treated wood / open lattice | $800–$2,500 | $2,500–$5,500 |
| Mid-range cedar pergola | Detached | 12x12 | Cedar / open beam | $2,000–$4,500 | $4,500–$8,600 |
| Large freestanding pergola | Detached | 12x16 | Cedar or aluminum / louvered | $4,000–$7,000 | $7,000–$15,000 |
| Basic attached cover | Attached | 10x12 | Aluminum / solid insulated panel | $1,800–$4,000 (kit) | $5,400–$10,000 |
| Mid-range attached solid cover | Attached | 12x16 | Alumawood or vinyl / solid roof | $3,500–$6,500 | $8,000–$16,000 |
| Large attached solid cover with electrical | Attached | 20x20 | Aluminum / insulated panel + fan/lighting | Not recommended DIY | $14,000–$32,000 |
| Polycarbonate panel cover (attached) | Attached | 12x14 | Aluminum frame / polycarbonate panels | $2,000–$4,500 | $6,000–$11,000 |
| Poolside pavilion | Detached | 14x20 | Cedar or steel / metal roof | $5,000–$10,000 | $12,000–$25,000 |
These ranges reflect 2025-2026 national data and will shift based on your region, local labor rates, and material availability. The Southwest and Southeast tend to come in at or below the national average for aluminum cover systems because of higher installer competition. The Northeast and Pacific Northwest run higher due to labor costs and stricter snow and wind load requirements that can force larger structural members.
Permits, codes, and when you actually need an engineer
The 2024 International Residential Code (IRC), Chapter 7, governs wall covering and flashing requirements for any structure attached to a house. IBC Appendix I specifically addresses patio covers, including fire separation from the house, minimum clear height (7 feet under the IRC), and structural requirements. Most jurisdictions have adopted one or both of these standards, but local amendments matter, always verify with your local building department before assuming what's required.
When do you need a structural engineer? Generally: if you're in a high-wind zone (Hurricane zones, tornado corridors), a high-snow-load area (generally above 20 psf ground snow load per ASCE 7-22 maps), building a span larger than about 16 feet without intermediate support, attaching to a house with unconventional framing, or if your building department specifically requires engineer-stamped drawings for the permit. ASCE 7-22 hazard maps are publicly available and let you look up your location's design wind speed and ground snow load before you talk to a contractor, knowing these numbers helps you understand whether the project needs engineering before you get a bid.
Phoenix requires a permit and plan review for all residential patio covers. See the City of Phoenix guidance 'blank" rel="noopener noreferrer">Residential Patio Covers – City of Phoenix Planning & Development Department' for the city's permit and plan review requirements for residential patio covers. Little Elm, TX sets a 200 sq ft threshold below which a permit may not be required. Other municipalities set thresholds by height, attachment to the house, or proximity to property lines. The variance is wide enough that you cannot rely on a neighbor's project or a contractor's claim that 'permits aren't needed', look it up yourself with your local AHJ.
DIY vs hiring a contractor: a practical guide
A lot of homeowners can realistically DIY a freestanding pergola or basic lattice cover. The skills required, digging and pouring footings, setting posts plumb, cutting and bolting beams, installing rafters, are within reach for someone comfortable with basic carpentry and willing to read the instructions carefully. The biggest DIY risks are setting posts out of square, undersizing footings, and skipping the permit (which can cause problems at resale). Polycarbonate panel installation is also very DIY-friendly as long as you follow the manufacturer's pre-drilling and fastening guidance, Palram's SUNTUF installation documentation is thorough and written for non-professionals.
Attached covers with solid roofs are harder to DIY correctly. The ledger flashing is the critical step, and getting it wrong creates a slow-moving water damage problem that may not appear for two or three years. Building Science Corporation's guidance on integrating a ledger with the drainage plane is the definitive reference here, step flashing, drainage mat continuity, and proper sealant sequencing are not complicated once you understand them, but they require patience and the right materials. If you're not confident with flashing and moisture management, hire a contractor for at least that part of the work.
Electrical work almost always requires a licensed electrician to pull the permit and perform or inspect the rough-in, regardless of whether you DIY the framing. Ceiling fans, outdoor outlets, and lighting on a patio cover are code-regulated and need to be on a GFCI-protected circuit. Budget for this separately from the structure itself.
High-level DIY steps for a freestanding pergola
- Pull the permit if required in your jurisdiction and get your layout approved
- Mark post locations using batter boards and string lines; verify square by checking diagonals
- Dig footing holes to the depth required by code for your frost line (typically 12 to 48 inches depending on region)
- Pour concrete footings and set post anchors or temporary post forms; allow 48 to 72 hours to cure
- Set posts plumb and brace temporarily; cut to consistent height using a laser level
- Install beam spans across the top of posts using structural screws or through-bolts at the post connections
- Install rafters across the beams at the spacing specified in your plan (typically 16 to 24 inches on center)
- Add roofing material — lattice, polycarbonate panels, shingles, or louvered inserts — per manufacturer guidance
- Install any electrical conduit, boxes, and wiring per your electrician's plan
- Schedule inspection before closing up any framing or covering footings
When to hire a contractor instead
- Any attached cover — ledger flashing requires experience to get right
- Projects in high-wind or high-snow zones where structural sizing matters
- Covers larger than about 200 sq ft that require plan-reviewed permits
- Any project involving electrical panel work or circuit additions
- Situations where the patio slab needs to be poured as part of the project
- HOA or neighborhood architectural review situations where drawings and specifications need to look professional
Maintenance expectations and realistic lifespan
Wood frames require the most ongoing maintenance: staining or painting every two to three years, checking post bases annually for moisture damage (especially in wet climates), tightening hardware as wood shrinks and swells seasonally, and eventually replacing boards that split or rot. A cedar pergola properly maintained can last 25 to 30 years; pressure-treated pine typically runs 15 to 25 years depending on ground contact, drainage, and maintenance discipline.
Aluminum covers, powder-coated systems like Alumawood and similar, are the low-maintenance baseline. They don't rot, they don't need painting, and the finish typically holds for 20 to 30 years before needing a touch-up on chips or scratches. Cleaning twice a year with a hose and mild detergent is about all they need. The trade-off is upfront cost and a more industrial look than natural wood.
Polycarbonate panels need periodic cleaning to prevent algae and dirt buildup, which can reduce light transmission over time. UV-stabilized grades (like Palram's UV-coated SUNTUF or SABIC Lexan UV sheets) maintain clarity much longer than cheaper non-stabilized alternatives, this is worth paying the difference for on any project expected to last more than five to seven years. Typical replacement intervals for quality polycarbonate panels are 15 to 20 years in most climates.
Impact on home value
A well-built attached patio cover that looks integrated with the house, matching roof pitch, complementary materials, clean permit history, generally adds to appraised value and improves resale appeal. In warm-climate markets where outdoor living is a major selling point (Phoenix, the Southeast, Southern California), a covered patio is often listed as a feature and adds real dollars to comparable sales. A poorly built attachment with flashing problems or no permit, however, can become a liability at inspection.
Detached pergolas and shade structures typically add curb appeal and lifestyle value, but their direct impact on appraised value is less consistent. An appraiser will include a well-built, permitted pergola as a site improvement, but the dollar contribution is smaller than for an attached structure. The intangible value, a yard that photographs beautifully and shows well, is real even if harder to quantify.
One consistent recommendation: keep your permits. A closed permit for any patio cover makes it a legal improvement in the eyes of a lender and buyer. An unpermitted structure, especially an attached one that's been flashed into the house wall, is a red flag in many real estate markets and can require removal or retroactive permitting at the worst possible time.
Your decision checklist before you start
Use this checklist to narrow down your choice before talking to contractors or ordering materials. It surfaces the questions that most reliably predict which option, attached or detached, solid or open, wood or aluminum, fits your actual situation.
- Where exactly do I need the covered area? Adjacent to the house door = attached. Away from the house = detached.
- What is my primary goal: rain and sun protection (solid roof), shade only (lattice/pergola), or some light transmission (polycarbonate/acrylic panels)?
- What does my local AHJ require for permits? Call or check the city website before designing anything.
- What is my budget — realistically? Get at least two contractor bids and compare them to the DIY material cost before deciding which route to take.
- How much maintenance am I willing to do annually? If the answer is 'none,' lean toward aluminum. If you enjoy maintaining a wood structure, cedar or redwood is worth the cost.
- Does my house wall at the attachment point have clean, accessible framing for a ledger? If the wall has stucco, EIFS, or lap siding over foam, ledger flashing becomes considerably more complex.
- Am I in a high-wind or high-snow zone? Look up your location on the ASCE 7-22 hazard maps before sizing the structure.
- Do I want this to look like part of the house or a separate garden feature? Aesthetic integration drives a lot of the attached vs detached decision.
- Will I be adding electrical? If yes, budget for an electrician separately and plan conduit routing before finalizing the structural design.
- What is my timeline for resale? If selling in under three years, a permitted, attached solid-roof cover in a warm climate likely adds the most visible value. If this is a 10-year home, optimize for how you'll actually use the space.
Next steps: what to do before calling a contractor
Start with your local building department's website. Download the residential patio cover application and handout if one exists, many municipalities publish a one or two page guide that tells you exactly what they require for permit submittal. This saves a wasted trip and helps you give contractors a more accurate scope when getting bids.
Measure your space carefully and sketch a rough layout: post locations, approximate size, where the ledger would attach (if going attached), and where electrical outlets or fans need to go. You don't need an architectural drawing, a dimensioned sketch on graph paper is enough for initial contractor conversations and gives everyone a shared reference.
When you get contractor bids, ask specifically: What is included in the permit fee and who pulls it? What flashing system will you use at the ledger (for attached)? What post footing diameter and depth are you specifying and is that based on a soil assessment or a standard default? Is electrical included or separate? What warranty do you provide on the installation versus the manufacturer warranty on materials? These questions reveal whether a contractor has actually thought through the project or is just giving you a ballpark number.
If you're leaning toward a DIY build, it's worth spending time on material selection before you price anything else. The choice between solid and lattice roofing, and between wood and aluminum framing, affects total cost more than almost any other single decision. From there, exploring the specifics of lattice cover construction, the performance differences between polycarbonate and acrylic panels, and how solid versus open roof styles affect the feel of the space will help you land on a design that actually fits your goals, not just the first thing that comes up in a search.
FAQ
What primary cost data is required to provide realistic cost ranges and a sample cost table?
Collect national and regional installed-cost datasets (Angi, Fixr, HomeAdvisor), manufacturer/kit price lists, contractor bid examples, and permit valuation records (BuildZoom). Record cost ranges by size (10×10, 12×12, 12×16), build type (attached solid, attached lattice, freestanding pergola, louvered system, retractable awning), and line items (materials, labor, concrete footings, electrical, permit fees). Use RSMeans or similar for unit costs (concrete slab, labor hours) to generate consistent line-item estimates and produce a sample cost table showing low/typical/high costs and assumptions (sq ft, region, do-it-yourself vs pro). Cite sources and date ranges for each figure.
Which structural and code references must be consulted to explain permit triggers and engineered-design requirements?
Reference the current International Residential Code (IRC) and International Building Code (IBC) sections relevant to patio covers (e.g., IRC Chapter 7, IBC Appendix I), ASCE 7 wind and snow-load maps/standards (ASCE 7‑22), and local jurisdiction examples (city permit guides such as Phoenix, or local municipal thresholds) to show variation in permit triggers (area thresholds, anchorage requirements, electrical work). Also include typical AHJ documentation and plan-review checklists used by municipalities.
What manufacturer and technical documentation is necessary for materials and performance comparisons?
Use polycarbonate and acrylic manufacturer datasheets and install guides (Palram, Amerilux, SABIC/Lexan) for light transmission, R-values, UV-stabilized grades, thermal expansion and fastening details. For metal and aluminum systems, use major manufacturers' specs for alumawood/aluminum patio covers and louvered-roof systems. For wood/cedar products, use species and treatment specs from timber suppliers. Include warranty terms and installation constraints from manufacturers to assess DIY viability and failure modes.
Which test standards and technical sources are required to support claims about impact resistance, thermal performance and durability?
Cite ASTM standards relevant to polycarbonate and glazing (e.g., ASTM F736), manufacturer R-value/light-transmission tables for multiwall panels, and material weathering/UV-stability lab test reports when available. Use corrosion and finish standards for metals and accepted lumber grading/treatment standards for wood. These support quantified comparisons (impact resistance, U-factor, expected service life).
What line-item cost drivers should the sample cost table include?
Include materials (posts, beams, rafters, roofing panels/shingles, fasteners), site prep and demo, concrete footings or slab, ledger/flashing and house tie-in, labor (framing, roofing, electrical), permit & plan-review fees, insulation/finish, lighting/fan/electrical outlets, and optional items (paint/stain, gutters, integrated drainage, retractable awning mechanisms). Provide unit costs or per-sq-ft ranges for each category and note regional variability.
What research is needed to compare materials and styles (acrylic vs polycarbonate, solid vs lattice, louvered, retractable awnings)?
Gather manufacturer tech sheets for acrylic and polycarbonate (UV, thickness, R-values), independent reviews and longevity data, installer feedback on installation complexity, and comparison matrices from trusted trade sources. For solid vs lattice/pergola, collect lifespan and maintenance expectations for wood, vinyl, and metal; for louvered and retractable systems, gather manufacturer cycle-life ratings, motorization/electrical needs, and cost/benefit comparisons (light, ventilation, weather protection). Include photographic examples and common failure modes.
Next Article
Lattice Patio Covers Do Yourself: Plan, Build, Costs & Pros
DIY lattice patio covers: step-by-step build, costs, materials, permits, pros/cons, who should hire a pro.