Yes, you can put solar panels on a patio roof, but whether it makes sense for your specific structure depends on three things: what the roof is made of, whether the framing can handle the extra weight and wind loads, and whether the orientation and tilt angle will actually produce useful energy. If you're wondering what to call a roof over a patio, it's commonly referred to as a patio cover or patio roof what do you call a roof over a patio. A solid-framed patio cover with 2x6 or larger rafters on proper footings is a realistic candidate. A lightweight pergola, a fabric sail shade, or a corrugated polycarbonate lean-to probably isn't, at least not without significant upgrades.
Can You Put Solar Panels on a Patio Roof? Practical Guide

Miles Hart
13 Aug 2026
Which patio roof types can actually carry solar panels
Not every patio cover is built the same way, and the roof surface matters as much as the framing underneath it. Here's how the most common types stack up.
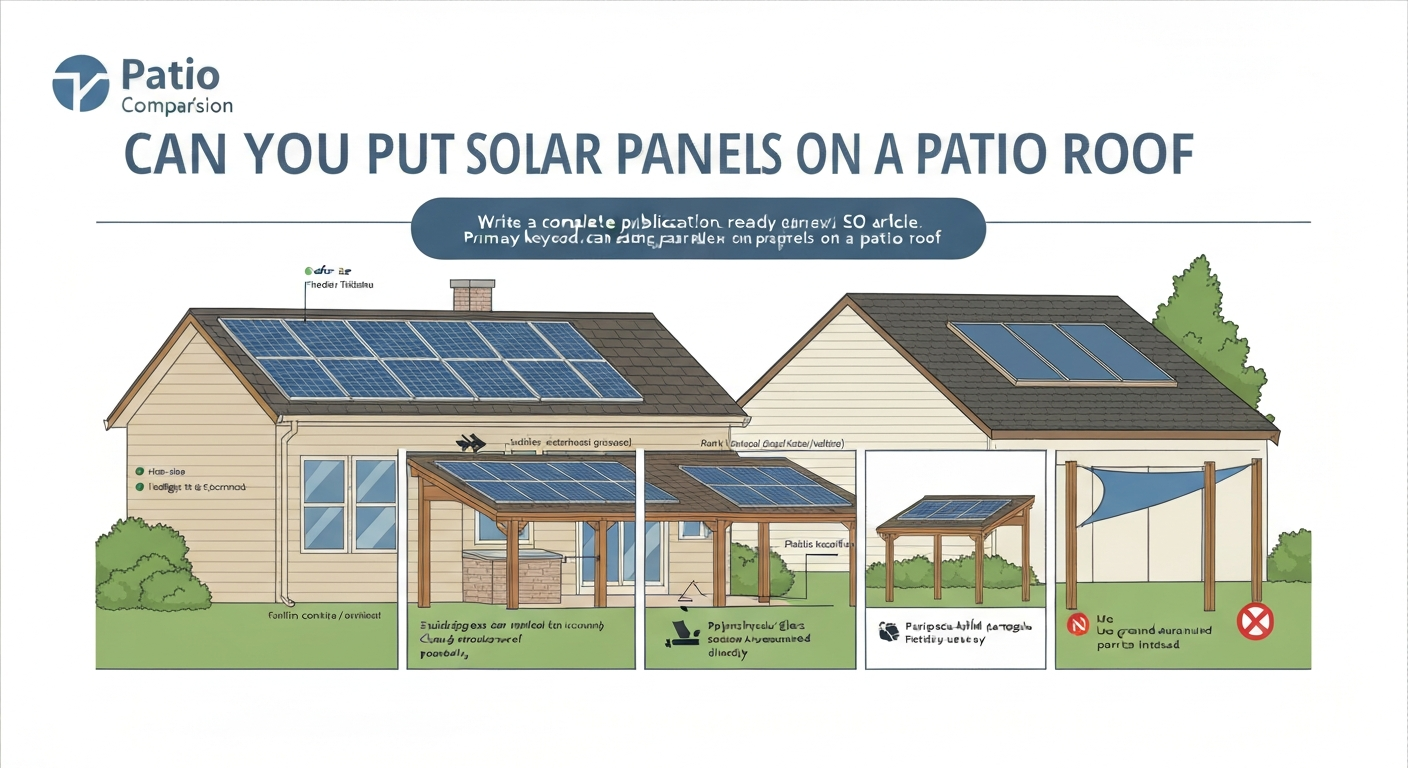
Solid roofs (wood framing with shingles, metal roofing, or concrete)
A solid-framed patio roof with composition shingles, standing-seam metal, or a concrete/tile surface is the most compatible type. It gives you a real decking layer to attach racking to, and the framing is designed to handle some dead load already. If the structure was built to code with a proper ledger attachment to the house and concrete footings, it's starting from a reasonable baseline. That said, many patio covers are built lighter than a main house roof, so you still need to verify rafter size, span, and spacing before adding 2.5 to 4 pounds per square foot of distributed load from an array.
Polycarbonate and glass panel roofs
Polycarbonate or glass-paneled patio roofs present two problems. First, the panels themselves can't support racking lag screws without cracking or losing their weatherproofing. Second, the aluminum or steel framing that holds the glazing is usually engineered only for the glazing load, not for a solar array on top. You can sometimes mount rails to the structural purlins or rafters beneath the glazing, but this requires removing or working around the glazing panels and often voids the glazing system's warranty. Glass canopy roofs face the same challenge with the added risk of point-load cracking.
Pergolas and open-lattice structures
A standard pergola, whether wood or aluminum, is rarely strong enough for a conventional rooftop solar array. The rafters are spaced too far apart, the posts are often set in gravel or minimal concrete, and there's no decking to distribute load. Some homeowners do put purpose-built solar pergola kits on these structures, which are essentially canopy-mounted panels engineered as a complete system, but that's a different product category than standard rooftop PV racking. If you have an existing pergola and want solar, a ballasted canopy kit designed for the structure is a more realistic path than retrofitting standard rail mounts.
Fabric and shade sail covers
Fabric covers and shade sails are not suitable for solar panels, full stop. They have no rigid decking, the attachment points aren't rated for the loads, and the movement inherent in fabric structures would stress any electrical connections or conduit runs. If you have a fabric cover over your patio and want solar, a ground-mounted array nearby or panels on the main house roof are the practical alternatives.
| Patio Roof Type | Solar Ready? | Main Obstacle | Best Path Forward |
|---|---|---|---|
| Solid wood framing + shingles | Yes, with structural check | Light framing on older builds | Verify rafters, use standard rail mounts |
| Solid wood framing + metal roof | Yes, with structural check | Attachment method varies by profile | Seam clamps (standing seam) or rail mounts |
| Polycarbonate/glass panels | Not directly | Glazing can't accept lag screws | Mount to purlins/rafters under glazing if rated |
| Pergola (open lattice) | Only with purpose-built kit | Insufficient decking and rafter load capacity | Solar pergola canopy kit or ground mount |
| Concrete/flat slab patio cover | Yes, with membrane work | Penetration waterproofing is critical | Ballasted or membrane anchor mounts |
| Fabric/shade sail | No | No rigid structure | Ground mount or main house roof |
Structural checks you need to make before anything else
A rooftop solar array typically adds about 2.5 to 4 psf (pounds per square foot) of distributed dead load to the roof structure, once you account for the modules, rails, clamps, wiring, and standoffs. For a 200-square-foot array, that's 500 to 800 pounds spread across the framing. Modern residential PV modules weigh roughly 40 to 50 lb each, so a 6-panel array is already 240 to 300 lb before the racking. Patio covers are frequently built lighter than main house roofs, so these numbers matter.
Start by looking at the framing. For a wood-framed patio roof, you want to know the rafter size (2x6 minimum is a reasonable threshold for most residential arrays), the rafter spacing (16 or 24 inches on center), the span between supports, and whether the structure has a proper ledger connection to the house wall and concrete footings at the outer posts. Older patio covers, especially DIY builds, often lack adequate ledger hardware or have posts sitting on surface-mounted post bases with minimal concrete. These are upgrade items before any solar work begins.
Also look at the roof decking or sheathing. For rail-mounted systems that use lag screws into rafters, you need a solid decking layer (typically 1/2-inch or 7/16-inch OSB or plywood) over the rafters, plus roofing material that allows a waterproof penetration. A metal roof without decking requires a different attachment strategy, usually seam clamps on standing-seam profiles or direct-to-purlin brackets on exposed-fastener metal. If you're unsure about any of this, pulling the permit drawings from your local building department (if the patio cover was permitted) is a good starting point. If there are no drawings, that's a sign the structure may not have been built to code, which is a red flag for adding solar.
- Confirm rafter size, spacing, and span against your planned panel count and array footprint
- Check post footings: concrete depth and diameter matter for combined vertical and lateral loads
- Verify the ledger connection to the house: it should use structural lag screws or through-bolts, not just nails or toenails
- Identify roof decking material and thickness
- Note the roofing surface type: shingles, metal profile, tile, or membrane
- Look for any existing rot, damage, or deflection in rafters or sheathing before adding load
- Check the age of the roofing material: if the shingles are near end of life, replace them before mounting panels
How to think about roof load capacity
Roof loads come in a few categories, and understanding them helps you have a real conversation with an engineer or solar installer rather than just nodding along. Dead load is the permanent weight of the structure itself plus anything permanently attached, including your solar panels. Live load is temporary load: workers walking on the roof during installation, for instance. Wind load is the lateral and uplift force the panels add, which can actually be more demanding than the weight on a patio roof because patio covers often have large open spans and are exposed on multiple sides. Snow load applies if you're in a region where snow accumulates.
ASCE 7 (the national standard for structural loads) provides methods for calculating all of these, and the International Building Code Chapter 16 requires that roof structures account for all of them in combination. What's particularly important for patio solar is wind uplift. PV panels can act like sails, and wind uplift at the edges and corners of an array is significantly higher than at the center. Racking manufacturers like IronRidge publish uplift capacity data for their attachments, and those numbers need to be checked against the wind speed for your location and the roof's attachment points.
If your patio roof is structurally marginal, a structural engineer can tell you what it can actually handle. A straightforward letter or plan review from a licensed structural engineer typically costs $300 to $800, which is a reasonable investment before spending several thousand dollars on panels and racking. Many jurisdictions require an engineer-stamped letter anyway as part of the solar permit submittal.
When you likely need reinforcement
- Rafters are 2x4 on spans greater than 8 feet
- Rafter spacing is wider than 24 inches on center
- Posts are 4x4 on spans greater than 10 feet with no cross-bracing
- Footings are surface-mounted post bases with less than 12 inches of concrete embedment
- The structure is in a high-wind zone (ASCE 7 wind speed above 115 mph)
- You're in a snow-load region with ground snow loads above 25 psf
- The existing roof is already near its calculated load limit
Mounting methods that work on patio roofs
The mounting method you use depends on the roof surface, the framing underneath, and whether the structure can accept penetrations. Here are the main options.
Rail-mounted systems
Standard rail-mounted racking, like IronRidge XR rails with FlashFoot2 or similar attachments, is the most common approach on solid patio roofs with shingle or tile surfaces. Lag screws go through flashing into the rafters below, rails run parallel to the eave, and panel clamps hold modules to the rails. IronRidge's FlashFoot2 attachments are tested to UL rain and wind-driven rain standards, and the racking system publishes structural ratings and uplift capacities for different attachment spacings. This method gives you flexibility in panel layout but requires hitting rafters accurately, which is harder on patio covers with non-standard rafter spacing.
Rail-less and frameless systems
Rail-less systems attach directly to the module frame without intermediate rails, reducing weight slightly and simplifying the layout. They still require lag screws into rafters and flashed attachments, so the structural requirements are similar. They tend to work best when rafter spacing aligns neatly with the module width, which is more predictable on a purpose-built structure than on an older patio cover.
Standing-seam metal roof clamps
If your patio has a standing-seam metal roof, S-5! clamps and similar seam-clamping products attach directly to the raised seams without any roof penetrations at all. This is a significant advantage: no lag screws, no flashing, no penetration leaks. The clamp grips the seam mechanically. This method only works on true standing-seam profiles, not on corrugated or exposed-fastener metal panels.
Ballasted and canopy systems
On flat or near-flat concrete patio roofs with a membrane surface, ballasted racking uses weight (concrete blocks) instead of penetrations to hold the array in place. The tradeoff is that ballast adds significant dead load, which a heavy concrete patio slab can usually handle but a wood-framed flat patio cover often cannot. Manufacturers like Unirac publish ballasted system load ratings, and the design needs to match your roof's load capacity. Alternatively, single-point membrane anchors (like the Carlisle U-Anchor) are welded or adhered to EPDM, TPO, or PVC membranes and provide tested uplift and shear capacities without penetrating the membrane substrate.
Standoffs on metal patio roofs (exposed-fastener profiles)
On corrugated or rib-profile metal patio roofs, direct-to-purlin standoffs that attach at the existing fastener points (replacing a screw with a longer standoff bolt and EPDM-gasketed washer) are a common field approach. The key is torquing to spec and using a compatible sealant so the existing fastener hole stays watertight. This is more field-variable than a certified attachment system, so it's worth reviewing with the racking manufacturer's technical support or a licensed installer.
Orientation, tilt, and what to expect from a patio roof installation
This is where a patio roof solar installation often has a real disadvantage compared to a main house roof. Patio roofs are usually low-slope (2:12 to 4:12 pitch, or flat) and are frequently oriented toward whatever direction the backyard faces, which may not be south. Both of these factors affect energy production.
For most of the continental U.S., south-facing panels at a tilt angle between 15 and 40 degrees produce the most annual energy. A low-slope patio roof facing south might sit at 10 to 15 degrees of tilt, which costs you roughly 5 to 10 percent of potential production compared to an optimal tilt. That's manageable. An east- or west-facing patio roof cuts production more significantly, typically 15 to 25 percent compared to south, depending on latitude. A north-facing patio roof in the northern hemisphere is a poor candidate for fixed-mount solar.
Tilted mounting brackets can improve the angle on a flat or low-slope patio roof, but they add height and wind load. A 10-degree tilt kit is relatively low-profile; going to 20 or 25 degrees of tilt on a flat roof significantly increases the wind load on the structure because the panels present more surface area to the wind. If you go the tilt-kit route on a low-slope or flat patio roof, the structural and wind load analysis becomes more important, not less.
Partial shading is another real concern. A patio cover is often surrounded by the house walls, fences, or trees. Even a small shadow on one corner of an array at certain hours can drag down production of the whole string if you're using a standard string inverter. Microinverters or DC power optimizers (like Enphase IQ or SolarEdge optimizers) mitigate this by allowing each panel to operate independently, which is worth the added cost on a shading-compromised patio installation.
| Orientation | Typical Production vs. Optimal South | Notes |
|---|---|---|
| South-facing, 15–40° tilt | 100% (baseline) | Best case for most U.S. locations |
| South-facing, 5–10° tilt (low slope) | 90–95% | Typical patio roof scenario, acceptable |
| Southeast or Southwest, 15–30° tilt | 85–95% | Moderate loss, often worthwhile |
| East-facing, 15–30° tilt | 75–85% | Morning peak production only |
| West-facing, 15–30° tilt | 75–85% | Afternoon peak production only |
| Flat (0° tilt) | 85–90% | Depends on latitude; soiling/standing water a concern |
| North-facing | 40–60% | Not recommended for fixed-mount arrays in U.S. |
Waterproofing, membranes, and keeping the roof dry
Every roof penetration is a potential leak point, and patio roofs often have less pitch than a main house roof, which means water drains more slowly and sits longer around any imperfect seal. Getting the waterproofing right is non-negotiable.
On shingle roofs, the standard approach is a flashed attachment: a piece of aluminum flashing (like the IronRidge FlashFoot2 or EcoFasten GF-1/ClickFit) slides under the shingle above the attachment point, and a lag screw passes through it into the rafter below, sealed with an EPDM gasket and butyl sealant. The flashing then laps over the shingle below it in the same way shingles lap each other. Properly installed, this is a proven system that roofers and solar installers have used for decades. Improperly installed (wrong sealant, no gasket, shingle not properly lapped), it leaks.
On flat or low-slope membrane roofs (EPDM, TPO, or PVC), you have two choices: penetrating anchors that are heat-welded or adhesive-bonded to the membrane (like the Carlisle U-Anchor, which publishes tested uplift and shear values), or ballasted systems that avoid penetrations entirely. If you're unsure whether your patio needs a membrane before installing solar, read our guide on do i need a membrane under my patio for advice on membrane types and when replacement is recommended. The penetrating anchor approach is more secure structurally but requires someone who knows how to properly weld or bond to the specific membrane type. EPDM, TPO, and PVC each use different compatible adhesives and techniques. Using the wrong product or technique is a warranty-voiding and leak-causing mistake.
If you're planning to put solar on a patio roof that has an existing membrane, it's worth understanding what that membrane is and whether it needs replacement soon. For guidance on whether and how to put a membrane under a patio, see do you put membrane under a patio. Solar panels typically carry 25-year production warranties, and if the membrane under them is 10 years old, you may need to remove the array to replace the membrane in 5 to 10 years, adding significant cost. Replacing the membrane before installing the array, or installing a new membrane as part of the project, avoids that problem.
On corrugated or exposed-fastener metal patio roofs, re-sealing the attachment points with a compatible metal roof sealant (butyl tape or Geocel/Sika-type sealant designed for metal roofing) and using EPDM-gasketed hardware is the standard practice. Check these seals annually during the first few years after installation.
Electrical integration on a patio installation
The electrical side of a patio solar installation follows the same principles as any residential PV system, but the physical routing of wiring and conduit has some patio-specific considerations that affect both aesthetics and code compliance.
Inverter choices
You have three main inverter options: a string inverter, microinverters (one per panel), or a string inverter with DC power optimizers. For a patio installation, microinverters or optimizers are often the smarter choice because patio arrays are more likely to experience partial shading from the house, surrounding structures, or trees. With a standard string inverter, the weakest panel drags down the output of the entire string. Microinverters (Enphase IQ series is the most common residential product) convert DC to AC at each panel independently, so shading one panel doesn't affect the others. The tradeoff is higher upfront cost, roughly $800 to $1,200 more for a 6-panel system compared to a string inverter.
Wiring, conduit, and the run to the house
On a patio roof, the DC wiring from the panels (or AC wiring from microinverters) needs to get from the array to the house's electrical system. If the patio is attached to the house, this usually means running conduit along the underside of the patio rafters and then through the wall or up to the main panel. NEC Article 690 governs PV system wiring, disconnects, labeling, grounding, and safety features. For attached structures in most jurisdictions, the full NEC 690 requirements apply, including NEC 690.12 rapid-shutdown, which requires that conductors on or in the roof area be de-energized within 30 seconds of initiating shutdown. NEC 690.12 (Rapid‑Shutdown) requires a rapid‑shutdown function for PV systems installed "on or in buildings" to reduce shock hazard to first responders; local adoption of the newest NEC edition varies by jurisdiction NEC 690.12 (Rapid‑Shutdown) requires a rapid‑shutdown function for PV systems installed "on or in buildings" to reduce shock hazard to first responders; local adoption of the newest NEC edition varies by jurisdiction.. This affects where the rapid-shutdown device is located and what labeling is required on the array.
For detached patio structures, some jurisdictions interpret NEC 690.12 differently, treating a non-enclosed detached structure (like a freestanding pergola) as outside the rapid-shutdown scope for the 30-second boundary-of-array rule. Several guidance sources interpret NEC 690.12 to mean detached, non-enclosed structures (for example some carports or canopies) may be treated differently for rapid-shutdown requirements, though local AHJ adoption and inspection practice determines whether 690.12 applies to a specific patio or carport canopy installation. However, local authority having jurisdiction (AHJ) adoption of the current NEC edition and local inspection practice determine what actually applies to your project. Don't assume the more permissive interpretation applies: ask your local building department or have a licensed solar installer pull the permit.
Disconnects, metering, and utility hookup
A PV system requires a DC disconnect near the array and an AC disconnect at or near the inverter or the main panel. If you're connecting to the grid, the utility will require a bi-directional revenue meter (or a second meter) and a signed interconnection agreement before they'll allow you to export power. Most utilities have a simplified interconnection process for residential systems under 10 kW, but the paperwork and timeline (typically 2 to 8 weeks for utility approval) is separate from the building permit process. Don't plan on generating power the day the panels go up.
Battery storage considerations
If you're adding a battery (like a Tesla Powerwall, Enphase IQ Battery, or Franklin WH series), it typically mounts on a wall inside the garage or against the house exterior, not on the patio roof itself. The battery needs to be in a location with a temperature range within its operating spec, which usually means avoiding direct sun exposure and extreme heat, both concerns for a sun-exposed patio installation. Battery systems also require their own permit and inspection in most jurisdictions and add roughly $8,000 to $15,000 to the project cost depending on capacity and brand.
Permits and plans: what you'll actually need
A building permit is required for rooftop PV installations in the vast majority of U.S. jurisdictions. This isn't optional or a technicality you can skip. Cities like San Diego, Los Angeles, and New York City all have published solar permit submittal requirements: San Diego requires a structural and electrical plan review, LADBS maintains standard plan sets and an expedited checklist for residential solar, and New York City requires an ED16A electrical permit filing. Most permit submittals require a site plan showing the array layout, a single-line electrical diagram, module and inverter spec sheets, and often a structural review letter or engineer stamp confirming the roof can support the array. If the patio cover itself was never permitted, that may need to be addressed first, which is a separate and sometimes complicated process. Understanding whether you need building plans for a patio roof addition is relevant here, since an unpermitted structure can create complications when you go to add solar. If you're unsure, see our guide "Do I need building plans for a patio roof?" for steps on permits, obtaining drawings, and dealing with unpermitted structures.
DIY vs. hiring a licensed solar installer
A competent DIYer with construction experience can install a small patio solar array, but it's genuinely more complex than most home improvement projects. You need to understand rafter finding and lag screw installation, flashing technique, DC and AC wiring to NEC standards, inverter commissioning, and the permit process. The permit process alone typically requires drawings and potentially an engineer letter that most homeowners aren't equipped to produce. More practically: many utilities and some state incentive programs require that the installation be done by a licensed solar contractor (C-46 in California, for example) for the system to qualify for interconnection or incentives.
For most homeowners, the right answer is to hire a licensed solar installer for a patio installation. The structural and waterproofing stakes are higher than on a main house roof because patio covers are more variable in construction quality, and an error in either area is expensive to fix. A licensed installer will pull the permit, handle the utility interconnection paperwork, and typically warranty the installation. Get at least three quotes and ask specifically about patio-cover experience, since not every residential solar company has done many of these.
Rough costs for a patio solar installation
Patio solar installations typically cost more per watt than a straightforward main-house-roof installation, because of the custom structural work, non-standard mounting, and additional conduit runs. Here are realistic ranges based on current market conditions.
| Cost Component | Typical Range | Notes |
|---|---|---|
| Panels + string inverter (4–6 kW system) | $6,000–$10,000 installed | Before incentives; includes standard racking |
| Upgrade to microinverters or optimizers | +$800–$1,500 | Recommended for shaded or complex patio layouts |
| Structural reinforcement (if needed) | $1,000–$4,000+ | Varies widely by scope; post/footing upgrades most expensive |
| Structural engineer review/letter | $300–$800 | Often required for permit; worth doing regardless |
| Membrane anchor or specialized flashing | $200–$600 materials | Flat/membrane roofs add labor cost too |
| Permit fees | $200–$800 | Varies by jurisdiction; some cities have flat solar permit fees |
| Battery storage (optional) | $8,000–$15,000 | Separate system; mounted on house wall, not patio roof |
| Federal ITC (30% tax credit) | –30% of system cost | Applies to equipment and installation labor through 2032 |
A 4 to 6 kW patio solar installation in good structural condition, with microinverters and proper permitting, will typically run $8,000 to $14,000 before the federal Investment Tax Credit (ITC). After the 30% ITC, that comes down to roughly $5,600 to $9,800 out of pocket. If structural reinforcement is needed, add $1,000 to $4,000 or more to those numbers. Ground-mounted systems at a similar capacity typically run $9,000 to $16,000 installed before incentives, slightly more than a roof mount but with better flexibility on orientation and tilt.
When a ground mount or main roof is the better call
A patio roof solar installation makes the most sense when your patio cover is structurally solid, faces south or close to it, has enough area for a meaningful array, and you'd rather keep the main house roof untouched. If any of those conditions fail, the alternatives are worth comparing honestly.
A ground-mounted array in the yard gives you full control over orientation, tilt, and placement, avoiding any structural concerns about the patio cover. It requires open yard space (typically at least 10 by 20 feet for a 6-panel array), trenching conduit to the house, and a concrete foundation for the racking posts, but those are predictable costs. Ground mounts are also easier to expand later if you add an EV charger or battery storage.
The main house roof is usually the default choice for a reason: it's structurally designed to handle loads, it typically offers the best south-facing exposure, and installers do it every day. If the patio cover has structural concerns, a north or east facing exposure, or significant shading, redirecting the project to the house roof is the practical answer.
Homeowner feasibility checklist
Run through this before calling installers or ordering equipment. If you're answering 'no' or 'unsure' to several of these, it's worth talking to a structural engineer before going further.
- Is the patio cover a solid-framed structure (wood or steel framing with actual roof decking), not a pergola, fabric cover, or lightweight glazing system?
- Were building permits pulled when the patio cover was built, and do you have access to the plans?
- Are the rafters 2x6 or larger, spaced 24 inches on center or less, with spans under 12 feet?
- Are the posts on concrete footings with adequate embedment (check your local frost depth requirements)?
- Is the ledger properly attached to the house with structural hardware?
- Is the existing roofing material in good condition with at least 10 to 15 years of remaining life?
- Does the patio roof face generally south (within about 45 degrees either way)?
- Is the area free of significant shading from the house, trees, or fences during peak sun hours (10 am to 3 pm)?
- Have you confirmed that your local jurisdiction requires a permit and what the submittal requirements are?
- Have you gotten quotes from at least two licensed solar installers with patio-cover experience?
FAQ
Can you put solar panels on a patio roof?
Yes — in many cases you can install solar panels on a patio roof or canopy, but feasibility depends on the roof type, structural capacity, water‑tightness, local codes, and how the panels will be mounted and wired. Some patio roofs (solid framed, rafters and decking, metal carport‑style canopies) can carry PV when properly designed and attached; lightweight or decorative pergolas, fabric covers, or roofs with inadequate framing usually cannot without significant reinforcement.
What patio roof types are most and least suitable for PV?
Most suitable: framed, load‑bearing patio roofs with rafters, purlins or joists and solid decking or metal canopies designed to take attachments. Moderate: flat membrane roofs (EPDM/TPO) on patios/canopies — require membrane‑compatible anchors or ballasted systems and engineering. Least suitable: open pergolas with widely spaced slats, tensioned fabric covers, or deteriorated/rotted structures — these typically need reinforcement or a separate structure (canopy or ground rack).
What structural checks should a homeowner run before planning panels on a patio roof?
Homeowner checklist (feasibility screen): - Identify roof type (composition shingle, tile, metal, membrane, open pergola). - Confirm framing: rafter/beam spacing, member sizes, span, visible condition. - Determine decking/underlayment and whether sheathing exists. - Estimate roof pitch, orientation and shading. - Look for signs of rot, rust or past leaks. - Check available clearances to gutters/edges and headroom under canopy. - Review local code/permitting roadmap (AHJ). If any uncertainty, hire a structural engineer or licensed solar installer for an evaluation.
How much extra weight do solar panels add to a patio roof?
A typical framed residential module weighs about 40–50 lb (18–23 kg). A system (modules + rails + attachments + wiring) commonly adds roughly 2.5–4 pounds per square foot (psf) of distributed dead load; manufacturers and racking vendors provide exact numbers. Certified engineering is often required if the existing structure wasn’t designed for additional loads or if edge/uplift wind loads are a concern.
What mounting options exist for patio roofs and when are they used?
Common mounting methods: - Roof‑mounted with flashing/lag anchors: used on pitched framed roofs (composition, tile, metal). - Railless or rail-mounted clamps: lower profile on framed roofs with proper attachments. - Single‑point membrane anchors or through‑deck attachments: for EPDM/TPO/PVC membrane roofs (follow manufacturer instructions to preserve waterproofing). - Ballasted or weighted canopy mounts: for flat patios where penetrating the membrane is undesirable and structural framing is insufficient. - Separate freestanding canopy/carport or ground‑mounted rack: when patio roof isn’t suitable.
What are the electrical and code considerations specific to patio installations?
You must follow applicable electrical and building codes (NEC Article 690 for PV wiring, local amendments, rapid‑shutdown provisions such as NEC 690.12 where adopted, labeling and disconnect requirements). Permits and plan review are typically required; many jurisdictions require electrical and structural documentation and sometimes stamped plans or licensed installer signoff. Detached canopies may be treated differently by AHJs, so verify with your local building department.
Next Article
Do I Need a Membrane Under My Patio? A Clear Guide
Learn when you need a patio membrane for moisture, weeds, and separation, plus costs, DIY tips, and alternatives.